
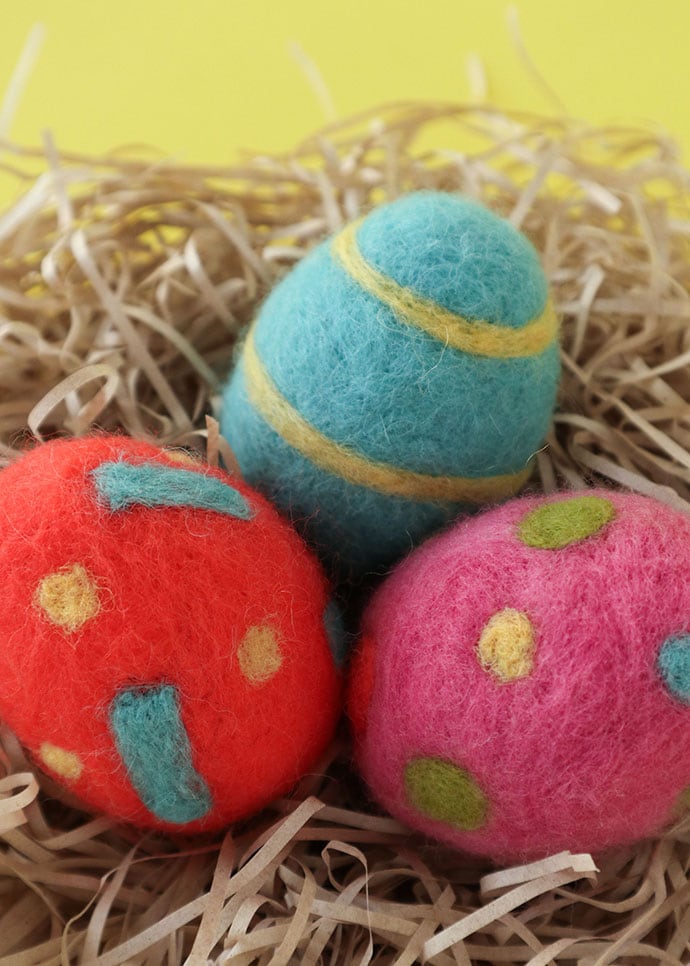
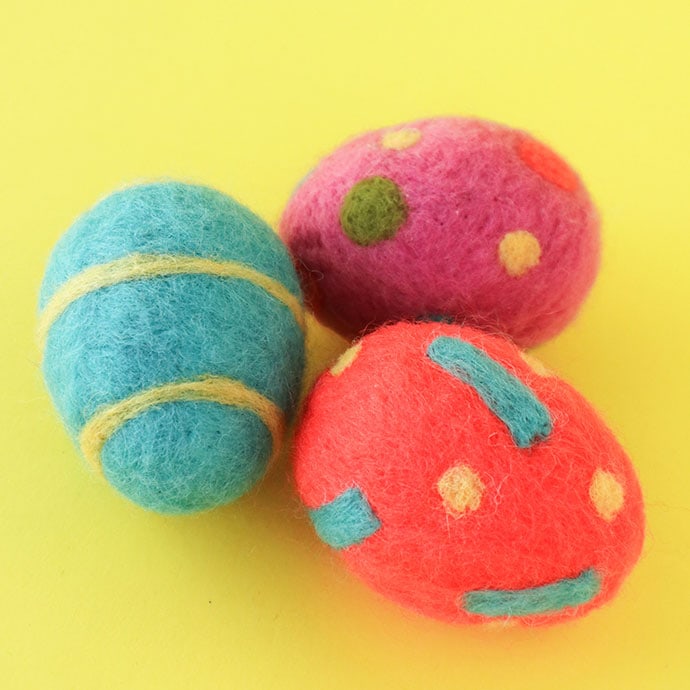
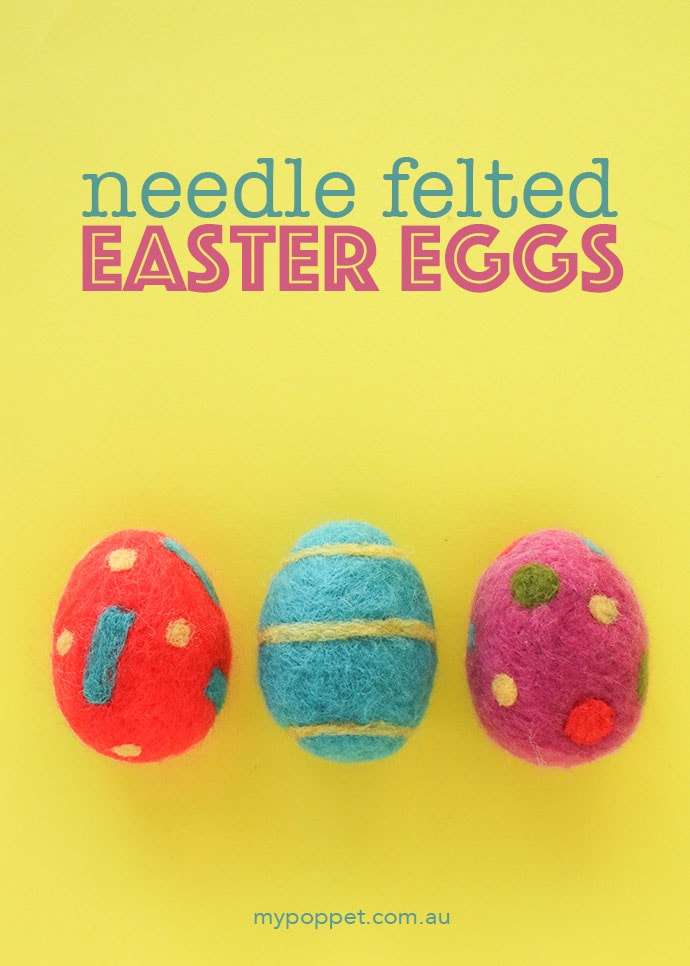
If you’ve ever wanted to try your hand at needle felting, this Easter craft project is the perfect opportunity to get started.
I’ve cheated a little bit and used Styrofoam egg shapes inside these felted eggs. It makes this little Needle Felted Easter Egg craft project very easy to get right on your first try, as you don’t have to worry about actually shaping the egg.

Building shapes from scratch from wool roving is a skill that takes a little bit of practice in needle felting, so thanks to an egg-shaped base, you can jump straight to the fun part – Decorating your Easter Egg!
Whether you choose to use a Styrofoam egg base, a more eco-friendly wool egg blank as a base, or create an egg shape yourself from scratch, this Easter craft idea really has a lot of scope to explore your own creativity.
Creating needle felted designs with wool roving really is easier than it looks. And the best part about it is that the more you practice, the better you get, so you’ll be creating masterpieces like this in no time.
If you are new to the concept of needle felting, have a read of my Needle Felting Basics tutorial.
After more Easter Egg Craft Ideas? Here are a few you may enjoy:
How to make Needle Felted Easter Eggs
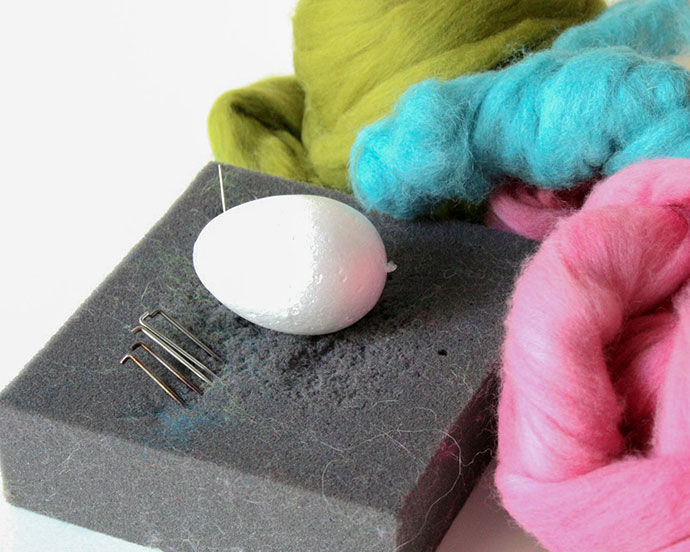
You will need:
- Styrofoam egg shape or Felt Egg Blank
- Wool roving in your chosen colours (only small amount required)
- Med/Fine Felting needle/s
- Foam pad
How to:
Caution: Felting needles are very sharp and brittle. Take care when handling needles, when not in use store them in a small tin or keep them safely embedded in your felting foam pad. To avoid needle breakage don’t bend the needle while felting. Try not to stab yourself.
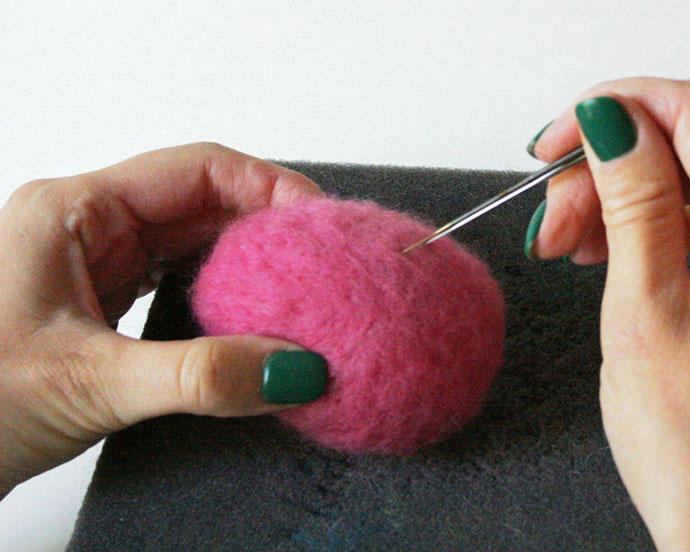
1. Start by covering your Styrofoam` egg with several thin layers of wool roving. If you are using a pre-felted egg blank and are happy with the base colour go straight to step 5.

2. Lay small pieces of wool roving over the surface of the egg and poke with felting needle as you go.
Tip: It’s best to criss-cross several thin layers to make an even coverage. The wool will felt to itself not the foam core so don’t stab too deeply or you risk breaking your needles.
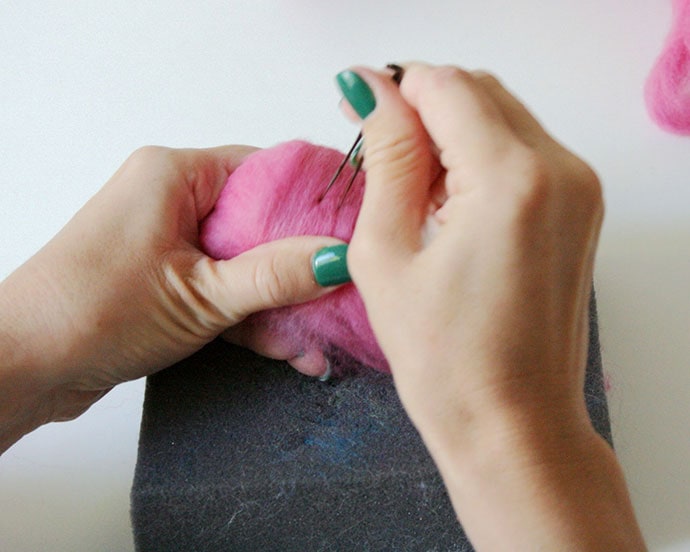
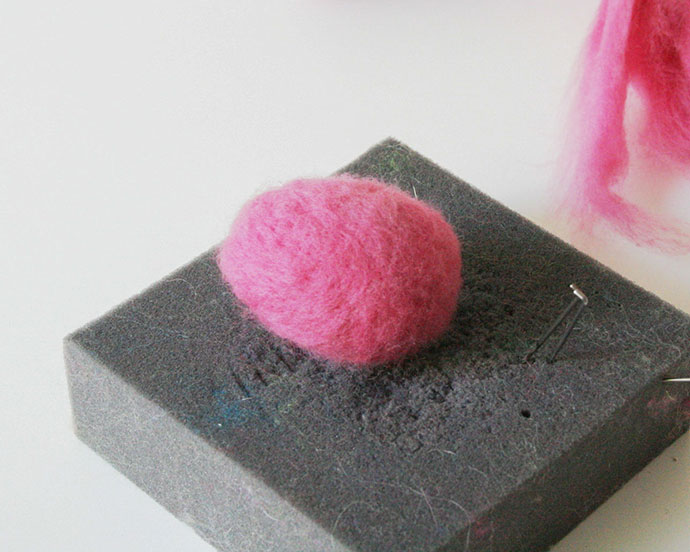
3. Continue needling over the whole surface of the egg shape to secure the roving and smooth it down. The more you poke with your needle, the smoother with surface will become. Keep adding small fluffed up pieces of roving to cover any bare patches.
4. Once you are happy with your coverage and density of the wool layer you can start to decorate your needle felted Easter egg.
5. Get creative with your surface design. If you are new to needle felting, the easiest design to begin with is Spots!
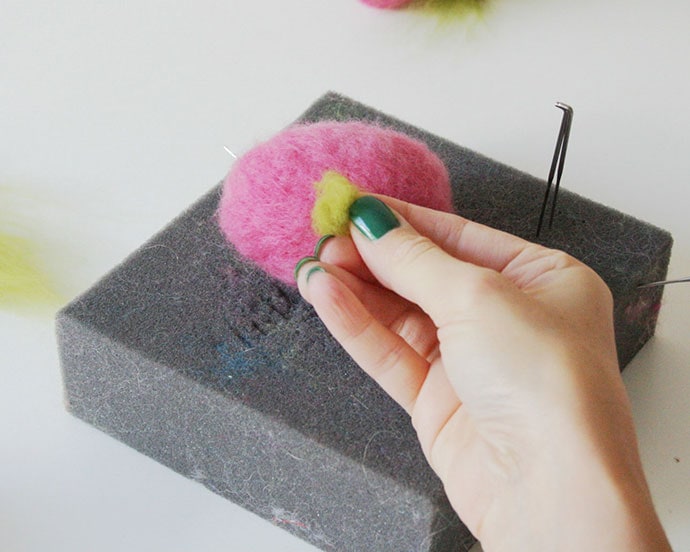
6. To make spots, take a small amount of wool and roll it between your fingers to make a little ball. You’ll need a lot less than you imagine.
7. Flatten the little ball of roving between your fingers and place it where you want the spot to be. Poke it with your felting needle until it felts/fixes to the base layer.
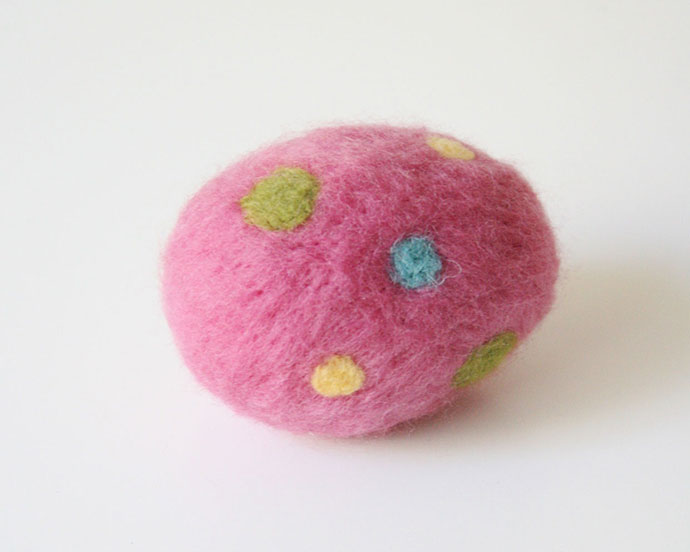
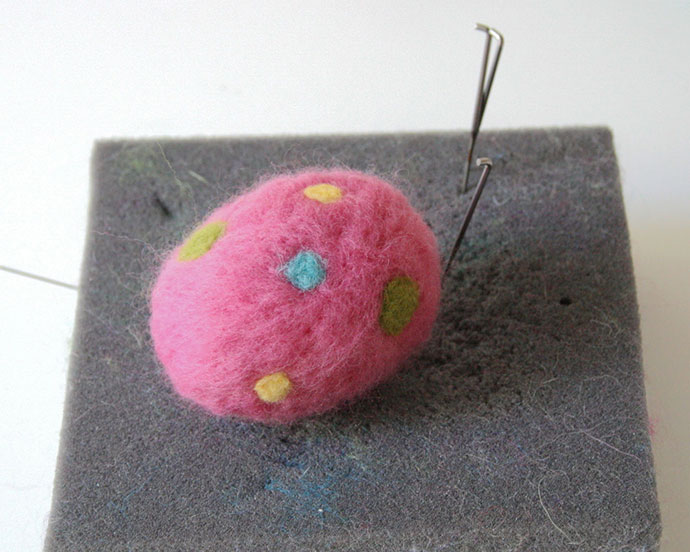
8. Continue adding spots until you are happy with your design. To finish, give the surface of the egg one last needling to smooth the whole design out.
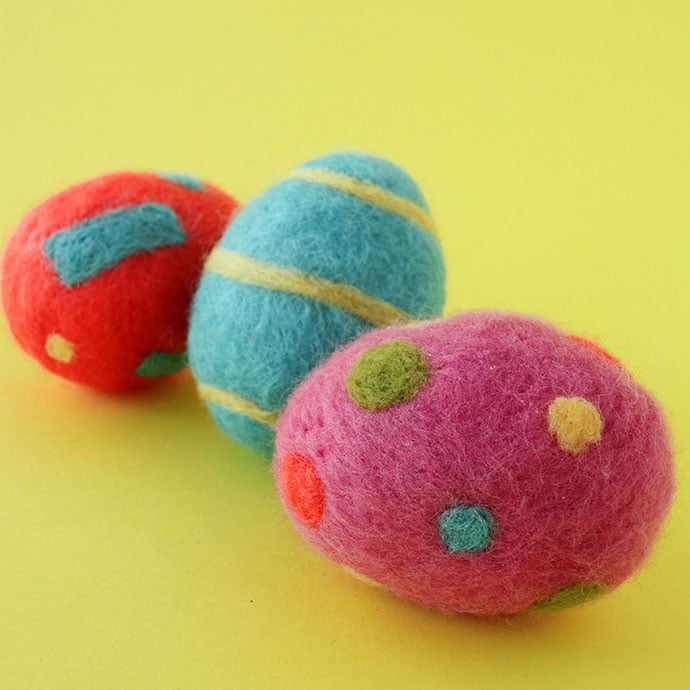
Once you get the hang of making spots, try stripes, zig-zags or other shapes on your needle felted Easter Egg.
I hope you enjoyed this easy Easter Craft project, needle felted Easter eggs are great for improving your needle felting skills.
Due to how sharp felting needles are I wouldn’t recommend this craft for young children, but it certainly would be fun for mature kids 10 and over.
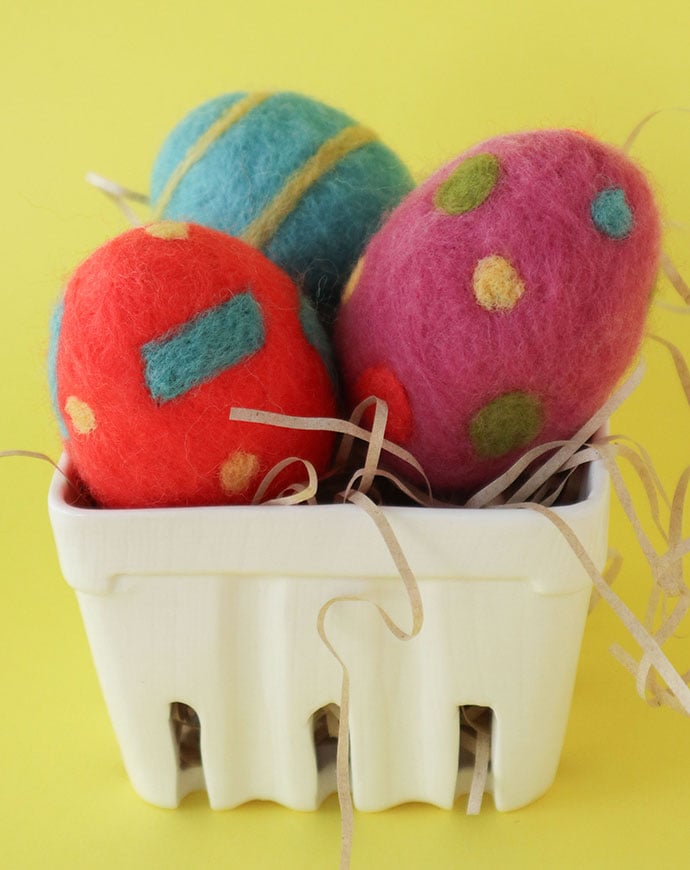
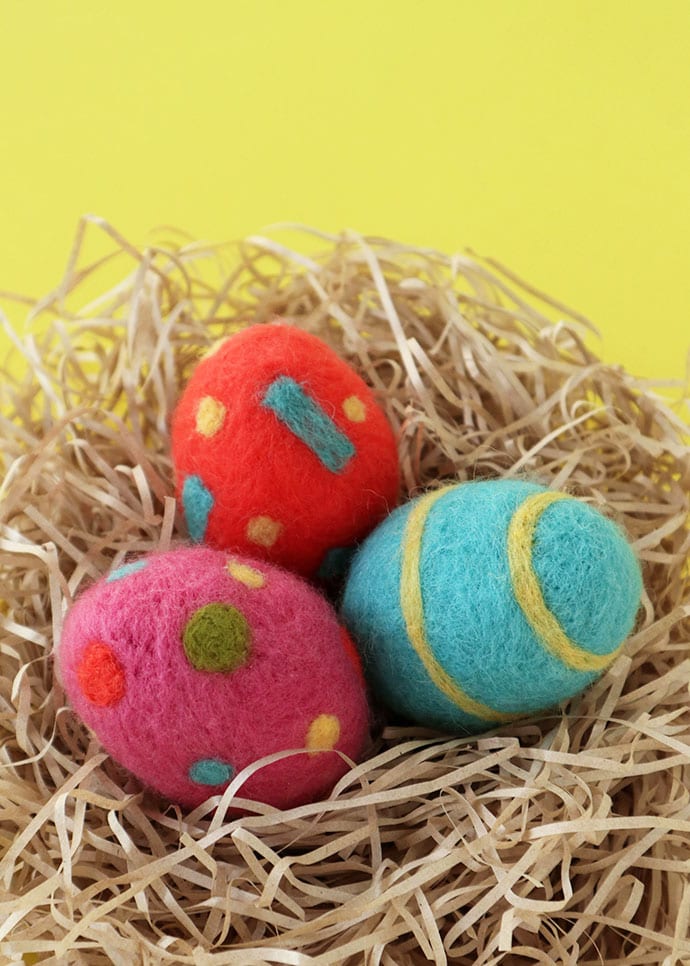
Why not make a whole bunch of these Needle Felted Easter Eggs in assorted colours. They are great for pretend play all year round, not just for Easter!
Safe for toddlers to play with as long as the decorations are firmly felted on. Can be gently hand washed in warm soapy water when they get grubby.
LOVE IT? PIN IT!
This Easter Craft post was originally published April 2011 and updated April 2019

Gorgeous!
This is so cool and you make it look so easy…even I may try it!
This is beautiful. Emma's is going to have a gorgeous little Easter box of treats. x
great tutorial.
i really want to try this out!
I linked to your tutorial on my blog – thanks for sharing!
doro K.
Great tutorial but Fantastic nail polish!! Couldn’t keep my eyes off it! I do love a splash of green.
I am using Wool dryer balls that I reshaped as my base
That’s a great idea.