Have you ever wanted to push the boundaries with your photography and really get to know how to use that big camera beyond just the ‘Auto’ setting? If you own a Canon, you may enjoy taking part in some FREE photography workshops, located all over Australia.
This post contains amazon affiliate links – indicated by an *
I recently attended an event run by The Canon Collective in Melbourne which transformed the city lights into whimsical abstract landscapes. The workshop was called ‘Out of Focus’ and it was all about Bokeh photography and getting creative by shooting photos out of focus.
Bokeh -the way the lens renders out-of-focus points of light
In the past I attended a Canon Collective workshop on macro photography and found is amazingly helpful in learning some of the basic functions of my (new at the time) camera, a *Canon 70D. This year I’m hoping to improve my photography skills even more, and the only way to do that is to get out an practice!

So with my camera, tripod and *Nifty 50 prime lens in tow, I headed into Federation Square to meet the other students, my pal Imogen, and our bokeh photography tutor for the evening, Erin from the Canon Collective.
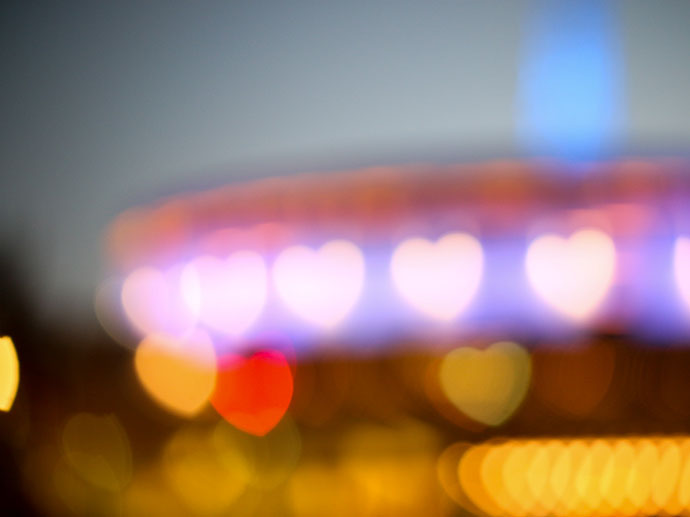
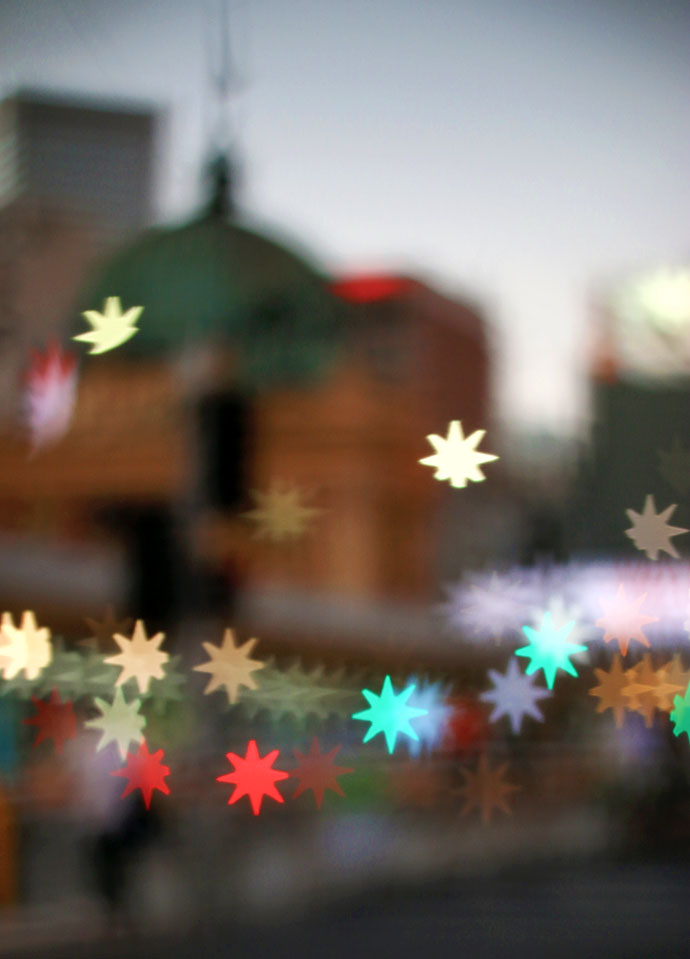
Bokeh is the term that describes the blurred dappled light effect you see in the background of portraits and macro photography when the photographer uses a lens with a wide aperture. Normally it’s round blobs of light (because a lens aperture is round), but we had fun experimenting with fun bokeh templates which transform the bokeh into fun shapes.
How to achieve a basic Bokeh photography effect
- Use a lens with a wide aperture, at least an f/2.8 aperture, with f/1.8 or f/1.4 being ideal. A prime lens (one that doesn’t zoom in and out) is ideal as they have large apertures.
- Set your camera to manual setting and the aperture to the widest aperture for your lens.
- Switch your lens to manual focus. You’ll have to go against every instinct and go out of focus on purpose.
- If you are shooting at night use a tripod, this will help counteract blur at slower shutter speeds.
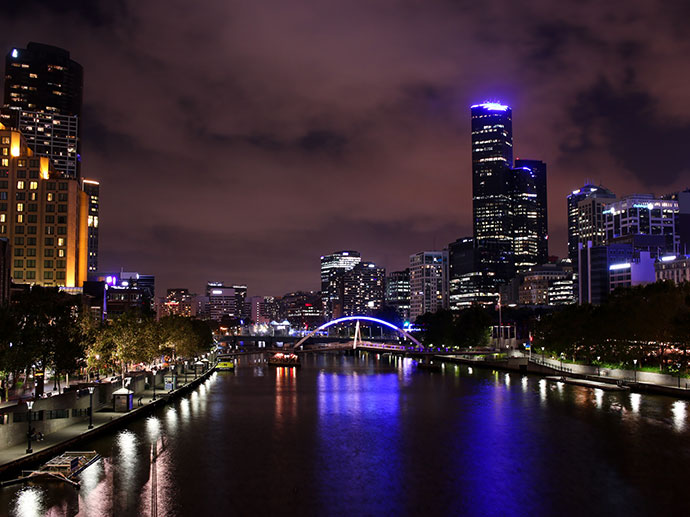
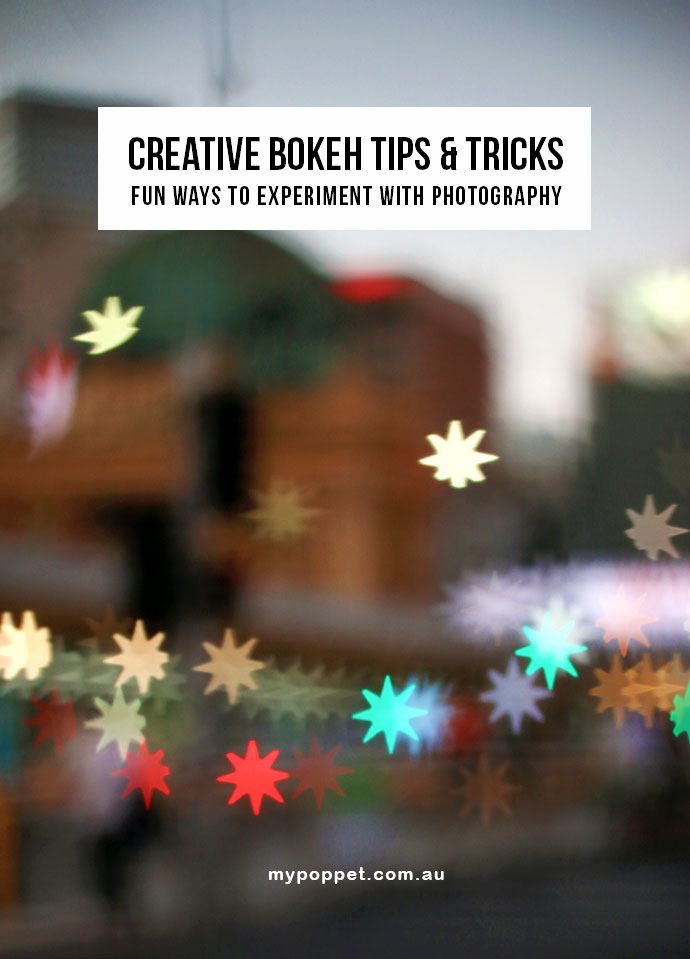
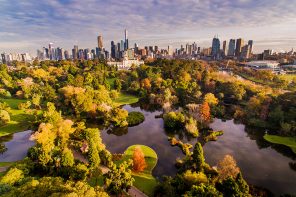
If you’ve done all that you can transform a cityscape from this:
to this:

Add a template like *these ones here and you get this:
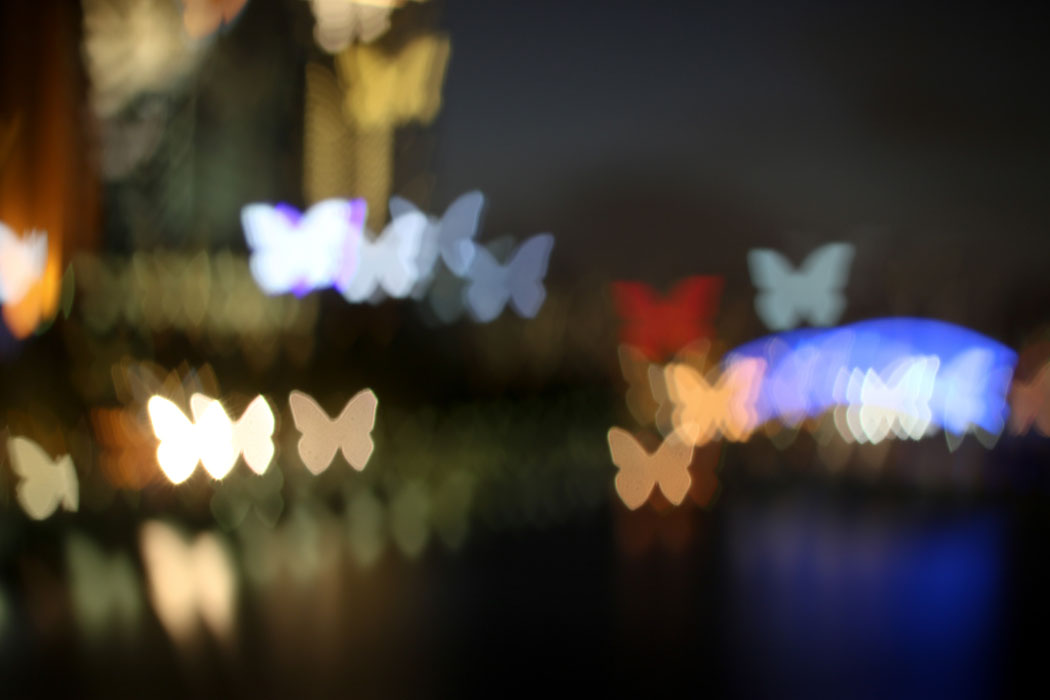
So pretty!
If you don’t want to buy ready made templates you can make them easily with black card – There are some easy instructions over here.
Using a Bokeh Template
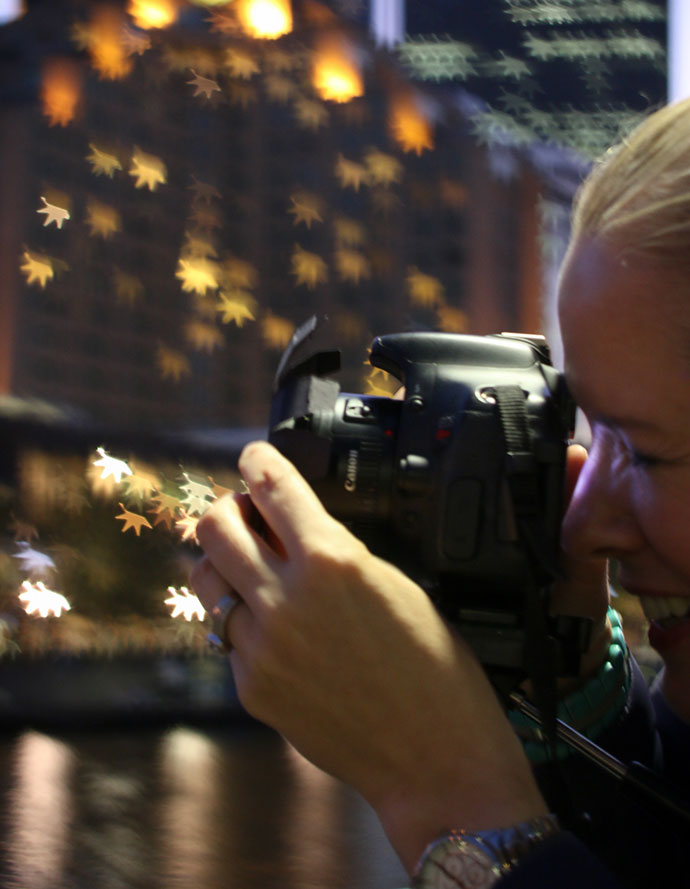
Here Imogen demonstrates how the bokeh template is held over the lens. Light travels through the small shaped hole in the center which gives a distinctive shape if your focus is just right. We found it easier to hold the template with our hands as our 50mm lenses have the focus ring right on the front. But you can also attach them with a hood or elastic band to go hands-free. If you have a lens filter you can cut them to size and slip them right in.
It took me a little while to get the hang of it, and after many rejected shots, I managed to improve a little by the end of the evening.
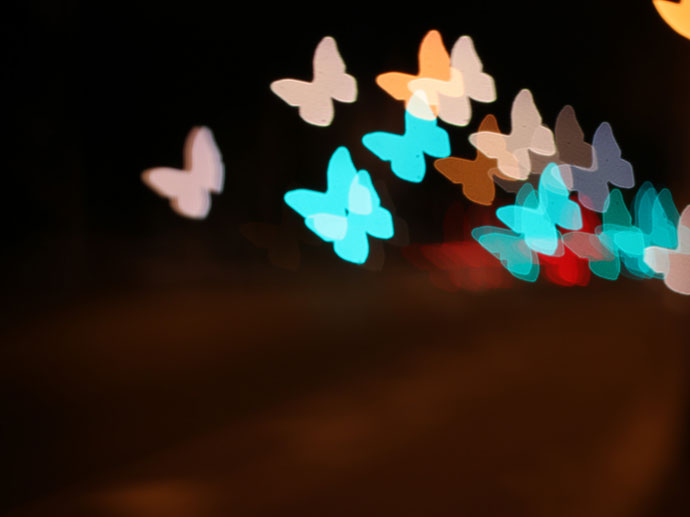
Traffic lights and car headlights gave vivid crisp colours and shapes that looked very colourful.
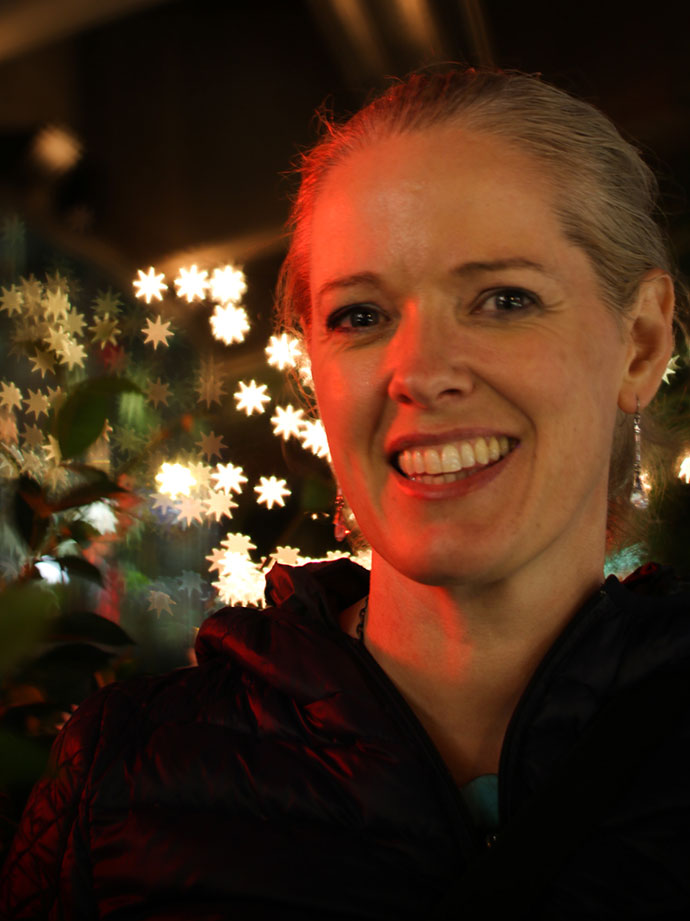
Here Imogen was kind enough to model for a portrait so I could experiment in getting a star effect with some fairy lights in the background.
If you are interested in improving your camera skills check out the Canon Collective workshops in your area, most of them are FREE and the instructors really are amazingly helpful. All skill levels are welcome.

LOVE IT? PIN IT!
Just thought I’d mention that this was not an invite event or sponsored in any way. I attended as a private citizen (not as a blogger), but thought I’d share it with you because I really got a lot out of it and would love all of you to know about this great service that canon offers to it’s community.


Got some great shots here Cintia! It was a really fun workshop.
Thanks! Great company too 🙂