Remember back at the start of the year when I told you about how I hoped to have all our home improvements ‘done and dusted’ by the end of the year? Well it seems that timeline was a little bit ambitious. The bathroom renovation took much longer than expected, and it was quite chaotic too. (It’s finished now and when I get my act together I’ll post a final reveal.)
But whilst all the bathroom stuff was happening, we thought it was a good time to repair and patch all the problems in the lounge room while the house was full of construction mess.
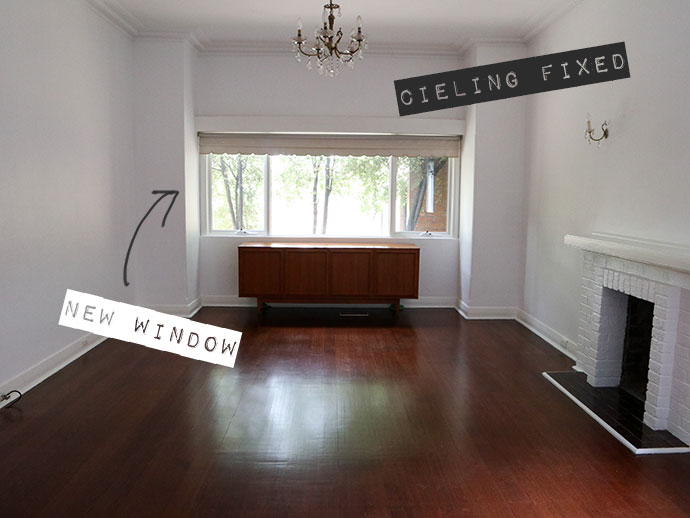
For years we’ve been needing to replace the rotten window frames, patch the ceiling where a big chunk of plaster fell down 6 years ago and remove a horrible faux window that has bothered me since the beginning of time.
There has been quite a lot to do just to get it to a ‘blank slate’ stage. Take a look…
When we originally moved in, I was 7 months pregnant with Emma and the room looked like this. It was painted 80s peach, had shiny yellow floors and heavy velvet curtains.
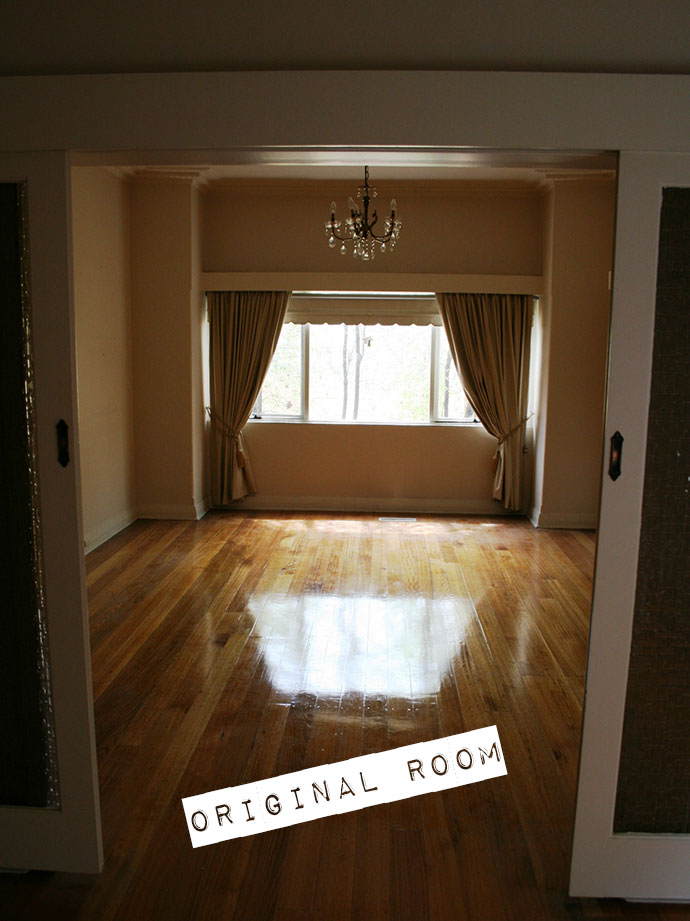
This is what the room looked like when we bought the house.
We gave it a quick coat of paint, and re-did the floors with a darker satin finish. That was 8 years ago so it was well overdue for a refresh.
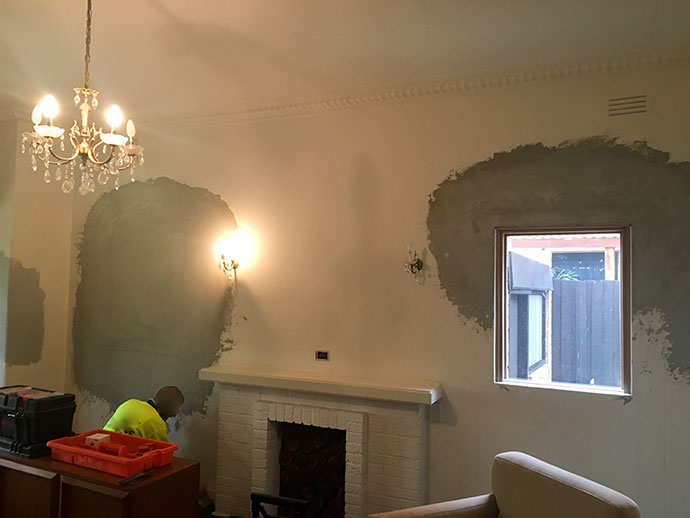
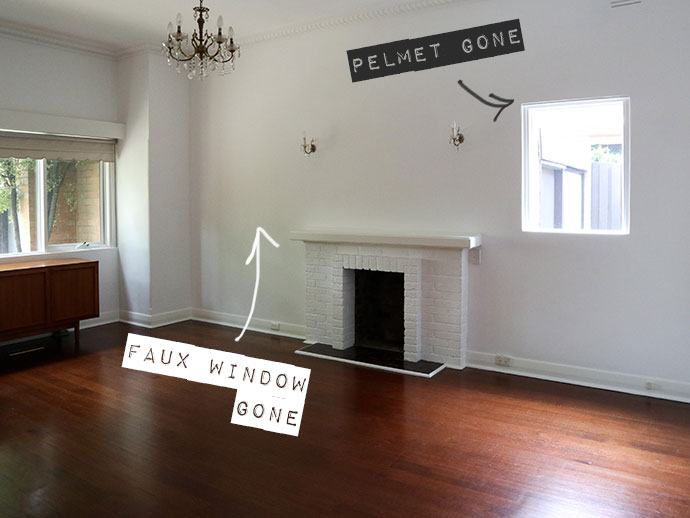
After the first quick makeover – some extra work was required.
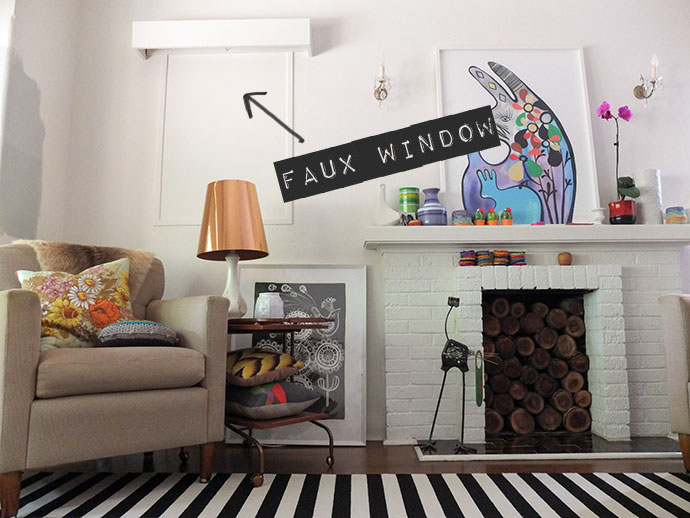
Here’s that faux window I was talking about (see above). I believe it was once a real window until a garage was built there and it was bricked in. When we moved in it had velvet curtains covering it, hence the random pelmet.
Removing the pelmets and patching the faux window was quite a big job. We needed to contract a renderer to re-screed the wall, as it’s a solid brick wall, not plaster board. I had a power point that sat in the middle of my mantle removed too.
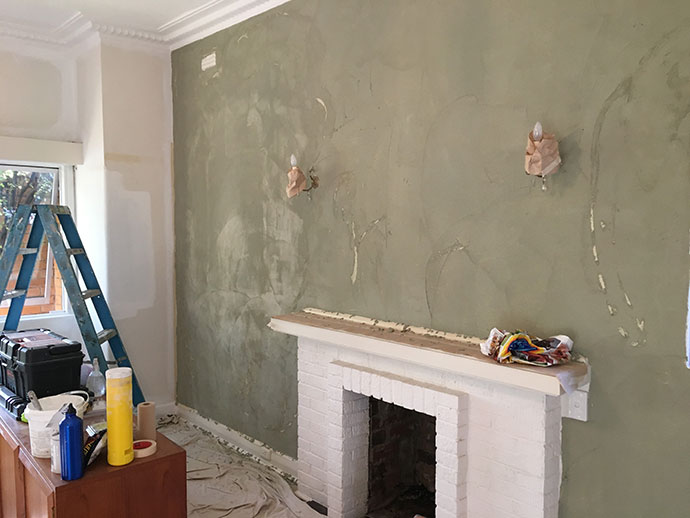
Then the whole wall needed to be screeded to ensure a smooth finish before painting, so the repairs wouldn’t look obvious.

I’ll be putting a frosted film on the small window because it looks out onto our bins. Not a nice view.
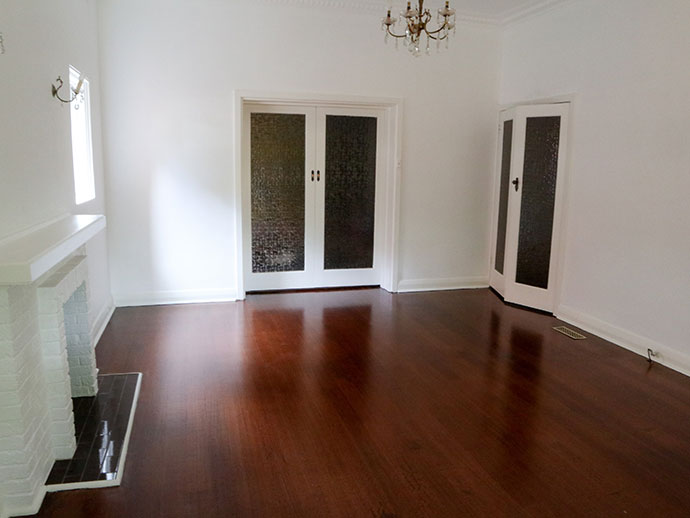
And here’s what it looks like now after a nice coat of white paint.
I’m looking forward to re-furnishing the space with some of my existing vintage pieces and some new furniture too. A couch, floor lamp and coffee table are already on order – I’ll tell you more about that next week. I have a ton of artwork to hang too.
It was actually quite hard to settle on a furniture layout because the room is quite long, has two door openings and a sort of central (but not ideally placed) non-working fireplace. The only saving grace is that there will be no TV in here, so at least I don’t have to find a place to put that.
The room is that awkward size where big furniture doesn’t really fit properly, but anything too small looks pokey. There is also the window alcove which limits the way furniture can be arranged.
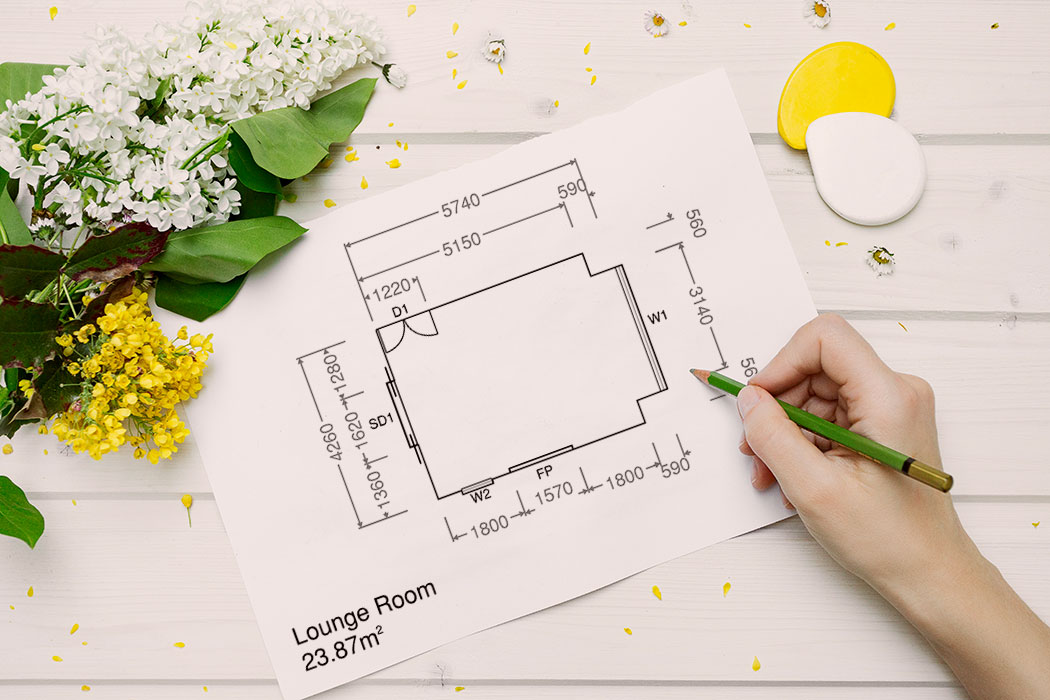
Mr Man drew up some plans to help us with furniture shopping. As you can see he was very thorough.

So all that work for an empty, plain white room!
Next week I’ll share the fun part, my plans for injecting some colour and personality back into the space. There will be an awesome giveaway as part of the next post too, so make sure you tune in.
x Cinti


A lot of work has gone into this, obviously, with beautiful results. The floor is gorgeous! I’m looking forward to the next step in this renovation story!