
This post contains affiliate links
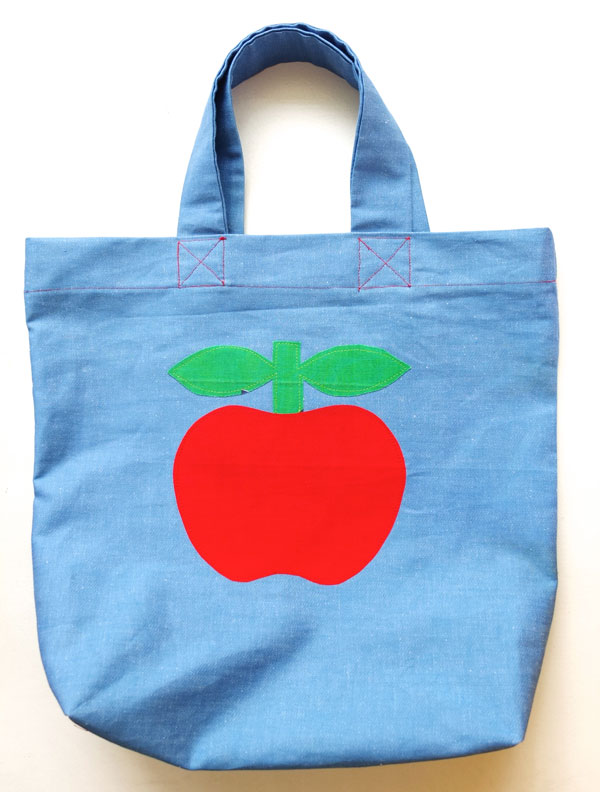
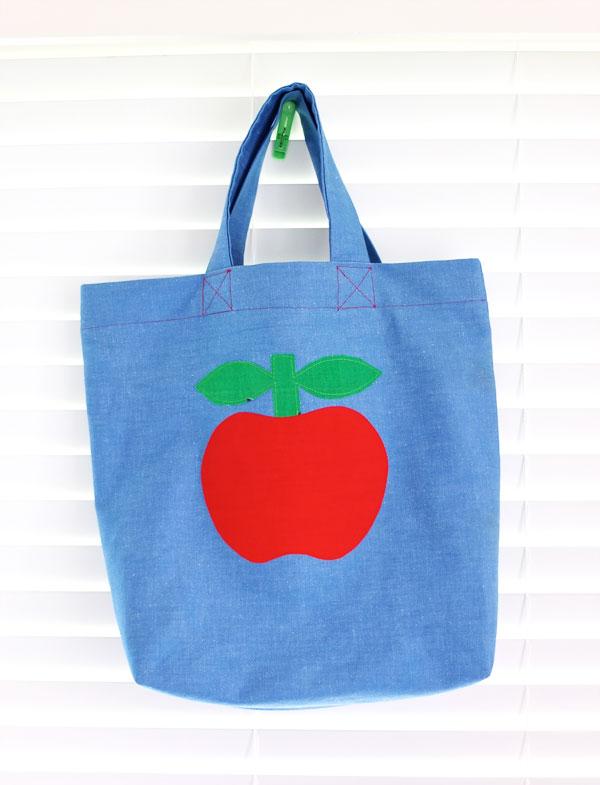
This easy to make tote bag features an apple applique designed by Draw Pilgrim.
Previously I used the templates for knee patches, now I’ve enlarged it to decorate this practical tote bag.
I’ve been working my way through my Handmade Christmas gift list, and this bag is going to be for Emma’s Kindergarten teacher, which is really funny because I only just connected the giving your teacher an apple reference. It was meant to be.
I’ve made the bag with boxed corners which are super easy to do with the method I’ve shown here.
You will need:
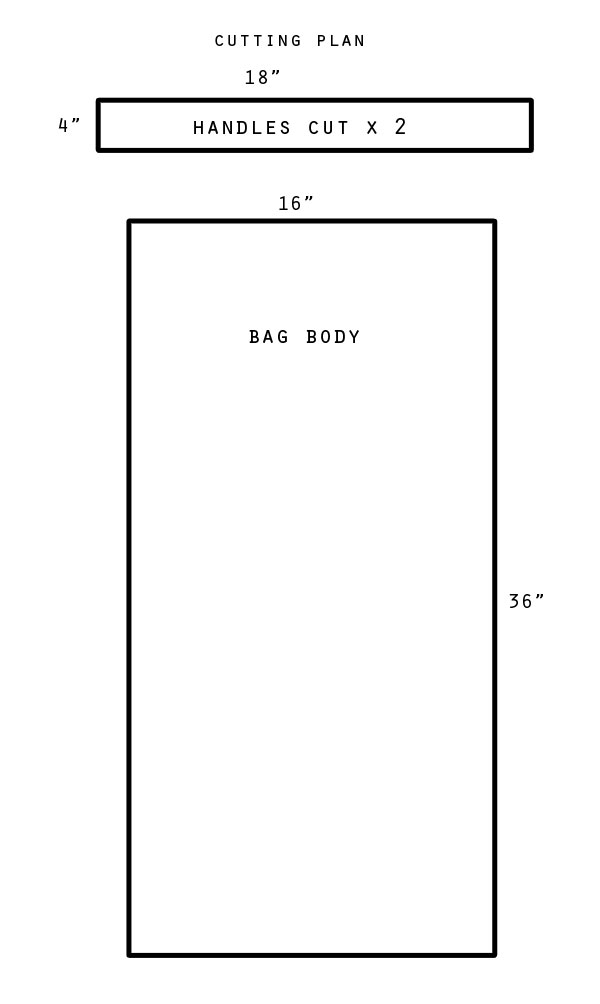
- Light weight denim fabric 24″ (61cm) length x 36″ (91cm) width
- Applique template
- Scrap fabric, red and green.
- Double sided fusible web (like Heat’n’Bond)
- General sewing supplies
More Free Bag Patterns
How to:
Cutting
1. Cut your fabric pieces. See cutting plan below. The handles are each half the length of the total width of the fabric, if you have wider fabric you can make your handles longer.
Applique
2. Enlarge the apple pattern to the size of an A4 sheet of paper and print the template pattern.
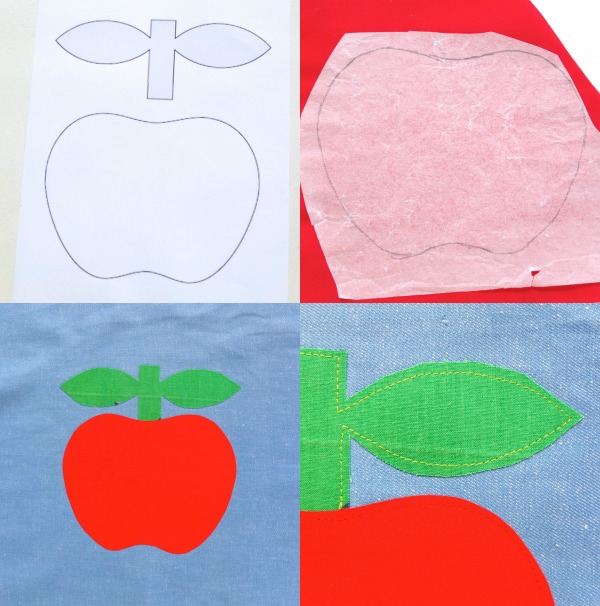
3. Trace the apple and leaves onto the paper of your double sided fusible web. Iron onto fabric scraps as per product instructions, then cut out apple and leaf shapes.
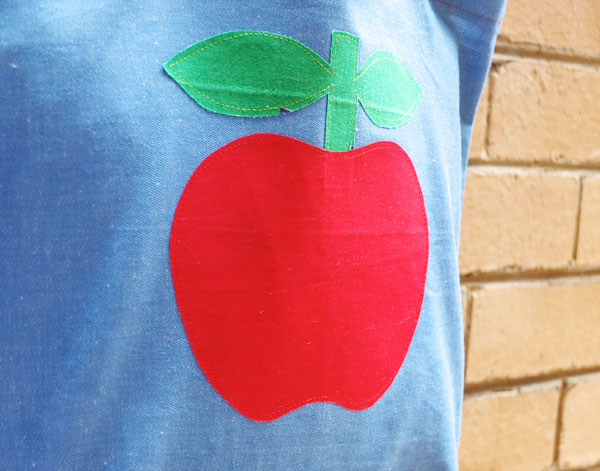
4. Iron on leaves and apple onto denim panel (position in top third of rectangle).
5. Top stitch over applique with matching thread.
Assembling bag
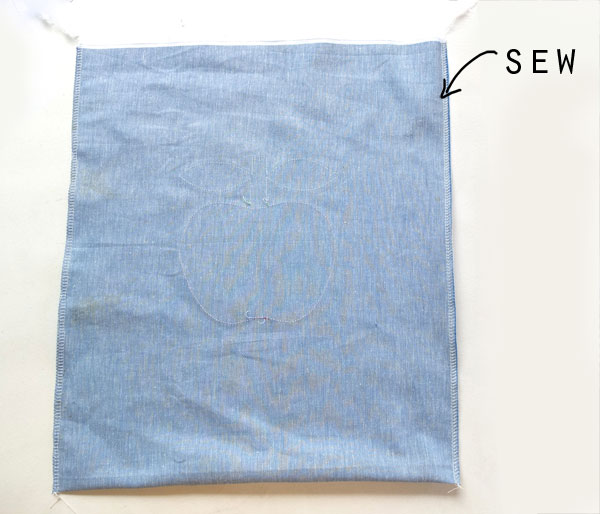
6. Fold the denim panel in half with right sides facing, sew seams down both sides. Use a serger (overlocker) if you have one to strengthen seams.
Making box corners
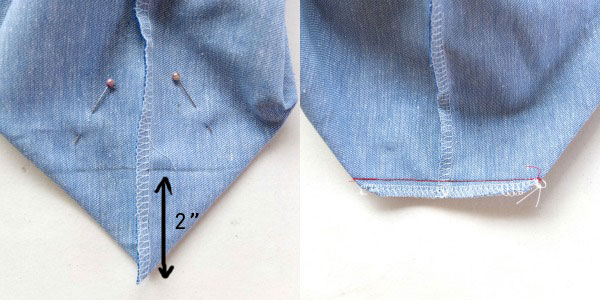
7. Fold corner flat with seam down the middle.
8. Mark a line perpendicular to seam 2″ from corner.
9. Sew along line and trim excess fabric. Reinforce with serger or zig zag stitch.
Making and Attaching Bag Handles
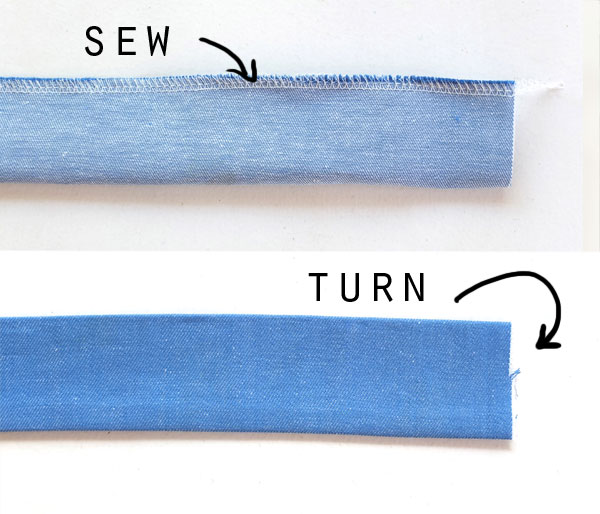
10. Fold bag handle pieces in half lengthwise, right sides facing.
11. Sew seam down length then turn inside out and press.
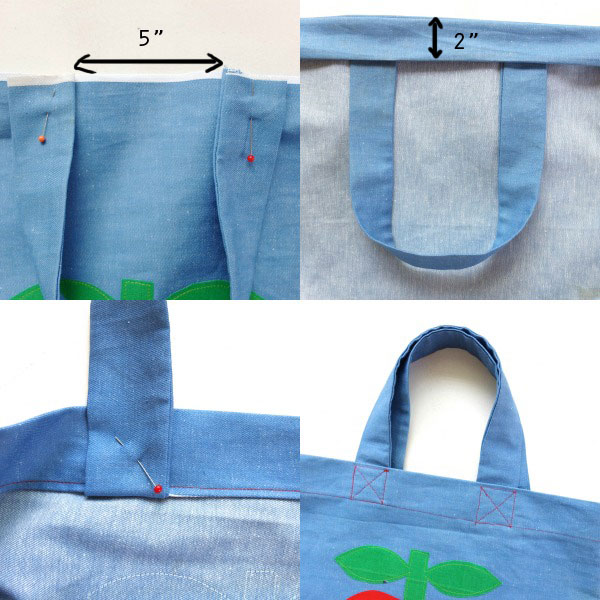
12. With bag right side out, pin handles facing down to top edge of bag. Position centrally with about a 5″ gap. Sew very close to edge to secure.
13. Turn bag inside out, fold over twice as pictured, the first fold about 1/4″ and second fold about 2″. See Monster Tote bag tutorial for extra details.
14. Pin handles up.
15. Top stitch handles in place, reinforce with a cross.
All done! Looks super cute!
For more Handmade Christmas Gift Ideas, browse through My Poppet’s Handmade Christmas Inspiration Guide


Gorgeous. I also inadvertently have my daughters prep teacher stationery – with apples! Serendipitous I think.
Good use of old denim, I love creative upcycling, so impressed with tee pees too!
Thanks for sharing the links, I love seeing what readers are making
x cinti