I’ve been propagating baby succulents from the plants in my garden and thought it would be fun to make little mini planters to display them in. If you’ve never propagated succulents you can find some easy instructions here.
I had a little bit of polymer clay leftover from a couple of projects in my soon to be released craft book, it’s a very versatile material and perfect for making small creative objects.
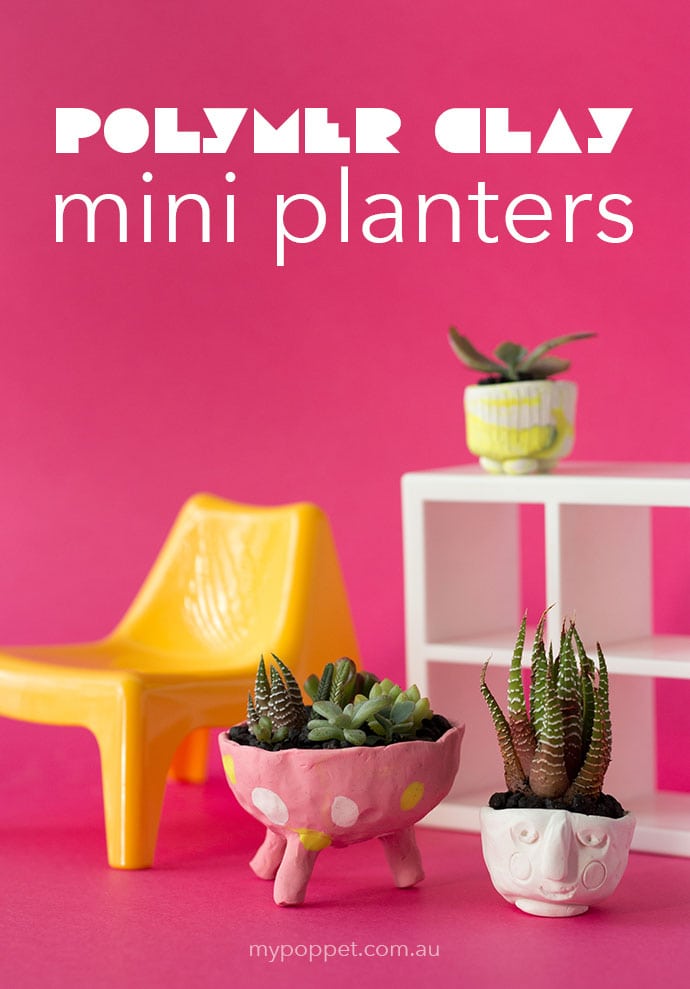
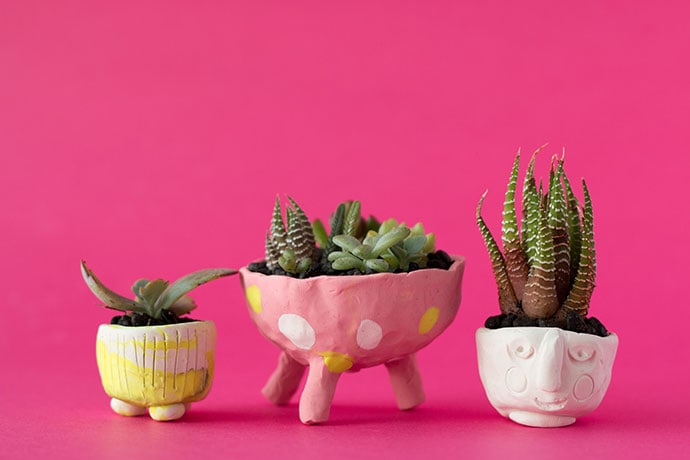
These mini planters are loosely inspired by mid-century ceramics and would be perfect to display in a doll house or as part of a little vignette. I’m sure kids would love to make a few of these to give as gifts.
Succulents are pretty hardy so a few drops of water about once a week should be all that’s required to keep them healthy. If the plants start to grow too large, just transfer them into a larger container.
How to Make Mini Succulent Planters
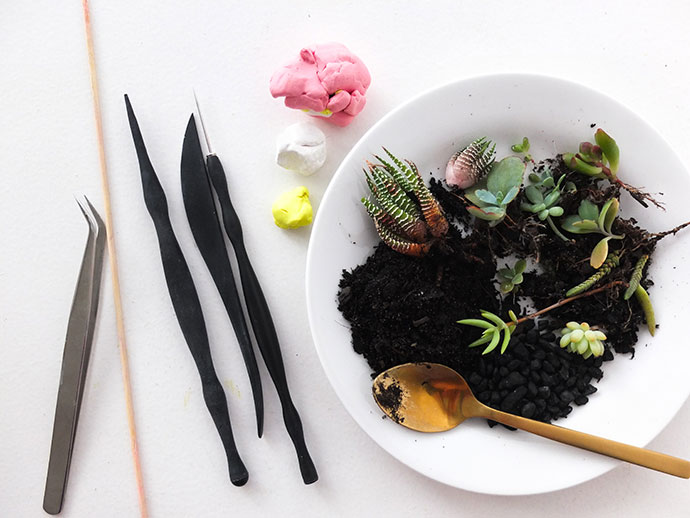
You will need:
- Polymer clay – assorted colours
- Clay sculpting tools including skewer
- Aluminum foil (not pictured)
- Baking tray
- Oven
- Baby succulent plants – assorted
- Soil
- Fine gravel
- Spoon
- Tweezers
How to:
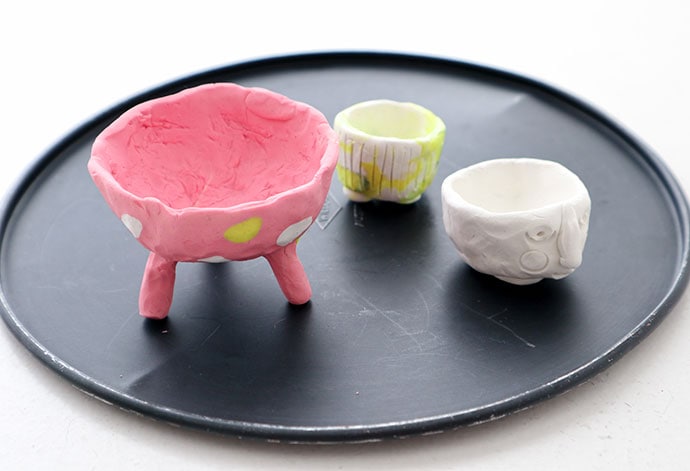
Making a Three Legged Mini Planter
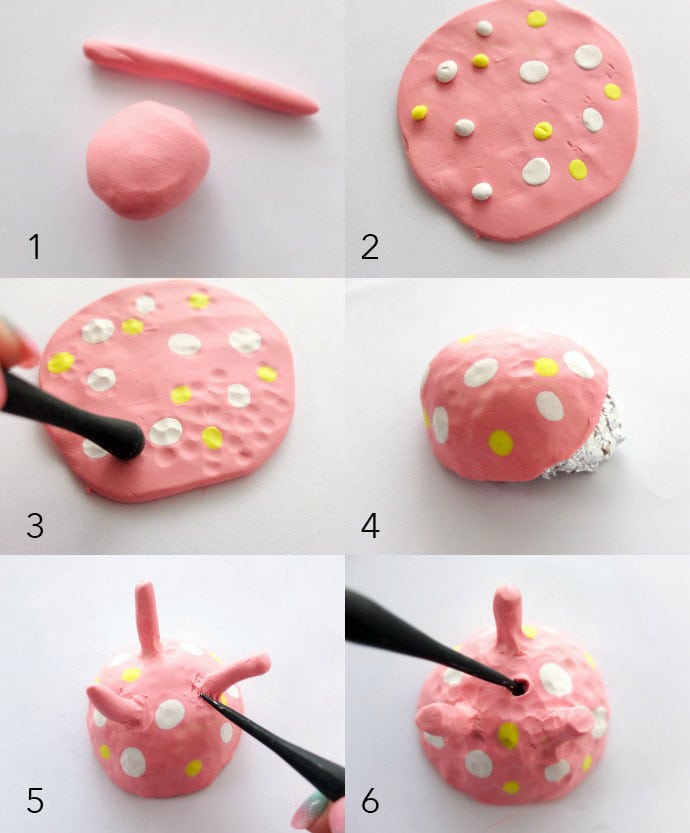
1/ Knead the clay to soften and condition. Roll a small ball for the bowl of the planter and a little sausage for the legs.
2/ Flatten the ball and add decorations if you choose. I’ve made spots by squishing little balls into the clay.
3/ If desired, add texture with a round ended tool. You can also leave flat if you prefer a smoother finish.
4/ Make a small half dome shape with aluminum foil and mould the clay over it. It will also help support the shape while baking.
5/ Cut sausage into three equal parts and attach to the base.
6/ Add a drainage hole to the bottom.
Read on for baking and planting instructions.
Making a Pinch Pot Style Mini Planters
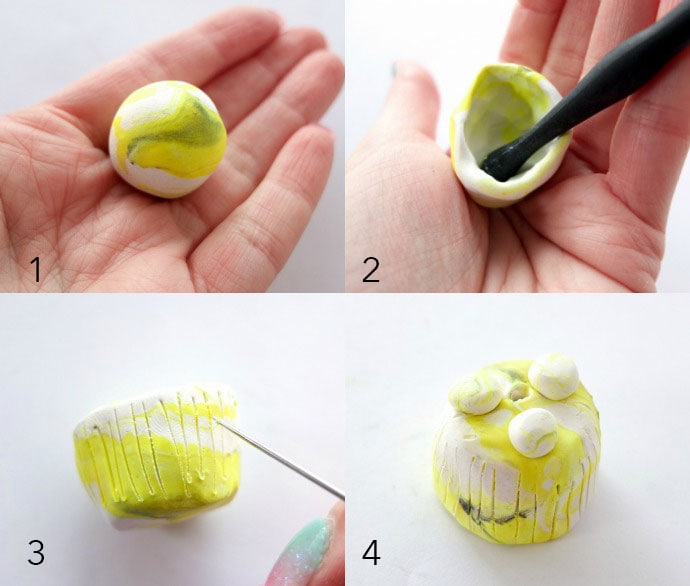
1/ Roll a piece of clay into a small walnut sized ball.
2/ Use your pinky finger or a small ball ended tool to hollow out the center of the ball. Shape into a flat bottomed pot shape.
3/ Decorate as desired. Score a pattern into the surface or add a small face.
4/ Add small feet and a hole for drainage.
Read on for baking and planting instructions.
Baking the clay
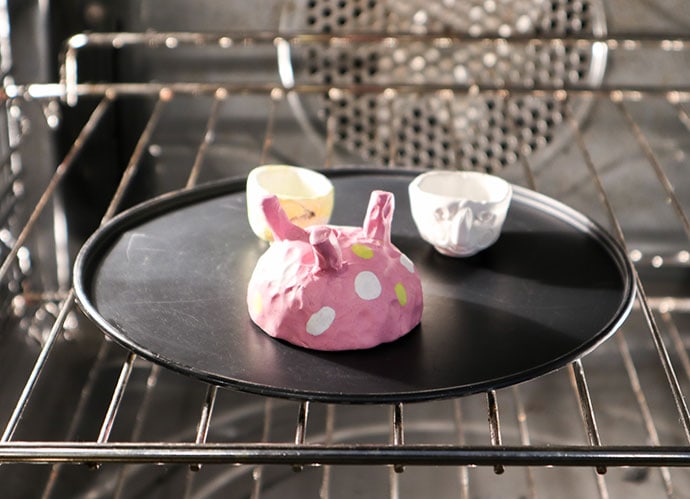
Follow manufacturers instructions for temperature and baking times. Each brand of clay differs in regards to optimal baking conditions.
Allow to fully cool down and remove foil from domed planter.
Planting the Succulents
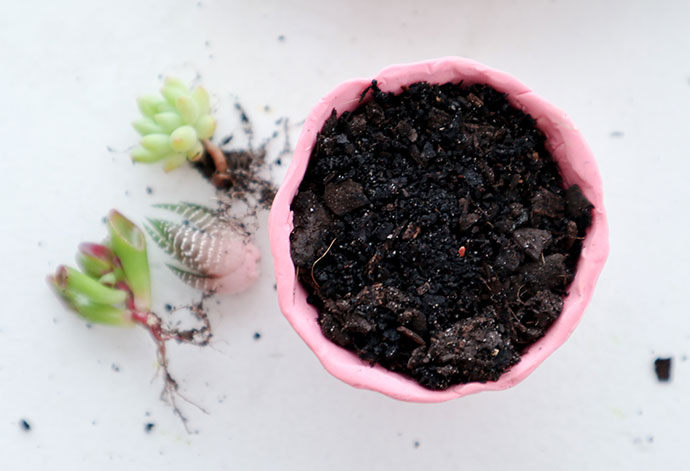
Use a teaspoon to fill the planters with damp soil.

Use tweezers to make small holes and plant the baby succulents in the soil. Be careful not to damage the delicate roots.
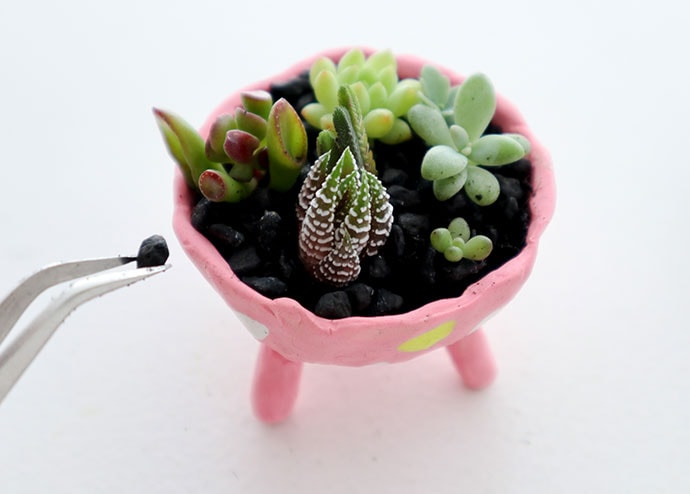
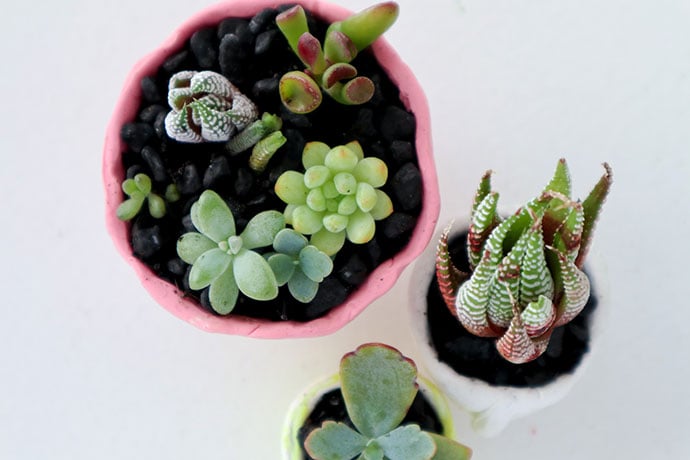
Top with gravel. You may need to place the stones individually. Press down firmly to secure soil and plants in place. Repeat with smaller planters.
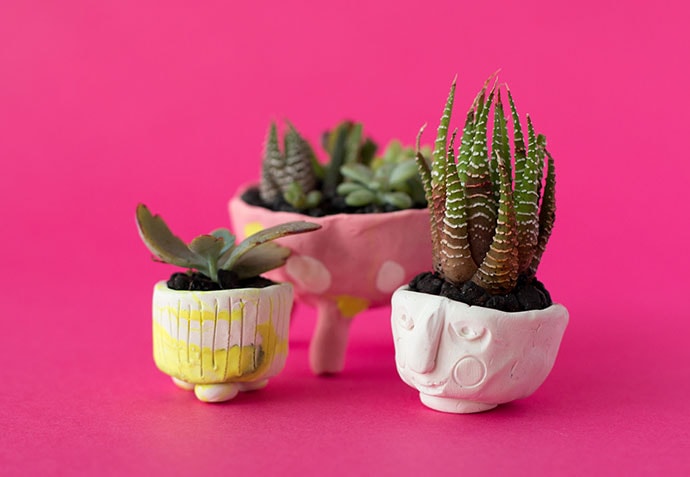
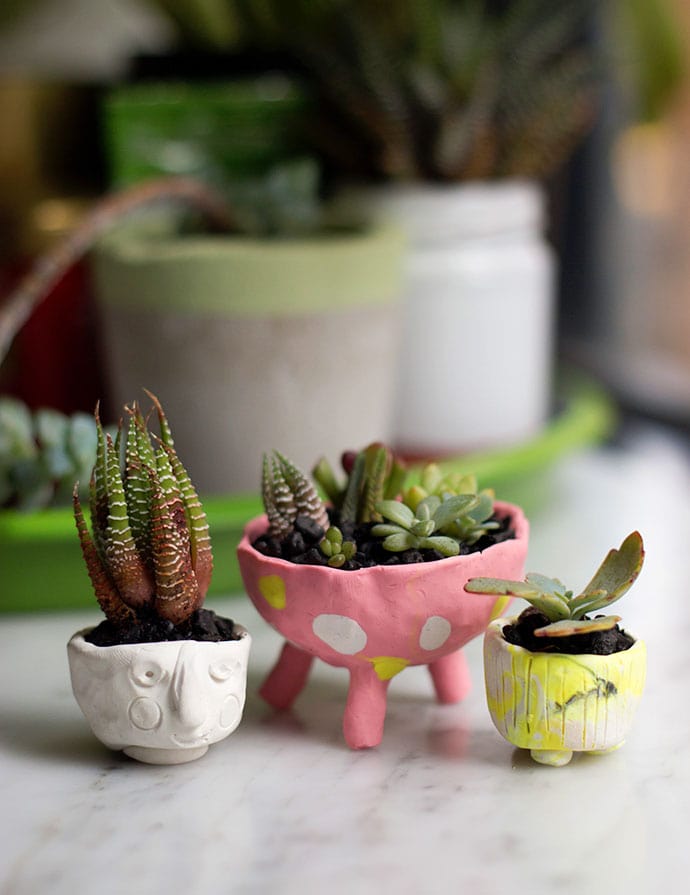
I’m very pleased at how these turned out, although my polymer clay moulding skills could use a little finessing. It’s quite difficult to get a perfectly smooth finish, I’d love some tips if you have any experience.
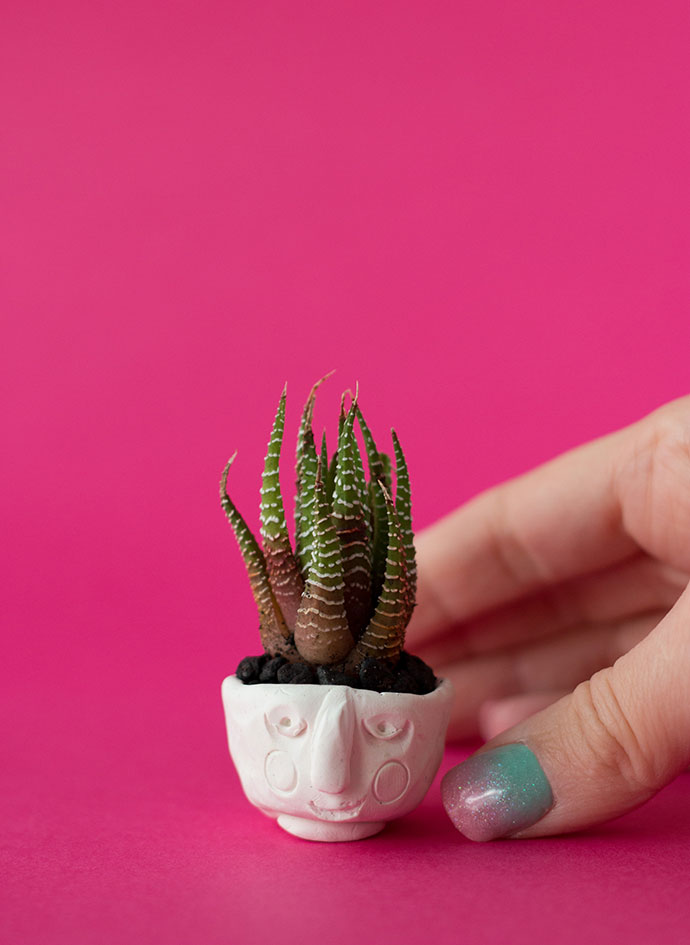
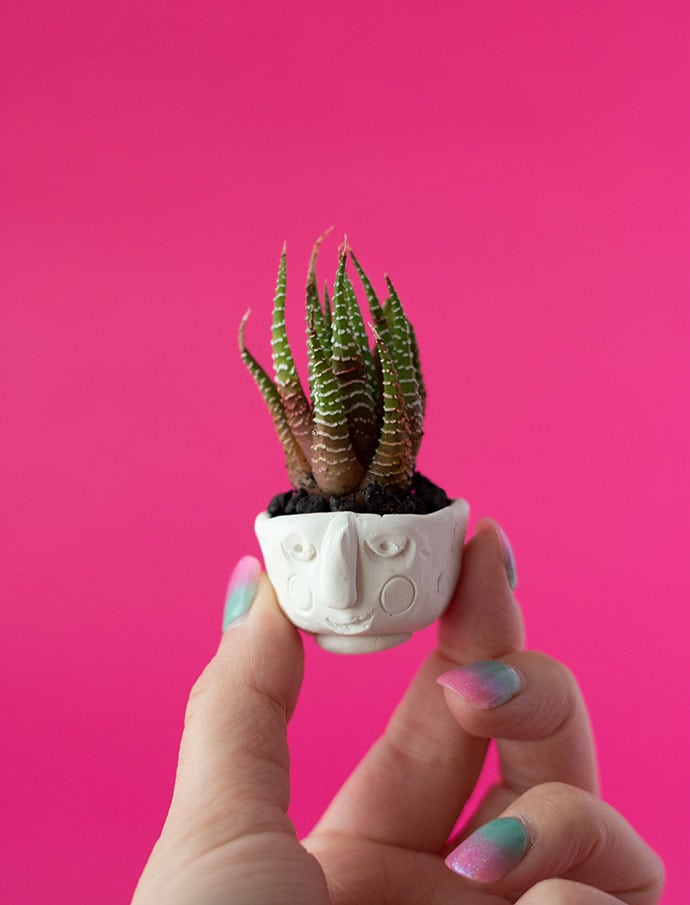
The face planter is my favourite, I may make a larger one when I get my hands on more clay.
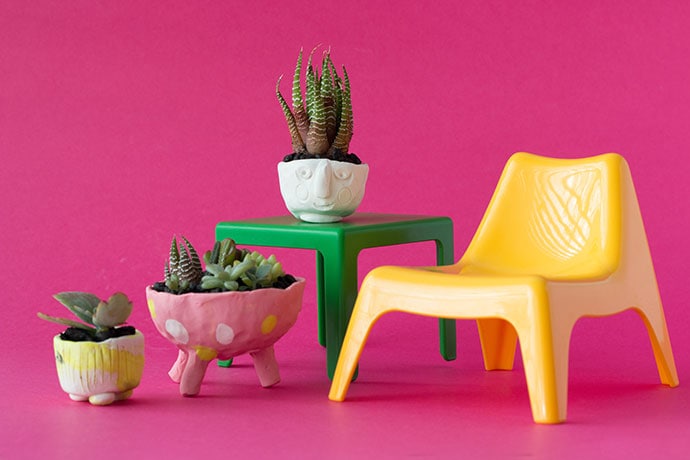
They now live on my kitchen bench keeping their big plant friends company until I find them a permanent home.
Here’s some more clever succulent planting ideas:
https://mypoppet.com.au/living/2016/04/11-clever-succulent-planting-ideas-no-pots-required/


They are VERY cute! Thanks for sharing. Another little something I can do with my daughter. 🙂
These are so cute. Something for me and the girls to try.
I don’t think you should change your molding style! That’s part of the charm of projects like these! They are adorable! 🙂 Lisa
Love this whole post. I have lots of clay so poppong some in the oven tonight. My succulents tend to multiply on tgeir own. Wld love some minis too so going to give it a try.
What a good idea! Thanks!