![]()
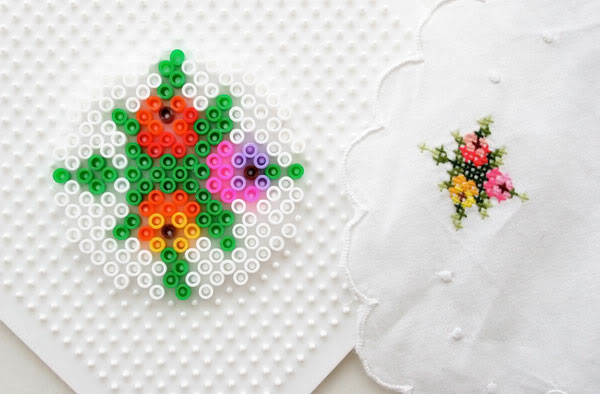
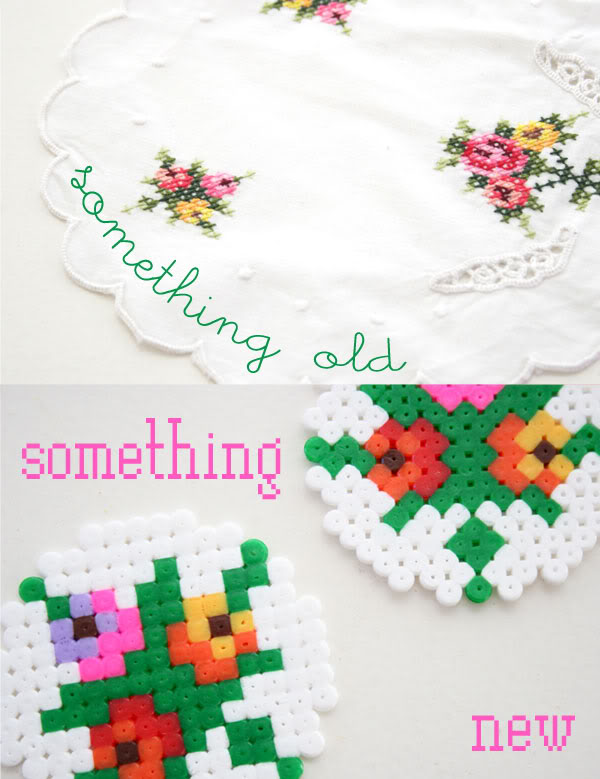
Ever since I used my Japanese cross stitch book to make some cute brooches with fuse beads last year, I’ve been looking at all cross stitch through totally different eyes – especially my small collection of pretty vintage cross stitched doileys and serviettes.
Small motifs translate brilliantly to fuse bead projects like these coasters. Have a look in your linen draw, there may be some wonderful designs waiting to be reinterpreted into pixelated masterpieces.
What are Fuse beads?
I’m glad you asked. Fuse Beads are small plastic beads/tubes that are placed one by one on a pegboard and then ironed until the beads are fused together. They are available at some craft stores, online and even IKEA.
You will need:
- Hama, Perler or fuse beads in assorted colours including green, yellow, orange, red, pink, brown, white, violet.
- Square bead pegboard
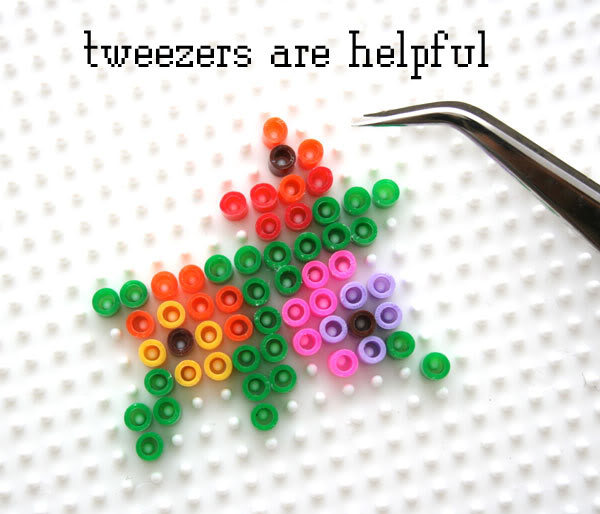
- Tweezers (optional but useful)
- Silicone baking paper (ironing paper)
- Iron
- Heat proof surface
- Heavy book
How to:
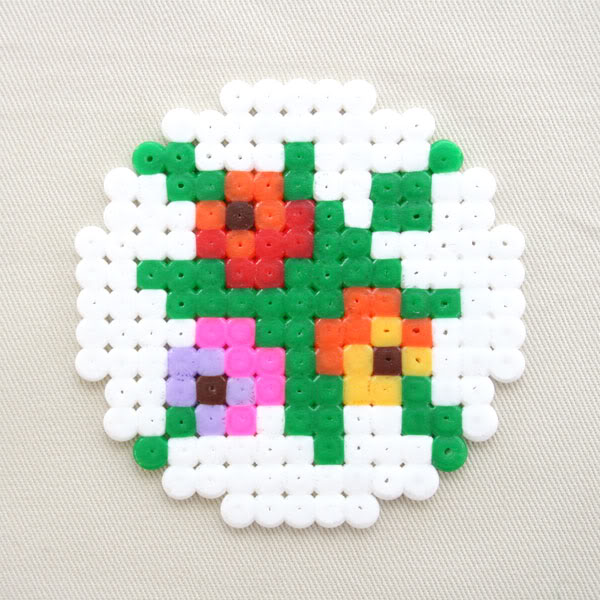
1. Following this pattern layout, place your beads, one by one onto the peg board. Tweezers help.
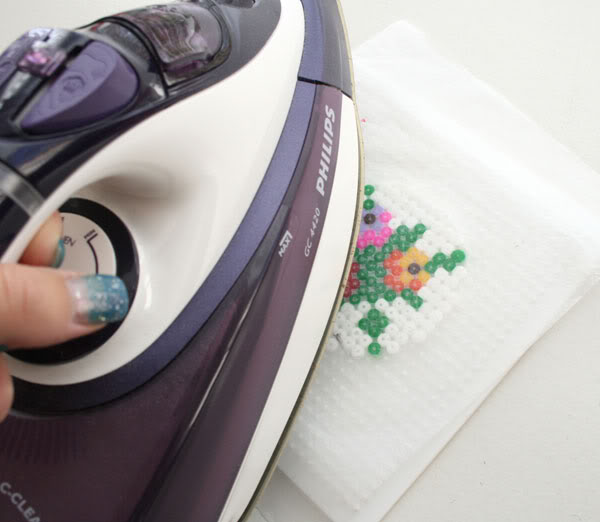
2. Place your non-stick ironing paper over your design. Apply the iron (no steam) for just a few seconds using smooth movements, make sure the iron doesn’t touch the pegboard. Leave your bead design to cool for a short time, then carefully remove it from the pegboard.
3. Once you have removed the design from the board, the beads will be fused together on one side, flip the design and on a heat proof flat surface, iron the other side with the paper.

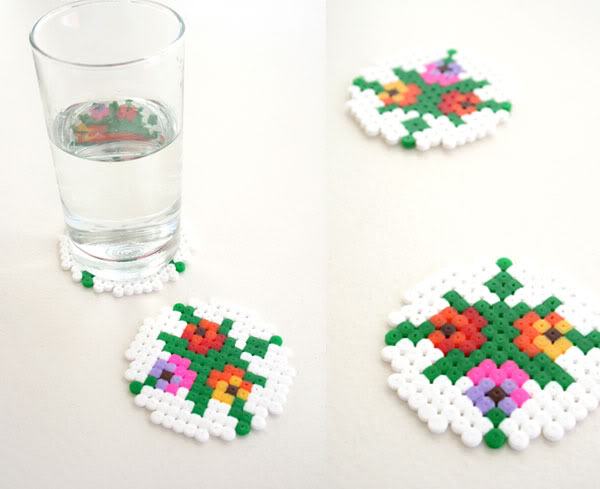
4. While still warm, place a heavy book on top of the coaster to avoid the edges curling up as it cools.
All done! Invite some peeps round for drinks to show off your pretty coasters.
These also make great housewarming gifts – Make a set of 4-6 and tie them up with a ribbon to give to a friend.
LOVE IT? PIN IT!
![]()


That is my kind of cross stitching!
WOW. I've never seen that before! I have a brother who is just a bit obsessed with manga… I have some ideas brewing! Thanks for this post 🙂
ahhh! cross stitch + hama beads = super great idea! thanks!
My daughter loves these beads and is forever getting me to iron things she has made. Ours never seem to be that sturdy though. Maybe I need to iron them more
Ohhh how fun fun fun! Love these to bits!! 🙂 xo Jenny
very cute:)
Nice! I work w/ kids & what we know as Perler beads (perlerbeads.com) are their all-time fave project – they'd do it every day if I let them. I love how all things pixelated lend themselves to these beads. Last Summer we did a lot of video game & cartoon characters, using pixelated images as patterns.
FWIW, I discovered that baking parchment works great for ironing the beads, once the 'official' paper runs out, & I use a number of kitchen/bath floor tiles, since they are heatproof & a larger size glazed tile is great for keeping the table safe when ironing.
I also always iron both sides to make the items a bit stronger – doing just 1 side as per directions makes them very breakable. The beads will stick to the paper for a short time right after ironing, making it very easy to remove from the pegboard & flip over – I keep an extra sheet of paper ready to iron the 2nd side.
Love the flowers! We recently made little flower earrings w/ Perler, now I'm getting some more ideas…
i absolutely love them a very great idea. i want to see more of those cross stitch coasters!
I linked to your tutorial on my blog – thanks for sharing!
doro K.
thanks for that inspi!!! I have gazzillions of that beads and my doughter needs input for nwe ideas.
Kerstin
I have done this many years ago, on cutoutandkeep.net i had read an awesome advice, when you will make them durable, they aren’t so durable , you must give them some layer of mod podge.
I didn’t knew that, so mine is now just in pieces and people didn’t saw them for to use.
I think i was to modern in my ideas. It was a more difficulty one cross stich of a rose.
It’s not critical comment, but just to help others, i love the idea and well done.
it’s a great fun idea.
I tried many things with those stupid hama beads. Did you know that you can melt them too as well on carton and fabric. I have tried that out , you can use it for more. I still love them, but… i’m still working at my new home to seatle down more.LOL