Learn to draw fashion sketches the easy way with this posable fashion illustration template. You’ll master fashion drawing in no time at all!

This post contains affiliate links
Fashion illustrations are absolutely divine, and for me, much more magical than the finished article of clothing they represent.
Of course, fashion illustrations capture the mood of a garment or outfit and, are intended to inspire the designer, dressmaker or draft person in it’s creation.
But mostly fashion drawings offer allure and enticement for public consumption.
Before the advent of photography, fashion illustrations were the main visual reference in periodicals (newspapers and magazines) to entice the reader to buy the new fashions.
Improvements in photographic equipment, and the specialization into fashion photography, resulted in higher speed turn over of image creation, which led to the almost demise of illustrations for fashion.
With anything that runs in cycles, even fashion illustration can make a comeback.

Photo by Charlota Blunarova on Unsplash
And if you are in any doubt to it’s usefulness in the world of print editorial, simply flip through any magazine and you will usually find at least one example of illustration being used.
Today fashion illustrators are celebrated as much as fashion photographers.
For a bit of fun I have created a project that can help you create your own fashion illustrations and sketches.
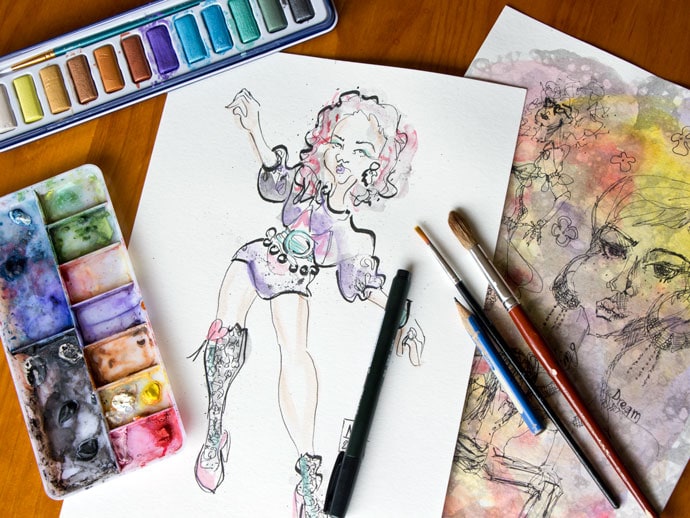
The project runs in two parts.
First we will construct an articulated paper doll. This paper doll acts as a fashion illustration template that can create natural forward facing poses.
For the second stage of this project I will show you how you can create your own fashion drawings.
How exciting is that? Come on, let’s get started.
You may also enjoy:
How to make a Posable Fashion Illustration Template
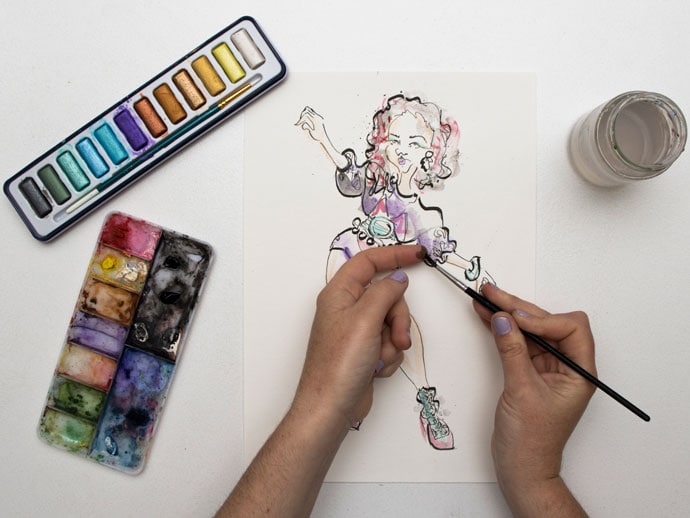
You will need:
-
- Printable cardstock
- Watercolour paper
- Scissors
- Art knife
- Cutting mat
- Mini brads (split pins)
- Pin
- Ruler
- Lead pencil
- Pens
- Watercolour paints
- Paint brushes
- Water
- Wine bottle cork or cork board
Note:
The best materials to use when illustrating aren’t so much what others recommend but what you’re comfortable with using. For instance I really like to use calligraphy pens for my line art. Also, my favourite canvas happens to be watercolour paper and Chinese rice paper. If you don’t have a preference give this combination a go. But if you already have your own material and tool preferences, you do you.
Making the Fashion Sketch Template
1. Print the template page at 100% on printable cardstock.
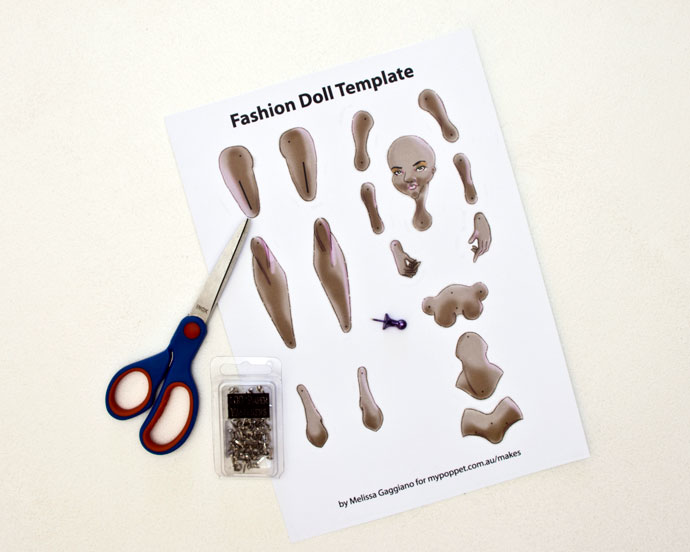
2. Cut out the body parts.


3. Cut out the straight lines on the upper leg pieces.

4. Push through the marked dots with a pin. You can place a piece of cork behind the pieces when making the holes (I used a wine bottle cork, but you can also use a cork board).
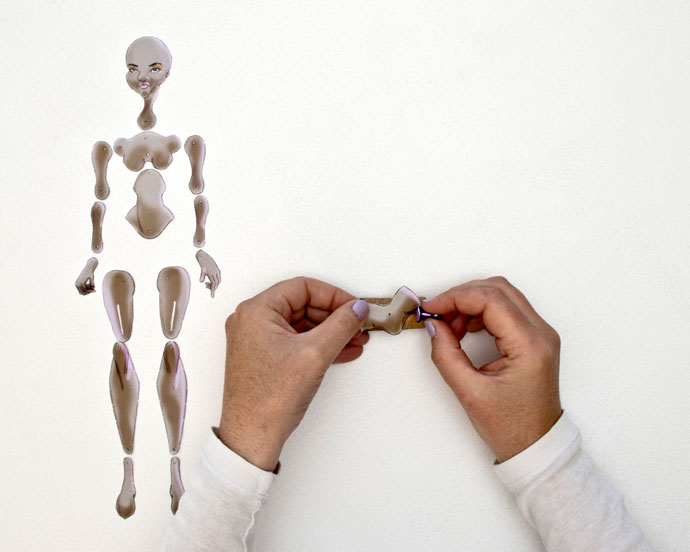
5. Position the upper bust hole in front of the neck hole. Insert a split pin and fold closed.
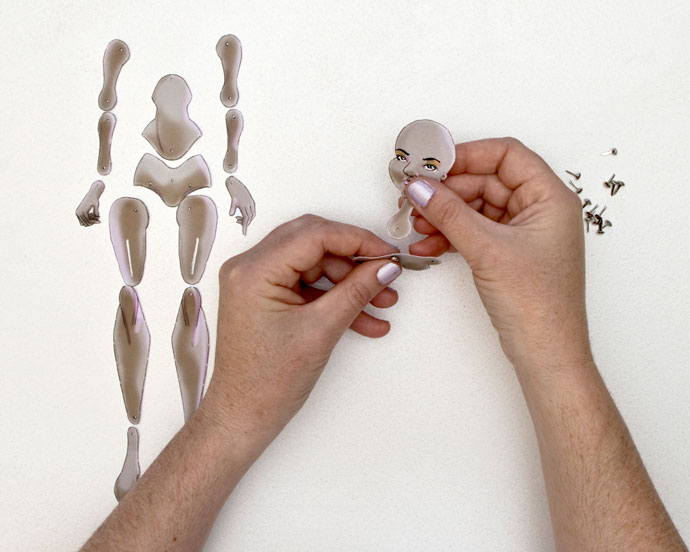
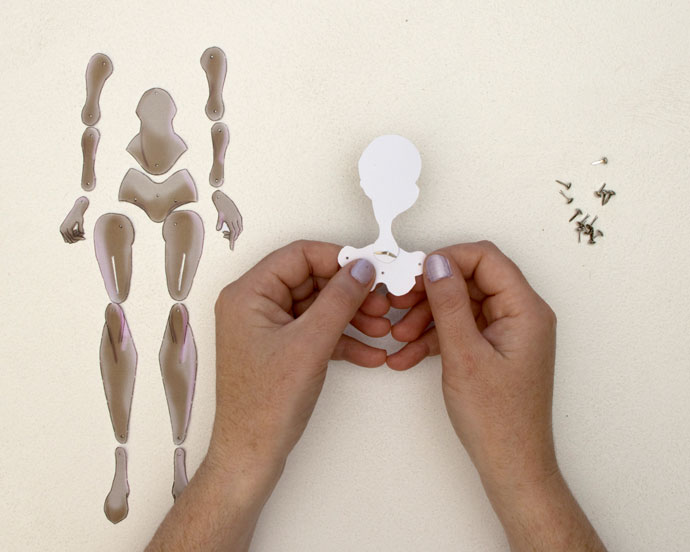
6. Position the lower bust hole in front of the upper stomach hole. Insert a split pin and fold closed.
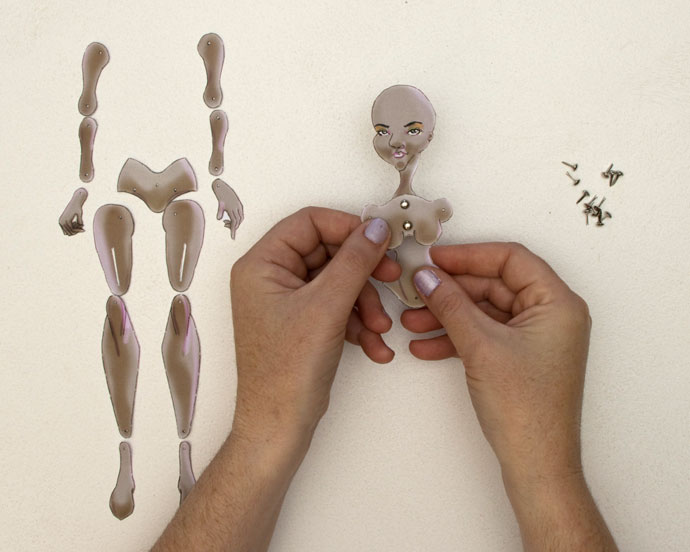
7. Position the upper pelvis hole in front of the lower stomach hole. Insert a split pin and fold closed.

8. Line up the three arm pieces – upper, lower and hand – with the lower arm holes placed in front. Insert split pins and fold closed. Repeat with the second arm.

9. Line up the three leg pieces – upper, lower and foot – with the lower leg holes placed in front. Insert split pins and fold closed. Repeat with the second leg.

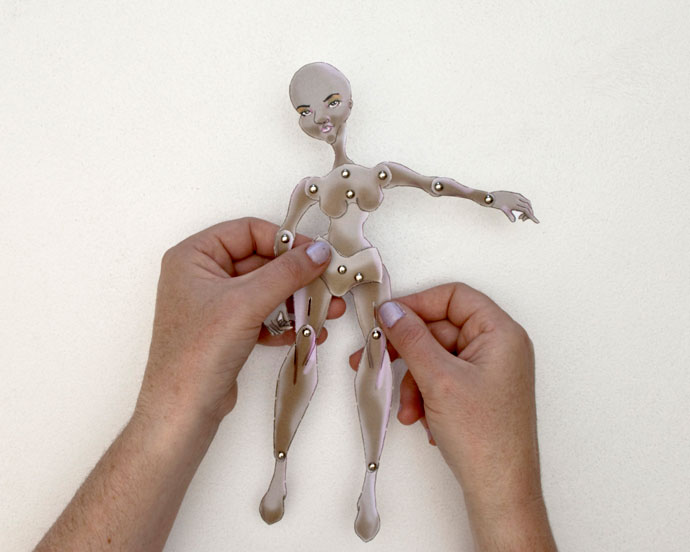
10. Position the arms and legs behind the body section, lining up the joining holes. Insert split pins and fold closed.
How to Draw Fashion Sketches

11. The fashion template can be positioned into lots of different forward facing poses. You can even make the template look like she is in mid walk (one leg lifted) by moving the knee joint up the upper leg.
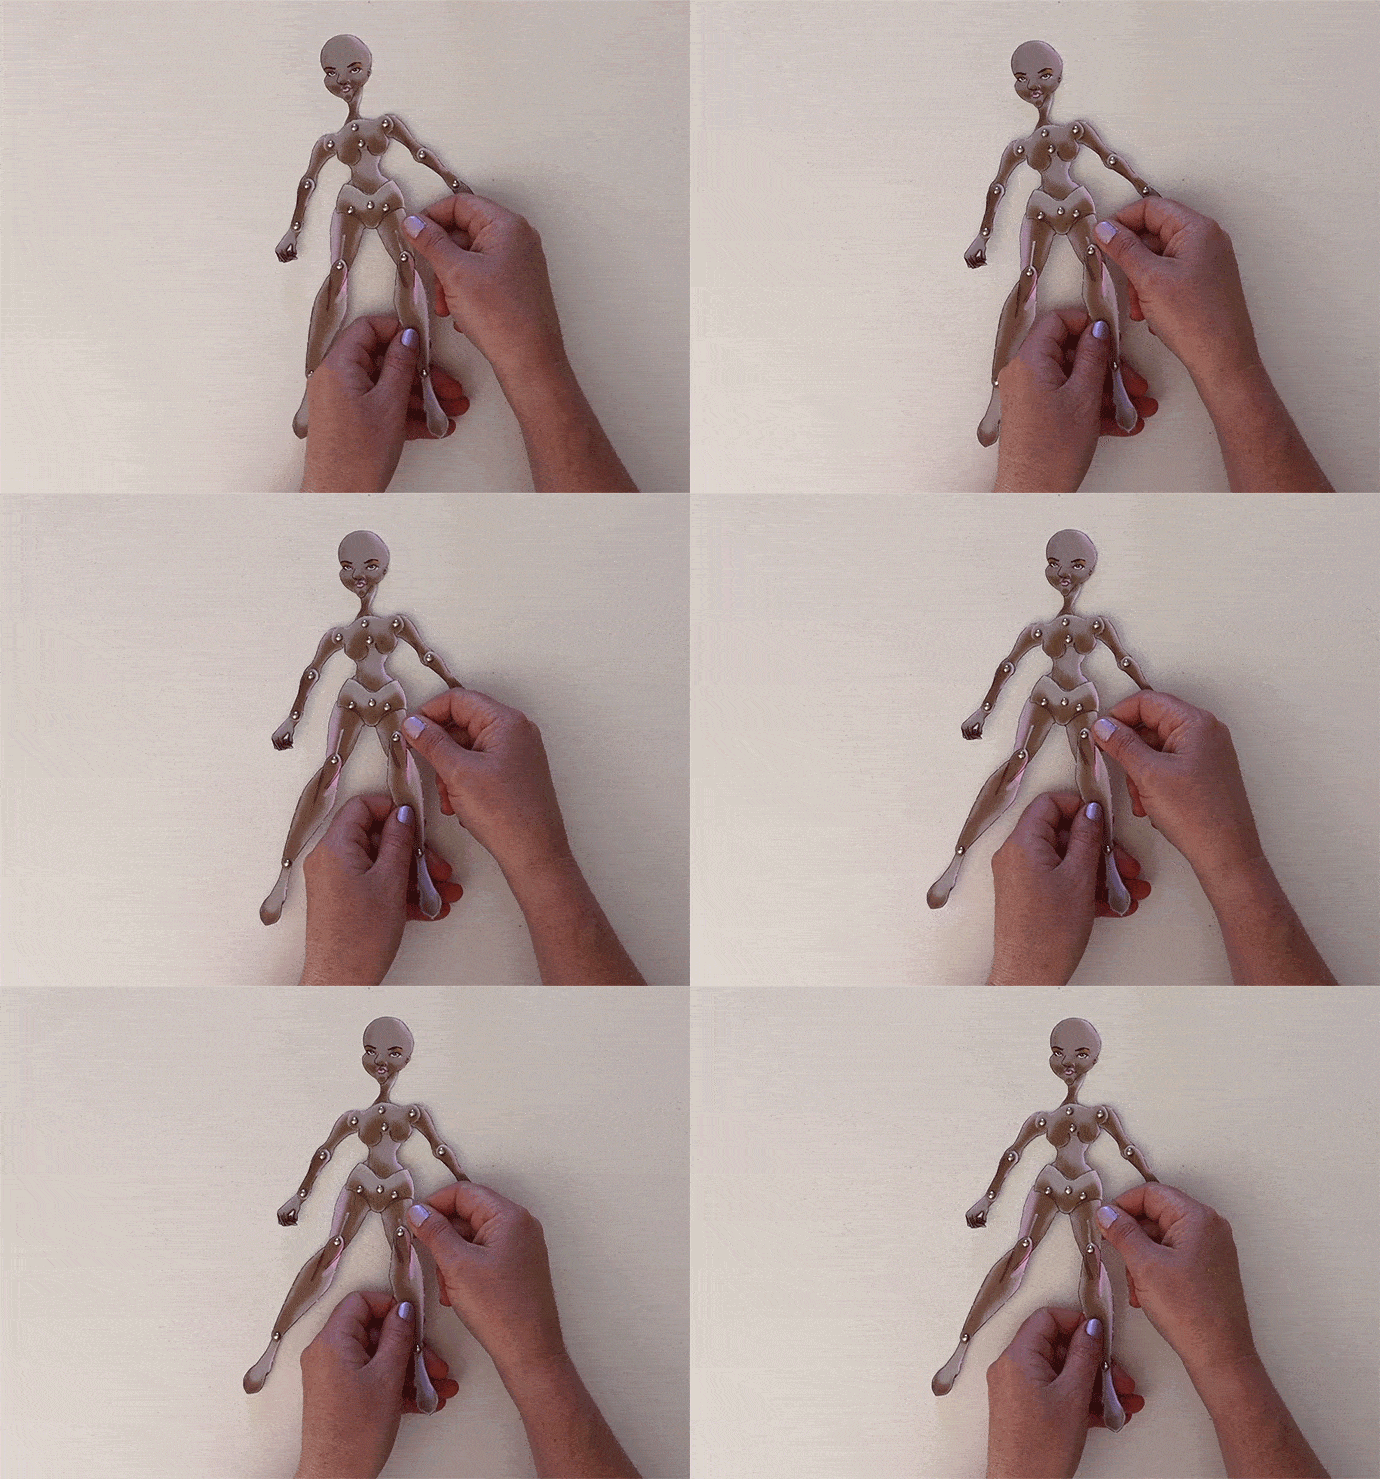
Play around with the different poses you can make. You can look at fashion magazines for inspiration, or just come up with your own pose.

12. Place the template on a piece of watercolour paper and lightly draw an outline of the posed template.
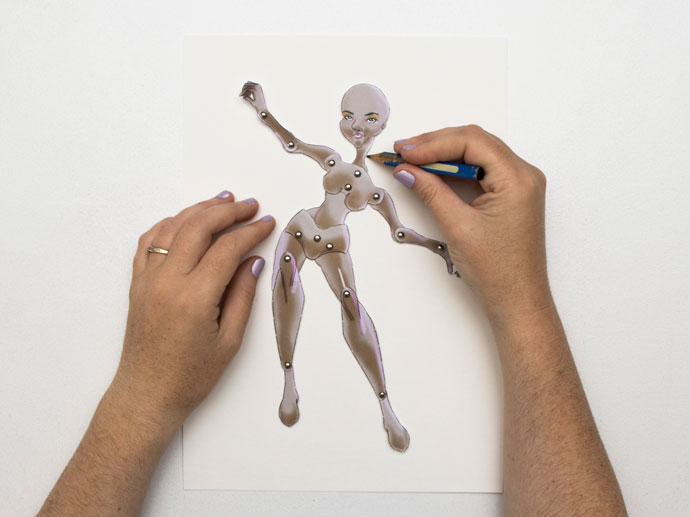
13. Move the template aside. Fill in the facial and hand details. Smooth out some of the lines.

14. Have a think about the outfit you want to draw. You may already have an idea in your mind, or you can choose something that you’ve seen in a magazine. Draw a light outline of the outfit over the template outline.
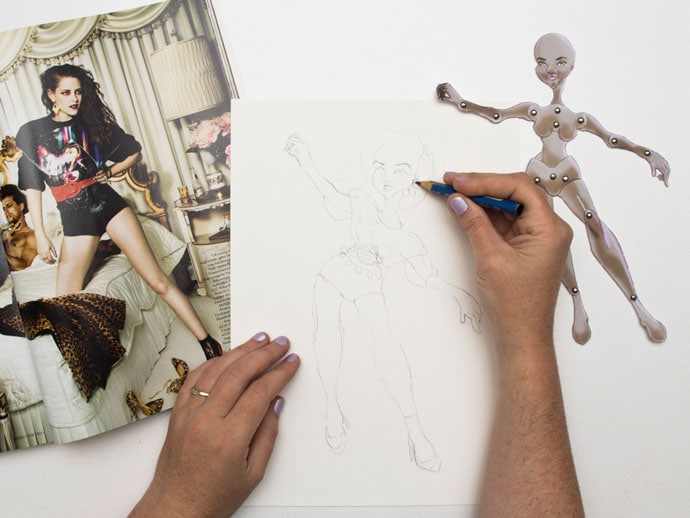
15. Go over the outfit with a few permanent pen markings. When adding the ink (or paint) line art you do not need to draw in every single detail to create a recognizable image. Also, when drawing the line art I like to make a ‘swish and flick’ motion. I am basically drawing each section in short bursts so I can move my hand around the image more comfortably. The result is a smoother illustration.

16. Erase the pencil markings.
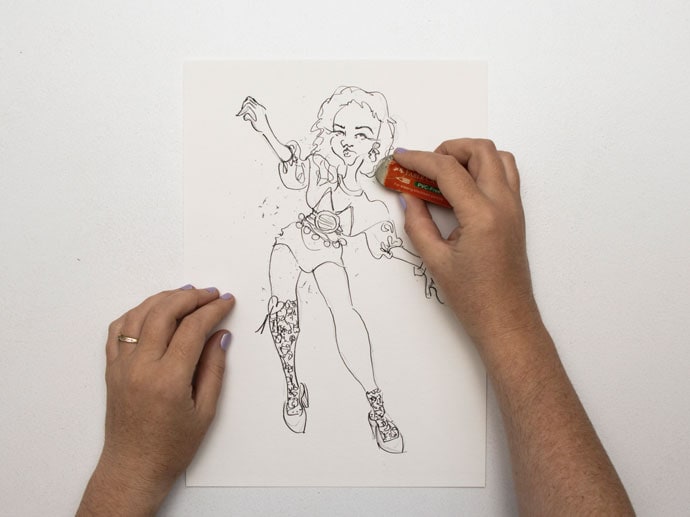
17. Using a thicker pen go loosely draw over the hair and clothing outlines.

18. Apply my ‘swish and flick’ motion add touches of watercolour to add colour the illustration. Leave areas of white to suggest highlights.
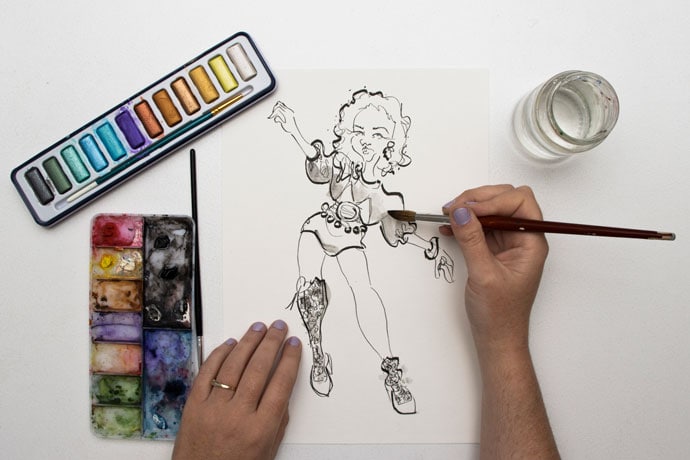

19. Splatter the page by gently running your finger across a watercolour brush.

20. When your fashion figure drawing is finished, add your signature and date of completion.


 Melissa is a hyper creative artist, and content creator.

