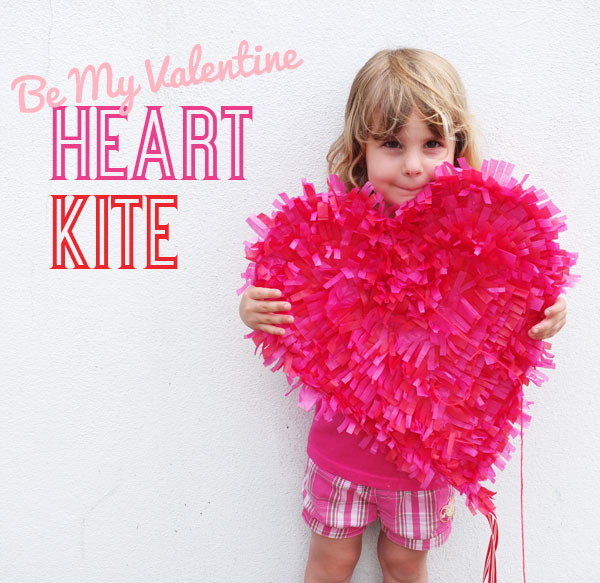
As Valentine’s Day approaches one can almost feel that ‘Love is in the air’, so inspired by that whimsical phrase I decided to make a heart shaped kite. I’m not really into the whole commercial nature of Valentine’s day, but I think it’s a nice gesture to give someone you care about a small token to show your affection. It can be a simple as a note or a card, but if you have more time, this pretty heart kite would make a special gift. Add a note “You have my heart on a string” to make it really romantic. Take the family out for an dinner picnic and some kite flying for a memorable evening. This kite is not only fun to make and fly, but makes a gorgeous photo prop or wall hanging as well.
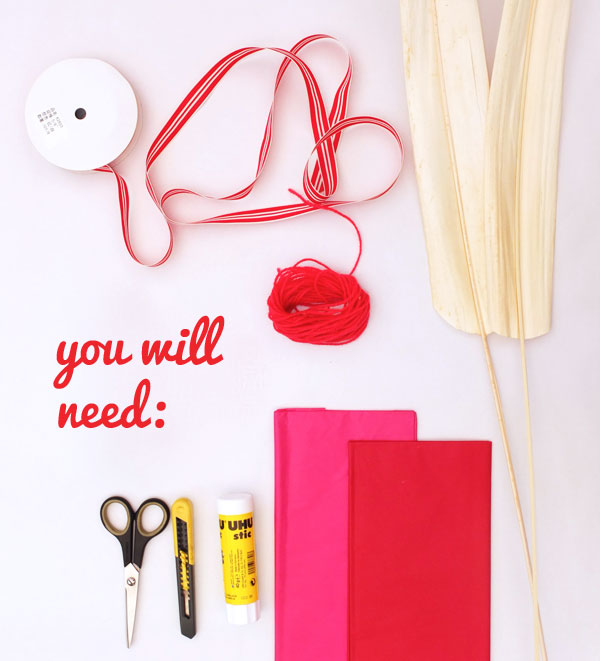
You Will Need:
-cane (like the type you make baskets with) I had trouble sourcing exactly what I wanted but improvised and used the stems of some decorator foliage from a homeware store or florist. No exact measurements are provided as it will be dependent on the length of the cane you have available. As a guide the lengths I used for the sides were 70cm (27″) and the cross brace 40cm(16″) x 32cm (12″)
-Tissue paper in red and Pink
-yarn or twine (for your kite string)
-stick or scrap wood (not pictured)
-Ribbon for tail about 110cm (44″)
-glue stick
-scissors
-craft knife
-tape (not pictured)
How to:
Finished size without tail 45x38cm (18″x15″)
1. If required strip off any leaves from your cane/stems using a craft knife. This should leave you with some strong but flexible sticks to make the frame of your kite with.
2. This part is a bit tricky. Bend your bits of cane to form a heart shape. Tape where indicated. Cut two shorter lengths to form a cross brace and tape them in place to keep your heart shape rigid. Tie the cross in the center. Try to get the shape as symmetrical as possible (mine is a little wonky).
3. Lay your frame over a sheet of red tissue paper and trim away excess paper.
4. Clip around curves
5. Fold edges over frame and paste with glue stick.
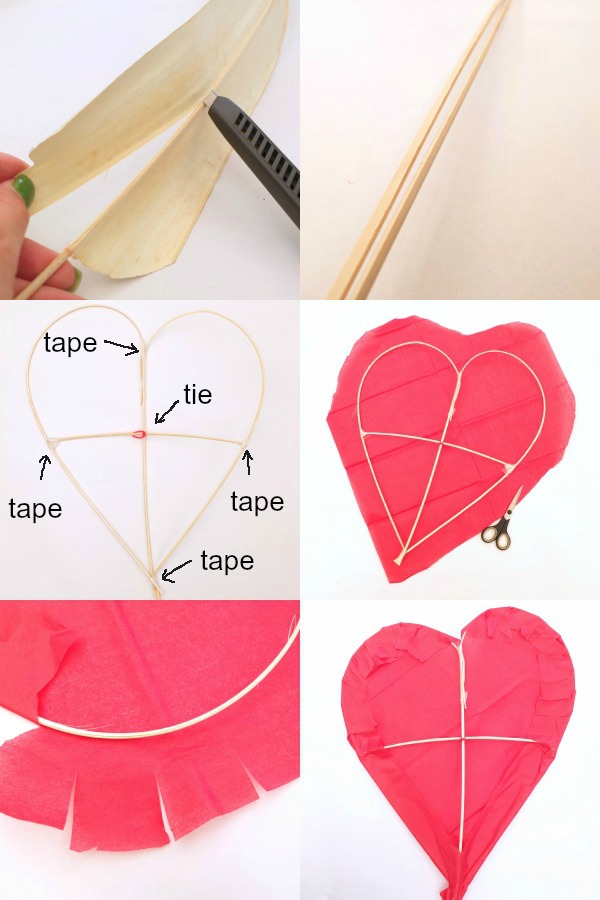
6. Flip over and repeat steps 3-5 on the other side.
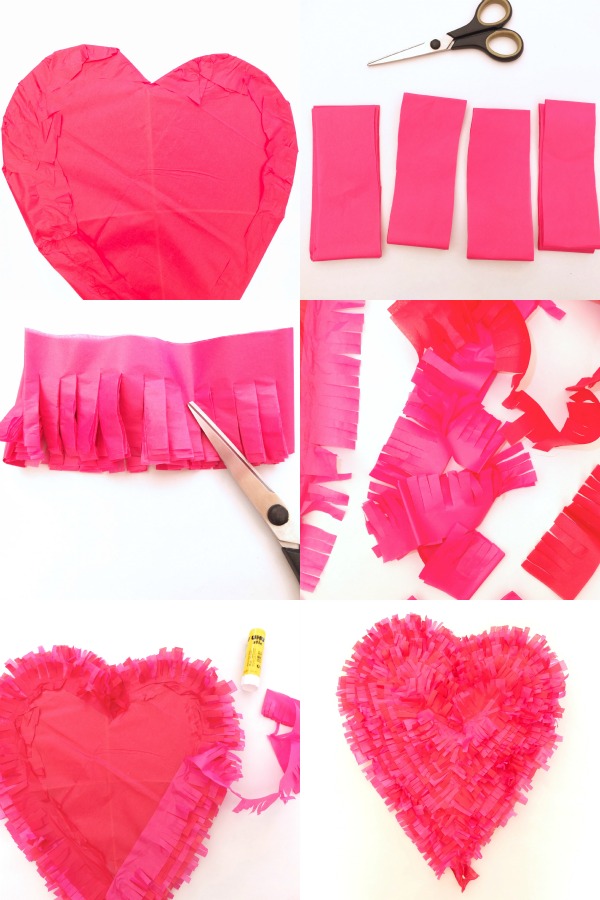
7. To make fringe cut your folded tissue paper into 5cm (2″) wide strips
8. Cut fringing about 1cm (0.5″) wide, making sure not to cut all the way through.
9. working from outside, paste on fringe rows, alternating between pink and red rows until the whole surface is covered.
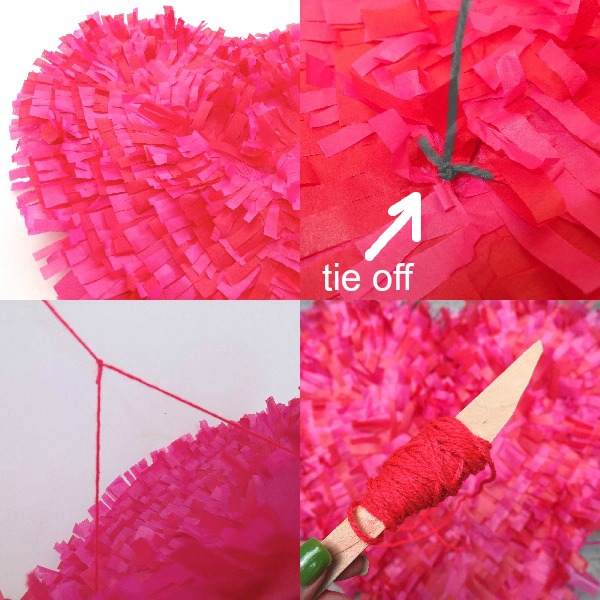
10. To add string. Feel through the tissue for the frame cross brace. About 10cm(4″) from top, poke a little hole and tie one end of a 30cm (12″) length of yarn of twine to the vertical brace. Tie the other end of the yarn about 2/3 of the way down the brace.
11. Tie off your long yarn/twine to the middle of the string you have tied to the frame.
12. Wind your long twine to a stick (I’ve used and old piece of wooden picnic cutlery)
13. Add your tail (not pictured).
Time to take it out for a spin!
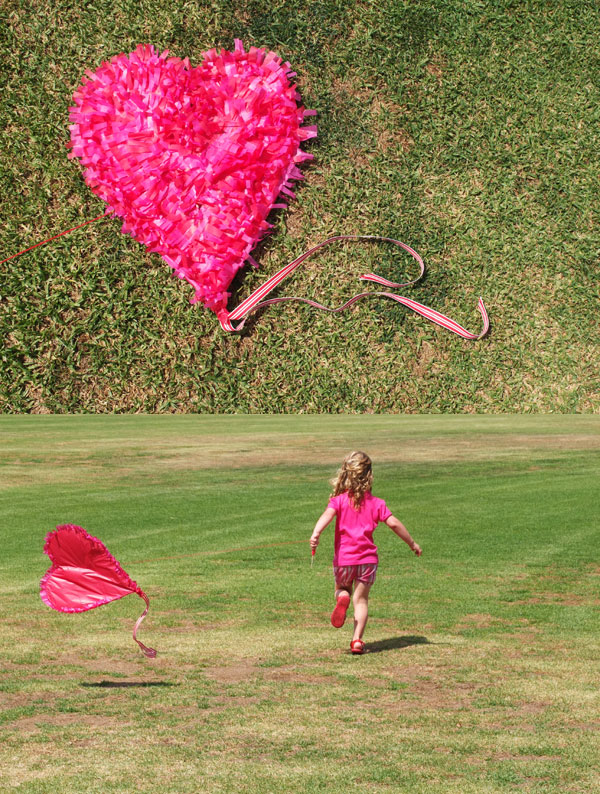
So did it fly? Yes, well sort of. We did get it up as you can see from the photos, but it spun around and around, I think beacuse the frame was slightly askew. Also the wind was a little blustery. Obviously my skills in aeronautical engineering need a little brushing up. With some tweaking I think we can get it to fly a little better. You may need to experiment with string placement and frame size.
I’d forgotten how fun flying a kite is and am definitely going to make another soon.

It’s quite sturdy and survived a few crashes. Now it’s hanging on the kitchen wall as a decorative piece and it makes me smile every day.
Why not make one for someone you heart?


this is so cute and my girls would love it, we’ll have to give it a go!
SO CUTE
SO CUTE
SO CUTE