Hi everyone!
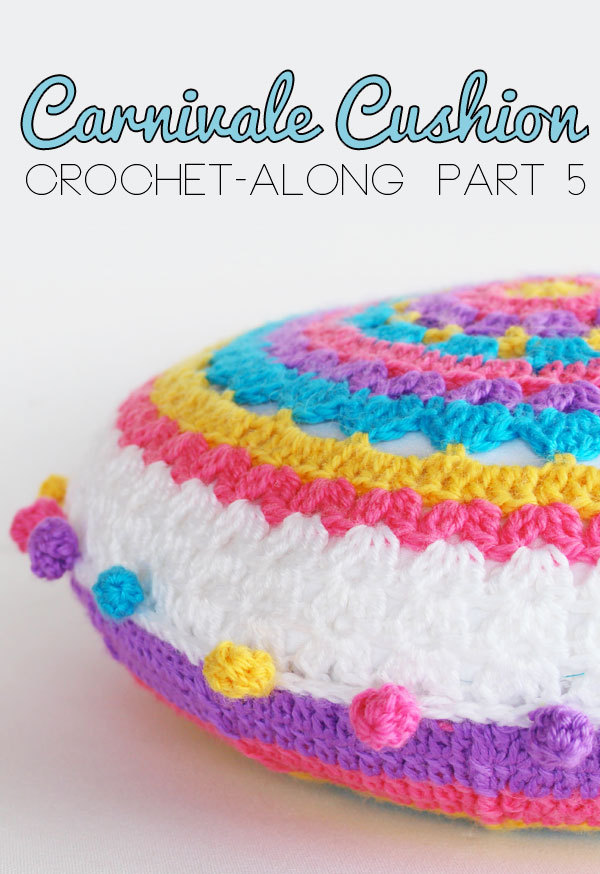
Well, hasn’t time flown by! Today is our final installment for the Carnivale CAL and it’s finally time to join our cushion pieces and finish them off with some fun pom poms.
By now you’ll have finished your cushion pieces and made your cushion insert, following Cintia’s super easy tutorial.
So make yourself comfy and let’s get started …
You will need:
Cushion front & back
Cushion insert
Yarn – Main colour
Hook
How to:
Assembly
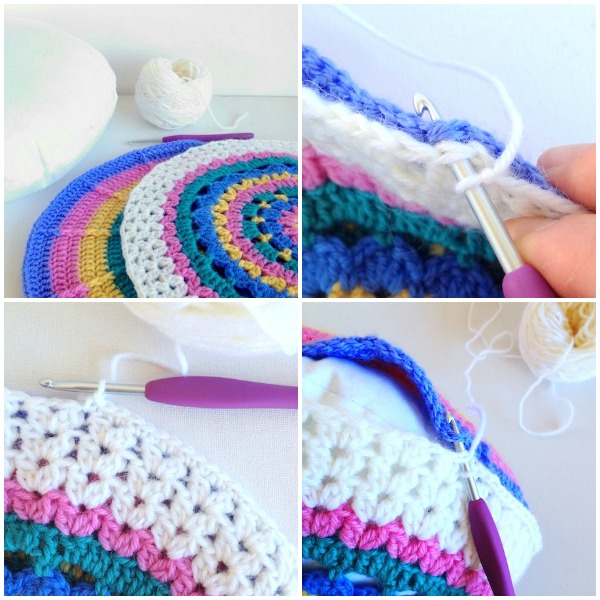
1. Gather your supplies.
- Place your cushion front and back together with wrong sides facing. (ie. good sides facing out). Starting anywhere on your cushion, make a slip knot on your hook and insert through all loops, yarn over hook and make a single crochet.
-
Continue sc through both pieces until you reach half way around.
-
Pop your insert in and continue sc around until you reach the end.
Now it’s decision time.
If you will be making your pom poms in a single colour, join with a slip stitch but don’t break off yarn.
If you will be making multi-coloured pom poms then join with slip stitch and break off yarn.
Pom Poms
It’s Pom Pom time! I’ve given instructions for making individual pom poms. Yes, it is a little time consuming but worth the spectacular effect!
If you will be making yours in just the one colour, make the same way, but instead of breaking off your yarn after each one, slip stitch across 6 stitches before beginning your next pom pom.
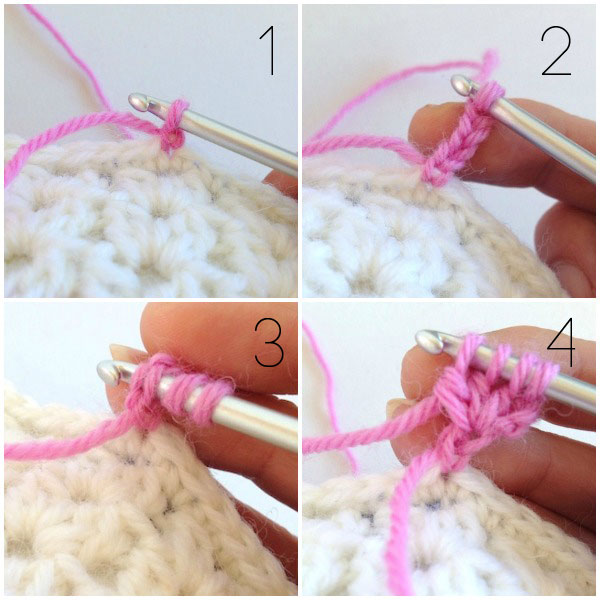
1. Join yarn with a slip stitch anywhere on your joined cushion. Leave a long tail to help secure when finished.
2. Chain 4
3. Yarn over hook, insert hook into first chain
4. Make a bobble stitch
Bobble Stitch
*Yarn over, pull up loop, yarn over, pull through 2 loops on hook.
Repeat from * into same s(tch 3 (mes (4 loops on hook)
5. Yarn over and pull through all 4 loops
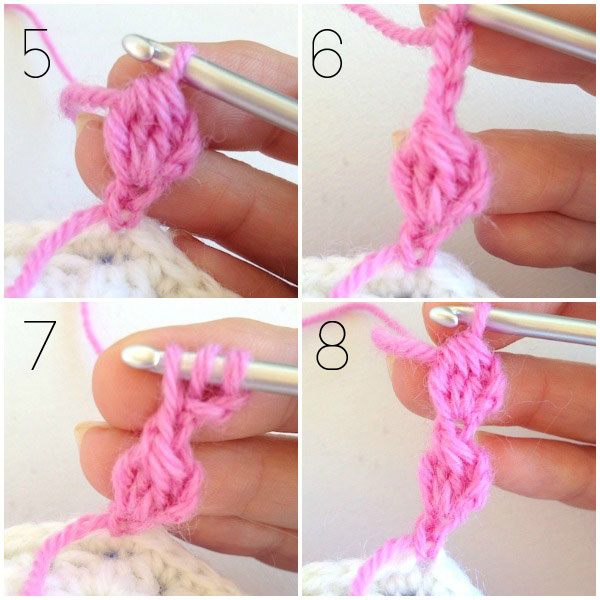
6. Chain 4
7. Make another bobble stitch into the first chain as you did in Step 4
8. Yarn over and pull through all 4 loops
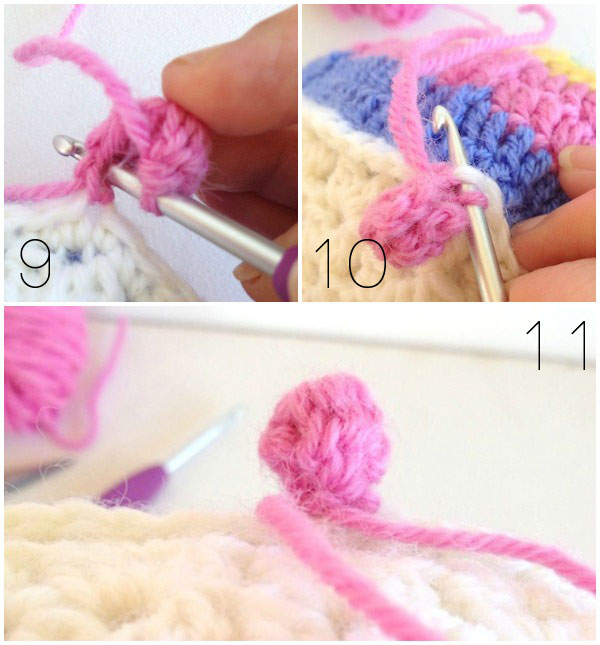
9. Fold this top bobble down towards the first bobble, insert hook into first chain and pull yarn through to make a slip stitch.
10. Make another slip stitch into the same stitch on your cushion where you started.
11. Break off yarn leaving a long tail. Tie both tails together into a single knot at the back of the pom pom so that it’s extra secure. Thread your yarn into a large eye needle and pull your ends back into the pom pom to hide. Use your needle or hook to push any straggly bits back in if you need to. Pom Pom made!
Repeat the process to make your next pom pom around your cushion. I’ve spaced mine 7 stitches apart.
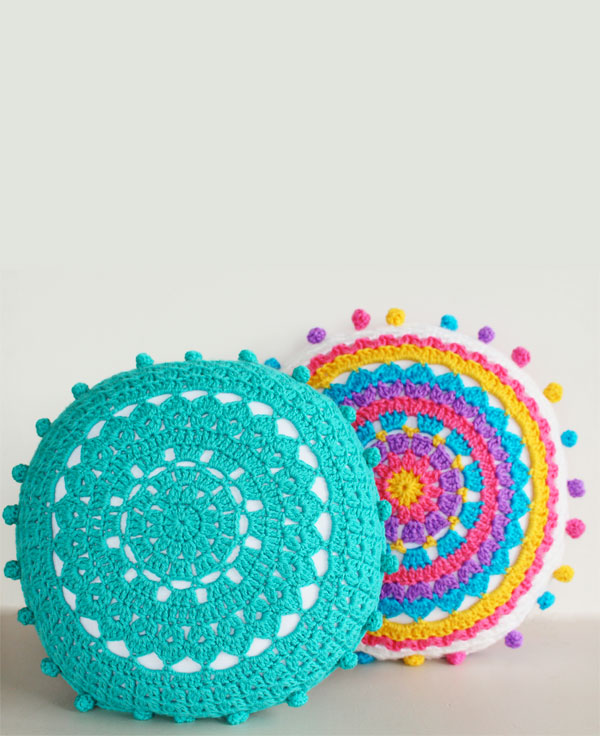
Now take a moment to admire your gorgeous new cushion. Aren’t you clever!
Part 1: Gather supplies
Part 2 : Cushion front – first half
Part 3: Cushion front – second half
Part 4: Cushion back and blocking
Part 5: Finishing off
Thank you so much for joining in on this crochet-along I hope you’ve enjoyed it as much as I have! Don’t forget to share all your gorgeous creatons on Instagram with the #carnivalecal tag or on the Ravelry group.
I’ll be back with monthly crochet contributions from now on. I’d love to hear your thoughts in the comments below on what would you’d like to see more of to add to your bag of crochet tricks?
 About Michelle Robinson
Michelle is the face behind Poppy & Bliss. Her passion is crochet and her style is modern, vibrant and fun.
She teaches workshops in various styles of crochet, designs modern crochet patterns, occasionally remembers she has a blog at Poppy & Bliss but shares most of her work on Instagram


Loving how simple but intricate the solid color looks!
Lovely! Thank you for sharing this.
Wow! What a gorgeous cushion! I;m so looking forward to giving it a go.
Thank you for the fabulous explanation and images. Wonderful for someone new to crochet, or, like me, an Aussie, left handed, old timer who hasn’t done much crochet for a very long time!