I’ve had this Bedside Organiser on my To Do list for well over a year. I don’t know what took me so long because it’s awesome and has made my space so much more pleasant to be in.
I’m not a very organised person and can sort of ignore a moderate amount of mess, but after a while it gets me down, so it was time to do something about it.
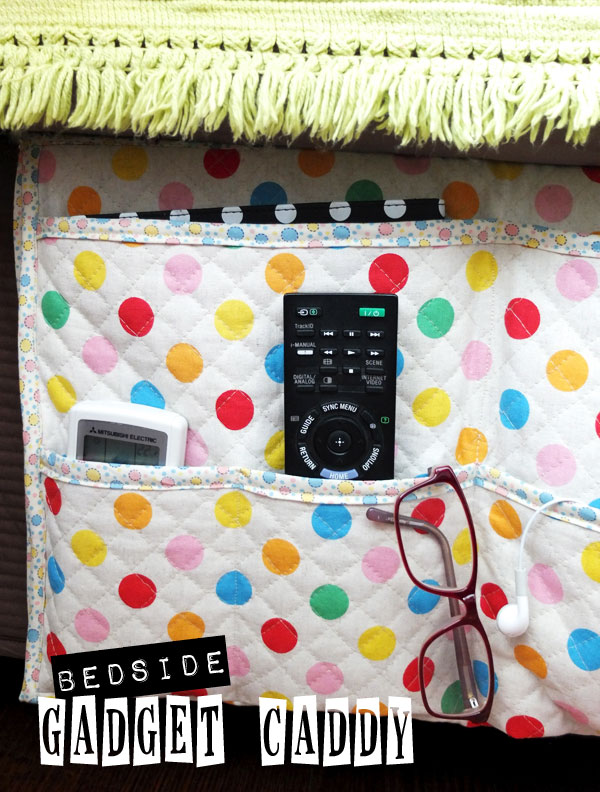
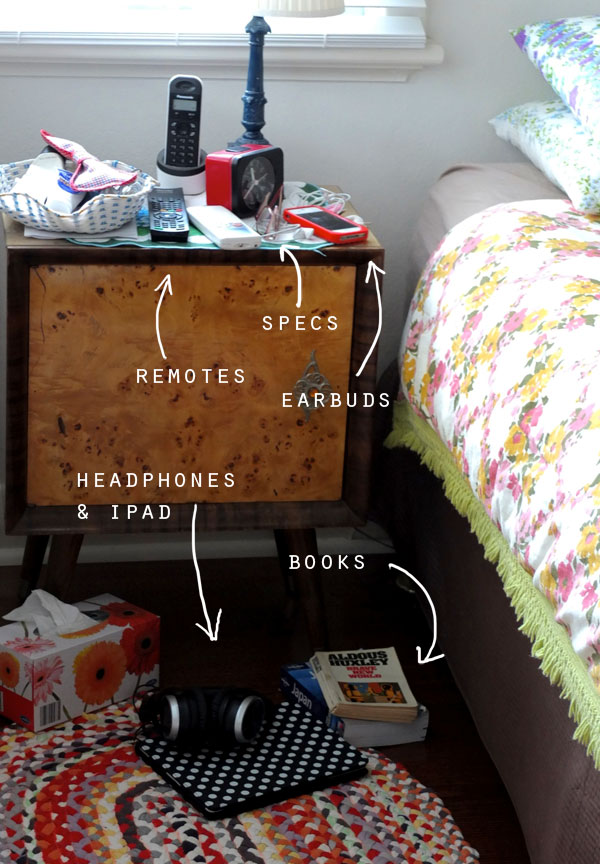
This Bedside Gadget Caddy is designed to hold everything that I like to keep on hand so I’ve designed it to suit my needs. Originally (last year) I was just going to make a pocket for my iPad but I’m quite happy that I waited and made a caddy to hold everything, as you can see from the picture below, I really had to sort out the clutter situation.
You can use my exact pattern or adjust it slightly to fit your space and gadget holding requirements.
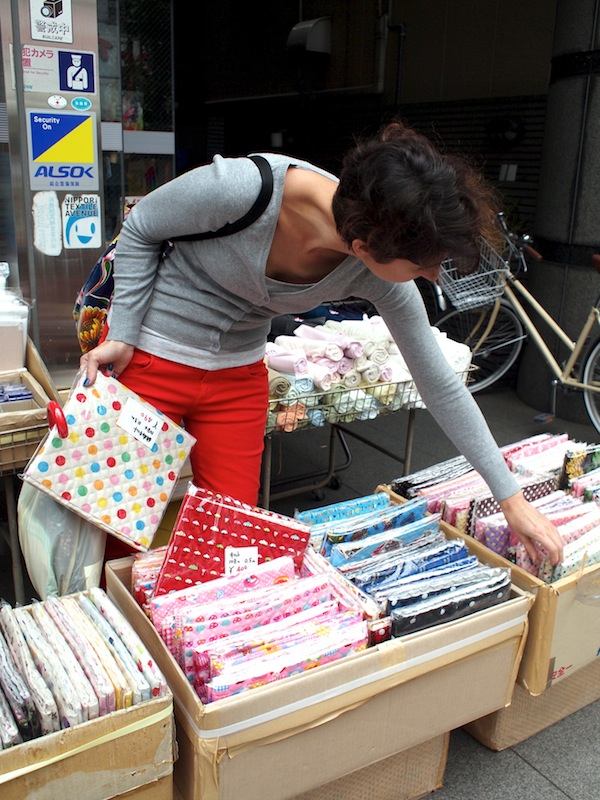
The fabric I’ve used for this project was bought in Japan as a precut a few years ago so I don’t know where it can be found locally (sorry), but I’m sure you can find similar quilted fabrics, or maybe quilt some yourself.
Here I am in Fabric Town (a suburb of Tokyo) looking through all the gorgeous pre-quilted fabrics.
I’ve been saving this piece for the perfect project, now I get to enjoy it every day.
The measurements of he original fabric piece (full width x 20″) dictated the size of the caddy, I used every piece as I didn’t want to waste any. You can adjust the width if you have a smaller piece of quilted fabric.
Sorry all the measurements are in inches because it was just easier.
You will need:
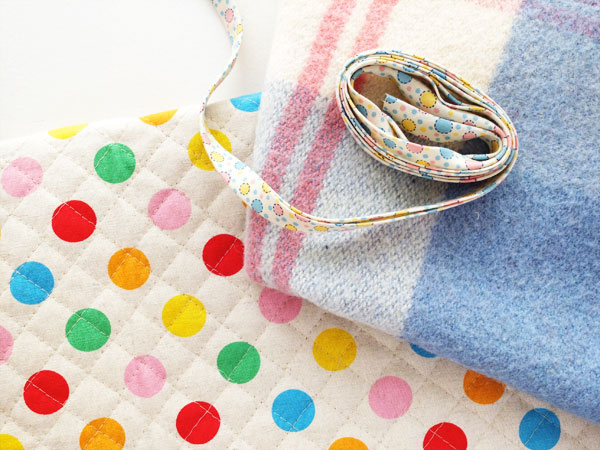
- 20″ (42″ Min width) Double sided pre-quilted cotton (Denim or heavy weight upholstery fabric will do in a pinch) See cutting guide below for actual piece sizes.
- 112″ (285cm) x 1″ wide Bias tape, twill tape or ribbon folded and ironed lengthways (get a little more just in case). I used bias binding that I had on hand.
- 20″ x 20″ Old blanket or towel (anything textured or grippy will do)
- General sewing supplies
How to:
I’ve broken the instructions up into a few stages to make it easier to follow
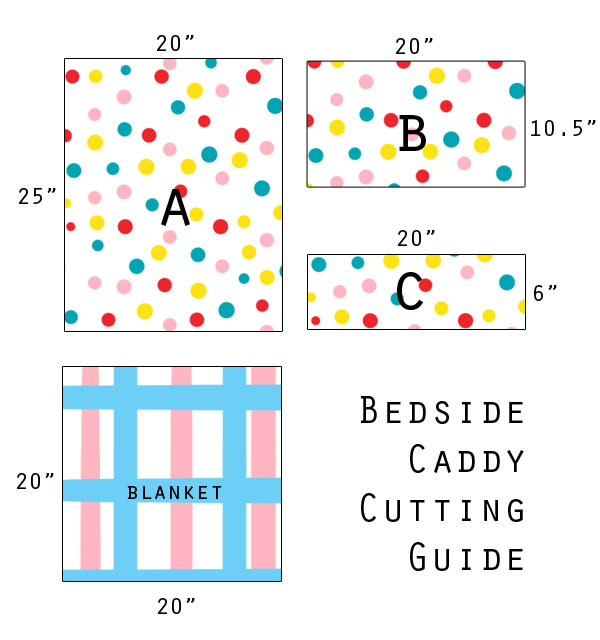
Cutting
Cut fabric pieces as follows:
- Blanket 20″ x 20″
From Quilted fabric:
- Piece A 20″ x 25″
- Piece B 20″ x 10.5″
- Piece C 20″ x 6″
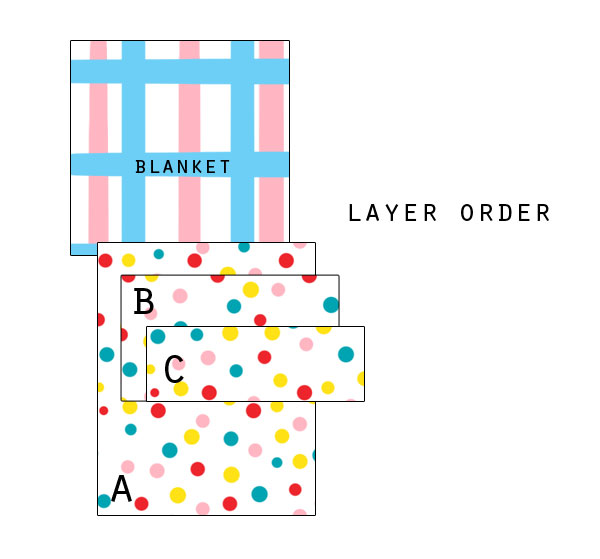
Assembly
Here is an overview if how the layers will fit together
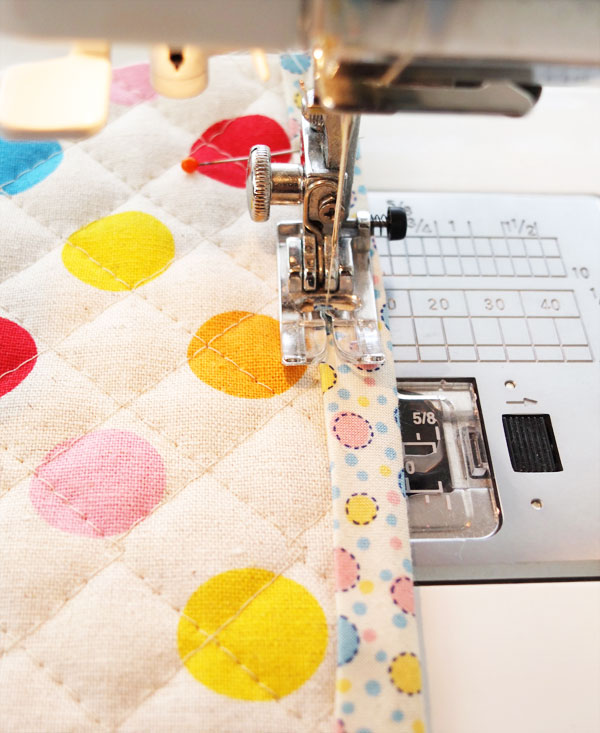
Binding raw edges:
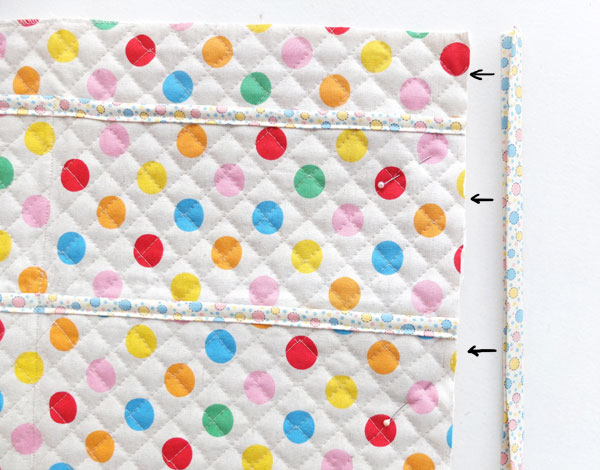
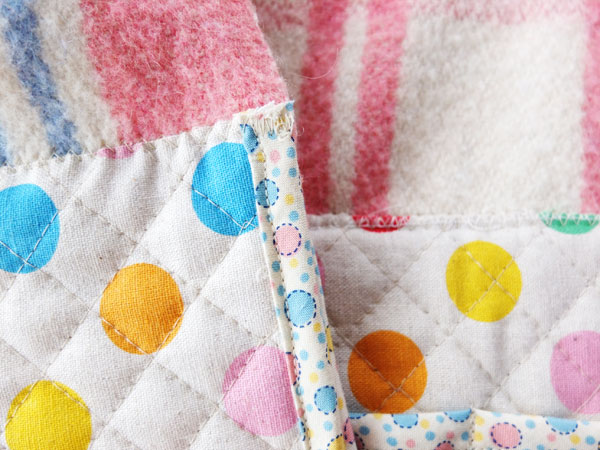
Pin and sew your chosen binding onto the top edge of pieces B and C.
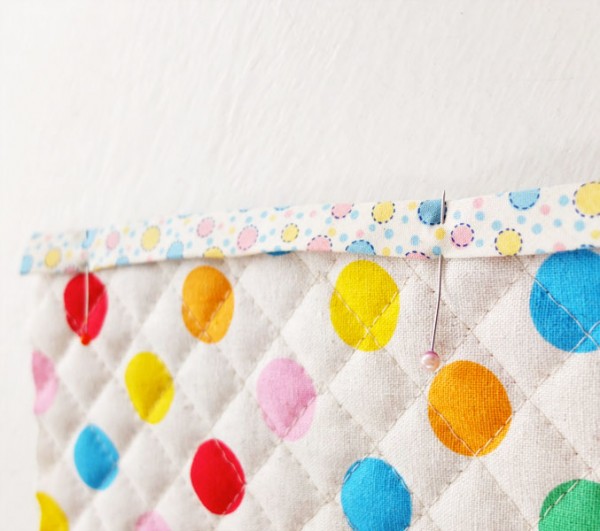
Make sure your stitches catch both the front and the back of your binding.
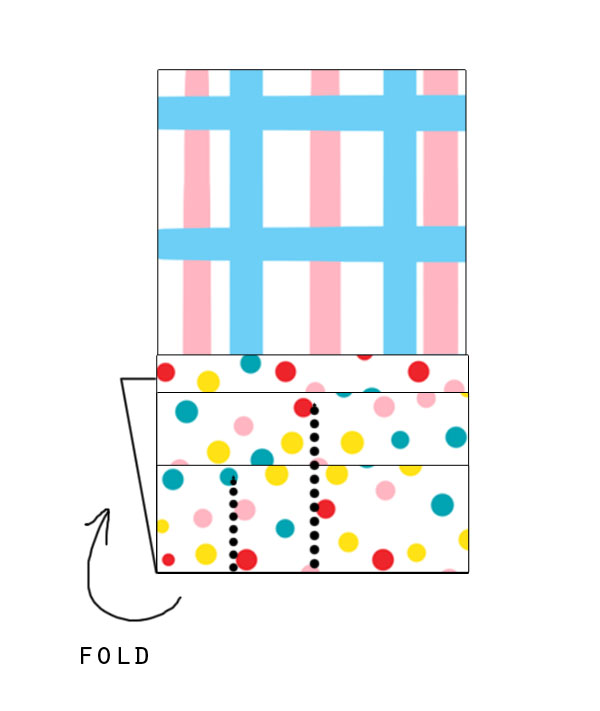
To create pocket unit:
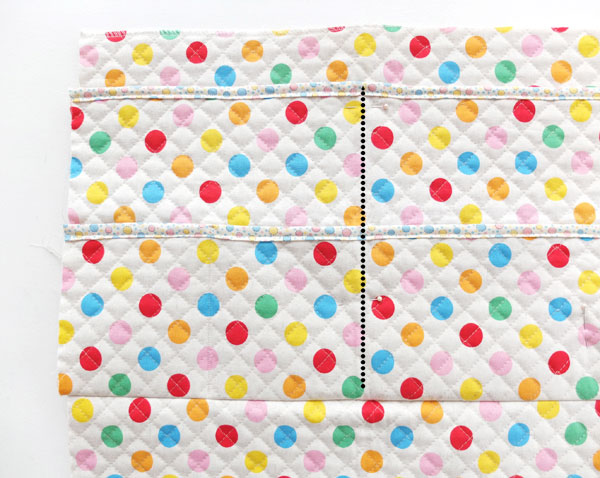
Lay piece C over B and sew a seam 5″ across (one quarter of the distance) to create small pockets on piece C. (see image)
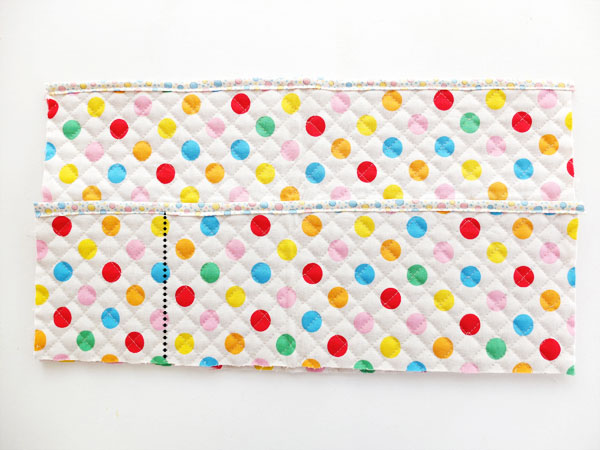
Make sure you reinforce the top end of the seam by going back and forth a few times.

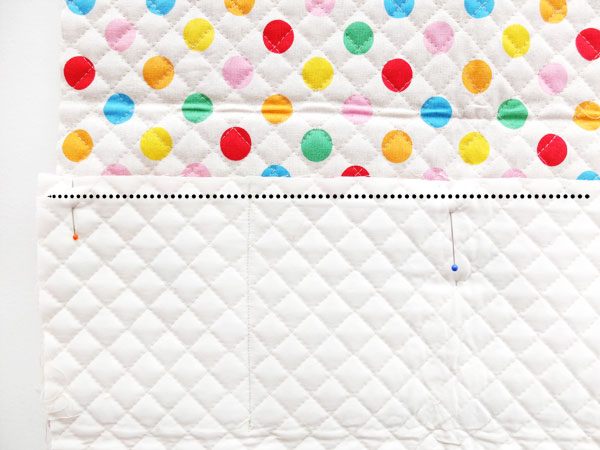
Mark the center of piece A and then lay pocket unit face down with the bottom of the pockets lining up with the center of piece A. Sew a 1/2″ seam as marked.
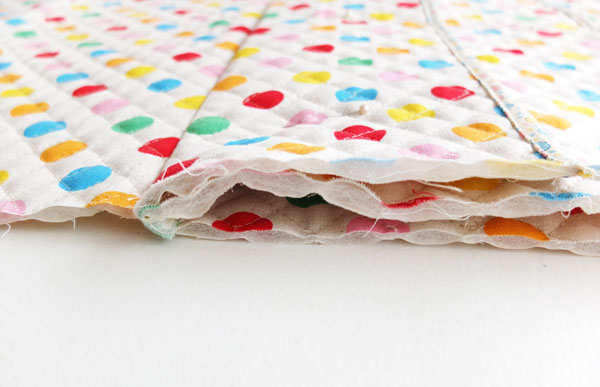
Flip pocket unit over – it should look like this.
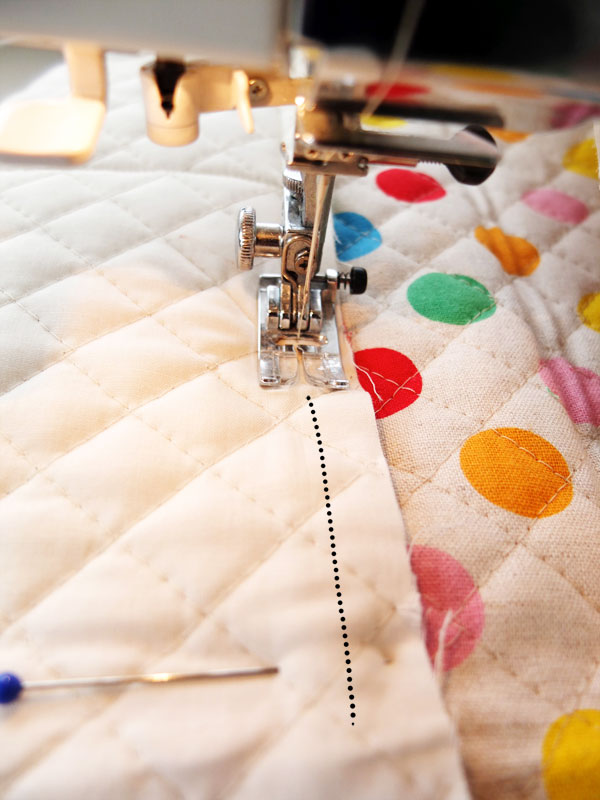
Stitch over piece B and C in the center to create large pockets. (see image)
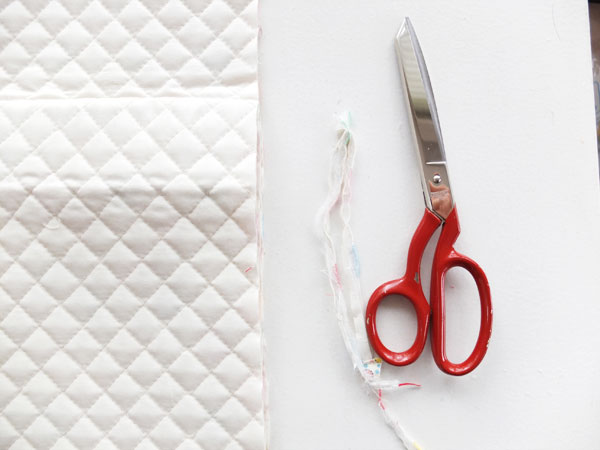
Lay flat and trim any excess from edges
Add binding to both sides of piece A including the pocket panel too.
Attaching Blanket Piece
The diagram below shows how the blanket piece will attach to the pocket section.
With piece A facing down, pin blanket piece to wrong side.
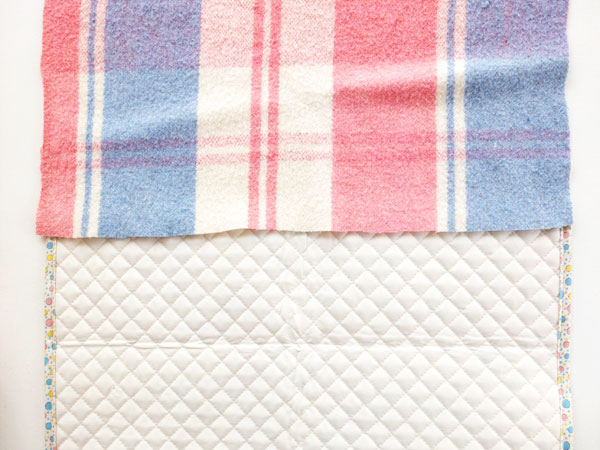
Fold piece A over and sandwich the blanket in between with about 1″ overlap.
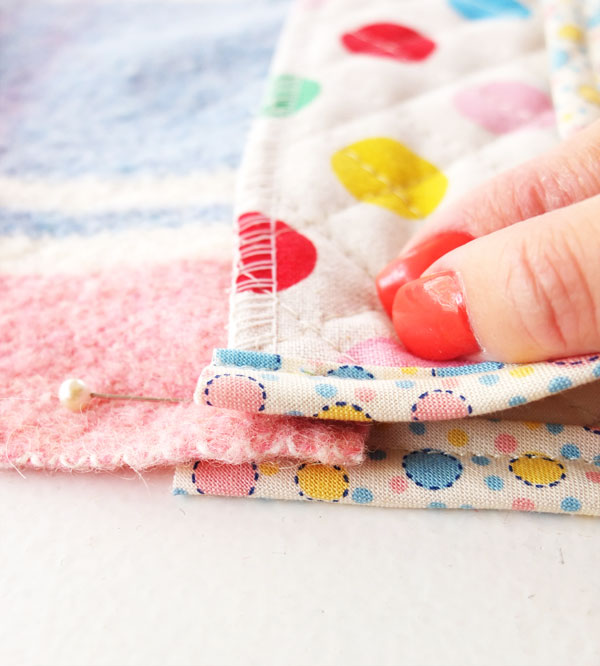
With a wide zig zag stitch, sew over the edge of the quilted fabric catching the front and the back, as well as the blanket piece.
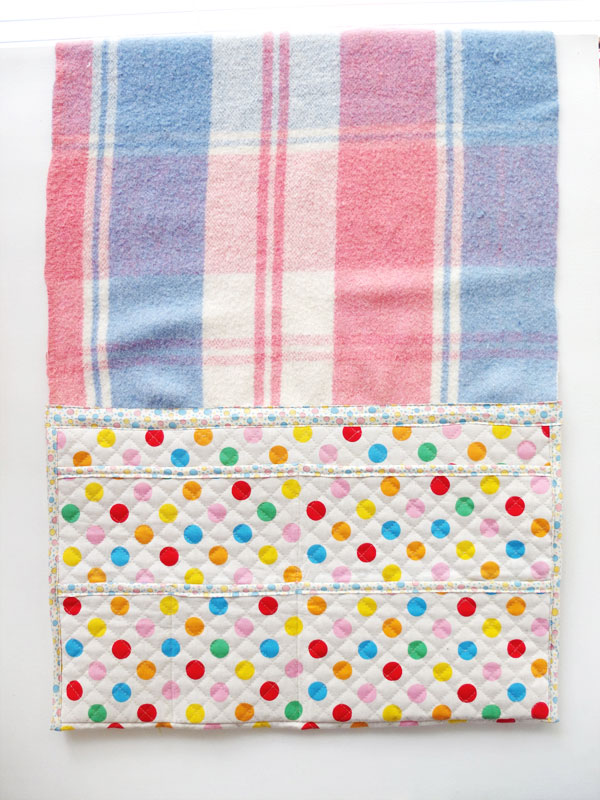
It should look like this
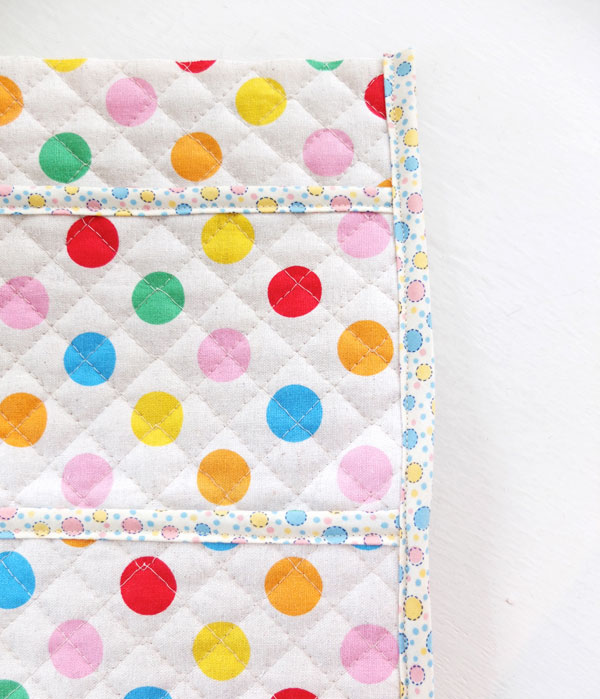
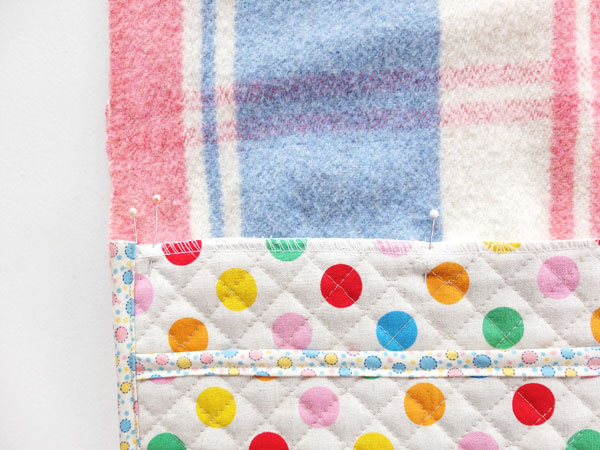
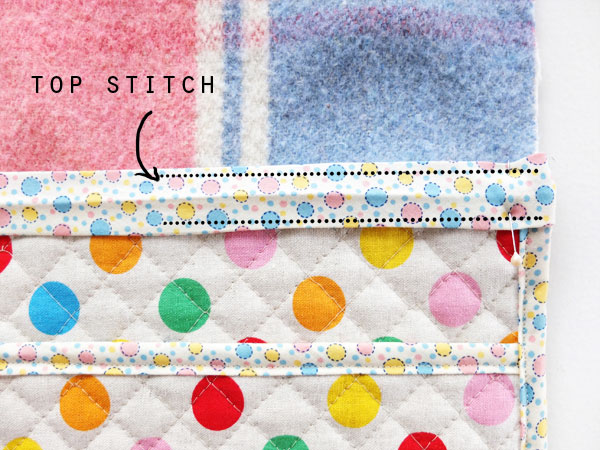
This part is optional:
If you would like to neaten the look of the zig zag seam, you can cover it with some of your binding trim and top stitch in place.
Your bedside caddy is now ready!
How to use
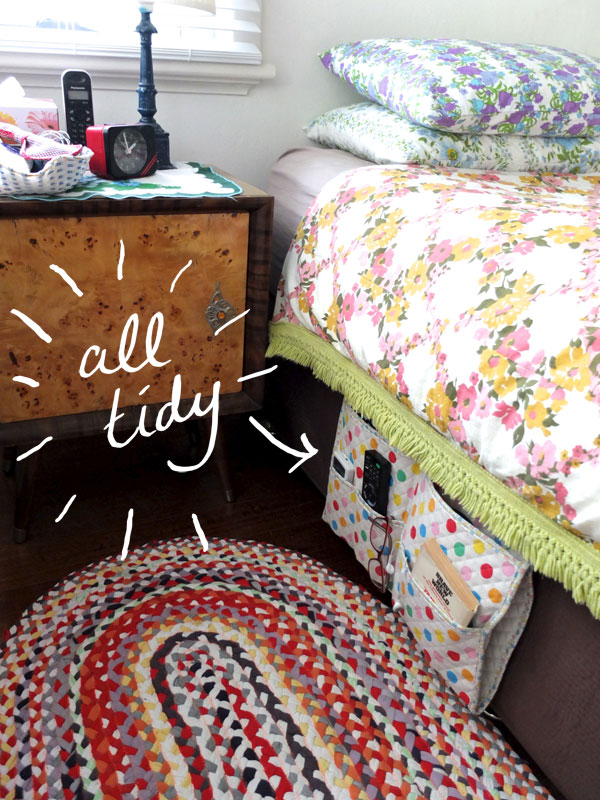
Slip the blanket section between the mattress and base, if you tuck it in properly you shouldn’t see the blanket at all. My mattress is really heavy so it can hold quite a bit of weight in the pockets without slipping.
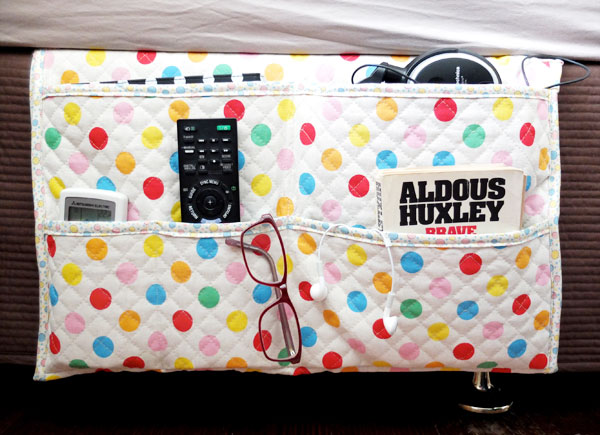
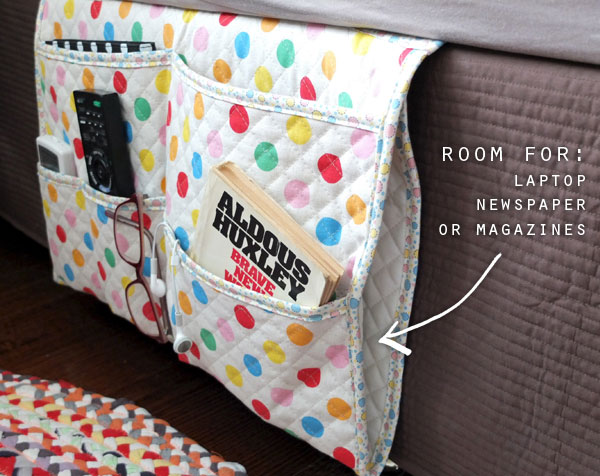
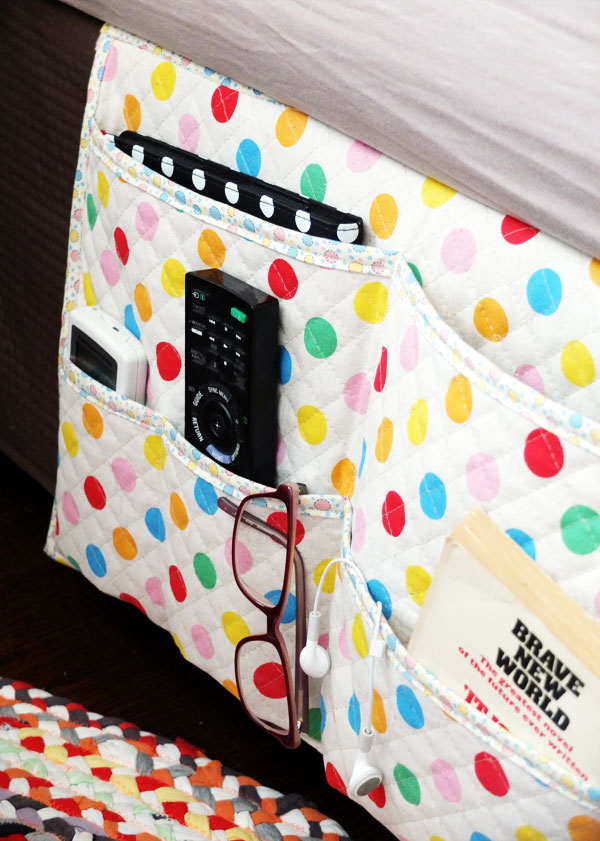
As you can see I have created pockets for all my gadgets and clutter. I have spots for remote controls, my iPad, large headphones and books, as well as all the little bits and pieces like specs and ear buds.
I also have a hidden large pocket that I can use to slide larger items in if required like a laptop, newspaper or magazine.
What a difference it makes! No more tripping over clutter or knocking stuff off my bedside table in the middle of the night.
This bedside caddy would also be great in a kids room to hold books and toys, in a nursery for nappy changing needs or if you like to craft in bed, you can use it to hold projects safely out of the way.
Once you make one you’ll wonder how you ever lived without it!
Like this project? Sign up to the mailing list and get lots of fun stuff delivered to your inbox.


Such an adorable way to organize! 🙂
I love the pulled-back view!
I just made this for my daughter to use in her college dorm room. The instructions were easy to follow and it turned out beautifully! It’s very sturdy and really stays put. I’m sure I’ll be making a few more and will try one with a non-quilted material.
Love it! What a fantastic idea – thanks for sharing! I definitely need to make one.
Great project!! My mother made me a similar bed caddy when I was a kid – though without the laptop sleeve, ha! She used a pair of quilted placemats to make mine. I’ve linked to your tutorial on Craft Gossip
I have 2 placemats and would love if the lady that posted that commented about that would contact me & tell me how to makee it that way. Thannks!
Have you tried clearing your cache? sometimes that helps. Also if you have another browser take a look in there.
This is so cute, I wish I knew how to sew because my daughter could totally use one of these!
I need this in my life. This would be so perfect in my caravan. I’m pinning this with full intention of making it!
How sweet! Great tutorial. Look forward to adding this to my list : )
Thank you……great tutorial…will be making a couple !!!!!
I am going to make this with an organizer for both sides for our air mattress for tent camping. I plan to use a larger piece of blanket to run across the bed. I need a safer place to put our “stuff” each night than the pockets on the tent. They do not allow for any separation of items.
Love that fabric!
Great idea. Nothing worse than digging around for stuff at night while camping.
Just wanted to say thank you for the tutorial. I made one as a gift for my mom. I knew what I wanted,but wasn’t quite sure how to make it look nice. Your tutorial was the first and best one I found. Thanks!
Thanks for the terrific pattern! I hadn’t thought of the sleeve before, what a great idea!
I modified your pattern a bit for my mom to hang it from bed rails, instead of having it sandwiched under a mattress. If I didn’t have the coveralls to use for a hanger, I was going to use grommets and ribbon…
Fantastic, the hanging idea sounds great.
Hi,
If I don’t have any pre-quilted fabric, what you recommend I use? Should I just use cotton and Interfacing?
Thank you
You could quilt your own panel, or use a heavier upholstery fabric.
Thanks for the great tutorial! I am making these as Christmas presents for the teens in my house. Do you recommend pre-washing the prequilted fabric before using?
It should be fine to use without washing. I didn’t wash mine.
Love this pattern! Making one for myself and the kids!
This is a great pattern and idea. I’m making one for each of my sons at Mizzou! Of course my son that will be a senior asked where this has been for the last few years. 🙂 Someone gave me the idea to add grommets or big buttonholes in the back of the pockets for phone and laptop charging cords!
What a great idea!!
Hi! May I ask if ou used a heavy duty needle or thicker needle for this project or do you think it would work with just the normal sewing needle of a sewing machine? I’m planning to use upholstery fabric because we don’t have pre-quilted cotton over here. Thanks a lot in advance and sorry if the answer is obvious, I’m pretty much a beginner 🙂
Happy to answer any questions. A normal needle and machine should be fine for upholstery fabric.
I just found your great tutorial this morning and had all the supplies. I whippped one up for use on our sofa. I had premade bias tape and that made the project much simpler too. Loved everything about it. Thank you thank you. I think Im going to make a mini version for friend gifts just for the tv remote and eyeglasses, etc.
Fantastic idea! I’m sure they’ll love their handy homemade gifts.
Loved your pattern. So easy to understand .
Thank you for sharing.