Brought to you by American Yarns
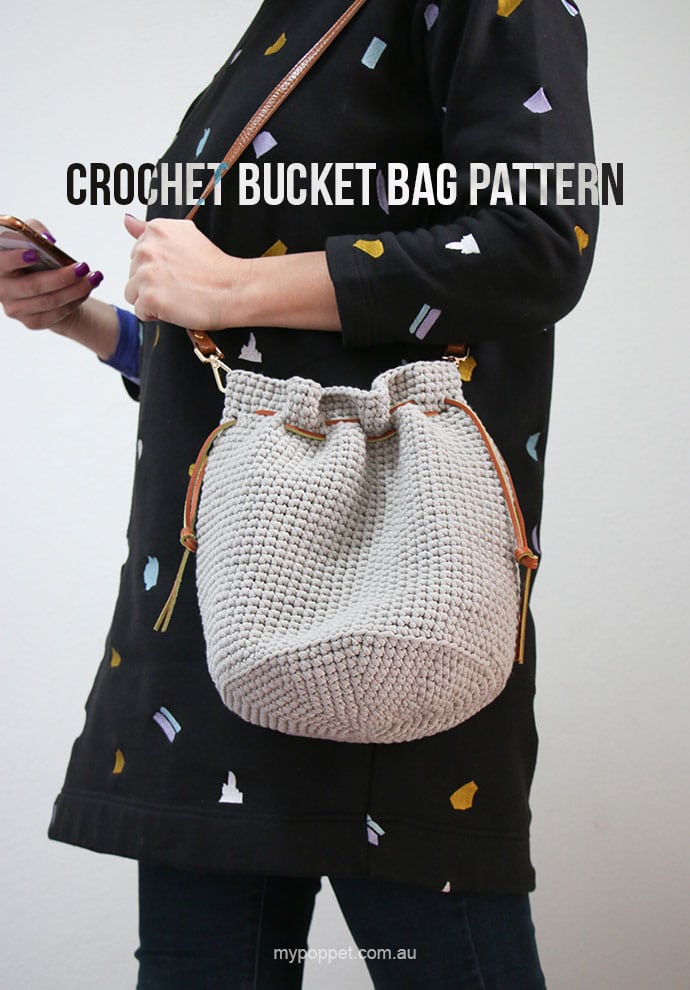
Today I have a super easy crochet bucket bag pattern for you made with a new yarn called Bernat Maker Home Dec. It’s a chunky tubular cotton yarn that has the feel of t-shirt yarn, with the added bonus of being much lighter.
American Yarns gave me a couple of balls to play with, so I had some fun testing it out and creating an exclusive crochet pattern just for you.
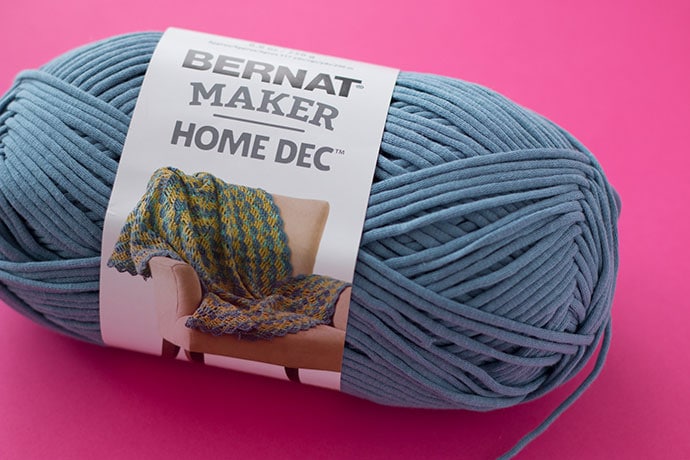
Bernat Maker Home Dec is quite a unique yarn. It’s made of a tubular knit cotton outer which surrounds a nylon core.
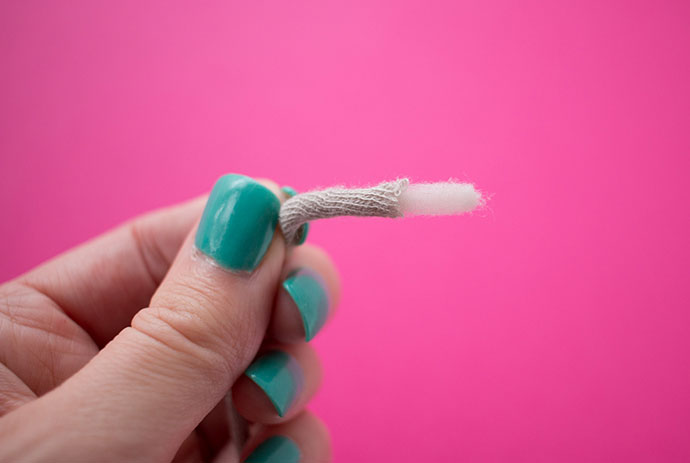
There’s so much to love about this yarn! I really enjoyed working with it.
Because it’s much lighter and thinner than regular t-shirt yarn, it’s more versatile, perfect for lots of home decor and garment applications. I like the chunky look of t-shirt yarn but it’s often too heavy for many projects, so Bernat Maker Home Dec is the perfect alternative.
Bernat Maker Home Dec is soft, but will hold up to wear and tear, and you can throw it in the washing machine and dryer if it gets dirty. Great for throws, cushions or accessories.
Crocheting or knitting with it is a breeze. It slides over your hook/needle really easily and creates very nice stitch definition.
Depending on your hook/needle size, you can create a loose drapey fabric (lovely for garments) or a really firm hard wearing fabric (great for bags and homewares).
The colour range is small but quite nice, (although I’m not really a fan of the variegated shades).
Great for beginners as it works up (and frogs) quickly and doesn’t split.
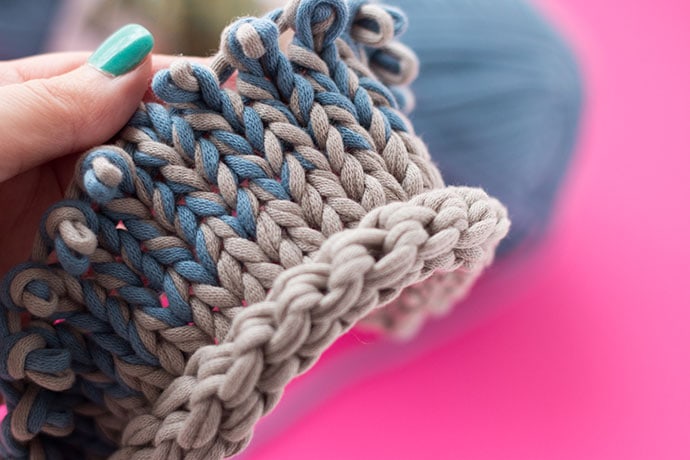
Sample of how Bernat Maker Home Dec looks knitted (held 2 strands together).
When I picked up this yarn I was planning on knitting a chunky cushion cover with it, but after crocheting a swatch, I knew that this yarn and crochet were just meant to be. The cushion cover idea went out the window, I was making a bag.
How to make a Crochet Bucket Bag
A girl can never have too many bags, and bucket bags are a great everyday all rounder.
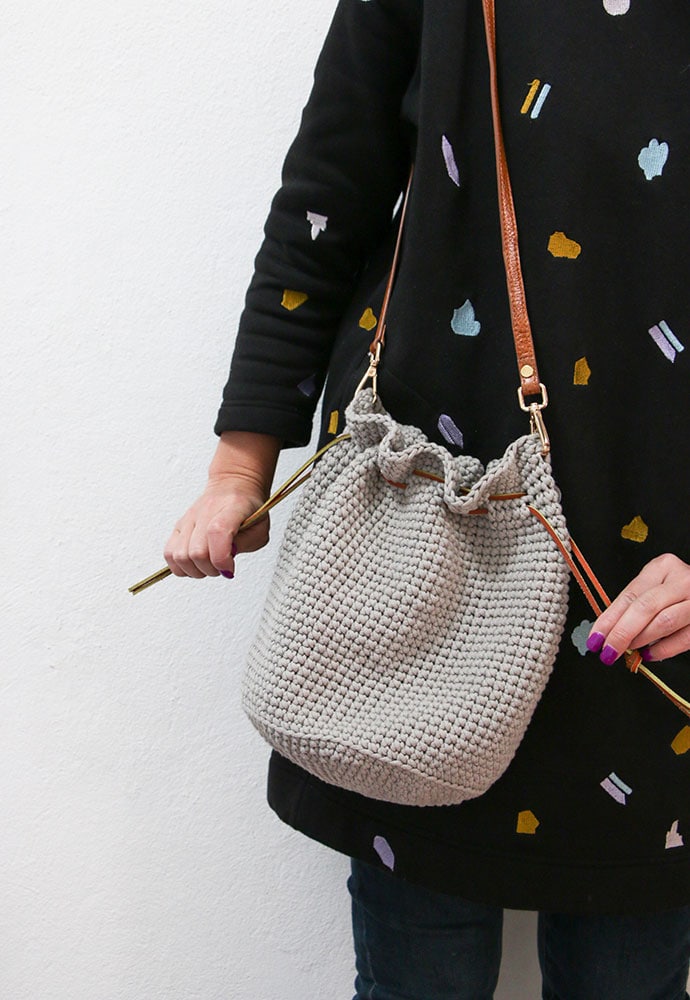
I’m a bit of a lazy crafter so as I was working in the main body of the bag, I realised that I could cheat a little and add a pre-made strap, rather than crochet my own.
I don’t really like crochet straps on bags anyway, they tend to stretch out and look a bit ‘homemade’ ( not in the good way). Adding the leather is a nice contrast to the softness of the yarn and it gives the bag a more boutique look.
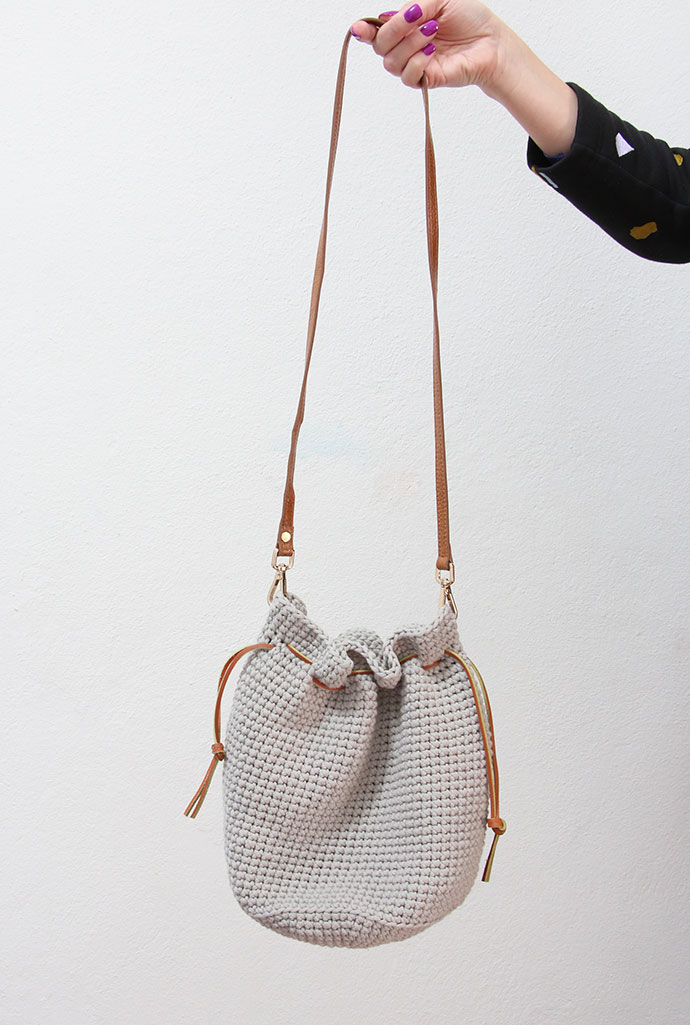
The strap and drawstring is removable, so you can crochet a few bag bodies in assorted colours to match your wardrobe, and just change out the strap when required.
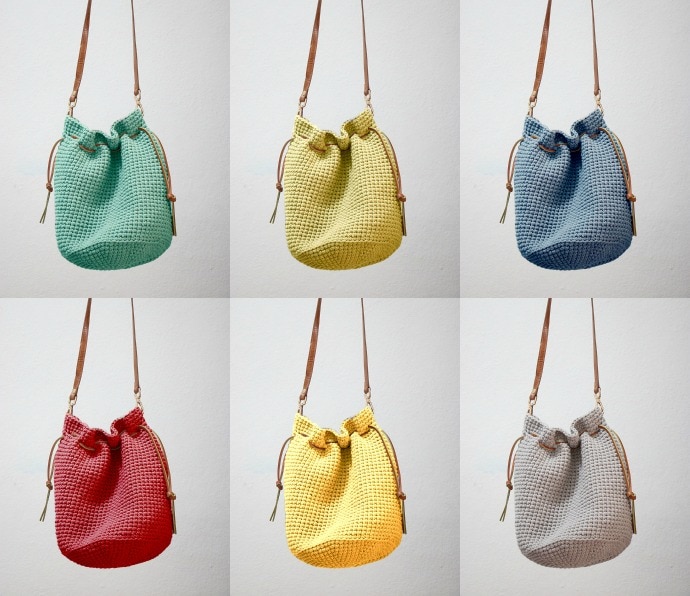
With the magic of photoshop, I’ve mocked up what this bag would look like in alternative Bernat Maker Home Dec colours.
I’ve used leather boot laces for the drawstring ties, but you could also use a waxed leather or cotton cord, thin rope, or even ribbon.
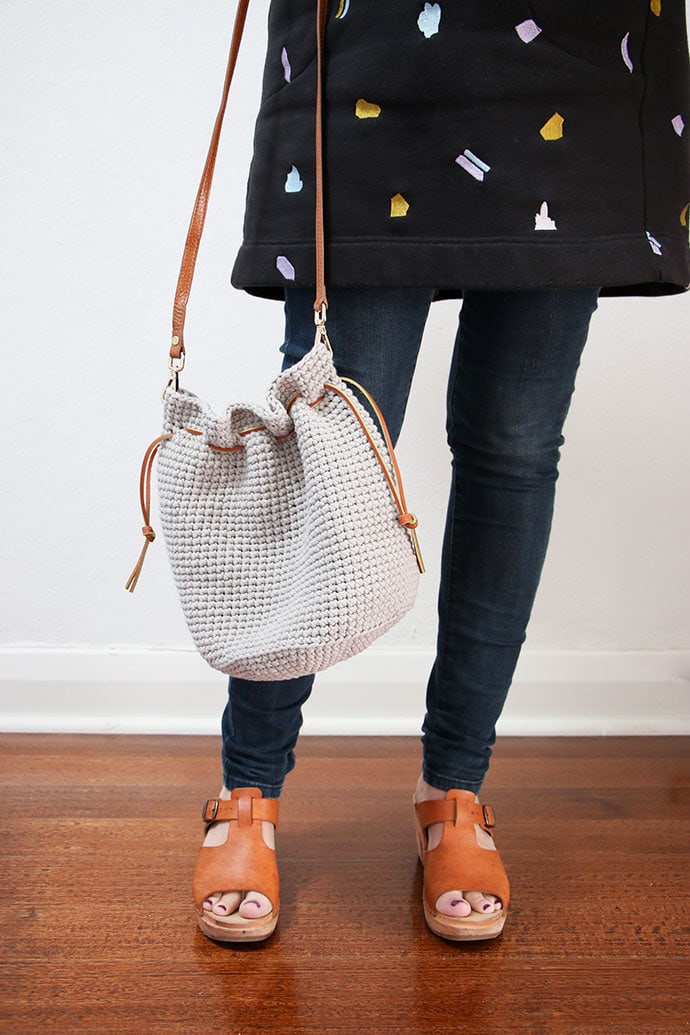
This is really the easiest bag pattern going around, and the best thing is you’ll only need one ball of yarn to make this project. Time to make a Crochet Bucket Bag!
Finished size: Height (no strap) 25cm/10″, Base 20cm/8″ diam.
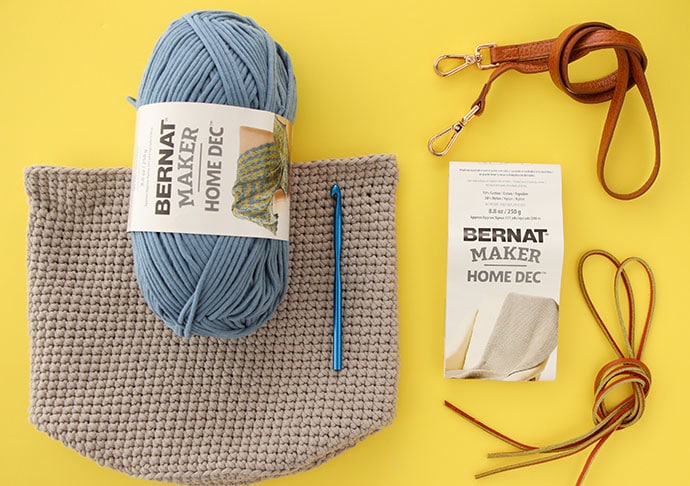
You will need:
- 1 x ball Bernat Maker Home Dec (290 m/317 yds) – colour used CLAY
- 8mm crochet hook
- Stitch marker or Scrap yarn for stitch marker
- 1 x clip on bag strap (about 95cm/37″ long)
- Leather cord 2x 85cm/33″ lengths
- Scissors
- Plastic sheet (optional for base insert)
Where do I find Bag Straps?
Great question, here are a few suggestions.
- The first place you can look is in your own wardrobe, you may already have a handbag with a clip-on strap that you can use. The great thing is you can swap over the strap whenever you want to use your old handbag again.
- I went the the op-shop (thrift store) and found a $5 purse with this attractive strap. It needed a small length adjustment so I took it to my local cobbler to shorten.
- If you are handy with leather work, try making one yourself. The clip fasteners are available at most craft stores.
- Ask your local cobbler (shoe repair store) to make one for you. You may need to supply the clips.
- Etsy, Ebay and Amazon have a huge selection of handbag straps in every colour and design you could possibly imagine.
Stitches used:
- Magic Loop
- sc – Single crochet (US) = dc Double crochet (UK) – instructional video here skip to 1:32
- sl – Slip stitch
How to:
Crochet the Bag Body
Pattern Instructions:
Pattern is worked as one piece in the round so there is no joining or turning. Work in a spiral and use a stitch marker to help keep your place.
Gauge 4″x4″ (10x10cm) = 13 stitches and 14 rows
MAKE THE BASE
Start by making a Magic loop – Magic Loop Crochet instructions here
Round 1: 10 sc into magic loop (10)
Round 2: 2 sc into each stitch (20)
Round 3: *1 sc, 2sc into next stitch*, repeat ** till round complete (30)
Round 4 & 5: sc all stitches (30)
Round 6: *1sc in next 2, 2sc in next stitch*, repeat ** till round complete (40)
Round 7: *1sc in next 3, 2sc in next stitch*, repeat ** till round complete (50)
Round 8: sc all stitches (50)
Round 9: *1sc in next 4, 2sc in next stitch*, repeat ** till round complete (60)
Round 10: sc all stitches (60)
Round 11: *1sc in next 5, 2sc in next stitch*, repeat ** till round complete (70)
Round 12: sc all stitches (70)
Round 13: *1sc in next 6, 2sc in next stitch*, repeat ** till round complete (80)
Round 14: sc all stitches (80)
Round 15: sc all stitches INTO BACK LOOP ONLY (80)
Base is done.
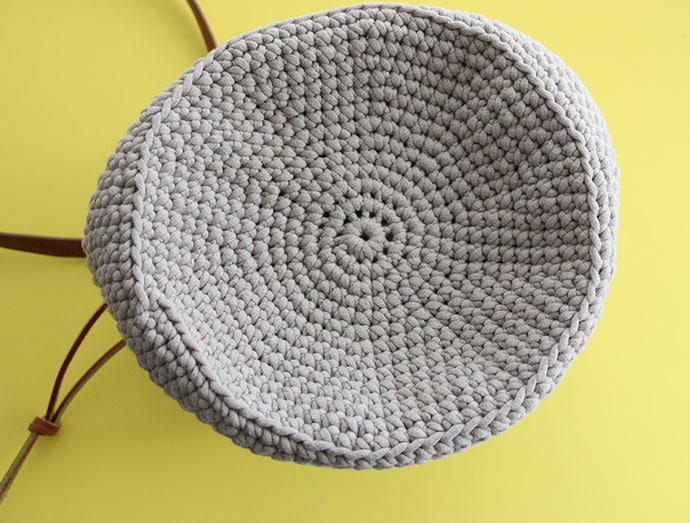
Because you are working in a spiral you will have a small jog (gap) in round 15 where you work into the back stitch. It’s not very noticeable, and doesn’t bother me too much.
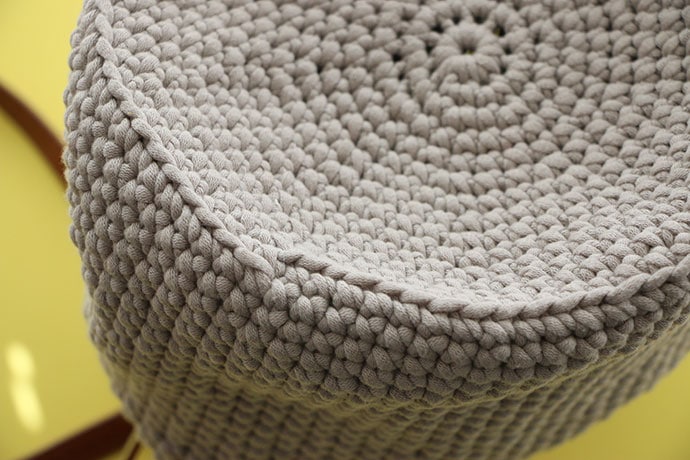
MAKE THE SIDES
The sides are super easy to make, just crochet all the stitches until the bag is as tall as you like.
Round 16-51: sc all stitches for 36 rows (or till side is 25cm/10″ tall).
Slip last stitch and weave in end.
Assembling the Bag
This part is a doddle.
Lay the crochet section flat and clip on the bag straps an equal distance apart about 3 rows down from the top edge.
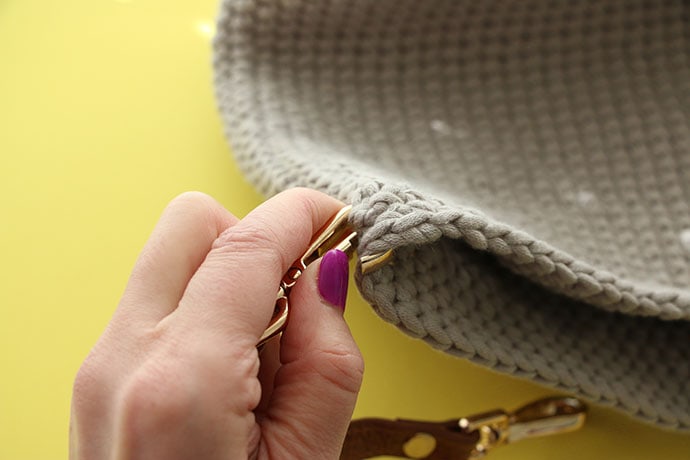
The crochet fabric is very strong so there is no chance the bag will tear away or break. You may get a little stretching in the stitch gap like this. (see below).
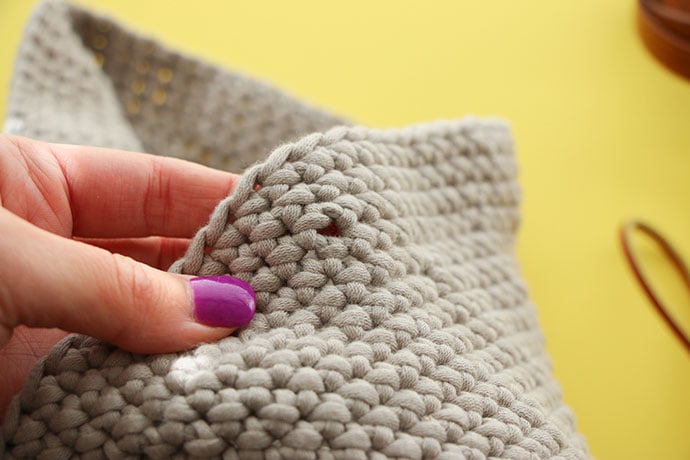
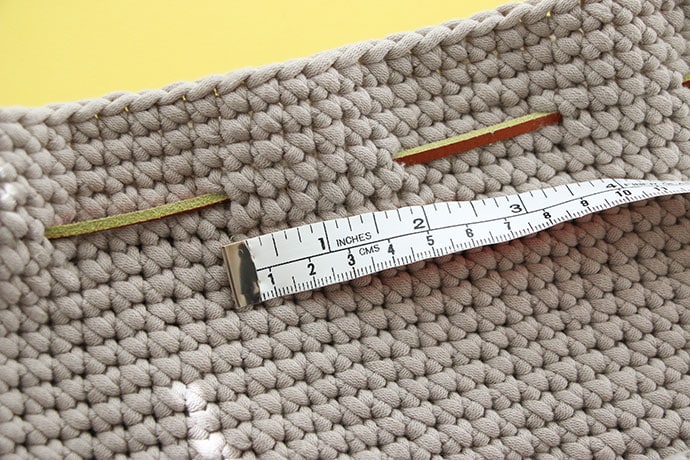
Weave leather cord in and out of stitches, about 4 rows down for 1st cord, and 5 down for second cord with about 2 inch spacing.
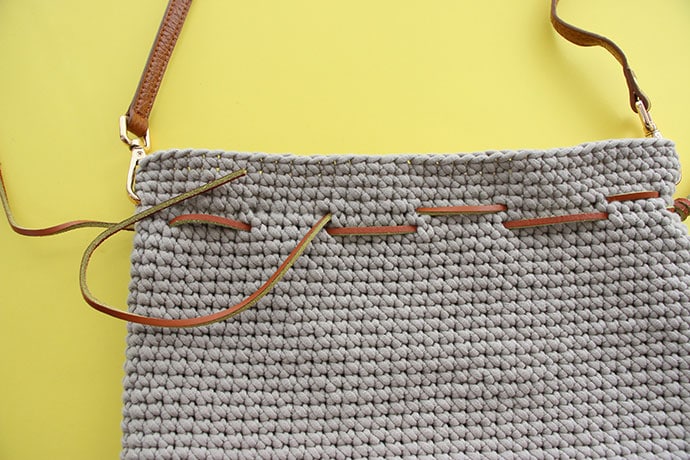
Make sure the ends of each cord finish facing out and on opposite sides.
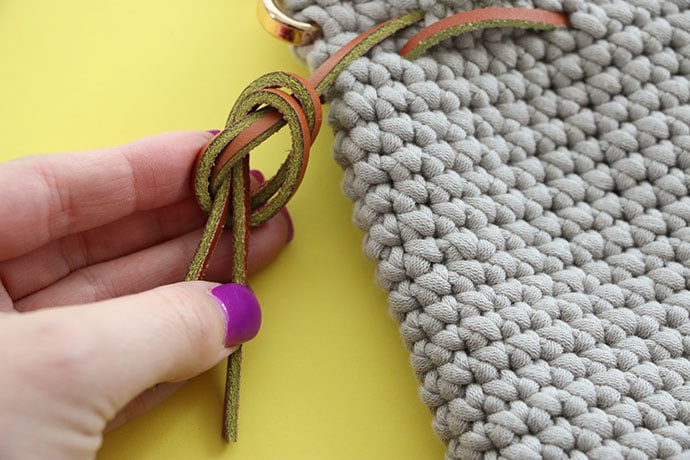
Tie off the leather cord ends.
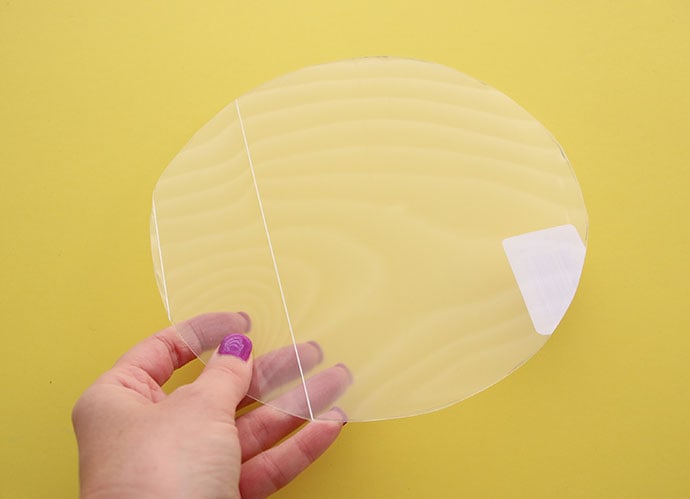
Optional step – If you prefer a firm base on a bag, go ahead and cut out a circle from a plastic sheet to fit the base (plastic packaging is ideal). I quite like a soft, floppy bag, so I left this out.
And you’re done! How easy was that?
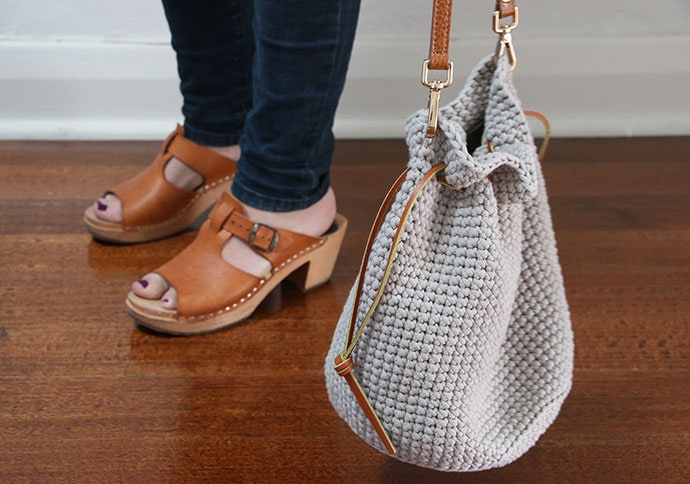
I’m pretty pleased with this project. It turned out much better than I expected, and I love how the leather matches my clogs. Can’t wait till the weather warms up so I can wear my new accessory combo.
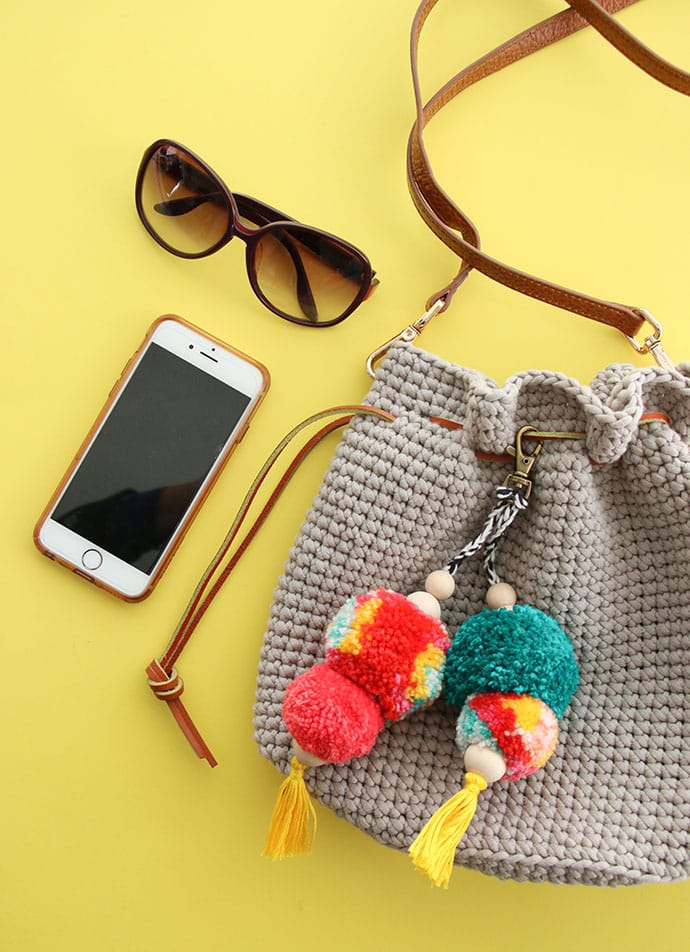
My Pom pom bag charm is an easy way to add a pop of colour and changes up the look of the bucket bag.
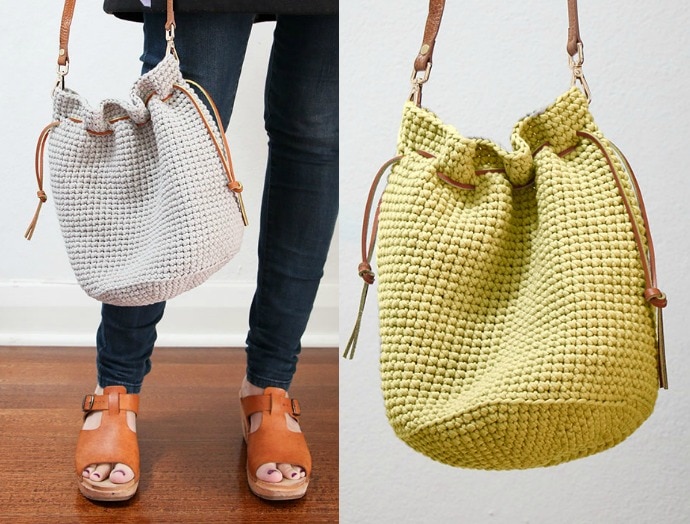
Bucket Bag alternate colour option – Left: Clay, Right: Pea Green.
Loving the classic look of the Clay colour yarn with the tan leather, but I also quite fancy making one in Pea Green.
Which colour will you choose?
You can purchase Bernat Maker Home Dec yarn from www.americanyarns.com.au

What a charming, casual, chic purse. I REALLY like it! Thank you for posting the pattern. I have worked with tee-shirt yarn before and liked it, so it’s good to know there is a more practical yarn available with the same sort of vibe. I just checked, and yes, the Bernat Maker Home Dec is available in the U.S.
Ooh, Cintia, I love this! I’d never heard of this yarn before and it sounds pretty interesting! I like how it looks almost like rope when you crochet it. Just lovely, thanks for the pattern! 🙂 Lisa
Thank you for this great pattern! Do you have any suggestions on how to create this with a leather bottom? I’m scouring the internet for tips on how to crochet onto leather. Thanks!
Absolutely. Here’s what you need to do. Cut a circle of your desired size from fairly robust leather. You’ll need to punch holes about 1/2″ from edge all around (about 1/2″apart, but may vary due to width of stitches) then blanket stitch into the holes. After that you can crochet into each stitch as usual as per section for sides.
Like this from step 7 https://mypoppet.com.au/makes/2016/02/rainbow-herb-scented-drawer-sachets.html
This post also has some information about making holes but the hook for the chunky yarn wont fit in holes so you’ll have to stitch with a needle and the crochet onto the stitches https://www.deliacreates.com/crocheted-leather-flap-clutch-tutorial/
Hope that helps.
Thank you so much!
I am making this bag but have found that following the directions precisely with a 8mm crochet hook I am going to need about 2 1/2 balls of this yarn not 1! I’ve measured everything and my base is a tad bigger.. just 8 1/4” instead of 8” but that’s still a lot of difference! Did I do something wrong!
Hi Katherine, are you using the Bernat Maker Home Dec which has 317 yards per ball or the Bernat Maker fashion which has only 126 yards per ball?
Also you may crochet with a slightly looser tension than I do which could explain why your base measurement is slightly bigger. You can always go down a hook size to tighten this up. It shouldn’t explain needing over 2 balls though. Just double check the label to see the yardage length of the ball.
What size is an 8mm crochet hook in the u.s.?
equivalent to L-11 I’ve referred to this chart
https://en.wikipedia.org/wiki/List_of_United_States_standard_crochet_hook_and_knitting_needle_sizes
Hello, i fell in love with this bag the moment i came across it! I ordered the exact same yarn in baby yellow and i am making it. My concerns is that your base stitches seem so tight together..like weaving. Mine has distinctly visible holes. I am only in round 4 but i can see the difference. I am holding the yarn as tight as i can but enough to allow for use of the 8 mm hook. I am doing the single crochet stitch (US). Can you explain to what i may be doing wrong? Thank you
I don’t think you are doing anything wrong, it’s just that you may crochet with a looser tension.
I would suggest using a smaller hook size – Go down one or even two sizes to achieve a tight crocheted fabric.
My tension is quite tight generally.
I too generally crochet too tight..i thought maybe i am holding it too tight?
should i hold it more loosely? And what hook size do you suggest i go down to? I am still a novice! If i go down a hook size, will the bag dimensions be smaller?
Thank you for your guidance..
It might be a good idea to make a swatch to check your tension. Because this is knit in the round the best way would be to make a chain of about 30 stitches then join the ends. Start sc all the way around to make a cylinder. Flatten it out and measure how many stitches and rows are in a 4×4″ square.
As a guide I have 13 stitches and 14 rows in 4×4″
if you have less stitches your tension is too loose and choose a smaller hook. if you have more stitches you may need a larger hook.
I know it’s a pain sometimes to make a gauge swatch (I usually skip this step depending on the project) but it can be really valuable to help you learn about and adjust stitch tension.
In the end it doesn’t matter what hook size you use (or your tension) if you achieve a gauge of 13 stitches and 14 rows in 4×4″ – You’ll end up with the same bag size as mine.
I hope that makes sense.
I think i understand. I will undo my work and try a swatch first!
I want to get it right 🙂
Just made this bag and it turned out fabulous!!! Your pattern was so easy to follow. Well done!! I was wondering if have a crochet pattern using home decor for a large tote bag or beach bag.
I just finished my bag and it turned out fantastic!! I used a 6.5 mm crochet needle and following the instructions, my base was 8″ as described, but i reached a 10″ height by row 30, so i finished the bag at row 31 with a row of slip stitches 🙂 Thank you for the fun project.
So great to hear. I’m glad your persistence paid off. Feel free to send me a photos if you’d like me to share it with other readers. You should be proud of your handiwork.
Thank you! I would be happy to share a picture of the finished piece, but I am not sure how to send you a picture of my work. There does not seem to be a way to attach the picture or send you an email.
You can send me an email at [email protected]
Sent it just now!
Hi. Is there a front and back, or am inside and outside to the work?
I am looking at the pics, but I can’t tell. My stitches are looser than yours, so they don’t look the same.
Thanks
Mary A
There is a front and back to crochet stitches, but you can present whichever side you like the look of most.
My stitches are very tight and I also use a yarn under technique which makes the stitches even closer together. read about it here https://mypoppet.com.au/makes/crochet-rainbow-cushion-pattern/
Hi, Can I please purchase pdf. Cheers, Robyn
It’s not yet available as a PDF but will put it on my ‘to do’ list as there is interest.
Hi! I’m currently trying this. I think it’s so cute!! I’m noticing my 8mm hook is like creating weird spaces in each of the stitches. Will it bounce back? Or do you have a tip to make it look not stretched out/holey? Thank you!
Maybe try a smaller hook.
Nice bag. It’s a very creative bag. I like it.
Is there a way to download this pattern?
I’m happy to create an ad-free printable version that can be downloaded for a small fee, otherwise you can copy and paste the instructions into a word document for your own personal use.
Hi there! Awesome pattern but using the 8mm/L11 hook makes the bag too big. I have tight tension. Did you mean an H8/5mm in US? I did go down a hook size to a K101/2-6.50mm and the base is measuring about 9.50. Going to keep going I was just wondering if the hook size should be different:
Hi Lorena. Yes I did use an 8mm crochet hook. My tension is quite tight also. I suggest you reduce the hook size until you achieve the required gauge.
I’ve just become aware that I use a ‘yarn under’ technique in my single crochet which results in a tighter stitch, maybe try that and see how it goes https://youtu.be/I086NC1YlmI
Hi is there a PDF version that I can download as I cannot find the pattern. I have to screen shot all the pages with lots of advertisements in the pattern.
Please let me many thanks.
It’s your drawstring bag. Cristol
I am working on adding a print button to all my crochet patterns but am having some technical problems with the plug-in at the moment. The feature is on its way.
I am a novice and trying to make this cute bag. Did you double up the yarn and use two stands? My sides do not seem to be growing straight. I am getting more of a round bowl affect. Do I just need to keep going and once it is taller it will be straight across the top? Thank you!
I just used one strand of this yarn. You will find that the sides will stay straight as the sides get taller.
Hi, Cintia, may I ask if you use the full ball of yarn (290m) to make the bucket bag? Or was there excess yarn left? Thank you.
Hi, the bag almost used a whole ball. I just weighed it an it’s around 240g – so there was around 10g of yarn left (just over 10m).
Hi Cintia …. I am Arpita from India. Can I use the t shirt yarn which is available easily here, I am asking this because I have never used a T-shirt yarn.
Hi, yes thin t-shirt yarn would work but you may find it heavier.
Fell in love with the look so I made the clay color and just started the pea green. I am also using an 8mm and it’s coming out perfectly! I couldn’t find anything sturdy for the bottom so I bought a styrofoam circle and it’s perfect! Thanks so much for making this pattern available.
Hi, I just finished the bag and I love it! I followed your pattern and the bag is just perfect. I’m going to add some decorative items too.❤️
Those that used the 8mm hook and the base came out larger did you keep going and Have enough yarn to finish? My base is coming out to 10” I’ll try a smaller needle if I’m not going to have enough yarn. Txs
You have 2 options. Try a smaller hook to get a tighter gauge OR use the 8mm hook but stop when the base is the desired size (which may be a few rounds less than my pattern).
Thanks so much
Hi again. I love this pattern and I cut a heavy plastic sheet for the bottom, how did you attach it so nothing ended up underneath it? Thanks!
How did you put the plastic in the bottom without it moving around
I’ve just left mine loose, and it does move around depending on what’s in the bag. If you want to secure it firmly you can either punch some holes around the edge of the plastic circle and stitch it in with a few tacking stitches, or make a fabric circle a bit larger and sew it over the inside base sandwiching the plastic in between the crochet base and the fabric.
It’s a beauty. Great job
It’s such a beautiful bag! Thanks for sharing 🥹👏🏻bucket bags are ALL THE RAGE!