
This post contains affiliate links
Have you noticed that shaggy cushions, pillow covers and rugs are really trendy right now? Interior stylists call it ‘texture’, I call it fun! It’s a throwback to the 70’s where shag was all the rage. The era of Flokati rugs and ankle deep wall to wall carpeting. What a nightmare to clean!
You know what else was big in the 70’s? Latch hooking!
Put your hand up if you ever made one of those latch hook kits as a kid. They always had the weirdest designs like sad clowns holding a bunch of balloons or a horse head.
I picked up a piece of latch hook canvas about 2 years ago while thrift shopping but had no real project in mind for it. After seeing lots of shaggy 70’s style cushions in stores and magazines, an idea finally clicked – a Shaggy Latch Hook Pillow.
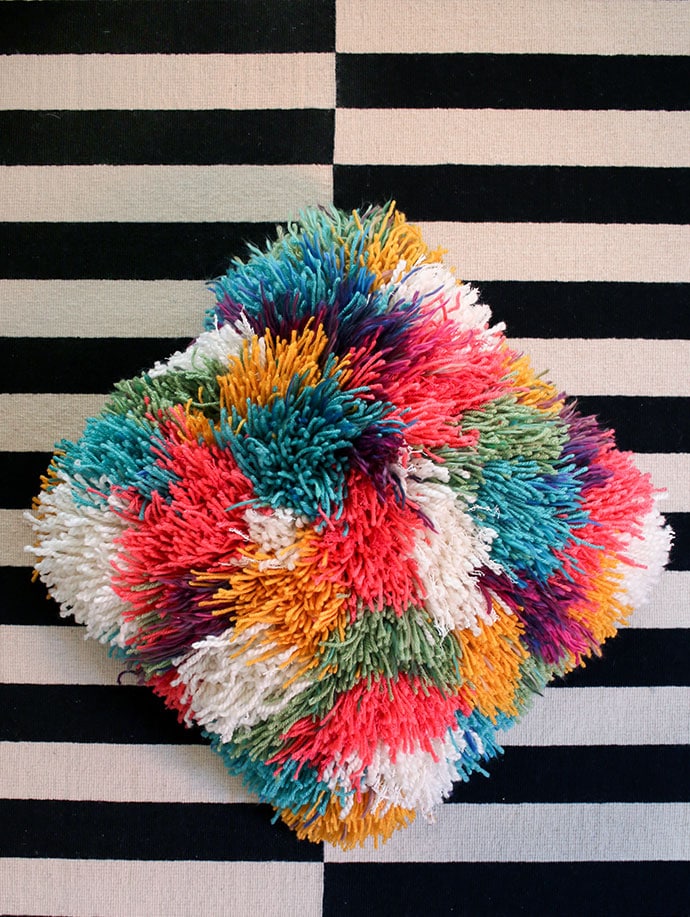
Because I love colour, this pillow is super bright. But if you prefer more neutral decor in your home, choose softer colours, greys or creams. The key is mixing up the yarn textures for an interesting finished result.
It’s not difficult, but it does take quite a time commitment. I worked on this project on and off for 5 months. It’s easy to pick up and put down, so it’s a perfect craft project to have at hand when you need something to do while you watch TV or a movie.
Are you inspired to dust off your old latch hook? Then it’s time to get started!
Let’s make a Shaggy Latch Hook Cushion
Finished size: 50x50cm (20″x20″)
You will need:
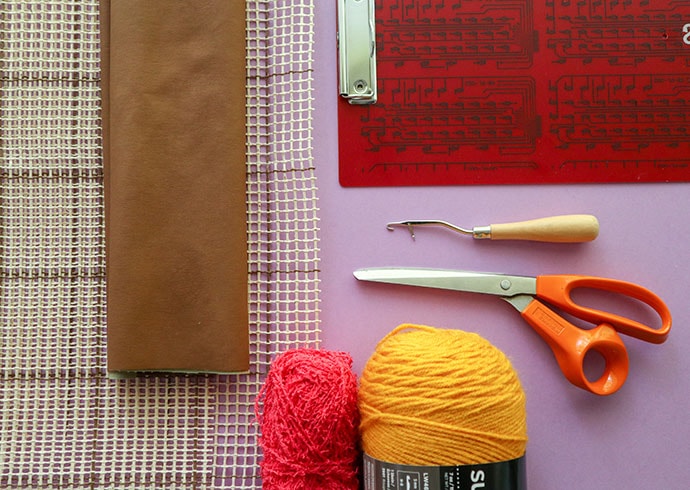
- Latch hook tool
- Latch hook canvas piece about 50x50cm (20″x20″)
- Backing fabric – cotton canvas or thin faux leather 50cm x 65cm (20″x25.5″)
- Assorted Yarn – lots of it
- Scissors
- Clipboard
- Cushion insert 40x40cm (16″x16″)
- Sewing machine
- General sewing supplies
How to:
This project is comprised of 2 main parts: making the latch hook canvas cushion cover and hooking the cover design.
Part 1 – How to make a blank Latch Hook Canvas cushion cover
Every tutorial for latch hook pillows I’ve ever seen works on the hooked canvas design first and then sews up the cushion cover at the end. But that seems and awfully complicated way to do things, I mean trying to wrangle all that bulky yarn and several layers of fabric under a sewing machine foot seems like a big pain in the butt.
In my opinion, working on the canvas first is a big mistake.
Here’s my solution to the problem, make the pillow cover first!
It’s logical when you think about it, and I’m actually surprised you can’t buy pre-made blank latch hook canvas covers already. Someone get onto that!
These instructions will show you how to make an Envelope Back Pillow Cover, which is the easiest style of cover to make and is manageable for all sewing levels. If you are an experienced sewist, feel free to make a zippered version if desired.
I’ve made mine to fit a 40x40cm (16″x16″) cushion insert and have included those measurements, but you can adjust the sizing to suit whatever size cushion you are making.
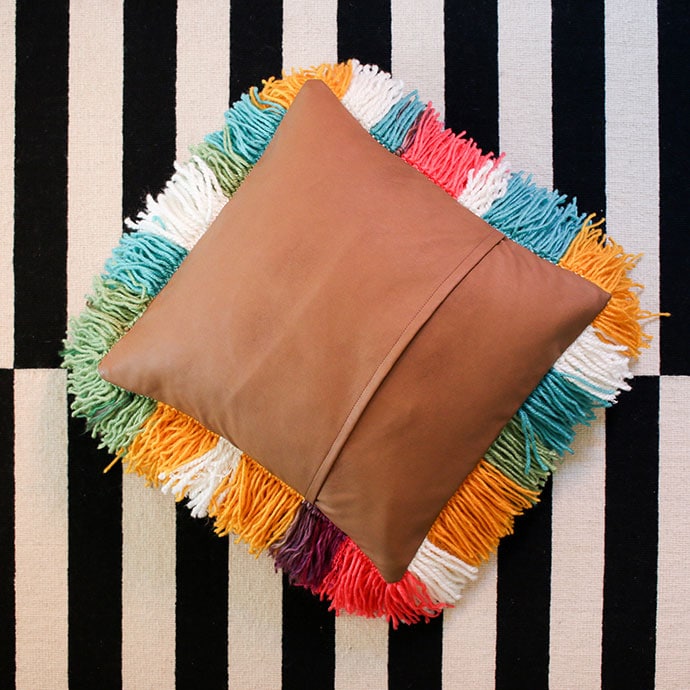
For the backing fabric I chose to use some thin faux leather that was left over from another project. It was an ideal choice as it didn’t fray, was a little bit stretchy and quite robust. If you don’t have access to something similar, upholstery weight cotton would be a suitable choice.
I’ve just freestyled my design and didn’t really follow any pattern. If you have a pre planned design in mind, you can mark it onto your canvas with a permanent marker at this stage before you do any sewing.
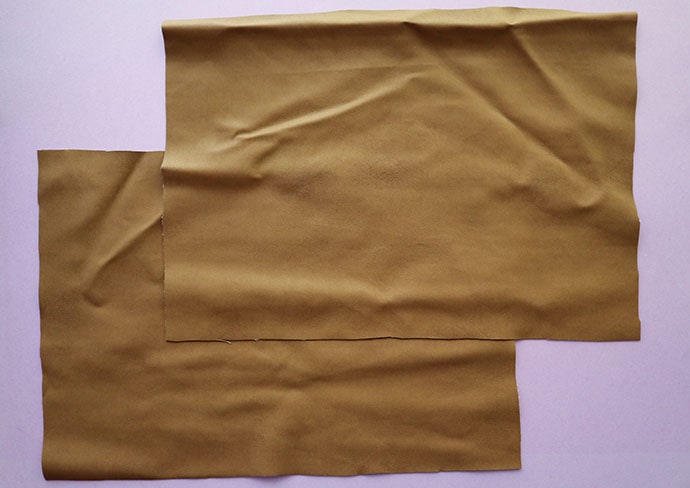
1. Cut 2 back pieces from your desired fabric – measuring 44cm x 34cm (17.5″x13.5″). I’ve allowed about a 1.5-2cm seam allowance. (¾”)
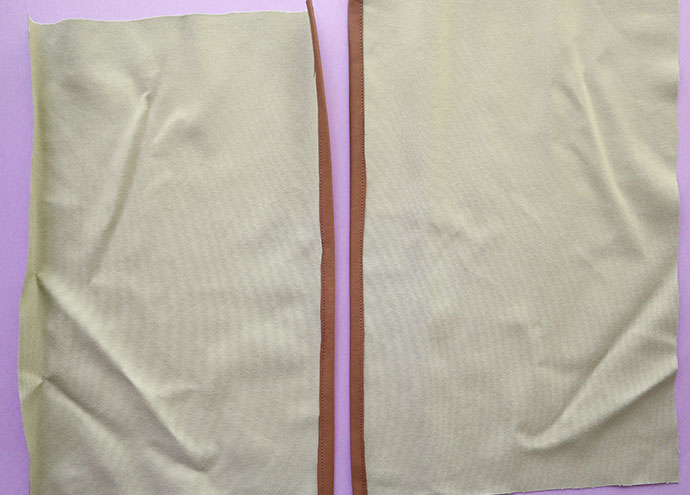
2. Fold over and sew a hem on one long edge of each backing piece.
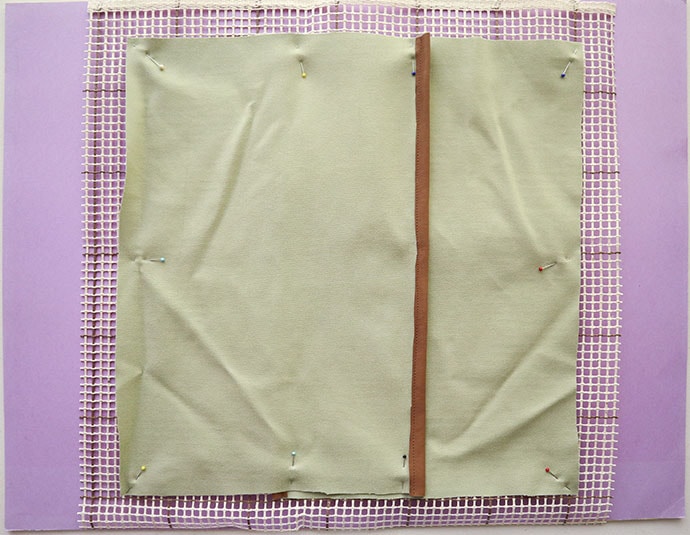
3. Overlap the back pieces by about 10cm (4″) to make a square, and with right side facing down, pin onto your piece of latch hook canvas. Try and align the edges to the squares of the canvas.
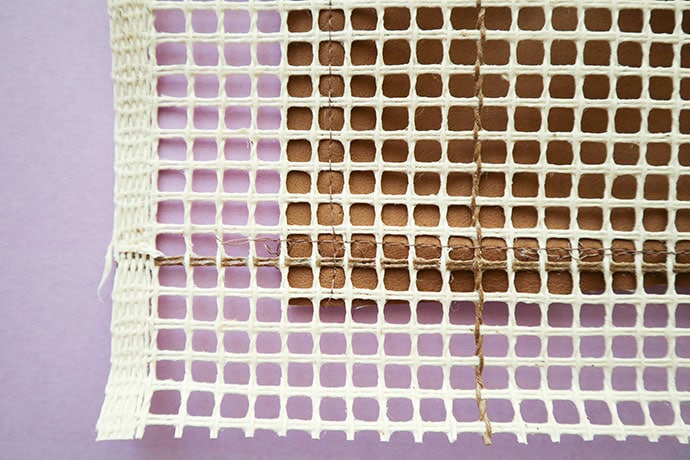
4. Sew the canvas and back together right around all the sides with a 2cm seam allowance. Aim to sew in the middle of the canvas spaces if possible.
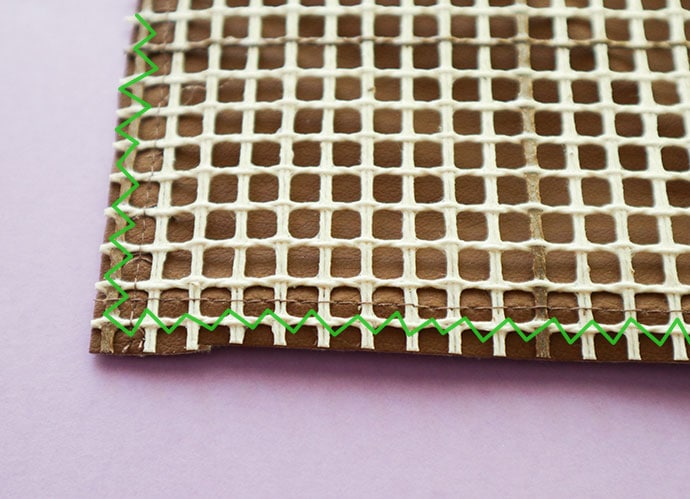
5. Trim the excess canvas and using a zig zag stitch, sew around the edge of the seam again to reinforce the canvas edges.
I made the mistake of not doing this initially and the canvas started to unravel with the pulling of the stitches. I promptly added an extra row of zig zag stitch and it made every thing super secure.
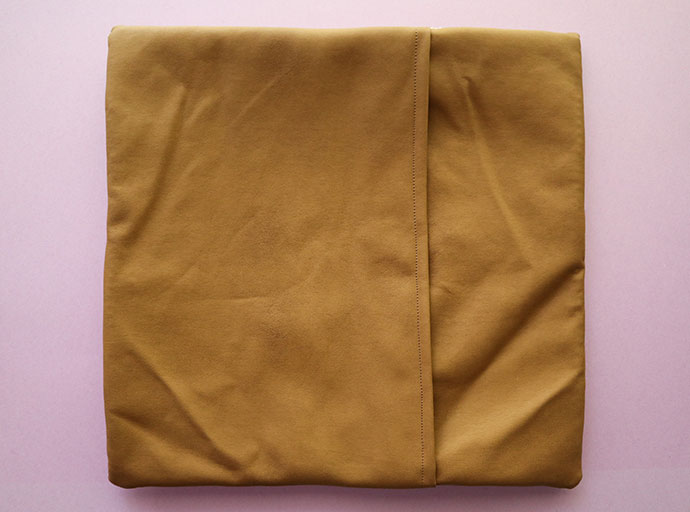
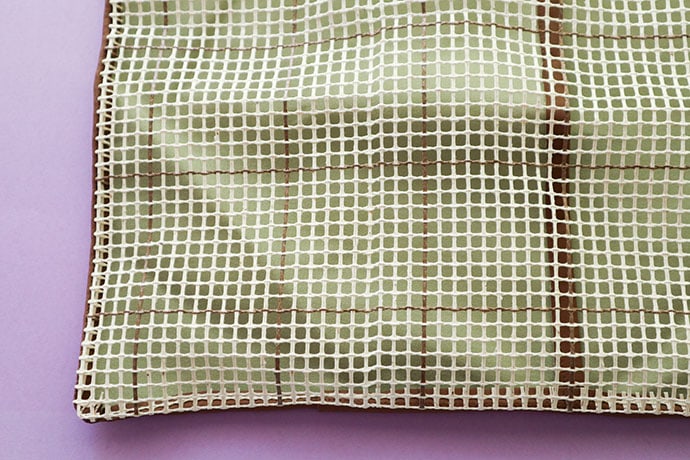
6. Turn the cover inside out and you are ready to get started. Because you’ll be working from the front of the canvas, which is the top of the pillow, there are no accessibility issues. You won’t need to do anything to the back side of the canvas.
Part 2 – How to Latch Hook a design with Regular Yarn
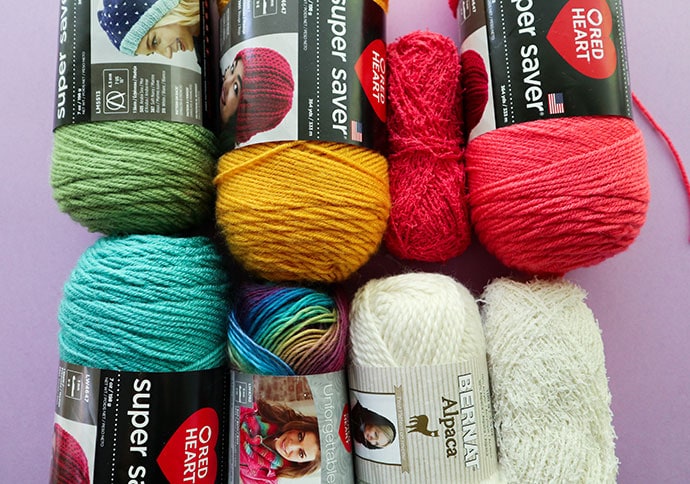
This latch hook cushion project is a real yarn eater! I went though a ton of yarn making this shaggy cushion so I was glad I opted for some ‘budget’ options.
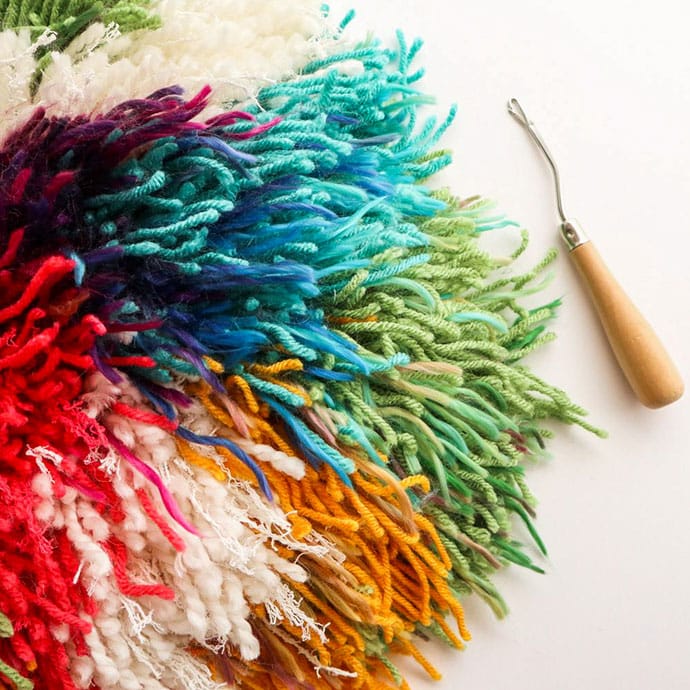
When choosing your yarn, go for a variety of textures as well as colours. I found that adding some fluffy, silky and bouclé yarn, really added to the visual interest and made the cushion much more tactile.
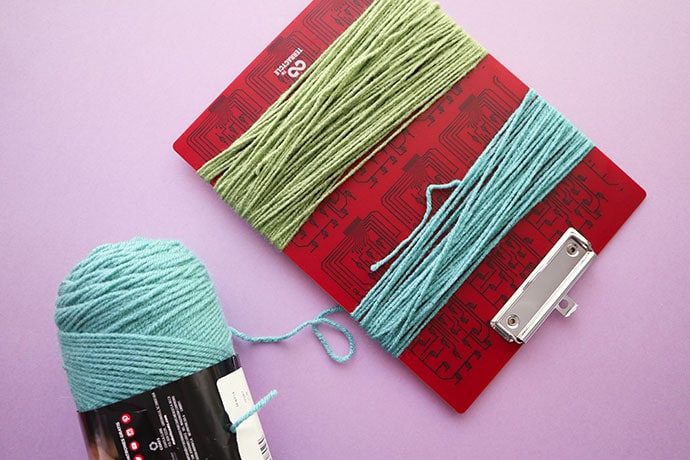
I used a regular A4 sized clip board as my cutting guide which gave me fairly long yarn pieces to work with, perfect for a very shaggy effect. You can also use a smaller piece of cardboard if you’d like a shorter pile on your cushion.
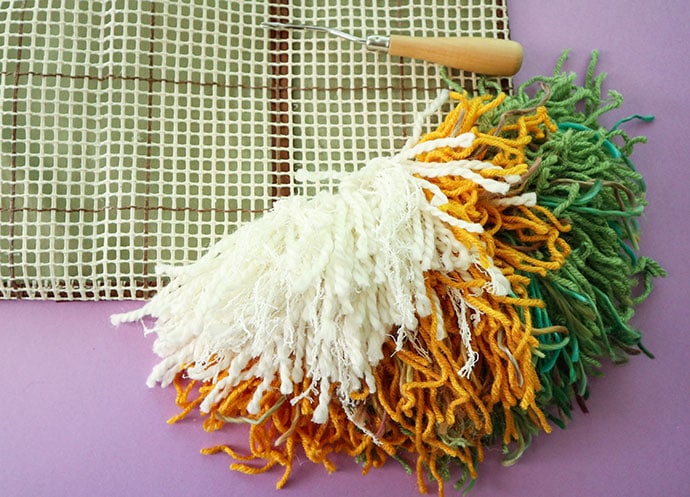
7. Prepare your yarn by wrapping it around your chosen cutting guide. Cut at the top and bottom of each wrap. Each strand will be about 23cm (9″) long.

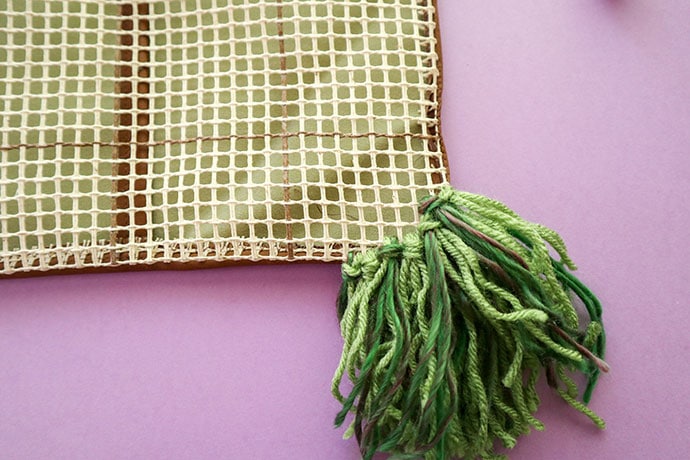
8. Cut more than you think you’ll need and then separate out your colours. You can always cut more later if you run out. I found that keeping each colour separate in zip lock bags was very helpful and makes this latch hook cushion project quite portable.

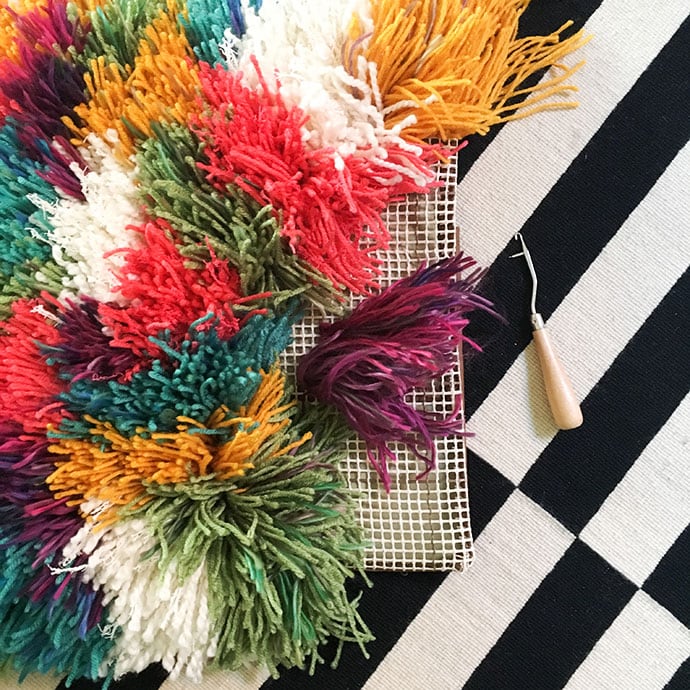
9. Time to latch hook! Start knotting wherever you like. I found that working diagonally from the bottom corner to the top was the easiest way to work. I’ve used 2-3 strands for each hooked loop.
Don’t know how to use a latch hook, take a look at my instructions below.
HOW TO LATCH HOOK
I’ve got a few extra steps in my instructions which may be a little different to how other people latch hook. Even though there are extra steps, I find my way a little less fiddly than the regular method, and faster over all. If you don’t have a latch hook, this method works great with a regular crochet hook too.
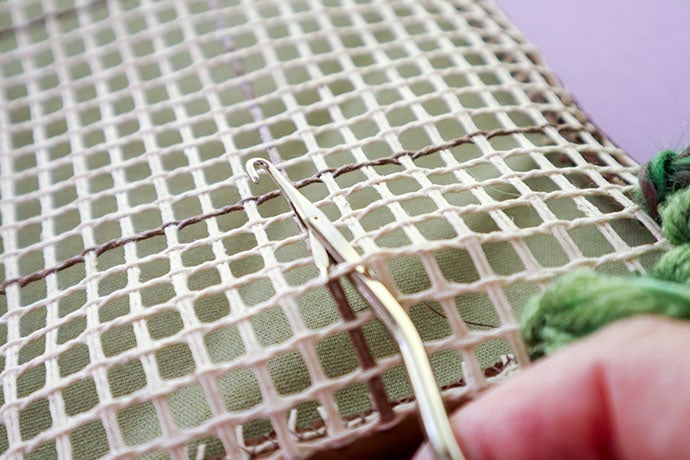
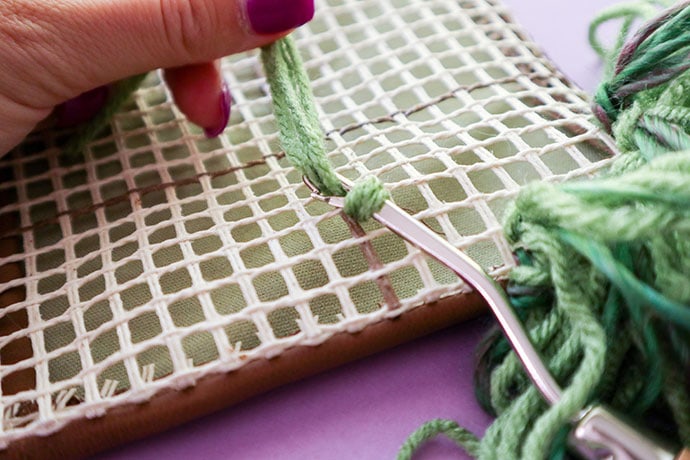
1. Insert the hook under the section of the canvas you are going to hook over. The little latch will open.
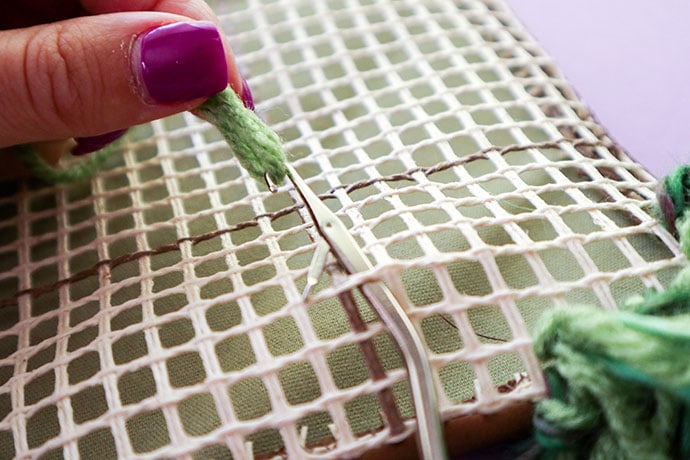
2. Hook the yarn and pull the yarn loop back though the hole. The little latch will close.
3. Slide the hook up the loop until the yarn is past the latch hinge. The latch will open again.
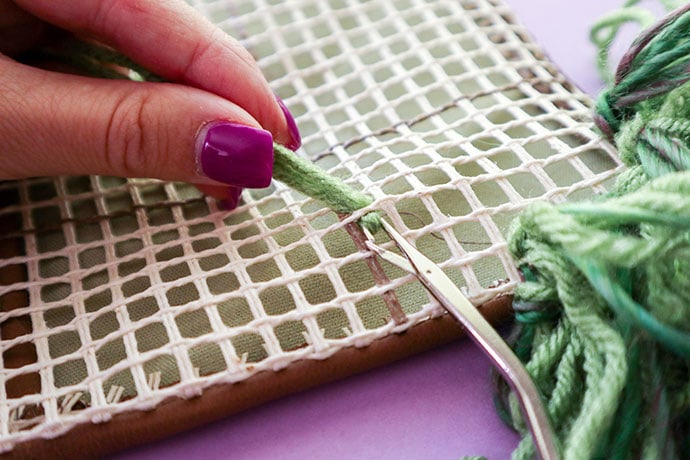
4. Catch the tail of the yarn with the hook section. Pull down through the loop – the latch will close.
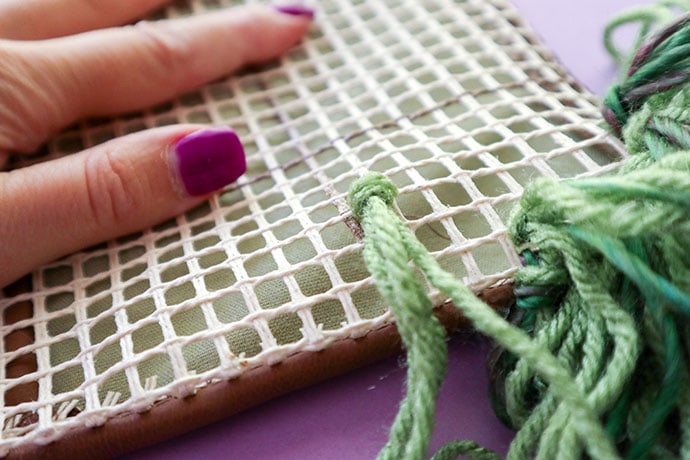
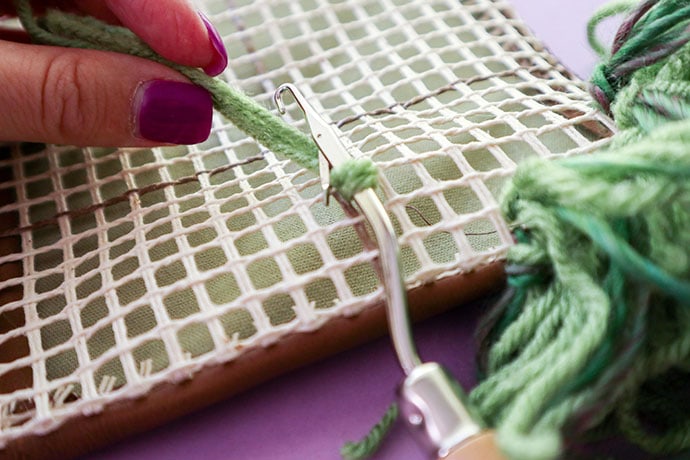
5. Pull the yarn all the way though. You now have one completed knot.
Now just keep going…
…and going…
…and going.
Once you are done, just go ahead and pop in your pillow insert.
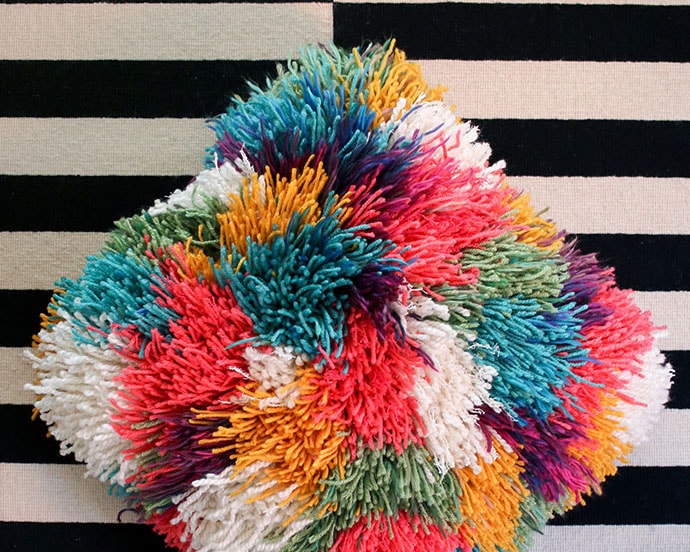
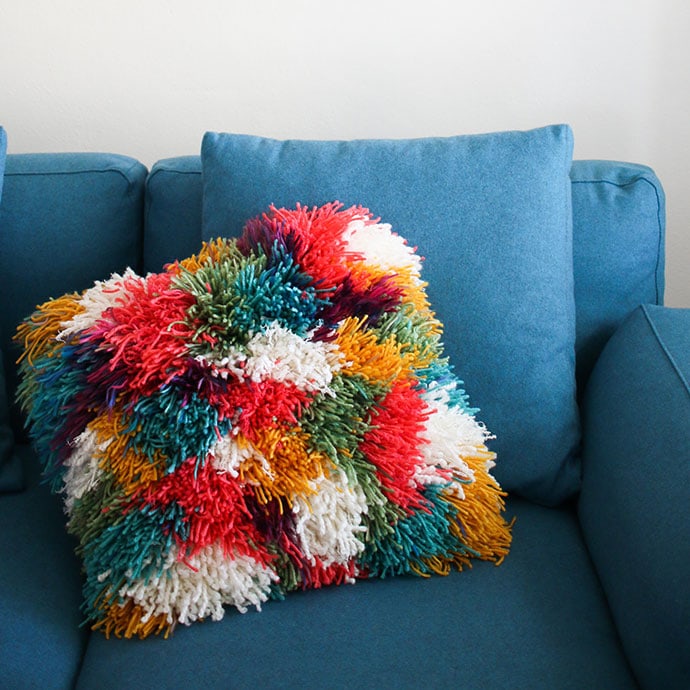
The design just developed organically as I worked on the project with no real plan in mind, except for chunky clumps of colour.
And here’s the end result. What do you think? My latch hook cushion certainly is very cheerful and makes quite the statement on my new teal sofa.
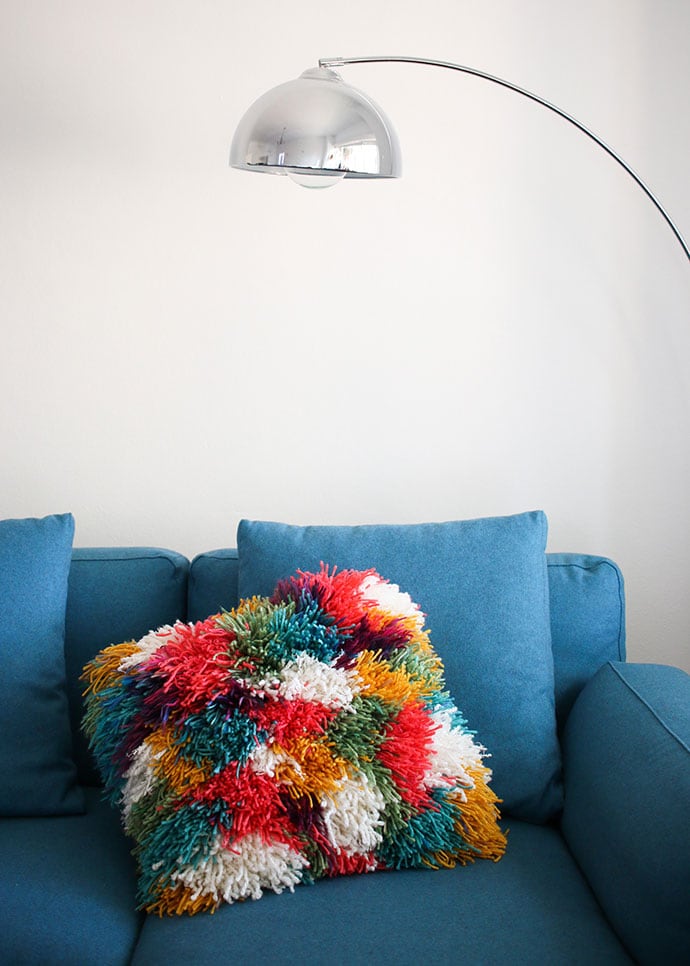
All that shagginess does come with a downside. This baby sheds fibre like crazy. It’s mainly the soft loosely woven yarns that are the main culprits. I’m hoping that will settle with use, but until then I’ll have to keep the lint roller handy (especially for guests wearing black)!
Some people have a pet that sheds, I have a shaggy pillow that sheds! LoL.


Your pillow looks so good on your sofa! Yes, I’ve latch hooked before, a small rug. But I’ve never seen such clear how-to pictures as yours on this post.
I had a “duh” moment: it makes SO much more sense to sew the pillow cover before doing the latch hooking. Thanks for pointing that out!
Yes, the idea to make the cover first came to me when I was planning out the project. I was quite pleased with myself for working that one out.
Great idea to make the cover first! I love the finished cover – so bright and happy:)
Hi I love your pillow and I just finished some latch hooking pillows. I love any 70’s crafts….. can’t wait to try this great idea!
Thanks. Latch Hook is so fun.
Sure enough, it was the 70’s when I made lots of hooked projects. I made rugs for friends and a special wall hanging for a special guy. I also made two 3’x9′ panels, intending to make an area rug. I finished the panels but that was as far as I went. There was a special tool I used to wrap the yarn around to cut. I had tools made in different sizes so I could make contoured pieces.
I saw one titled Grizzly Bear in a Snow Storm that I really wanted to copy but my interest in hooking had waned.
Your piece looks like a burst of fireworks. I still have all the necessary tools and a piece of canvas. I am still unpacking from my last move and just found the material today! Maybe I will make something in the same manner as yours. The cats would welcome something else soft to use as a bed.
Your pieces sound amazing. Yes I did see that there was a special cutting gadget available, I wonder if you can still buy them all these years later.
I’m sure your cat would love lounging on a shaggy pillow.
Hi Cintia. What a fabulous design! Love the shaggy effect of the latch hooking. I’ve included your tutorial in our latest Top 10 in Craft. Our readers will enjoy it. https://craftylikegranny.com/fall-crafts/ Cheers Jodie
Thanks – glad you enjoyed it!
This project looks like a lot of fun and our couch cushions could really stand to be replaced, so this might be the answer. I did a bunch of latch hook projects when I was a kid. My favorite was a self designed Swiss flag that covered the front of the three ring binder for my sixth grade report on Switzerland. Made for a really thick binder!
I would have never thought to latch hook a binder. I hope you got a good grade for your project 🙂
This looks like so much fun!
“I’m actually surprised you can’t buy pre-made blank latch hook canvas covers already. Someone get onto that!”
You inspired me to offer this on my shop!
Finishing up a project is always a drag for me and I tend to procrastinate. It’s so nice to have a complete project immediately done after your last hook (save stuffing the pillow form in).
You can I bought a blank one on Amazon – it also comes with the backing and zipper so you can just insert your pillow filler when you are done
Hello. I really love the colors you used in this pillow. Do you still know the color names and brands of yarn you used for it?
Hi, sorry, I just used a lot of scrap and leftover yarn.
I really need a little help – I started doing mine but when I started I didn’t realize you had done yours in bunches (even though I looked at the picture a million times lol) so I started in the lower right hand corner and went diagonal but I did mine kind of stripy some colors had 2 rows some had 3 rows and different colors do you think it will look ok like that – I am so tempted to take it out and start over????
You’ll find the colours tend to blend together. If you really don’t like the stripe look, just take out a few small sections and put some blocks of colour in there to break up the pattern.
Thank you – I finished 2 of them – would love to post them but don’t quite know how to do so
First time I’ve done latch hooking and loving it. Just wondered if you have the knots all going the same way or do you turn the cushion as you work up.
I’d recommend doing all the knots facing in the same direction.