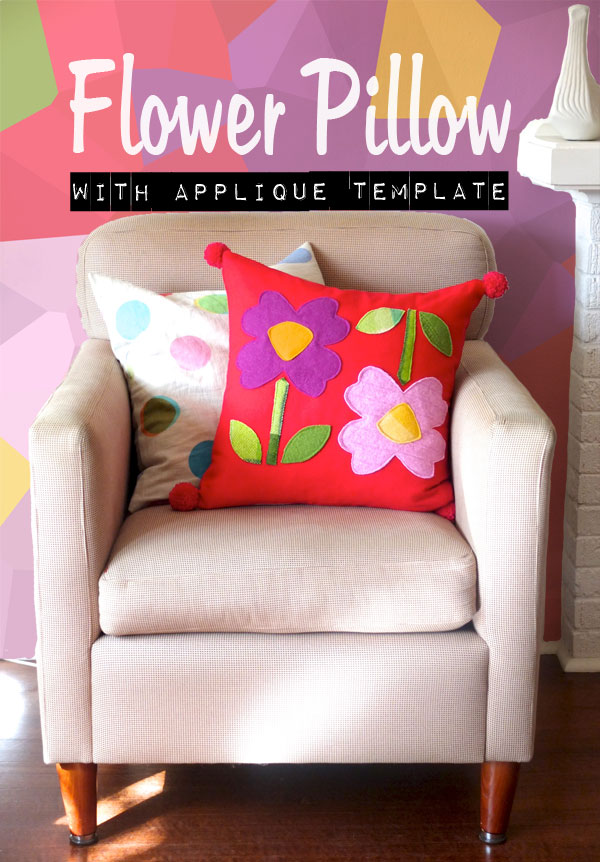
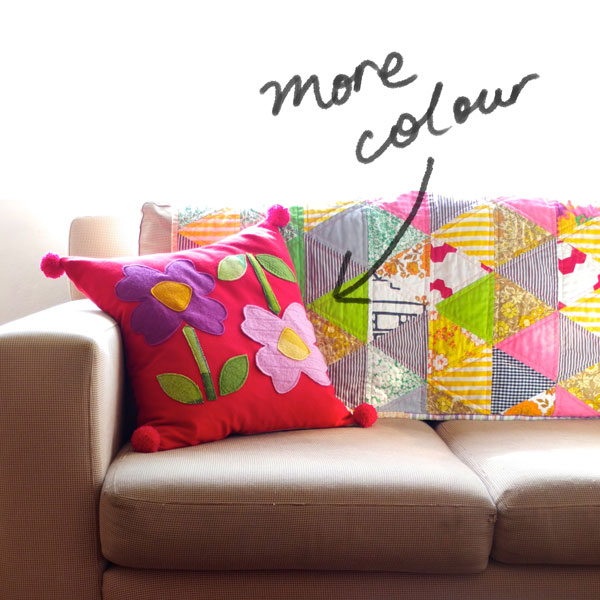
I’m really trying to inject more colour into my home. I went through a very long brown/wood/teak phase which took over my lounge room making everything look a little drab. Because I can’t really afford to redecorate fully I’m slowly making brightly coloured accessories to lift the mood of the room. (That wallpaper behind the chair is just photoshop magic).
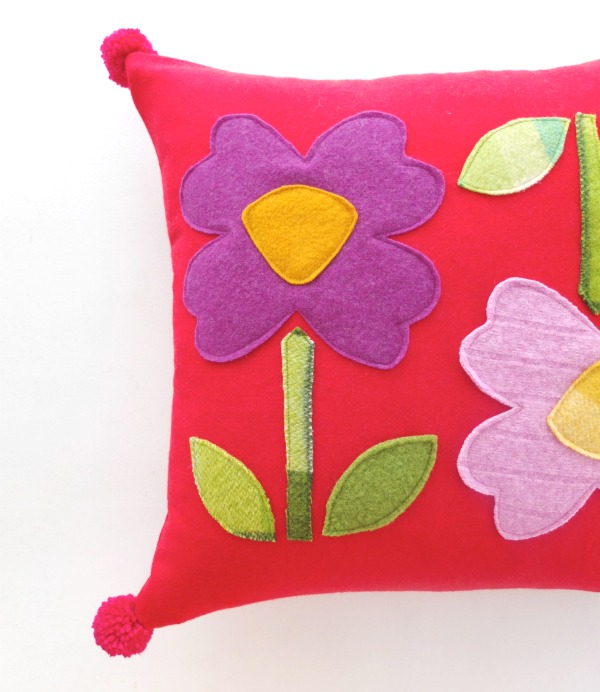
So I present the very colourful Flower Pillow inspired by my big pile of felt scraps and a lovely piece of red wool cloth thrifted a long time ago. It has quite a scandi folksy vibe which makes me happy. It’s fairly easy to make and I’ve created a template for the applique. You can construct the cover whichever way you like, I’ve inserted a zip and have linked to a detailed tutorial showing you how.
You will need:
Applique template – Free download from my Craftsy shop (You can join for free if you are not a member)
Wool felt in assorted colours – I’ve used felted knitwear, but commercially available felt is good too.
Thread to match your felt colours
Fabric panels for front and back of cover – I’ve used a lovely thrifted wool fabric, but an upolstery weight cotton is fine also.
Zipper longer than the width of the cover
Pillow insert
Zipper foot
Sewing machine
Yarn for Pom Poms – Thickish is best
Pom pom maker or cardboard for templates
Tapestry needle
General sewing supplies
How to:
1. Decide on the size of your cushion/insert size. Mine was 50x50cm
2. Cut front and back panel the same size as your cushion insert.
3. Print out flower applique template to desired size. You can enlarge or reduce to fit you panel by adjusting printer settings.
4. Cut out felt pieces using the template as a guide.
5. Pin applique pieces onto front pillow panel.
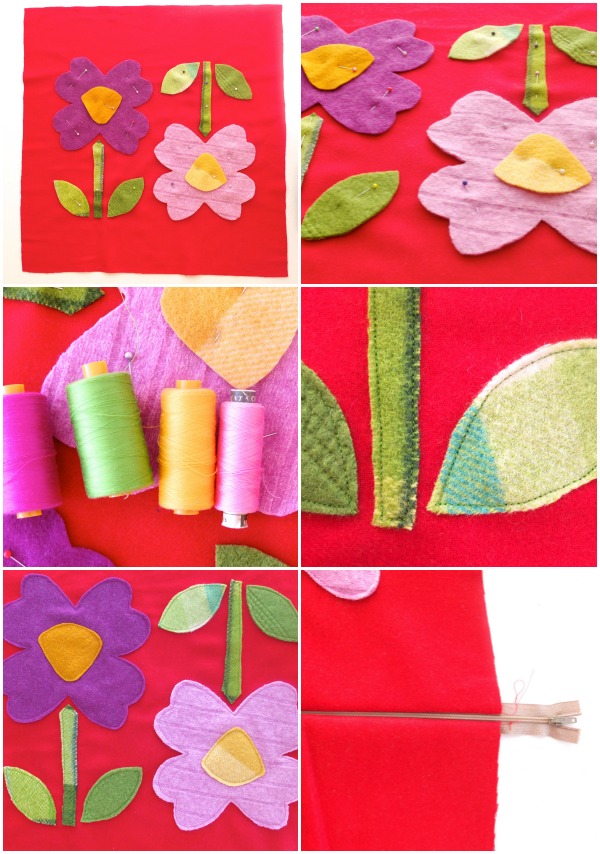
6. With matching thread sew on applique pieces in this order: Stem, leaves, petals, center. Use a straight stitch about 1/8″ (3mm) from edge.
7. Insert zip and assemble pillow cover following this detailed tutorial. How To: Zippered Pillow Cover
If you like, you can add Pom Poms to the corners to make your pillow extra special.
8. Make 4 small pom poms leaving about 15cm (6″) of yarn when tying off. I’ve used a pom pom maker – tutorial here: How To: Use a Pom Pom Maker , or if you prefer the old fashioned way, check out Pip’s template.
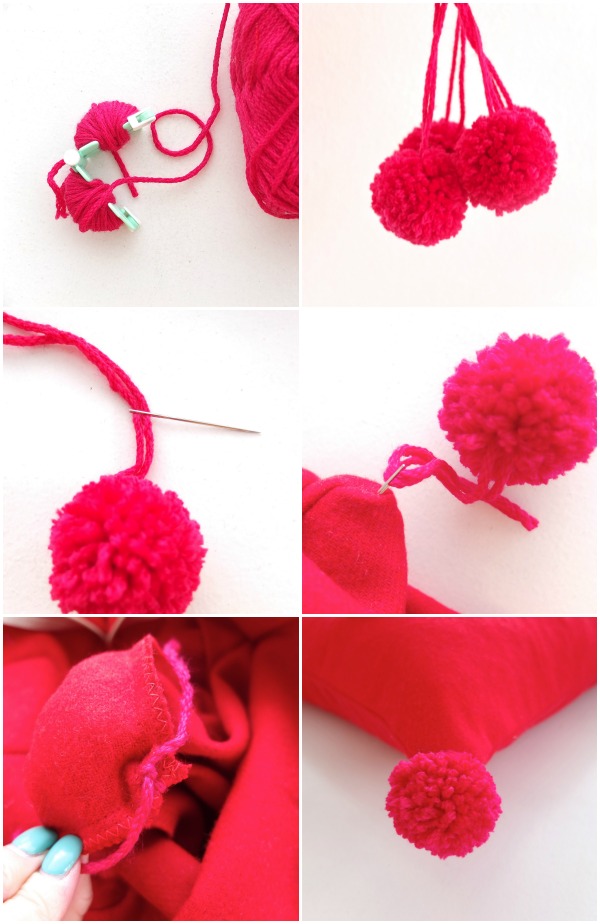
9. Trim your pom poms quite heavily so they look nice and dense and are all the same size.
10. Thread yarn end onto tapestry needle.
11. Sew into the corner pulling the yarn tail to the inside of the cover. (Take the insert out for this bit.)
12. Tie and secure firmly on the inside of the cover.
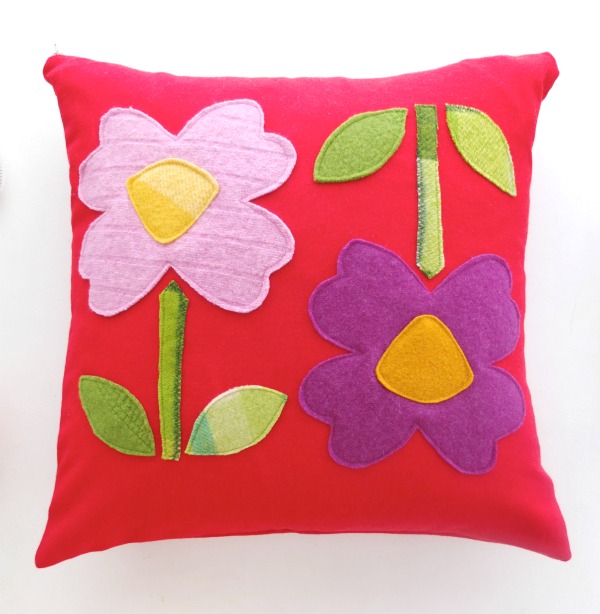
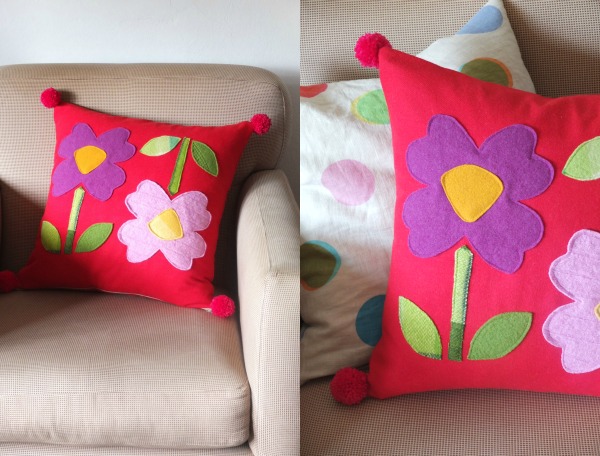
 Don’t they just look too cute?
I’m so pleased with how it turned out. I love all the textures of the felt and the rich colours, I was desperately in need of a colour injection in my lounge room.
Are you going to make one? If you don’t want to make a pillow feel free to use the applique design on a quilt, bag or clothing, but it’s for personal use only so please don’t sell things you’ve made with it. Thanks
x Cinti


The pillow came out so god dam cute! I’m going to whip some up this weekend, same colours too. Love it!!
They are very cute! I particularly love the pompoms 🙂
lovely tutorial. Good combination of colours. Only wished the pom-poms were of contrast colour, would have looked much better.
You can make your pom-poms any colour you wish 🙂