Have you ever come across old quilt tops on e-bay, or maybe a quilt that just wasn’t finished properly at the thrift store? Did you buy it or were you intimidated by the work involved in getting it ‘right’?
This is the story of a quilt that needed a little love and attention to be the best it could be.
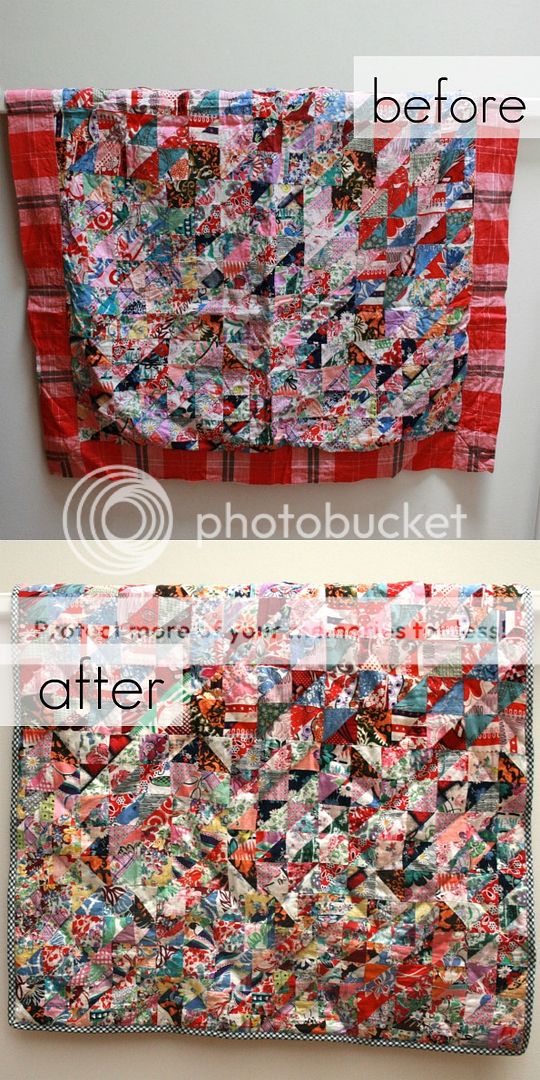
Found at a flea market languishing amongst a heap of fabrics, the colours just caught my eye. It was barely a quilt at all, but a pieced top backed with a tablecloth. No quilting, no batting.
But the top was beautiful, with tiny hand stitched (1-1.5″) triangles. All of the fabrics are pre 60’s, every piece a little gem. I was in love.
Unfortunately it had been backed and bound much later and very unsympathetically. The choice of backing fabric distracted from the design, and because it wasn’t prewashed it had shrunk making the top bulge.
So here is how I fixed it, with a little lesson in hand quilting thrown in:
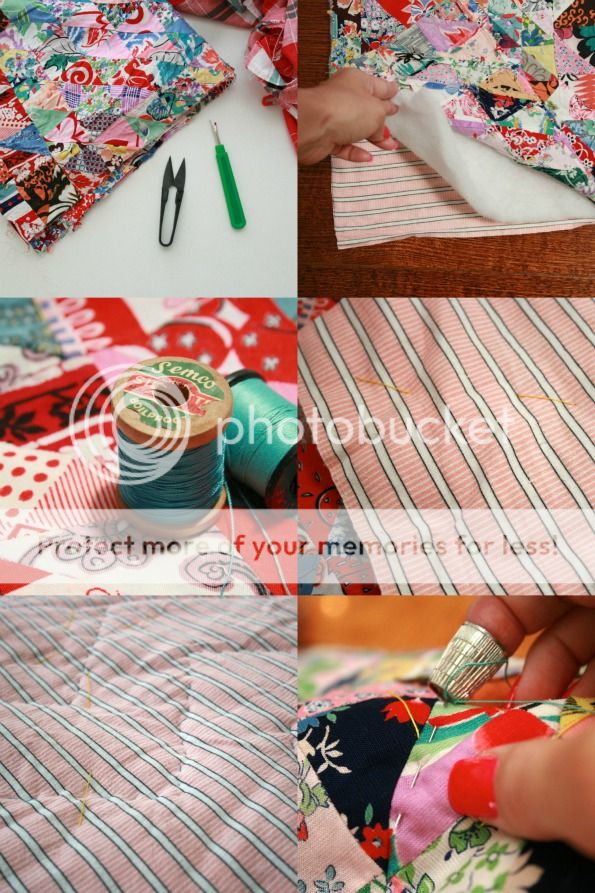
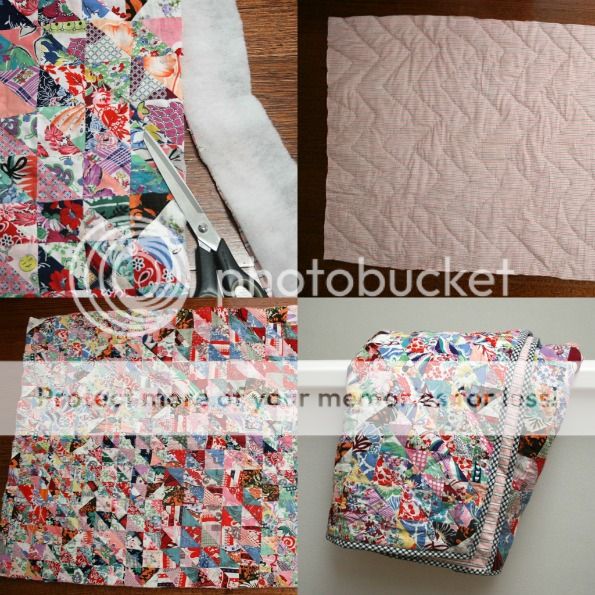
– Firstly I unpicked and removed the backing, then pressed the top.
– I chose a vintage flannel to back it and a poly batting as the fill. I considered a cotton batting but really wanted more loft than a cotton batting could give. (Plus I had the poly batting on hand)
– Sandwiched the batting with the top and backing and made sure it was all smooth and flat with no creases. The backing and batting were a little larger than the top (trimmed later).
– Decided that hand quilting would be most sympathetic to the top design, mainly because it was mostly hand pieced and also because the design was a bit free form. I had some vintage thread (blue) laying about which did the job nicely. A little thicker than sewing thread, but thinner than embroidery thread. I suspect it was a top stitching thread? Hand quilting thread is also available in stores.
– To hold all the layers during the quilting process, I hand basted (long running stitches) with normal sewing thread (yellow). Worked from the centre out, the basting stitches stop the layers from shifting whilst working the quilting stitches. Some people like to use safety pins at regular intervals for this stage.
– Due to the angular design of the patchwork, I felt a chevron pattern for the quilting would be flattering. All the quilting was worked in short running stitches, loosely guided by the design on the top.
Because this was my first experience with hand quilting, it was far from perfect, but overall very effective.
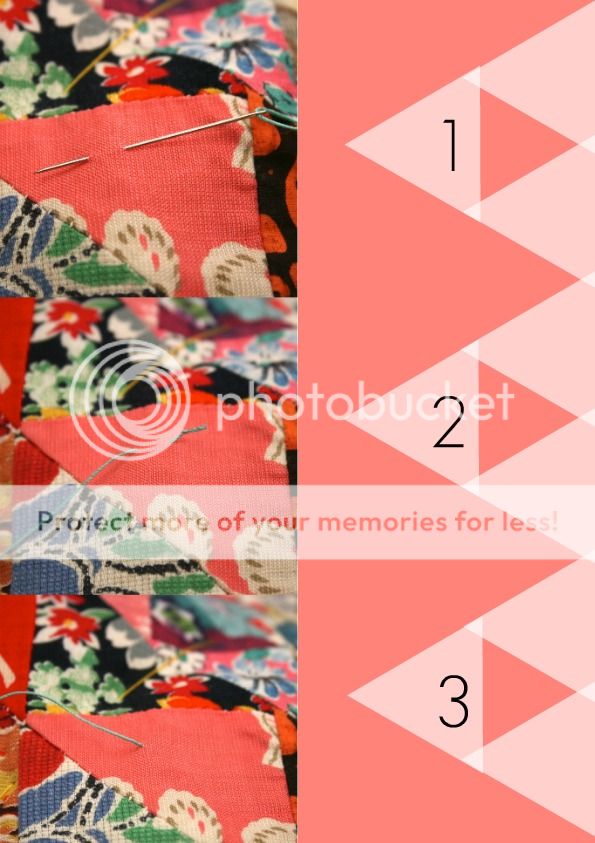
Below I’ll show you how to hide your beginning knot in the quilt.
1. Tie a small knot in the thread and put your needle through just the top fabric coming out where you want the stitch to start.
2. Here you can see the stitch.
3. Now gently tug the knot through so it now sits on the back of the fabric.
– Once the quilting was finished I trimmed the excess batting and backing using the top as a guide.
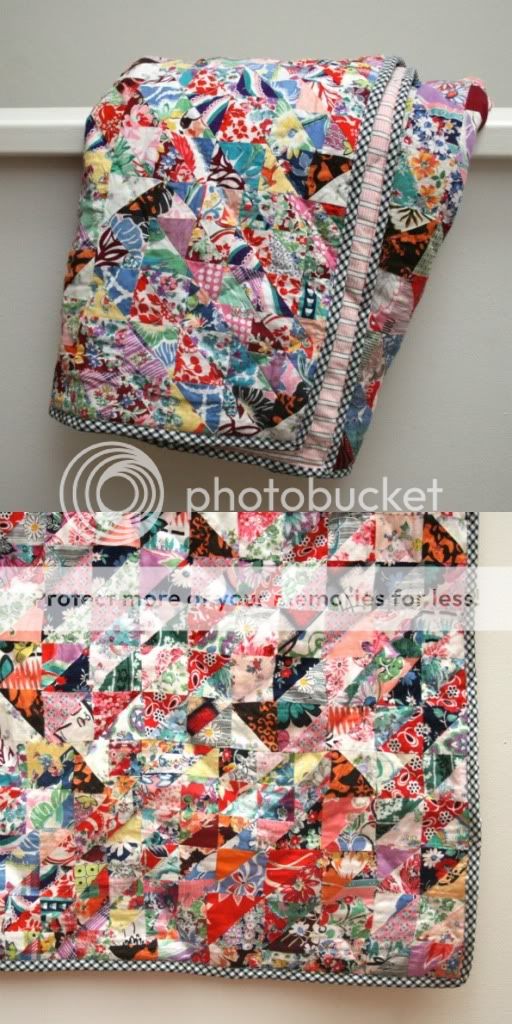
– The top was not at all square but I chose to keep the edges wonky because it was part of the character of the quilt. I didn’t want to cut away any of the beautiful fabric because I felt like it wasn’t my place to do so.
– Admittedly I probably should have hand bound the edges but I really don’t have anything against machine binding (which can be easily un-picked later if required).
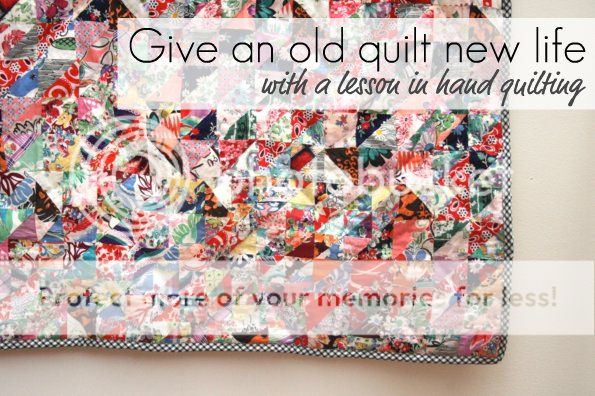
And here it is in all it’s glory.
It’s an odd little size, a lap or cot quilt perhaps. I’m going to hang on the wall. A little piece of textile art to brighten up a bare space.
I love looking at it and discover new fabric pieces all the time. Little surprises that reveal themselves if you just give them a chance. It’s imperfection is part of its charm.
I sometimes think about it’s history and wonder who made it. I’m sure it was someone that made their own clothes and these were all the little scraps accumulated over the years. Worked distinctly at two different times, even maybe by two different patchworkers. The oldest section with the smallest triangles was all hand pieced and the fabric is clearly from the 30’s and 40’s. Later the triangles got bigger and were machine pieced, with the fabric design leaning towards 40’s-50’s. I think the back was a different person altogether.
And now my contribution…
Do you have a story about a quilt with a story? Why not share it with us, I’d love to hear it.
www.mypoppet.com.au

what a beautiful quilt – enhanced by your hand quilting (awesome) and choices for complementary backing and binding (brilliant). i must admit, i'm a tad bit jealous that this will be hanging in your home and not mine!
really is stunning, and beautiful job on the hand quilting, it looks amazing. great way to breathe more life into the quilt!
That is such a pretty vintage patchwork quilt. I was just blogging about some vintage patchwork today, too! Thanks for sharing 🙂
your quilting skills are amazing! great work! i've only ever made one patchwork quilt and as much as i loved doing it, i think the cutting out was the longest annoying part… if i can get past that, i'd love to do more! x
Wow, I never would have thought to do that. I will be looking at “wonky quilts” in a different way now. Great job!
I love to do the very same thing! By now I've got myself quite a little collection of old tops that were never made into quilts, mistreated quilts, and “orphaned” blocks. It makes me happy to finish them off so that they can be used. Quilters are some of the original recyclers! 🙂
Thank you for saving this little quilt, it makes my heart happy. I wish someone saved the quilts my grandmother made, all I have is a mention that she quilted. Everything was lost in time.
I am saddened when I make and gift something and I find that whomever I gave it to didn't cherish it. Most have been throw out.
I saved a log cabin lap quilt I made my mother, who gave it to my sister. I snatched it from her hand as she was throwing the quilt into the washing machine and it also had white paint all over it.
It is sad to say I don't make anything for anyone any more, just for myself.
It's so true Laura, sometimes only a maker/crafter can appreciate the work that goes into a project.
I barely have time to make anything for myself so if I make handmade gifts I do so for only those I know will appreciate it.
I have a quilt that my mother made for me. Being not of sound mind I let my son use it for a couple of months because he didn't have a blanket. Now it needs repaired, I don't think she used a very good thread, and it needs cleaned. The top and the back are 100% cotton and the batting is poly. I'm not a quilter, but I'm a fair seamstress. My questions, for now, are should I wash this? Should it be dry cleaned? Should I do the stitching first? I've had the quilt since 1988, and she passed away in 1996. I would like to fix this myself.
Hi Terri, I've replied below.
Hi Terri, I'm not an expert but I would suggest repairing any stitching first. It should be able to withstand a gentle hand wash being just cotton and poly fill.
I would recommend washing it in your bath tub in tepid water with mild unscented liquid soap.Rinse well and gently squeeze out as much water as possible. try and dry in the shade to help prevent fading.
some more info here https://www.quilting101.com/care/quilt-washing.html
I hope that helped.
x cinti
So glad you saved the old quilt. I could never throw away
Anyone’s needlework.
I have an extraordinary quilt started on my birth by my grandmother, great aunt, and great grandmother. It’s a beautiful zoo of animals with fabrics chosen to look like the different animals’ skin/coats and habitats. Embroidery finishes the details of each animal. The binding is a very thick band with animal paw/foot prints all around the edge. It’s a work of art that I will always treasure. Sadly I don’t know how to sew (I can crochet like a champ and I’m decent with embroidery painting and Crewel work but don’t ask me to sew a button on a shirt…) so I think I may start with triangles or something and work my way up 😉
Have just finished my “waiting quilt” so called because I started it over forty years ago. I had a special basket packed with all requirements for my patchwork. My son was accident prone and long hours to kill at A &E , so all I had to do was pick up my basket and make a flask of coffee. After school activities also provided opportunity to work on it… All hexagons were backed with paper shapes and were of silks, satins or similar materials. Originally made for a super kingsize bed , on moving to the UK hade to downsize. All materials come from clothes from the 30’s to 60’s and a few patches from a few later years…..from dresses, shirts etc all with special memories of family and friends…. All hand stitched from beginning to end. Started to feel a bit lost so have started all over again with a new one…hope it does not take meso long this time.
Sounds wonderful. I love discovering all the fabrics on a old quilt. What a slice of history.
1n 1957 when I was 12 years old I made an appliqued Dutch Girl quilt top. My 82 year old grandmother helped me hand quilt it using old hanging quilt frames. In 1959 she died. When I married I used ( and sadly abused the quilt). I washed it and the thin cotton batting has lumped. My dilemma is that my precious grandmother’s stitches are in that quilt and as far as I can see the only way to fix it is to take all that hand stitching out and start over. Any suggestions?
I’ll have a think and get back to you 🙂
Lovely! I’m doing something similar with 6 very large blocks I found in our thrift bins–everything is $1.59 per pound. They were hands sewn as well, and very wonky. I repaired the most egregious mistakes and will add sashing before quilting. Lot’s of fun and I love a bargain.
thrift finds are the best!
I love, love, love this little old quilt you saved! I found one hand pieced that I am repairing and want to hand quilt. I thin the design you used on this one would be perfect. Can you tell me how many inches you made each zigzag from bottom of point to top of point. Thanks so much for the inspiration!
Not 100% consistent but about 4″ tall with 3.5-4″ spacing between each row. I let the design on top guide me.