I always dread tax time, every financial year I start off with the best intentions of having all my paperwork nice and organised but ultimately it all ends up in a big mess.
It was time to get organised and de-clutter to start the new year afresh.
I welcomed the challenge with gusto and have gone to town transforming my workspace from a horrible mess to an inspiring part of my home.
Home office Before

I’m a bit embarrassed to show you this photo, this space is a mess!
When we bought this house I really loved this little desk area on the landing of the stairs, it’s just the right size for a little home office with plenty of cupboard space.
But over time it’s become a bit of a dumping ground for all sorts of junk that makes it half way up the stairs, and the fact that we don’t even have a chair there means there isn’t much working happening.
There are tangled cords everywhere and I have a real issue with managing paperwork, most of it is overdue for bookkeeping (which I hate) and the rest just needs filing (or throwing away).
Needless to say it was time for an overhaul. Not only did I want to make this workspace tidy and functional, but because it’s out in the open and I walk past it every day, I wanted to make the area more attractive to encourage me to sit down and enjoy working there.
Here are the problems that needed sorting:
- Big printer dominating the desk area
- No chair
- Tangled cords
- No real filing system
- Uninspiring decor
Since I was de-cluttering I thought it was the perfect opportunity to give the walls a spruce up with a coat of paint and also remove an obsolete intercom that was in an awkward spot.
Home Office After
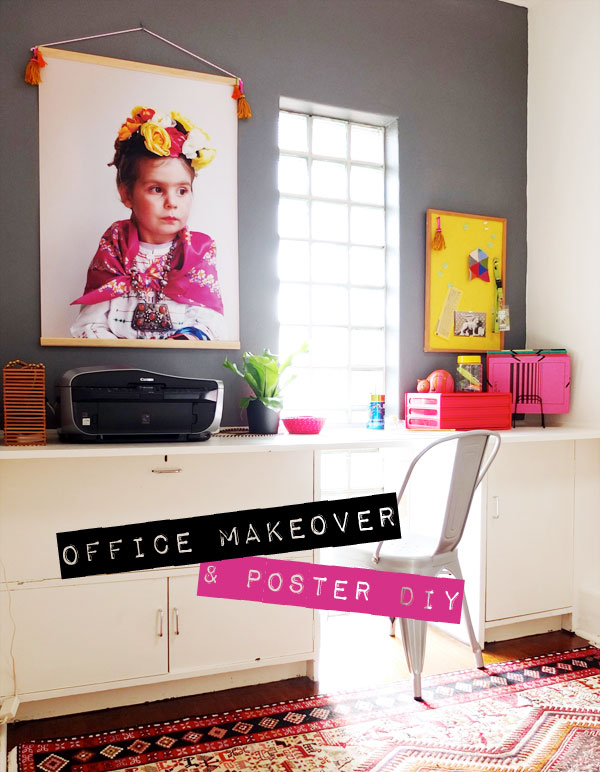
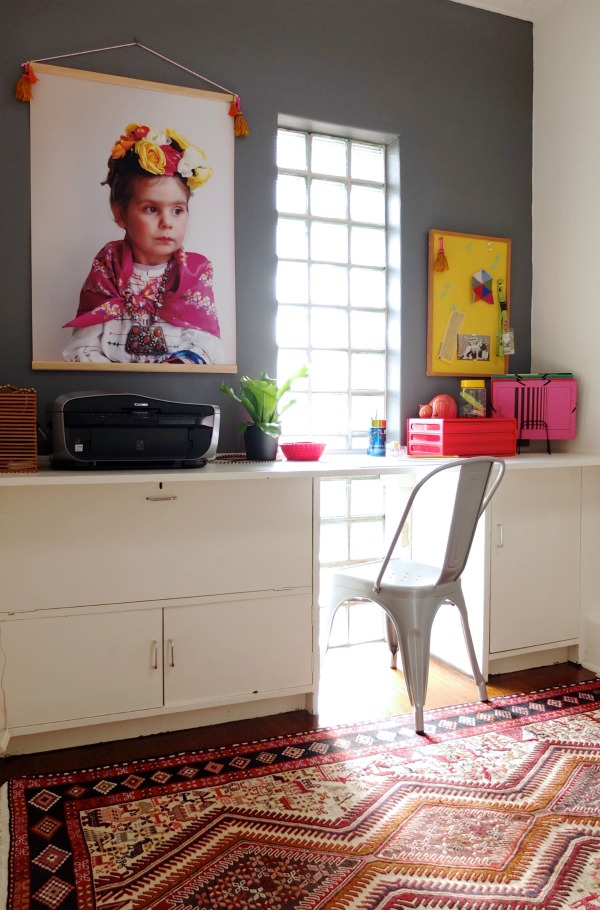
Ta da! Here it is, quite a difference.

I’m so pleased with the result and love that my ‘office’ doesn’t look ‘officy’ at all.
Here is how I solved some of the challenges:
Large printer – The printer dominated the space but because we don’t have anywhere else to put it, I decided to embrace it by painting the wall a dark grey to match. The printer looks less obvious but also like it belongs.
Chair – I wanted a chair that could do double duty when extra visitors came by as well as looking good, this chair has a vintage look that can work in any room, and even outdoors.
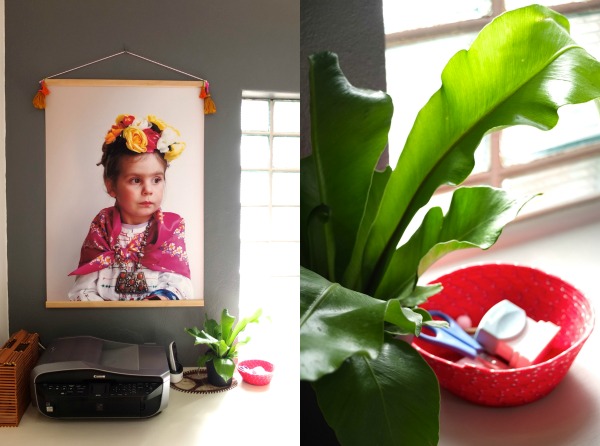
Tangled Cords – I used these handy velcro ties to keep cords under control and used a vintage basket to hide a power board so it wasn’t so obvious. I moved our modem down stairs to further reduce clutter.

Filling – I didn’t want a bulky filing system as we already have a large filing cabinet for long term filing, I just needed something that could hold bits and pieces till it was bookkeeping time. I also wanted something that fit my aesthetic so I went for a combination of these slimline drawers that had a cool retro look and some loose folders which are portable.
Decor – My favourite thing in this whole makeover is the giant poster I had printed of a colourful photo of Emma dressed as Frida Kahlo. The poster was actually the inspiration for the whole space.

To make the poster I took a hi res image to the Print & Copy desk at my local office supply store and in only 15 minutes they printed a beautifully vivid image on heavy 160gsm paper for only $29. Of course the price depends on the size you choose and the paper finish.
DIY Poster Hanger
Framing a picture of this size would cost a bomb, so with a little DIY inspiration (and a trip to the hardware store) I mounted it like an old school map. Here’s how.
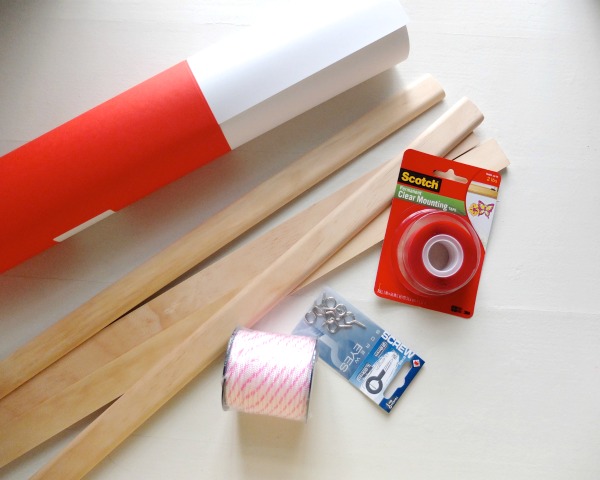
You will need:
- Poster
- 4x wooden strips cut to width of poster
- extra strong double sided tape (I used this one)
- 2x small eye screws
- strong cord
- Tassel embellishments (optional)
How to:
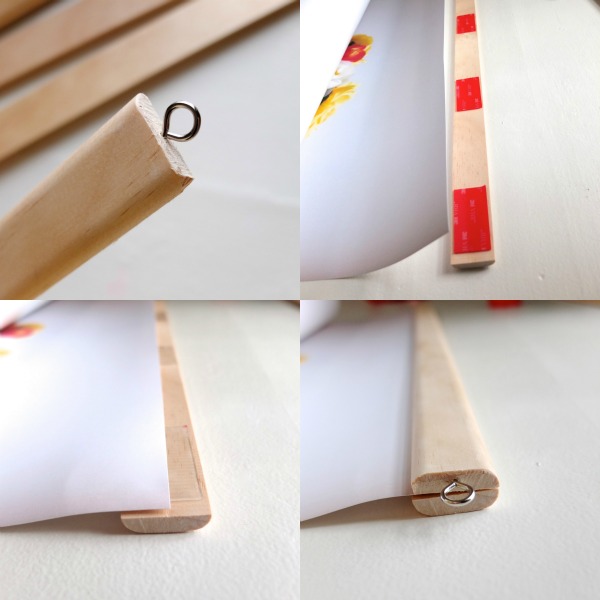
1. Screw in eye screws to each end of ONE piece of wood, reserve for top front.
2. Place pieces of tape across one of the wood strip and remove backing.
3. Carefully place top of poster to align half way down tape. The tape is really strong so be careful to get it right the first time as repositioning may tear poster.
4. Position wooden piece with eye hooks on top and press firmly.
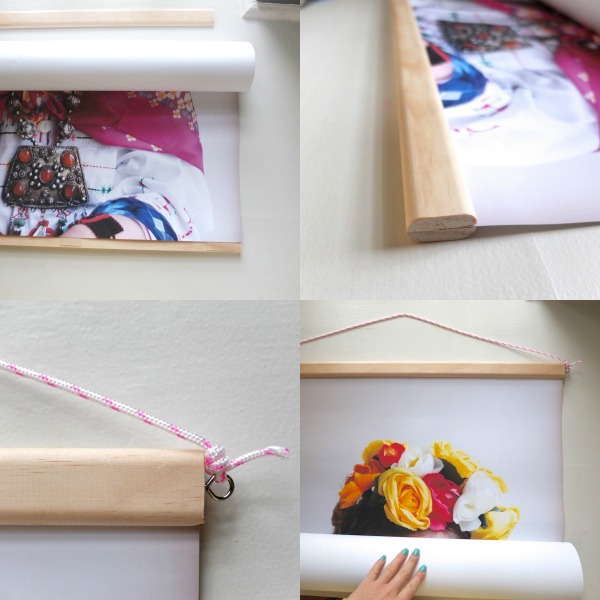
5. Repeat on bottom of poster.
6. Measure cord to desired length and tie firmly to hooks. You can embellish with tassels as I have it that takes your fancy.
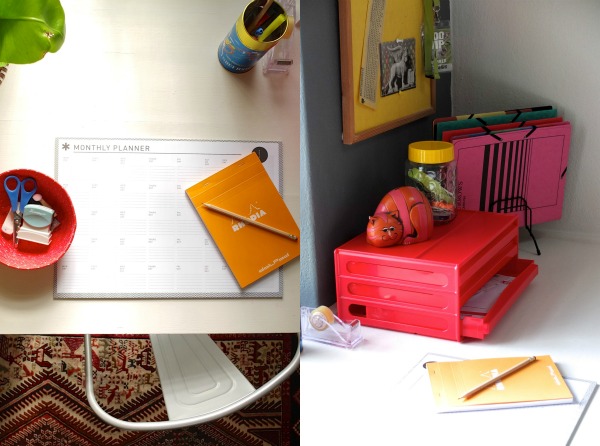
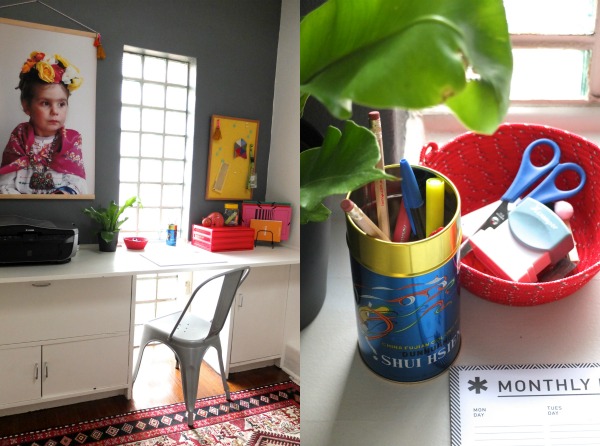
For some finishing touches I used some baskets and jars that I had laying around to store little bits and pieces, as well as treating myself to some new desk stationery.
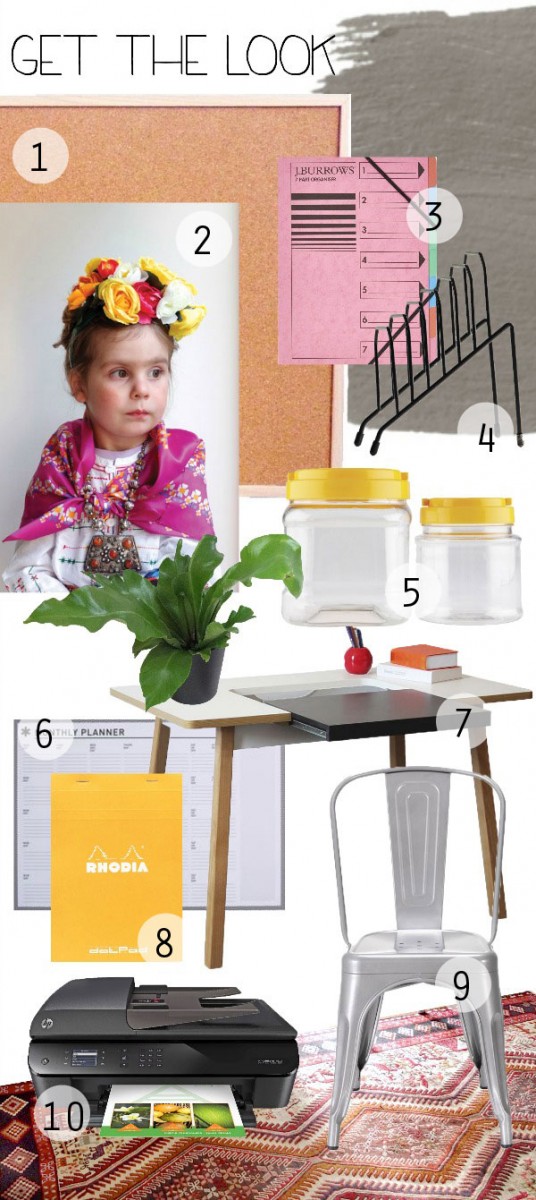
- Quartet Oak Frame Corkboard 580x890mm, $26.68
- Standard Colour Poster
- J.Burrows Pressboard 7 Part Organiser Pink, $2.99
- Wire Vertical File Small Black, $9.27
- Educational Colours Clear Jars with Screw Cap 700ml, $2.59
- Lot 94 Neon A3 Desk Planner Black, $14.95
- Hummingbird Evoque Slide Out Desk White Natural, $167.00
- Rhodia 16 A5 Dot Grid Pad – Orange, $6.95
- Inabox Colombo Steel Chair Silver, $59
- HP Officejet 4630 Colour Multifunction Inkjet Printer, $98.00


Great, great space! You have such a knack for the makeover, Cintia. Map poster hang is a genius solution.
I just recently moved my desk into a different room and it’s much like your before pic and is oh, so headachy! I need a whole new way to organise!
Wow! What a change! The poster really does make the space, doesn’t it. I’m inspired. I think Officeworks could help me organise the bits and pieces of paper and notes around my computer screen, a better chair is a definite, and a poster, a giant poster. Selecting which photo could take a little while though. Thanks so much Cinta.
Hi, I found you via officeworks on IG, I love a good makeover esp with DIY. Your poster is fab!
My office/craftroom aka studio is an ongoing work-in-progress that could really do with some pop like these funky metal A4 drawer units I’ve lusted after and new stationery cos every task is better with new pretty stuff to help 🙂
Wow, the before and after comparison is so great – you could hardly tell that they were the same place! The vertical file rack is just the thing to keep all those bits of papers organised and tidy in small spaces. To master my workspace, I’d totally ‘take back’ the office space from the bf. It’s become his little area of geeky collectibles, xbox controllers and boyish things. So the fun colours with the Office Works range would definitely inspire me to put a little pop of colour and woman power into the place!
I’m a stationary nut and just love spending time in Officeworks. Just moved into a new house and for the first time have a grown up office, study, craft room all in one! So excited to make it look and function fantastically but could do with a little bit of help from Officeworks! Think i’ll start with a cool poster for my wall and your handy map hanging tip might just work a treat!
I have been eyeing off the colourful filing system at officeworks for ages. I have papers EVERYWHERE and would be awesome to get rid of them!
Your transformation is awesome – well done 🙂
Add some color to the office.
Our office space needs files to organise paper work and a printer for printing important documents and this voucher from officeworks will definitely help us to master our office space ….
I would have a complete make over on the desk itself with more colorful mini drawers, classier pen holders, and some kind of a new filing system to get rid of the clutters (papers, receipts, etc)
Working in an office that uses hot-desking I’m thinking some Police “DO NOT CROSS” tape or BIO HAZARD warning stickers might help me secure my own permanent desk.
I would get a bunch of bins and storage supplies to organize all of the stuff I have.
I would love to try to frame the poster-sized prints I have like this. As an artist and photographer, my studio could definitely use organizing for all of my prints and supplies!
giveaway now closed – Thanks
What some brilliant ideas. I’m too late for the giveaway, but your post has reminded me to pop into Office Works today 🙂
I actually mixed 2 sample pots I had laying around together till the colour was just right.
Winner winner chicken dinner!
lovlely!
Where did you get the wood to hhang the poster?
I bought them at my local hardware and lumber supplier store, in the wood trim section.