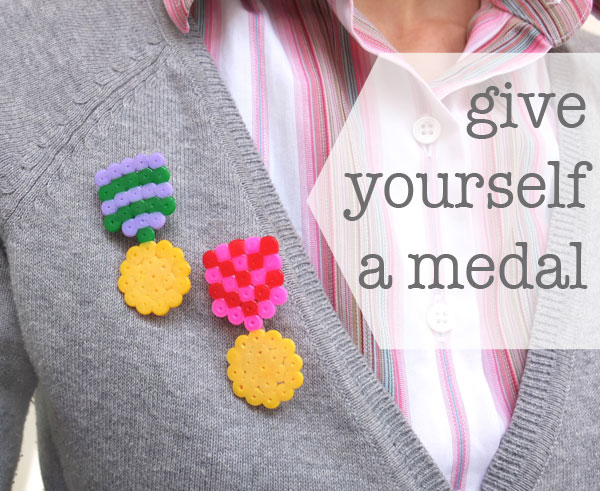
Being a mum is a hard and sometimes thankless job, as awesome as my kid is, some days I feel like I deserve a medal. (She is usually pretty great, so I shouldn’t really complain.)
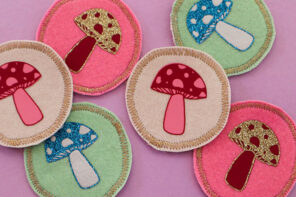
Well, I’m not one to rest on my laurels, so I decided to make a few medals of my own with some Hama beads. They are colourful, plastic fantastic ones, perfect for reminding myself that I’m pretty great at my job, when things aren’t always going my way.
I think you deserve one too, so read on and make some of your own.
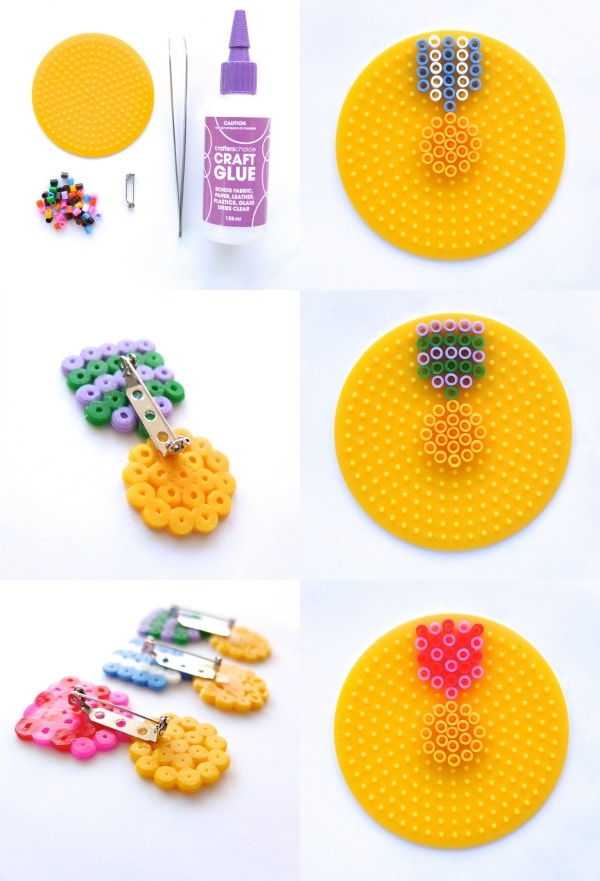
You will need:
- Hama (or Perler) beads in assorted colours including green, yellow, lilac, red, pink, blue and white.
- Circular Hama pegboard
- Tweezers (optional but useful)
- Silicone baking paper (ironing paper)
- Iron
- Heat proof surface
- Heavy book
- Brooch back
- Quick dry craft glue
What are Hama beads? I’m glad you asked.
Hama Beads (also called Perler beads) are small plastic beads/tubes that are placed one by one on a pegboard and then ironed until the beads are fused together. They are available at some craft stores, online and even IKEA.
How to:
1. Following the pattern layouts, place your beads, one by one onto the peg board. Tweezers help.
2. Place your non-stick ironing paper over your design. Apply the iron (no steam) for just a few seconds using smooth movements, make sure the iron doesn’t touch the pegboard. Leave your bead design to cool for a short time, then carefully remove it from the pegboard.
3. Once you have removed the design from the board, the beads will be fused together on one side, flip the design and on a heat proof flat surface, iron the other side with the paper.
4. While still warm, place a heavy book on top of the ‘medal’ to avoid the edges curling up as it cools.
5. Glue the brooch back onto the least attractive side of your medal. Some glues have some trouble sticking to the bead plastic, so you may have to experiment with a few different types.

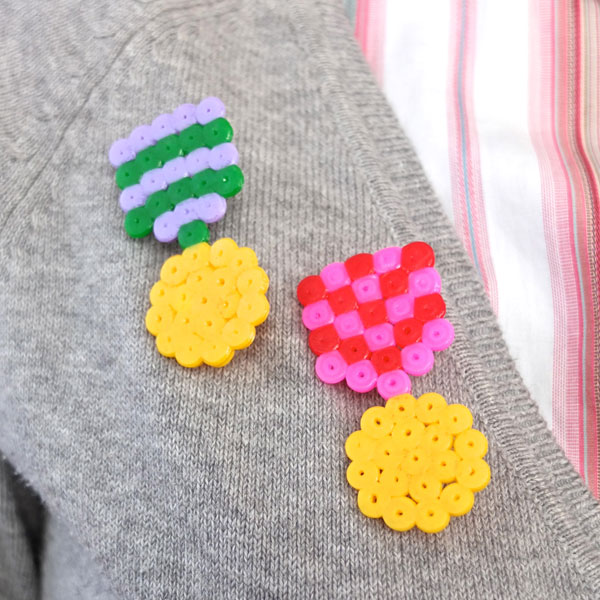
Wear your medal with pride, I’m sure you’ve earned it!
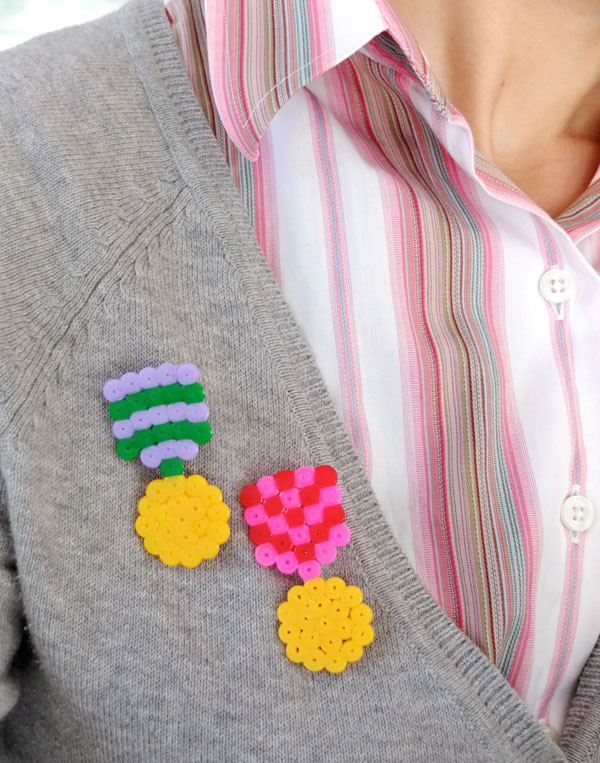
Do you know anyone that deserves a medal? Why not make them one?
Other Hama bead projects you may enjoy:

Really clever, simple, colourful and I deserve it, too!!!
xxxx Alessandra
Thanks. We all deserve a medal 🙂
I just love this! My young son and I made these straight away after seeing this. So fun.
The girlfriend and I absolutely LOVE making perler bead sprites.
I really like the idea of adding the pin. My GF makes bracelets and will often attach what she makes onto those for extra flair.
Quick Tip: If you do a search for “8-bit” or “sprites”, you can find a lot of templates for perler beads. Likewise, you could take a flat (few color) image, open it in MSPaint, zoom in 800% (the max), turn on the grid, and you can see how the perler beads can be setup for each individual one.
Thanks for sharing 🙂
Thanks Murray, will check it out. I love the pixelate function in Photoshop and will definitely try something more ambitious at some stage. Love your blog. The camera phone tripod is genius. I’m going to give that one a try over the holidays. Thanks for stopping by.
Thank you for this great tutorial! Just a question, did you have any problems with the pin sticking onto the hama beads? Apparently I’ve tried it out with hot glue and E6000 but it doesn’t seem to have a good hold. When i use the appropriate amount of force to open up the pin, it falls off the badge along with the glue and these adhesives are known to be really strong too. It would be great if you could let me know, I know that this blog post was done a really long time ago 🙂 thanks!
I’ve had mixed results with many different glues. I’m wondering if an epoxy would work or maybe the type of glue builders use to stick wood and metal together (we call it liquid nails in Australia). I think the plastic in some brands of beads resist glues more than others.