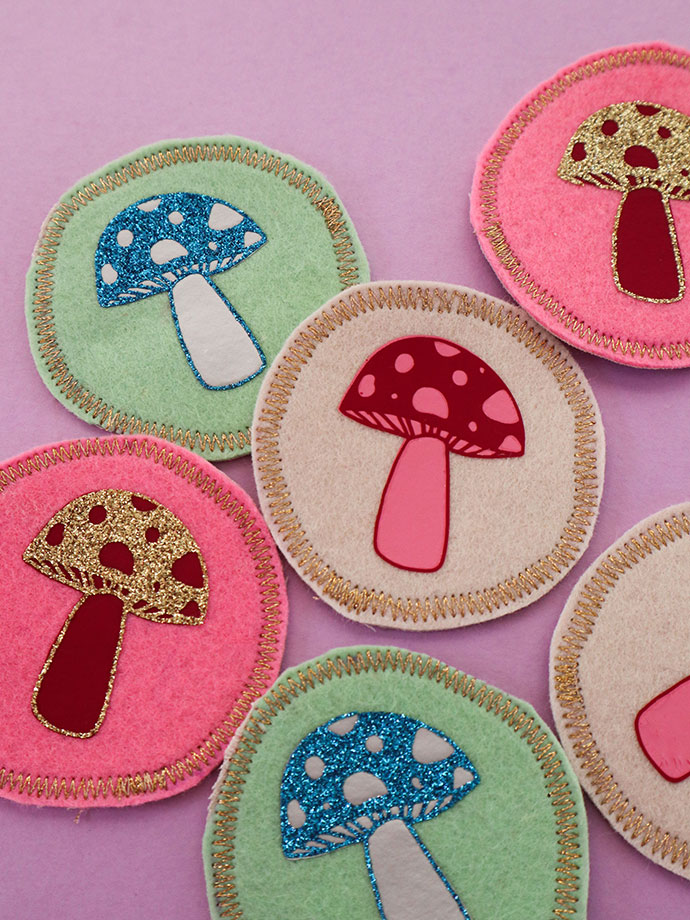
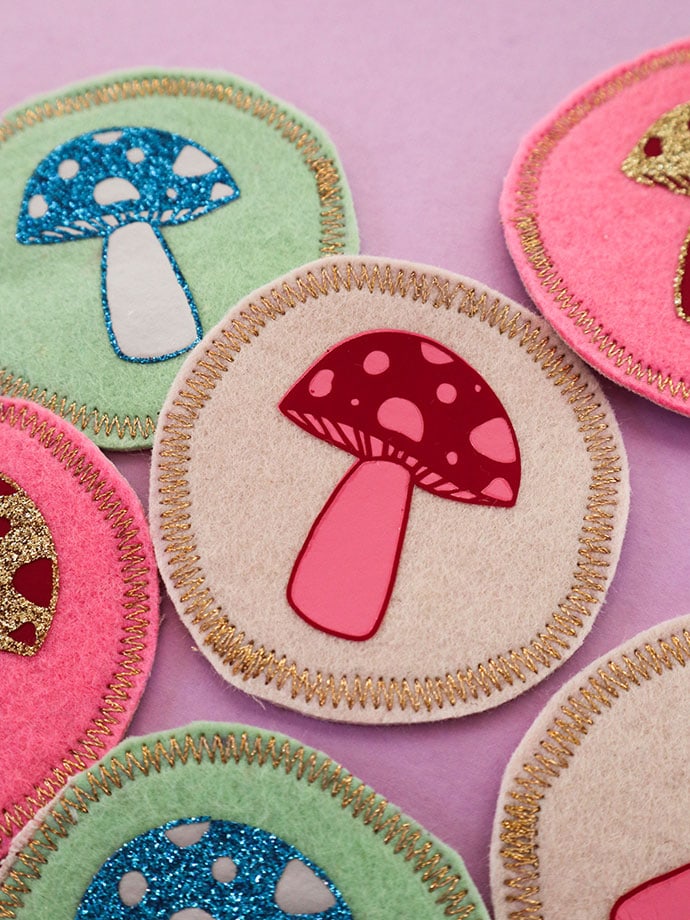
Make your own Mushroom Patches inspired by the latest Cottagecore trend. This cute sew-on mushroom patch craft idea is easy to make, and fun way to customize clothing and accessories.

This post contains affiliate links
My teen has really embraced the Cottagecore aesthetic. It’s the latest trend among the younger set. It’s all about cute forest scenes, folksy clothing and lots of wild flowers and mushroom motifs.
Emma now loves everything mushroom and toadstools. She has requested I make her a hat that looks like a mushroom, and various other mushroomy accessories.
I thought I’d start off small with some sew-on felt patches she can use to embellish her clothing and accessories. An easy way to embrace the Cottagecore vibe without too much effort.
Embroidering patches briefly crossed my mind, but to save time, and use up some vinyl scraps, I fired up my Cricut Joy cutting machine and made a big batch of mushroom patches.
You may also enjoy:
Design your own Mushroom Patches with Iron On Vinyl

These sew-on patches are an easy craft project idea to make with small scraps of iron-on vinyl and a bit of leftover felt.
You can get as creative as you like with the design – add some sparkle with glitter vinyl or just keep it simple with a single layer design.
If you have a cutting machine like my Cricut Joy, it’s easy to choose a simple design from Cricut design space and cut shapes as required. It doesn’t need to be a toadstool, you can make a patch with any design!
Don’t have a cutting machine? Scroll down for some tips for how to make this project without any special tools.
I’ve gone all out and added some machine embroidered edges with metallic thread to really make this mushroom patch project special.
But if you don’t feel like firing up the sewing machine, you can either hand stitch and edge on your patch, or just omit the edge stitching altogether.
You will need:

- Felt scraps (wool or acrylic)
- Iron-on vinyl scraps – I’ve used Cricut Everyday Iron-on and Glitter Iron-on Vinyl (Amazon US | Cricut)
- Circle template – something round to trace around (I’ve used a small tin about 7cm diam)
- Pen or marker
- Cricut Joy (or any other Cricut cutting machine) (Amazon US | Cricut)
- Cricut Joy Standard Grip Mat (or other appropriate mat) (Amazon US | Cricut)
- Cricut Design Space account (free to sign up)
- Cricut access subscription (optional – free trial available)
- Computer, iPad or smart phone
- Cricut basic tool set (Amazon US | Cricut)
- Cricut Easy Press Mini or regular iron
- Cricut Easy Press Mat (Amazon US | Cricut) or fabric pad/tea towel
- Non-stick Baking paper
- Sewing machine (optional)
- Sewing thread – contrasting colour or Metallic (optional)
- Iron-on interfacing or adhesive web fusing and scrap fabric (optional)
What if I don’t have a Cricut Cutting Machine?
You can still make a modified version of this project, even if you don’t have a Cricut cutting machine.
Get hold of some iron-on vinyl and just draw a simple mushroom shape on the shiny backing sheet, then cut your shapes out by hand. You can use a regular iron to press on the vinyl and then peel the backing away. Remember to use a piece of non-stick baking paper under your iron.
Various brands of iron-on vinyl (also called HTV – Heat Transfer Vinyl) can be purchased from good craft stores. Or ask a crafty friend with a cutting machine to donate some of their scraps for you to experiment with.
How to:
Preparing the mushroom patch base
This part includes a few optional steps to re-enforce the felt with a backing fabric and some decorative zig zag stitching around the edge of the patch. To keep it simple you can make the patch with one layer of felt only and omit the machine sewing.

1. Trace a circle on you felt fabric. You can use a small jar lid or anything round as a template. If you aren’t backing or sewing the felt, go ahead and cut the traced circle from the felt now.

2. Iron on interfacing or fusible webbing to back of felt
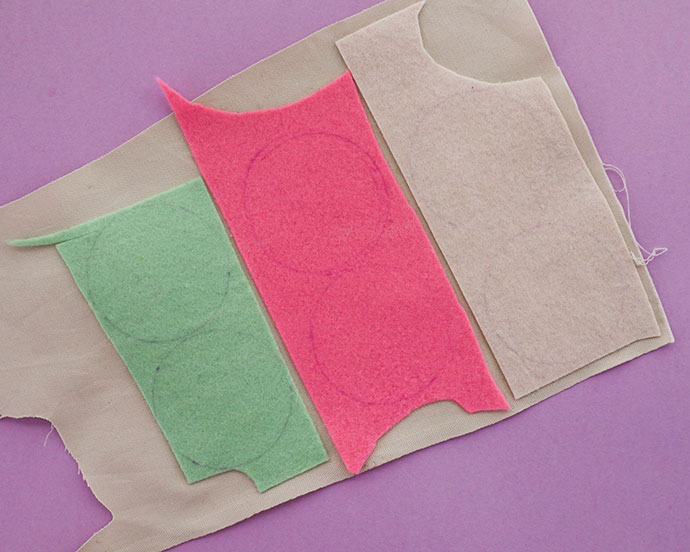
3. If you aren’t using iron-on interfacing, iron the felt onto a piece of scrap fabric.
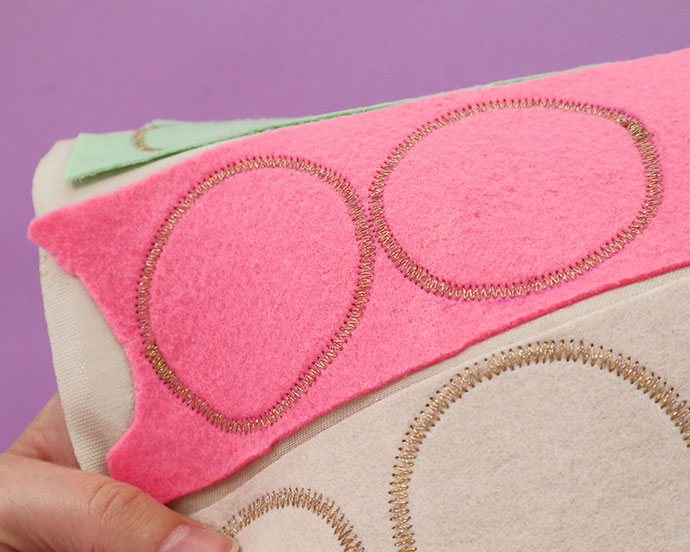
4. Using the traced circles as a guide, sew over the line with a zig zag stitch to make the decorative edge of the circle patch. Do your best to keep the circles as round as possible. Mine were a little wonky.

5. Cut out the circle patch with about a 1mm clearance from the stitching.
Preparing the Mushroom patch design
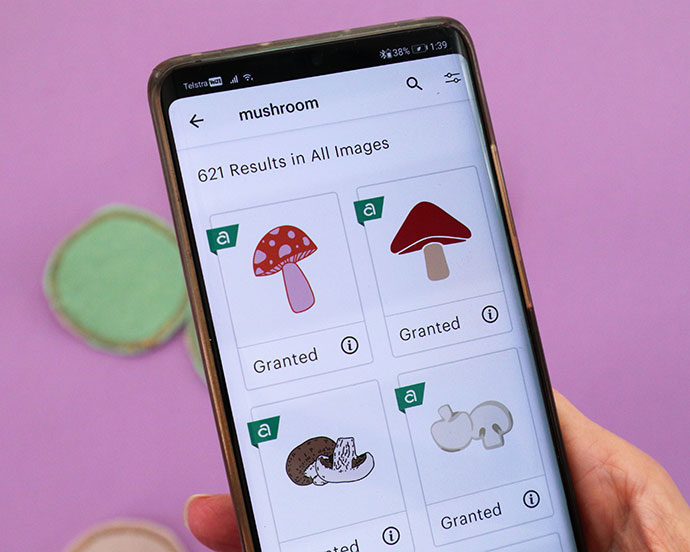
6. Choose a mushroom design from Cricut design space, there are so many to choose from – I’ve selected #M39CDF267 which is a 2 layer design. Alternatively you can upload your own design.
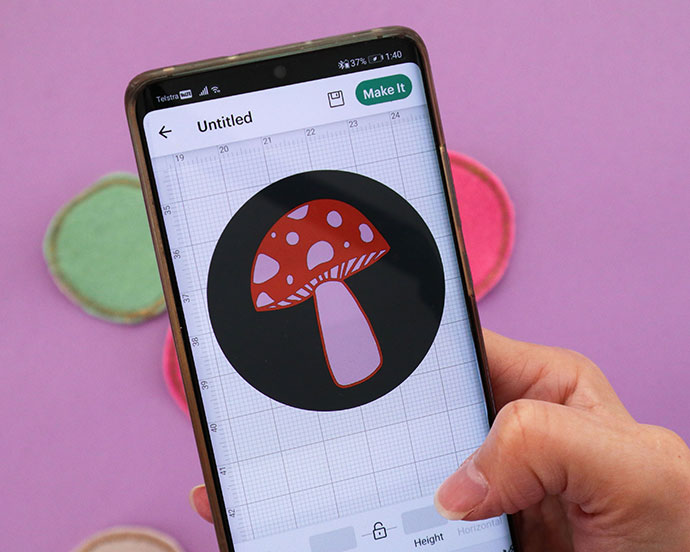
7. To help with scale, select a circle the same size as your patch and resize the mushroom design to fit in comfortably. Hide the circle before cutting stage.
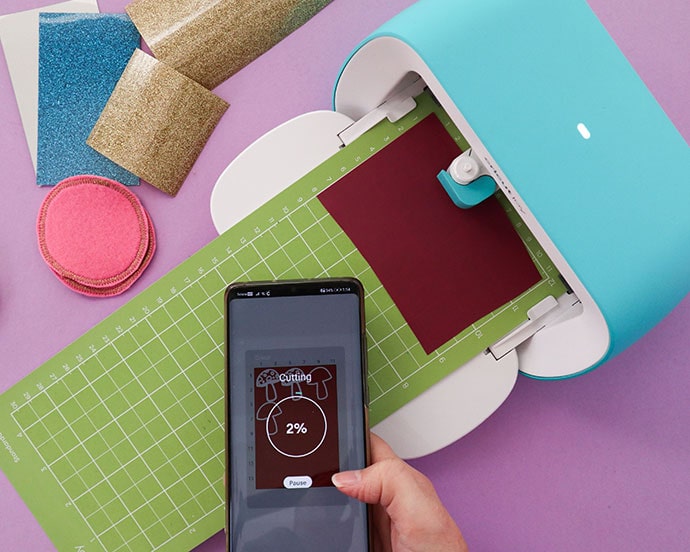
8. Follow Design space prompts to set up cutting mat and send to cutting machine.

9. Weed excess vinyl from design using the weeding tool. This stage can be fiddly with the small, intricate design layers.
Ironing the Mushroom design onto Patch
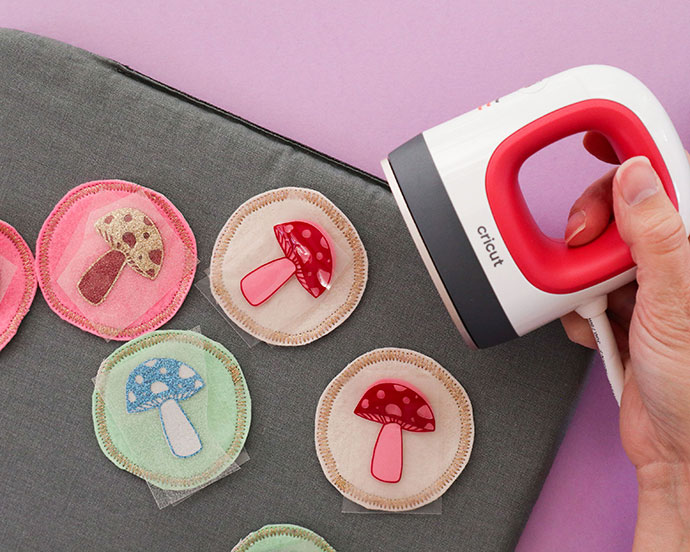
10. Warm up Mini Press to medium heat and match up layers in preparation for ironing.

11. Press the base layer of design for about 30sec on medium heat. I’ve used a layer of baking paper in between my press and the patch to protect the fabric surrounding the iron-on. Allow to cool before peeling plastic carrier sheet.
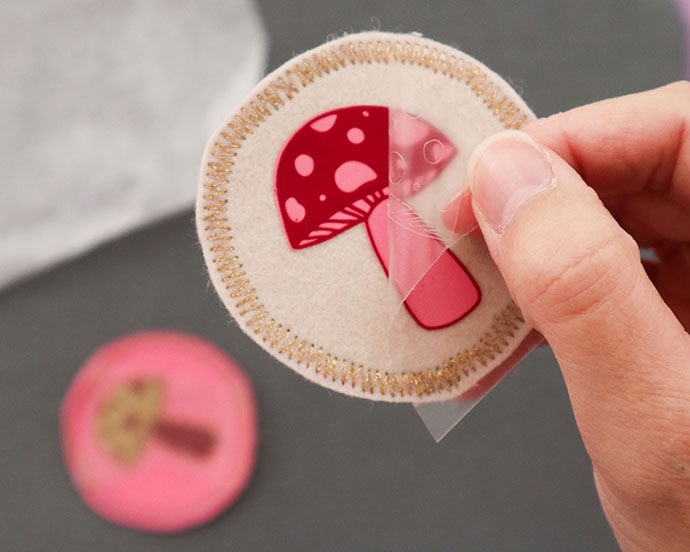
12. Repeat with 2nd layer of mushroom design.

All done!
How cute do they look!
They are so decorative, and a fun way to personalize clothing and accessories.

Sew your new mushroom patch onto a plain bucket hat to give it a little cottagecore twist.
I even added one of the patches to my Vintage Patch Denim Jacket. Barely managed to find a little bit of room on there – LoL.

Emma loves her cute cottagecore mushroom patches and is planning to give them out to her friends. The make great little gifts.