With St Patrick’s day around the corner, rainbow themed everything seems to be popping up on my Pinterest feed. But I don’t like relegating rainbows to just one day a year, and with this retro style Rainbow Wall Hanging, you can have a little rainbow in your home all year round.
If you are into bold graphic prints and 70’s styled decor (like I am), this wall hanging will sit comfortable next to any vintage pieces you may have.
I was inspired by the design of this wall hanging and used an array of bias tapes to create the rainbow’s arcs. If you aren’t great at sewing you could cut your shapes from felt and glue them on.
finished size about 76x43cm (30″x17″)
You will need:
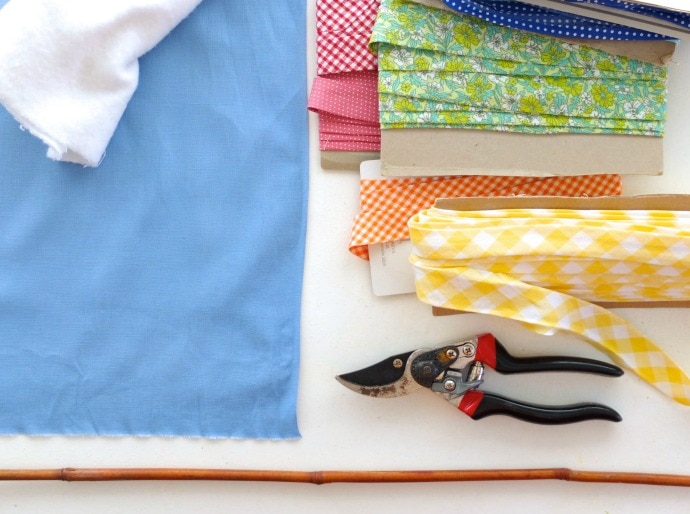
- Mid to heavy weight fabric (Canvas, twill or denim is ideal) cut to 41x84cm (33″x16.5″) – you can change this size to suit you space.
- Assorted coloured bias tapes 12-13 x 40cm (16″) strips (commercially made or see below to make your own)
- Large scrap of white felt or fleecy fabric
- Cord or thin rope for hanging about 55cm (21.5″)
- Bamboo Garden stake or thin wooden rod cut to 2x 43cm (17″) lengths
- Cutting tool for cutting rods (I used garden secateurs, a hacksaw would work too)
- Quick dry craft glue
- Matching sewing threads
- Sewing machine
- Iron
- Spray starch/ironing spray (optional)
- General sewing supplies
How to make Bias Tape
You will need: fabric, cutting mat, ruler, rotary cutter, bias making gadget.
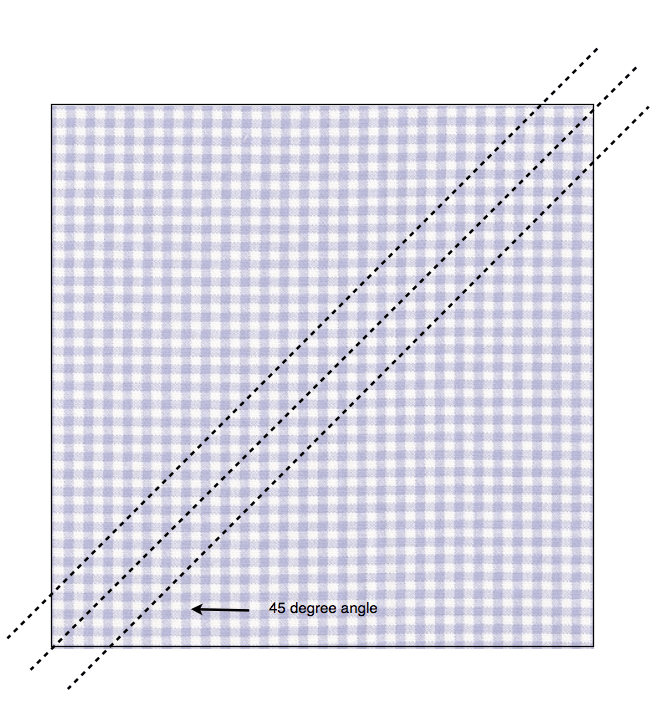
1. Cut 4.5cm (1 3/4”) wide strips on a 45 degree angle from assorted fabric.
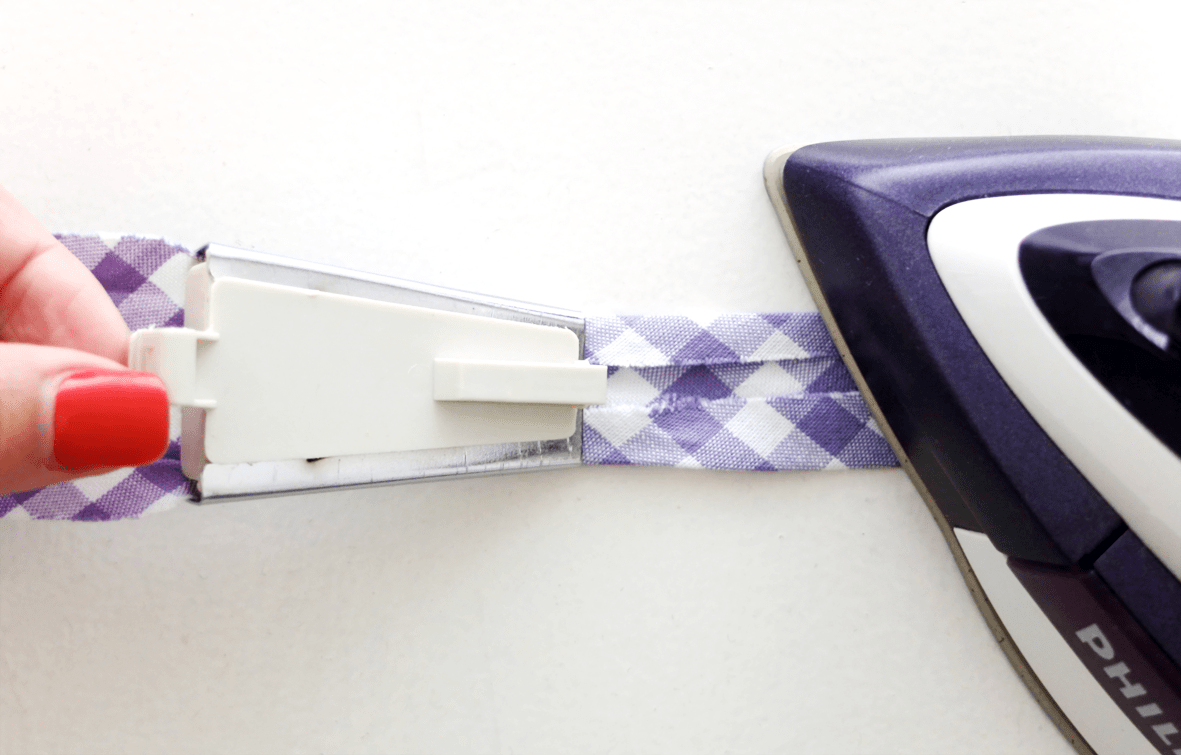
2. Feed your bias cut strip through bias maker, press flat with iron as you go being careful not to stretch it as you work. Depending on the manufacturer, your bias binding maker may look and work slightly differently from mine so it’s best to refer to manufacturers instructions for your particular gadget.
How to make Wall Hanging:
1. Press fabric really well, you can use spray starch to get a nice smooth finish and make your fabric a little bit stiffer.

2. Hem both long side sides by pressing a 1cm (0.5″) fold to back and stitch.

3. Make pocket on top and bottom of hanging by measuring size of rod and using that as a guide for width of hem.
4. Fold over and stitch, leave ends open.
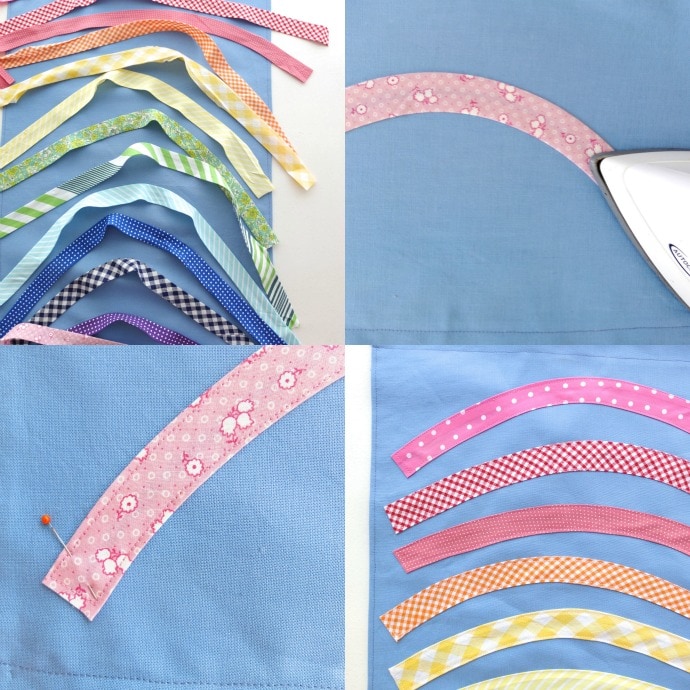
5. Arrange bias strips in a visually pleasing order.
6. Using your iron, gently press the bias strips into a curved shape.
7. Pin and stitch onto backing fabric with matching colour thread.
8. Repeat for other coloured bias strips.
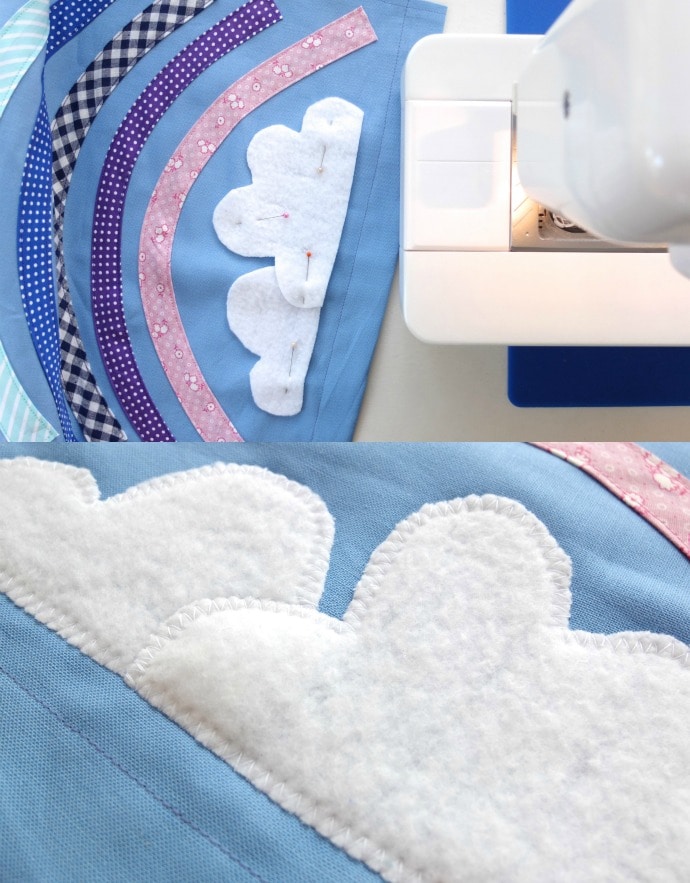
9. From felt or fleece, cut cloud shapes to fit under the rainbow.
10. Pin and zig zag stitch around edge of fabric.

11. Cut rods about 4cm (2″) wider than width of fabric hanging.
12. Slip rods into top and bottom pockets.

13. Tie cord onto top rod, you can adjust the length to suit. Trim ends and secure with a small drop of craft glue to stop the cord slipping off ends of rod.

14. Give your hanging one final starch and press, hang and enjoy!