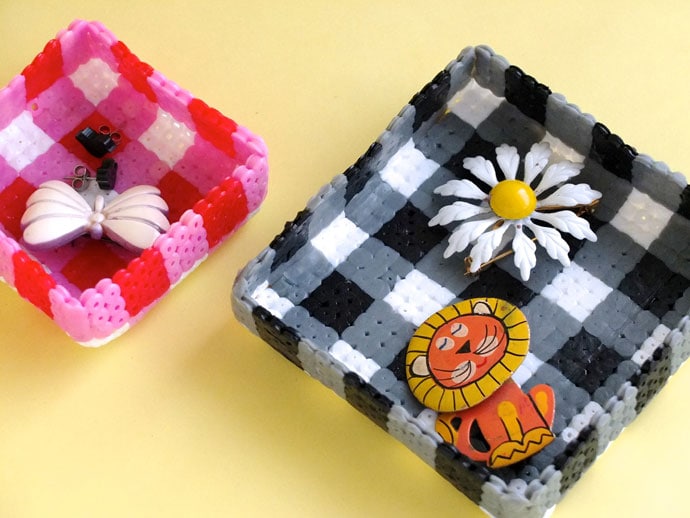
I’ve made these cute and practical DIY jewellery trays from Perler beads inspired by my love of gingham, they are the perfect little containers to keep my vintage enamel brooches in.

This post contains affiliate links
I really love the bold graphic contrast of Black & White gingham fabric, I use it a lot in my sewing projects but thought it would be fun to experiment with how the pattern would translate to other materials.
You can make this trinket tray any colour you like to suit your decor. Perfect for keeping small items tidy on a desk or craft space, make multiple sizes to suit your needs.
You may also enjoy the following Fuse bead crafts:
How to make a DIY Jewellery Tray from Fuse Beads
You will need:

- Perler or fuse beads in white and 2 other tonal colours (eg black and grey, or Dark Pink and Light pink)
- Large Square template peg board
- Tweezers (pointy)
- Silicone Paper (baking paper)
- Iron
- Small box or flat piece of wood
- Hard heat proof surface for ironing (I’ve used a large wooden chopping board)
Caution: This project involves melting and moulding hot plastic, please be careful not to burn yourself.
How to:

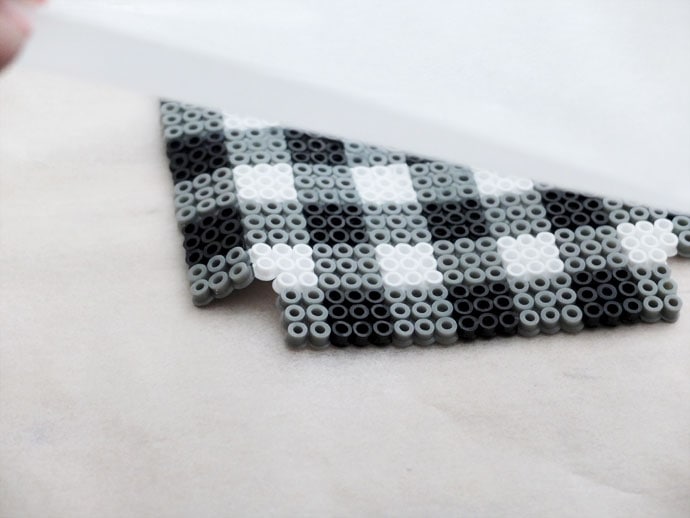
1. Lay out beads in a gingham pattern, tweezers are very helpful for this step. Each square is 3×3 beads. The bigger your template the larger you are able to make your tray.

2. Leave a 4×4 square empty on each corner. If you would like taller sided to your tray make the empty square bigger.

3. Lay the silicone paper over the bead design and gently press down with a hot iron (no steam) until the beads melt and the edges just start to fuse. Try not to move the iron vigorously or you will disturb the beads.

4. Gently remove the fused beads from the template and sandwich between 2 layers of silicone paper, un-ironed side up. Iron on a hard surface until both the back and front of the beads are fused, soft and pliable.

5. NOW YOU MUST WORK QUICKLY. While the plastic is still warm and pliable, bend up the sides of the tray so all the corners meet. Use a box or piece of wood too keep the sides flat. BE CAREFUL the plastic will be hot. If the plastic cools too much, it can get brittle and break if you try and bend it, so just iron that area a little more until its pliable again.

6. Once the sides are folded up, fuse the corners together by holding the corner edge against the base plate of the iron, make sure you have silicone paper in between or you will make a huge sticky mess on your iron.
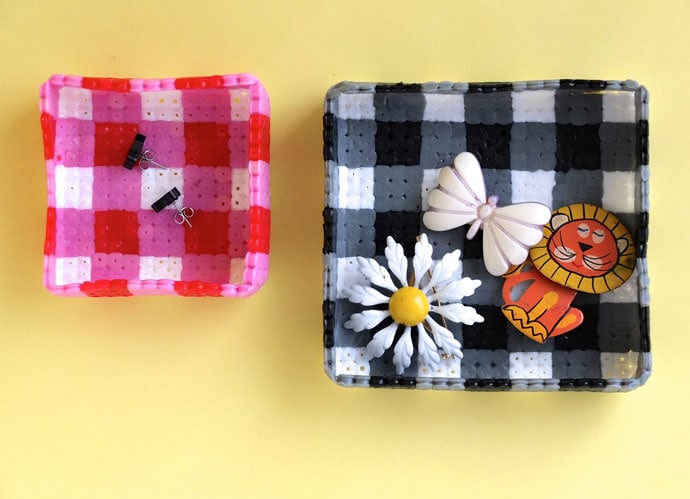
7. Let the tray cool and it’s ready to use. You can make various sizes and colours to suit your style.


Have fun making these Gingham DIY Jewellery Trays, I bet you won’t stop at one.


Hey Cintia, Your tray looking stylish and you did great job with beads and perfectly make this tray. I love this and would like to do the same.