If you’re drowning in little toys, LEGO minifigs, or small craft items, I’ve got an easy DIY storage box solution that will save the day!

This post contains affiliate links
You won’t even have to go out to buy any special supplies. An old shoe box and some cardboard is all you need to organise all those small items in this neat storage solution.
Previously on My Poppet we showed you how to transform a plain old shoe box into a glamorous vintage storage trunk.
Now we shall take it a step further and customise the interior of the shoe box with sturdy compartments to store small items.
Not only will your shoe box be oh so pretty, it will also be functional. With this shelving system, any bower bird will be able to neatly store their treasured stash.

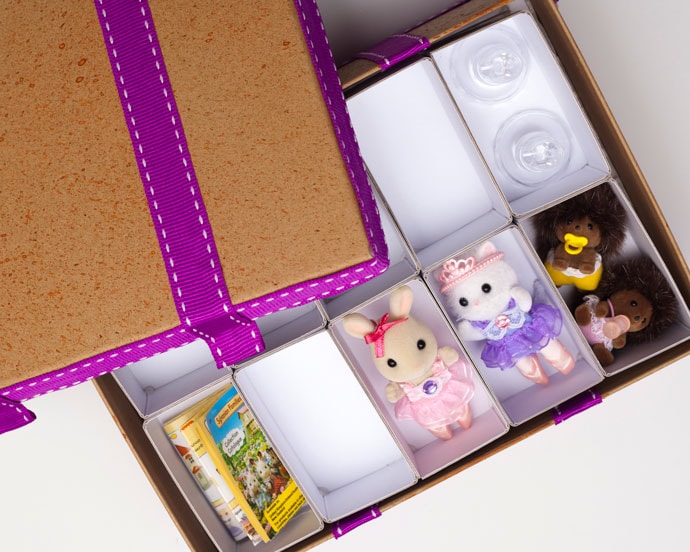
These mini storage compartments are ideal for storing so many little things.
Here are some small items you can organise:
- Toys – Sylvanian Families dolls, LEGO figurines or small parts, Polly Pockets, Toy cars, Barbie shoes and accessories
- Craft Supplies – Sewing machine feet, Buttons and haberdashery, Beads, Stamps
- Jewellery – Earrings, cuff links, brooches, rings
- Stationery – Erasers, paperclips, staples, sharpeners
- Beauty – Hair clips and ties, Makeup, nail clippers, mini perfume collectables
- Miscellaneous – Batteries, keys, charging cords, USB drives, Camera memory cards
As you can see, there are a thousand-and-one items in your home that could do with a bit of a tidy. So let’s get started on our Storage Compartment Box
How to add mini storage compartments to a shoe box
You will need:
- Shoe box
- Sturdy Cardboard
- Metal ruler
- Pencil
- Hot glue gun
- Adhesive tape
- Craft knife
- Cutting mat
- Thin paint brush or bone folder
- Eraser
amzn_assoc_placement = “adunit0”;
amzn_assoc_search_bar = “false”;
amzn_assoc_tracking_id = “mypoppet-20”;
amzn_assoc_ad_mode = “manual”;
amzn_assoc_ad_type = “smart”;
amzn_assoc_marketplace = “amazon”;
amzn_assoc_region = “US”;
amzn_assoc_title = “Need Supplies?”;
amzn_assoc_linkid = “614b9b0790730fef4916b0ea29437d6a”;
amzn_assoc_asins = “B00L5I8RG0,B002C12EHM,B004GXBXOE,B0721PTD5B”;
//z-na.amazon-adsystem.com/widgets/onejs?MarketPlace=US
Note:
- The cardboard needs to be thick enough for support, but not so thick that it can’t bend.
- You can vary the shape and size of your compartments to suit the size of items that need storing.
How to make a Storage Box with Compartments:
1. Measure and make a note of the internal dimensions of the shoe box. You will need the length, width and depth.

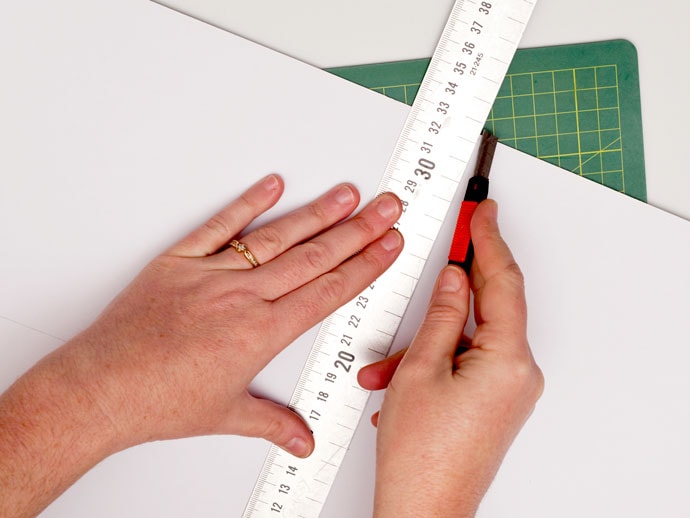
2. With your length (minus 2mm) and width (minus 2mm) measurements rule a rectangle. Then cut out the rectangle with an art knife and cutting board. This rectangle piece will be your shelving base.
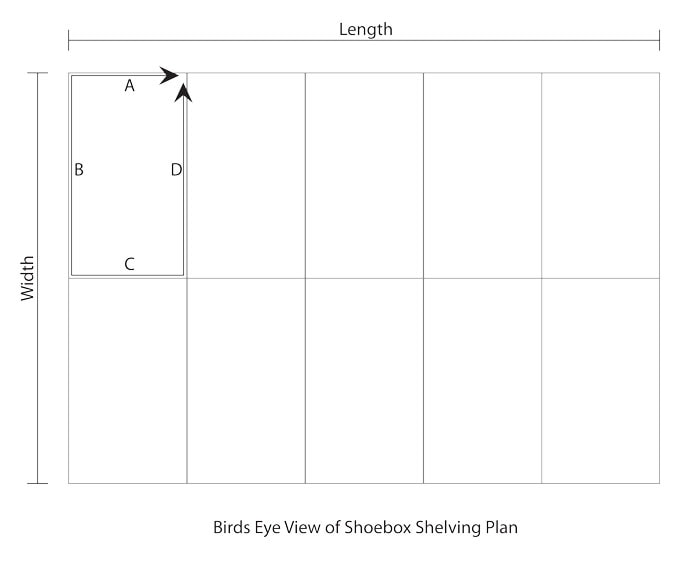
3. With pencil and ruler draw the shelving lines onto the base. Measure 1mm within the four sides (A+B+C+D) of one of the drawn shelf windows. Add up these four sides, and this will be the length measurement for making the wall of the first shelf box.
To get the width divide the shoe box depth by 2, then subtract 5mm. Rule and cut ten of these rectangles.


4. Using a ruler and the end of a narrow paintbrush score each of the rectangles made in Step 3, marking where the rectangles fold (Measurement A+B+C+D) to create a shelf box. Fold along these scored markers and tape the open corners together. Do this for all ten of the shelf boxes.


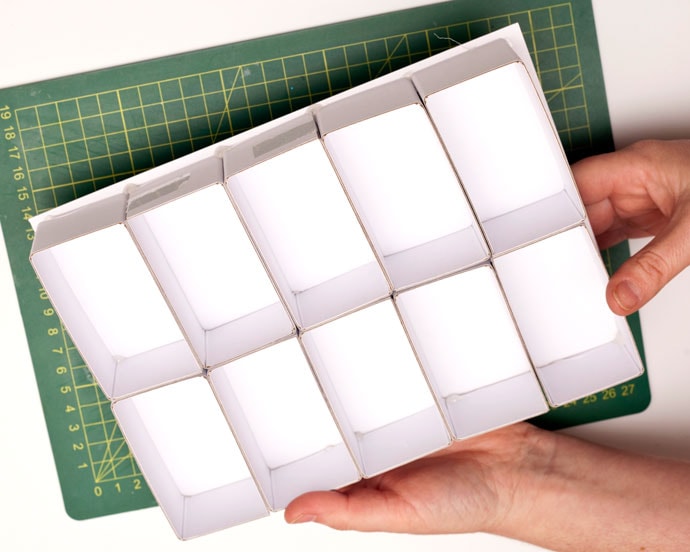
5. Warm up the hot glue gun, 5 minutes. Glue the shelf walls together, row by row, then joining the rows together.


6. Erase your pencil markings on the base. Quickly apply the hot glue to the bottom edges of the shelves, and firmly press to the base. Allow at least a minute for the glue to dry before using.

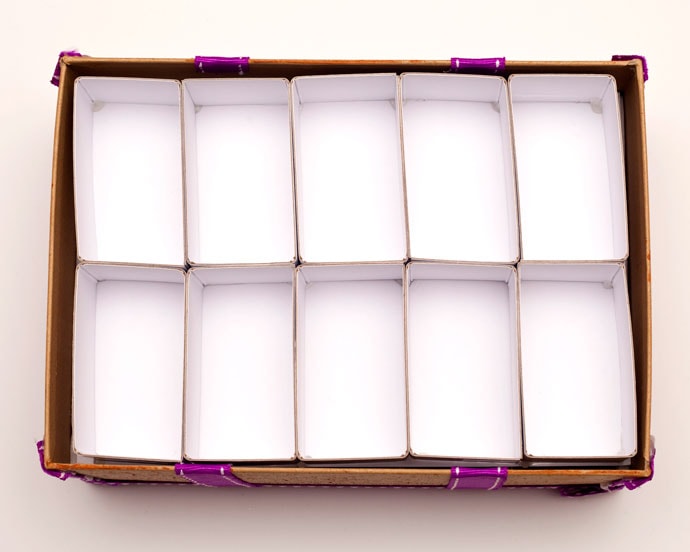
7. Gently slide your shelving into the shoe box, then you can make a second layer, following Steps 1 – 6.
That was easy! The tricky part is getting all your measurements sorted, but once that’s done, mini shelves come together quite quickly.
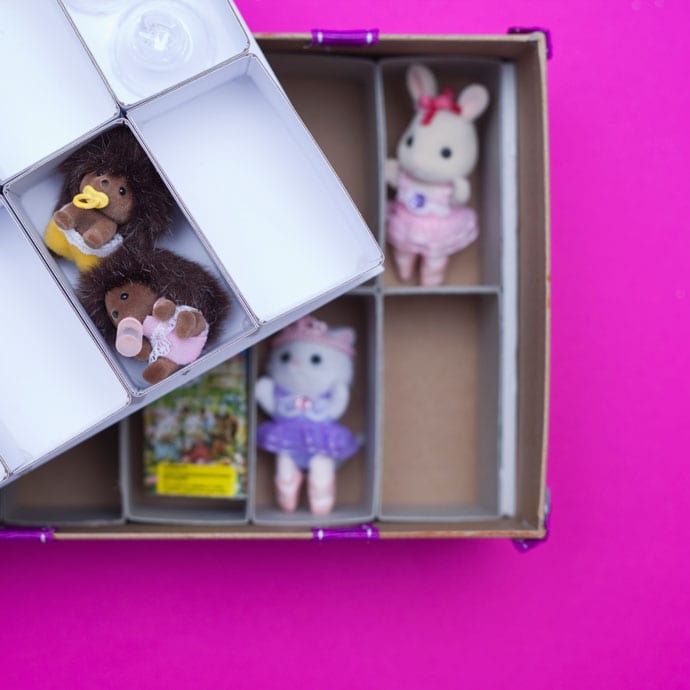
The double layer of mini compartments makes all those hard to find items very accessible at a glance. No more losing small items in the bottom of drawers.
Depending on the items you need to store, you can also make the compartments in varying assorted sizes to suit your collection. Marie Kondo would be proud.

 Melissa is a hyper creative artist, and content creator.


