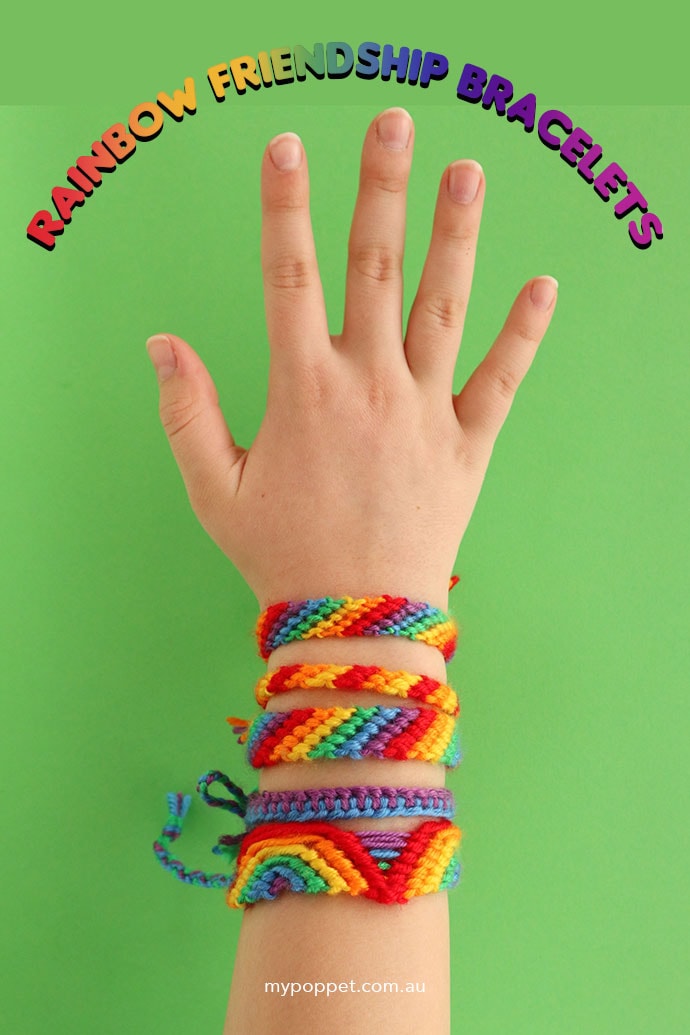
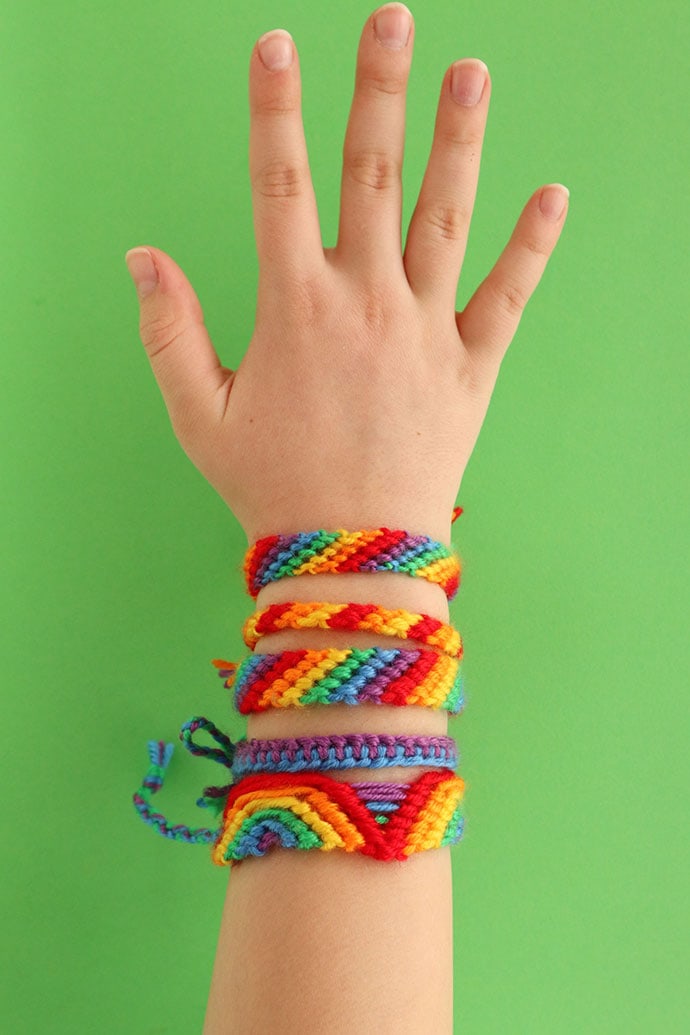
When was the last time you made friendship bracelets? Well it’s time to get knotting because I have 3 cheerful rainbow friendship bracelet designs made with the cutest box of yarn you ever did see!
This yarn review and Friendship Bracelet Tutorial is a collaboration with American Yarns. This post contains affiliate links.
American Yarns sent me one of their newest products to review – Crayola Yarn Box which contains 6 colours of mini yarn balls in a nostalgic Crayola branded box.
As soon as I saw bright rainbow colour selection, I knew it would be perfect for kids yarn crafts.

Each box comes neatly packed with 6 x 20g balls of yarn which conveniently center pulls to avoid tangling.
The yarn is 100% acrylic and are about a 5-8ply weight.

Because it’s a small amount of yarn overall, I probably wouldn’t recommend it for crochet or knitting projects, as it won’t go far.
But if you are after small amounts of several colours for yarn craft projects like, making pom poms, small weaving projects, or decorative yarn tassels, this box set is idea!
I was inspired by the bold rainbow hues to try my hand at making some Rainbow Stripe Friendship Bracelets!

Emma had never made friendship bracelets, so I thought it was high time we had some quality crafting time together.
Using yarn instead of embroidery thread made knotting easier for a beginner.
She is very keen to make lots of these over the school holidays to give to her friends once school goes back!
How to make Friendship Bracelets 3 Ways
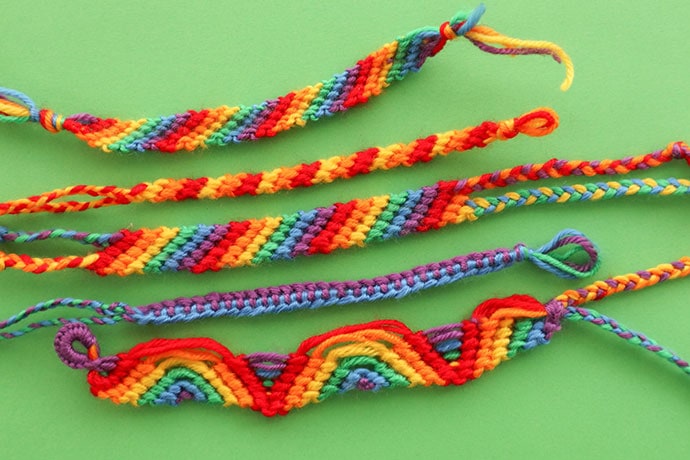
Once you know the basic knotting technique required to make friendship bracelets, you can create an endless amount of unique friendship bracelet patterns and designs.
This easy yarn craft is super portable and requires minimal supplies.
Most yarn or embroidery thread works fine for making friendship bracelets, but if you are just starting out, a thicker thread (like doubled over yarn) makes it easy to master this craft technique.
A clipboard is handy not only to secure the end of your yarn while you work, but also to use as a flat working surface.
Alternatively you can go ‘old school’ and use a safety pin to fasten the end of the bracelet into your jeans or a pillow.
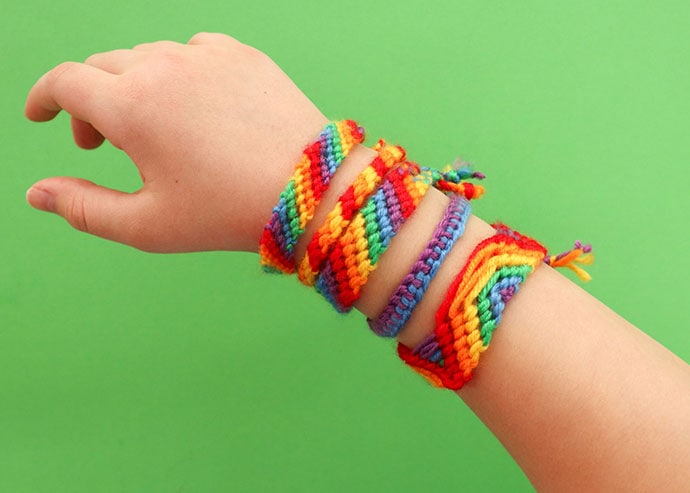
I’ve included detailed instructions for making two fairly easy friendship bracelet designs, and have linked to a video explaining how to make a super fancy rainbow arc pattern, if you want to challenge yourself.
I guarantee, once you get making, you’ll be hooked!
You will need:

- Crayola Yarn Box (or yarn in 6 colours – red, orange, yellow, green, blue, violet)
- Clipboard or safety pin
- Scissors
How to make a 6 Strand Diagonal Rainbow Friendship Bracelet:

Note: I’ve used doubled up yarn (2 strands of yarn) for each colour. For a less chunky bracelet, use one strand of yarn.

1. Cut 6 strands of yarn to measure about twice the length of your arm. It’s always good to have a little extra length.

2. Fold yarn in half and knot leaving a little loop.

3. Secure to clipboard (or pin to secure), and separate yarn strands matching up colour pairs in order left to right – red, orange, yellow, green, blue, violet. From now treat double yarn strand as one thread.
How to make a Forward Knot (4 knot)
The hitch knot is the basic building block of friendship bracelet knots. The forward hitch is sometimes called the 4 knot as it resembles the shape of a 4 when you make it. Each forward knot is made up of 2 hitch knots.
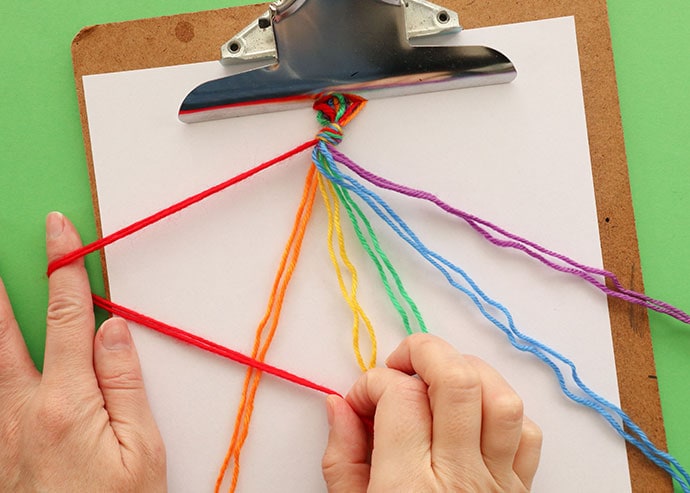
4. Cross the left-hand working thread (red) over the right-hand base thread (orange).
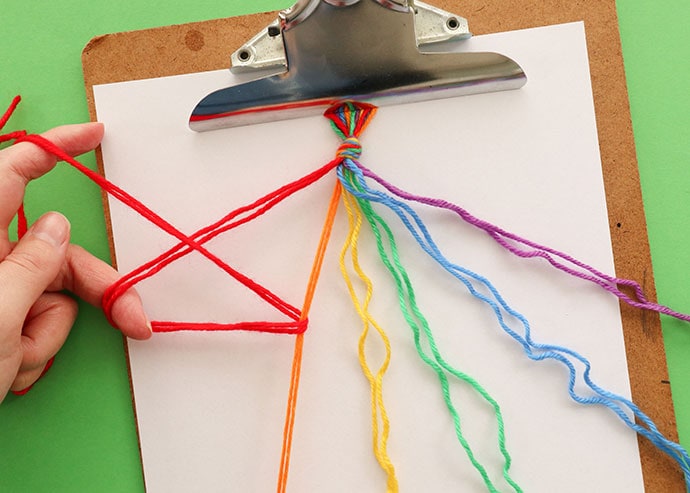
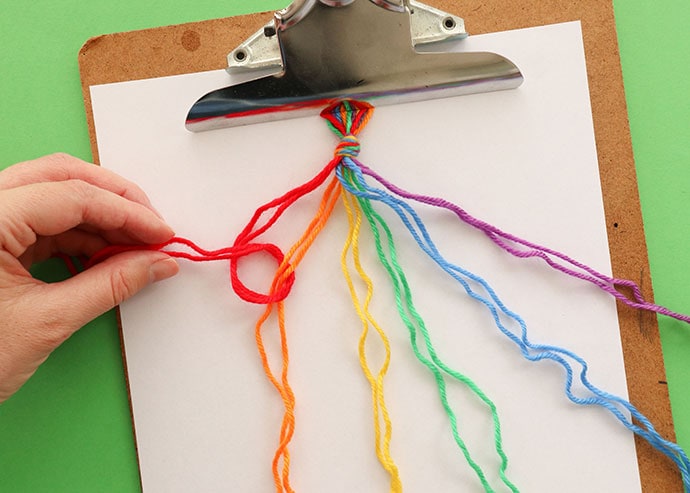
5. Pass the working thread under the base thread and back up through the loop. Tighten.
6. Do this TWICE – 2 forward hitch knots = a forward knot
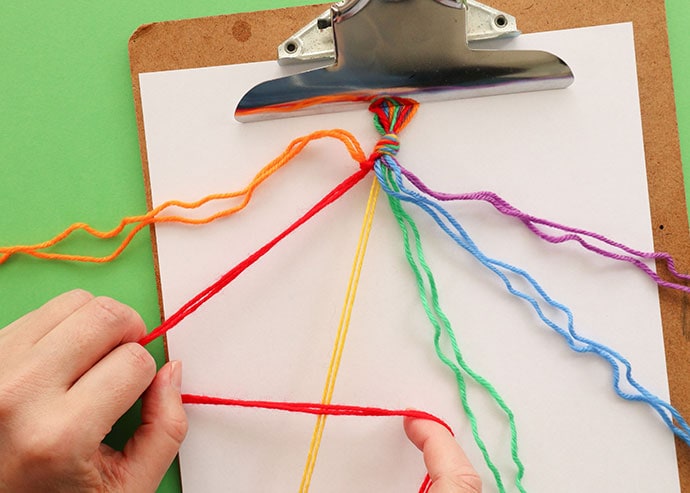
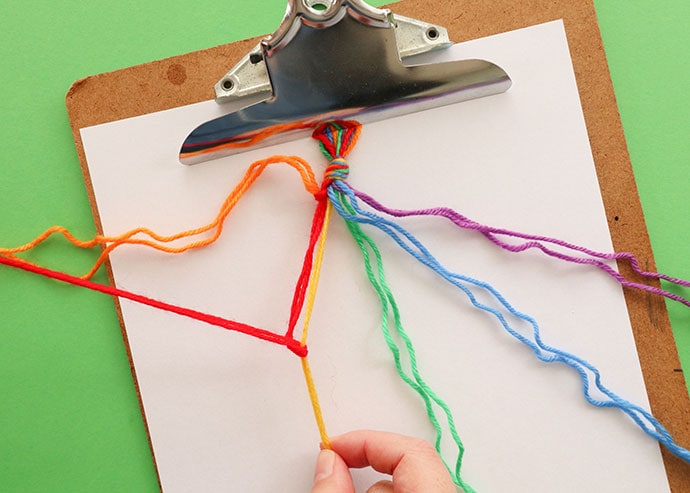

First row of hitch knots finished
6. Make 2 forward hitch knots per strand working from left to right. eg. Red will knot over orange then yellow, green, blue and violet.
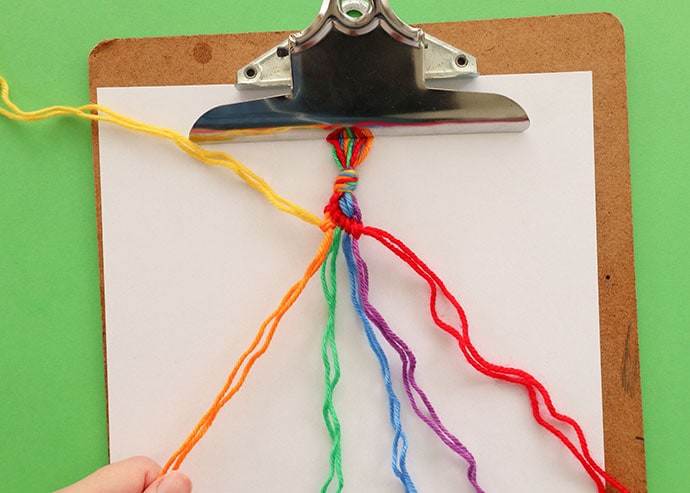

7. Once you have made a row of red knots, start knotting with orange strand from left to right finishing over red.


8. Continue working from left to right making diagonal stripes with each yarn colour. Continue until bracelet is desired length.

9. After every row, flip bracelet over and push on back of knots to tighten for a neat finish.
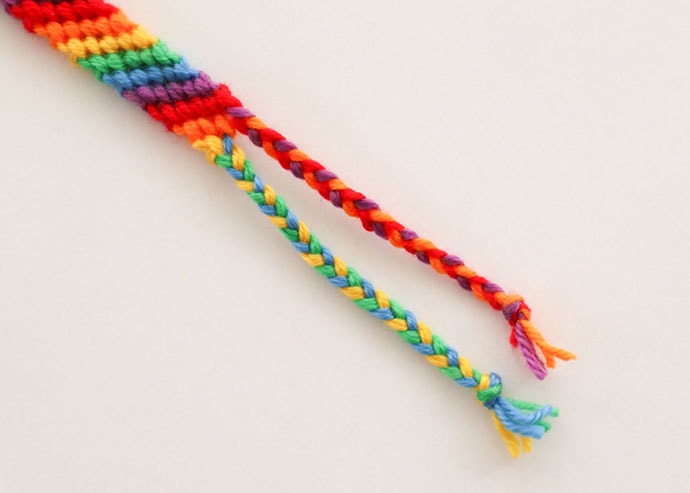
10. Complete bracelet by braiding remaining ends of yarn.

Tie off through the loop to secure and wear.
How to make a Zipper Friendship Bracelet:
A zipper bracelet is made with 3 strands of yarn. The zipper effect is created by working alternating half knots over a center strand.

Unlike a regular bracelet knot that needs 2 hitch knots per strand, this bracelet only requires one hitch knot per strand.
1. Start by measuring 3 strands of yarn about the length of your arm.
2. Tie 3 strands together to secure. Separate left, right and center strand.

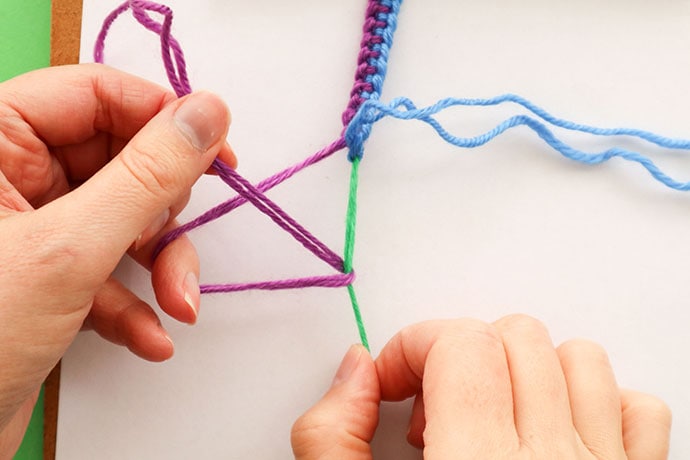
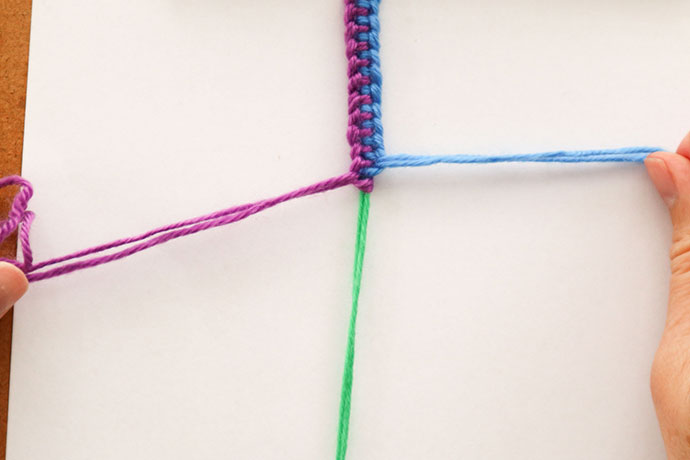
3. With left strand, make a forward hitch knot, and pull to secure


4. With right strand, make backward hitch knot, and pull to secure.
5. Keep alternating knots until until bracelet is desired length.

6. Braid and knot ends to finish.
How to make a Rainbow Arch Friendship Bracelet:
Once you’ve mastered the basic friendship bracelet patterns, try making this arched rainbow bracelet.

Follow this video tutorial by Beyond Bracelets for full instructions. It’s easier than it looks.
Mix and match colour combinations, amount of stands and patterns to vary your bracelet designs.
Have fun making these with the whole family. Hopefully they’ll keep the kids entertained, for a little while anyway.
Hands up if you love making rainbow friendship bracelets!
All yarns featured are available from www.americanyarns.com.au

