Sometimes a craft idea hits me so quickly I need to drop whatever I’m doing and get started right away. This is what happened to me a couple of evenings ago whilst I was drinking a soda (it’s my only vice) and looking at my calendar.
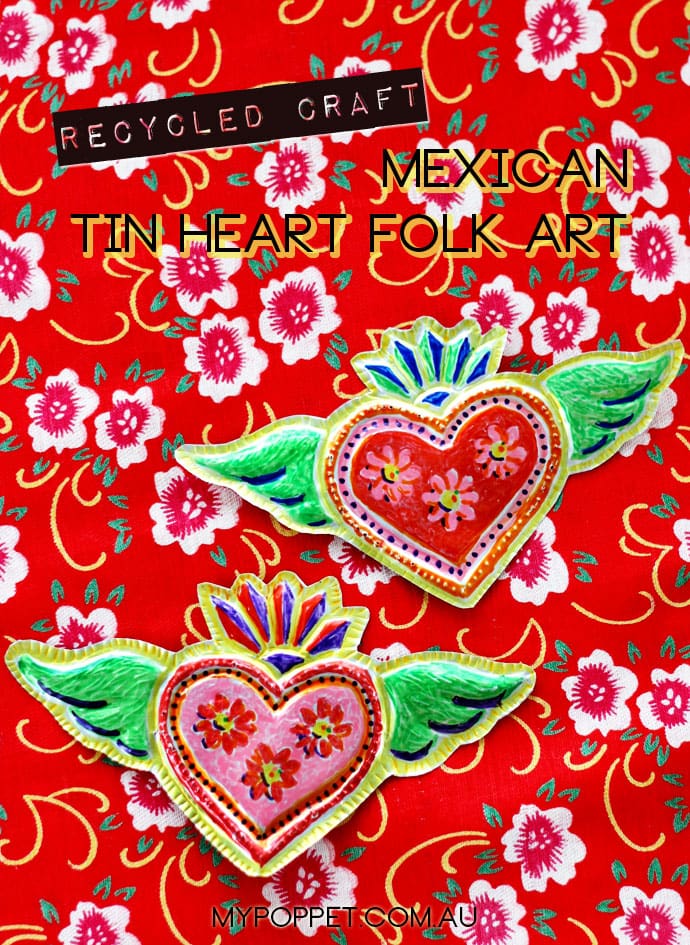
Here is how my brain works…”Valentine’s Day is coming up -> Hearts -> Metal can in my hand -> Recycle -> Metal Craft -> Mexican Tin Folk Craft -> Mexican Milagro Heart Decoration DIY Craft Project!”
Sometimes I wonder how I get anything done at all with all these ideas bouncing around in my head all the time. But I’m so glad I gave this one a try because I really love how they turned out and the fact that they use recycled materials (I had everything on hand) was a real bonus.
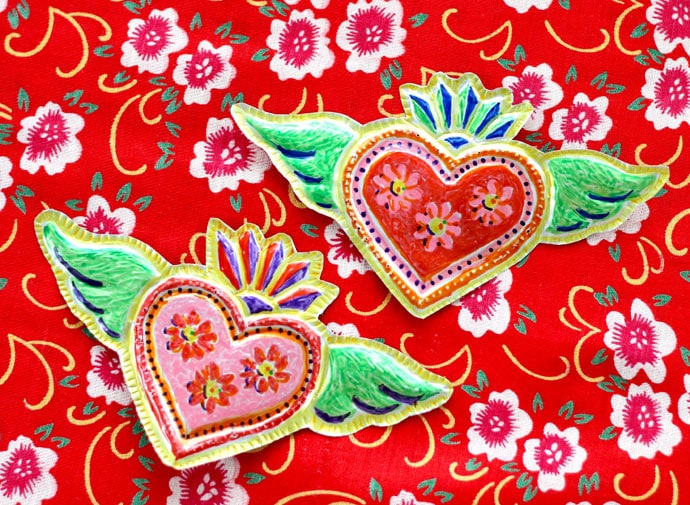
These colourful Mexican Folk Art inspired Decorations look so pretty displayed on a wall, or as part of a vignette. They make a lovely gift that is easily posted (just wrap it up well so they don’t get squished).
Traditionally Milagros (which literally means miracle in spanish) are used as religious folk charms to symbolise a prayer, or something to be grateful for. More commonly these days Milagros are used as decorative items.
They come in many designs but hearts can represent the human heart, and it might be connected with cares of worries over a heart condition, or the love that one person feels for another.
I like the idea that you may make a little tin heart and think of a person you care about. Keep it for yourself or give it as a gift to them to remind them of you.
You will need:
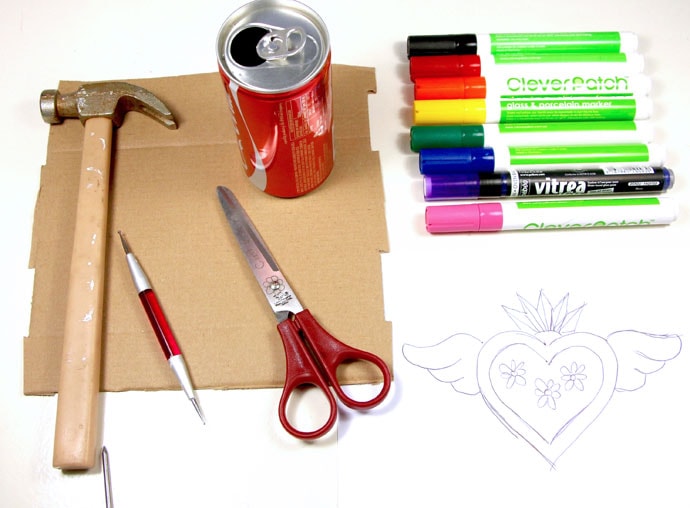
- Aluminum drink can (washed)
- Scrap cardboard
- Craft Knife
- Scissors (not your best fabric ones)
- Ball tipped burnishing tool (I’ve used a nail art dotting tool, but an old ballpoint pen will work too)
- Hammer
- Blunt Nail
- Pencil and Paper for your design sketch
- Porcelain & Glass Markers (Sharpies will work also)
How to:
Take Care: Please use caution when cutting and handling aluminum can as edges are very sharp and can cut you. This craft is not suitable for kids and is for display only where minimal handling is required.
Firstly measure the height and diameter of the can, that will be the maximum size of your piece.
Sketch a design on a piece of paper that fits the size of your measurements.
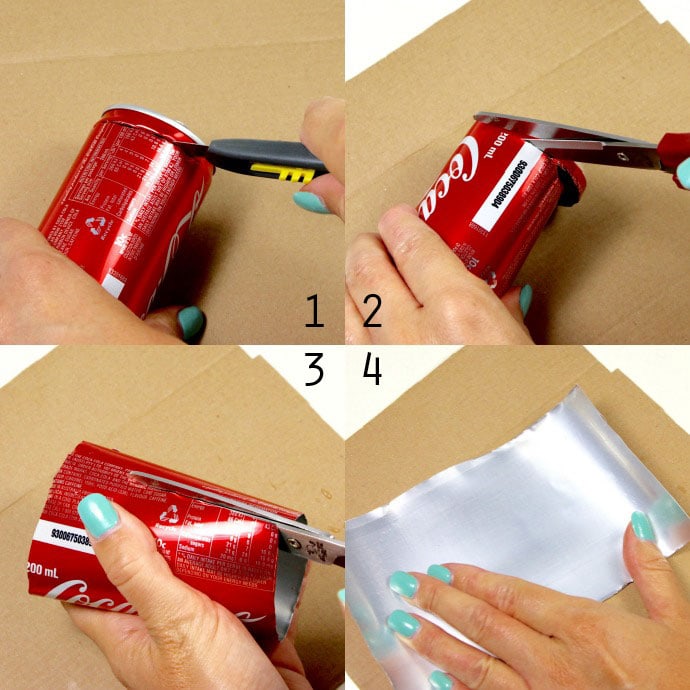
1. Use a craft knife to cut a slit in the top and bottom edges of can.
2. Finish cutting with scissors to remove top and bottom of can.
3. Cut can open.
4. Flatten out can by rubbing the back side on the edge of a table to take out the curl.
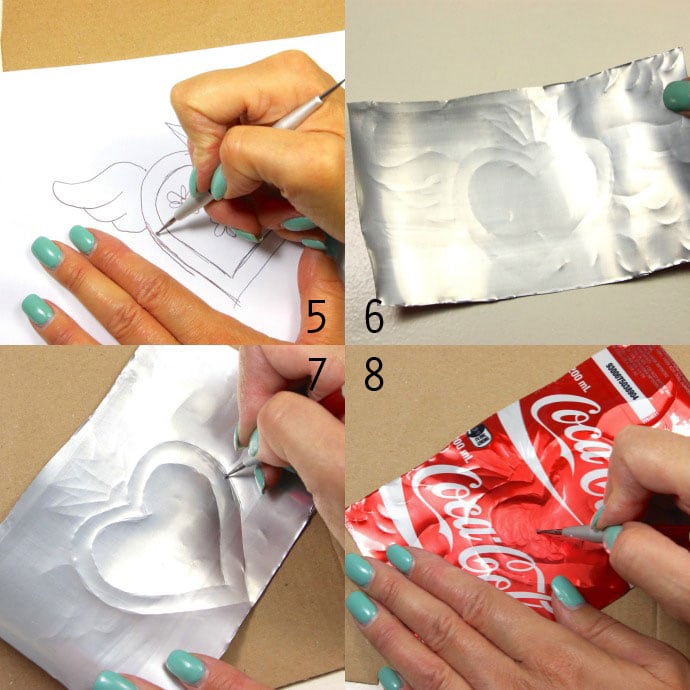
5. With cardboard as a work surface, trace your design onto your metal sheet with the ball tipped tool.
6. You should be able to faintly see the design embossed in the metal.
7. On the top side of the metal, emboss the lines with the ball tool.
8. On the reverse (printed side), rub the center of the heart in little circular motions.
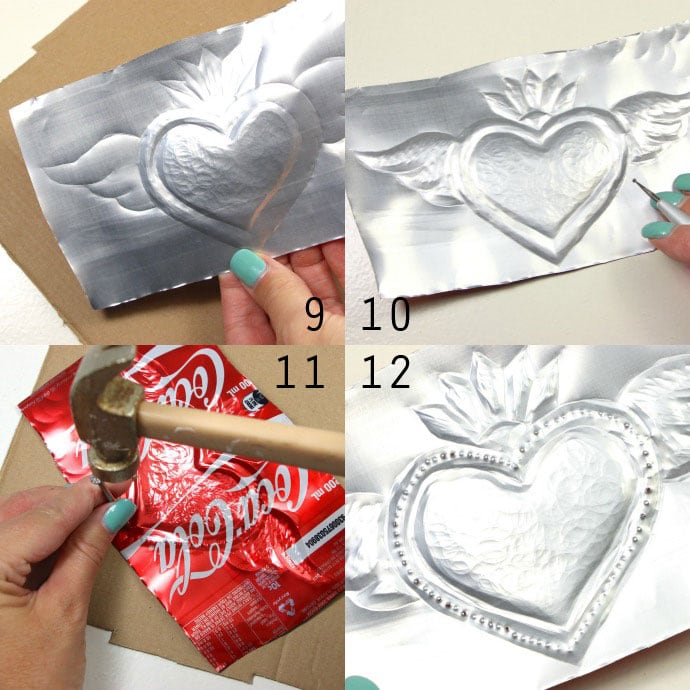
9. You should start to see some the shapes really popping out, it takes time so be patient.
10. Next work on the wings and crown area until you are happy with the over all effect.
11. (This part is optional but I think it adds to the authenticity) With the hammer and blunt nail, gently punch a design around the heart shape, trying not to punch right through the metal if you can help it.
12. Just do your best, it doesn’t matter if it isn’t perfect.
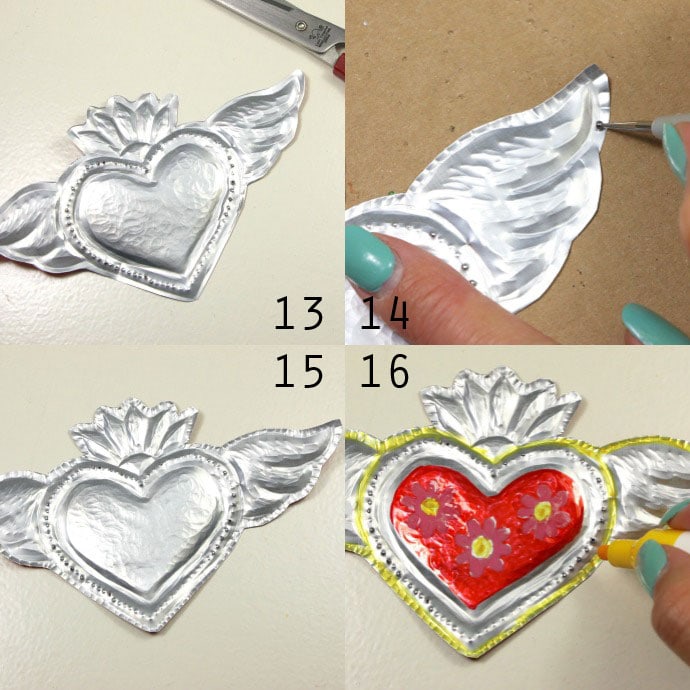
13. Cut out shape with scissors leaving a 2-3mm edge.
14. With the ball tipped tool, press little ridges in the edges to add texture.
15. Here is the finished metal work.
16. Paint your design with glass markers or sharpies. I found the glass marker gave a lovely translucent enamel like finish, but they took several hours to dry so be careful of colours bleeding.
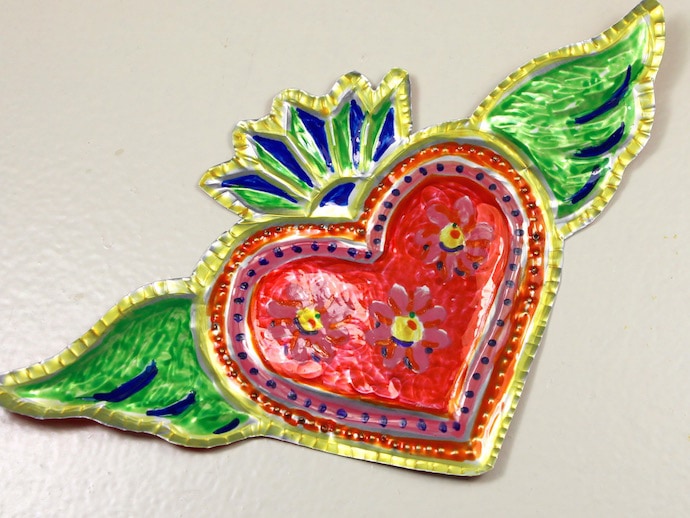
This terrible artificial lighting actually does a good job of showing off how the metal shines through the glass paint. It’s hard to capture the luminosity in daylight.
Leave to dry if required. If you want to hang them you can punch a little nail hole in the top.

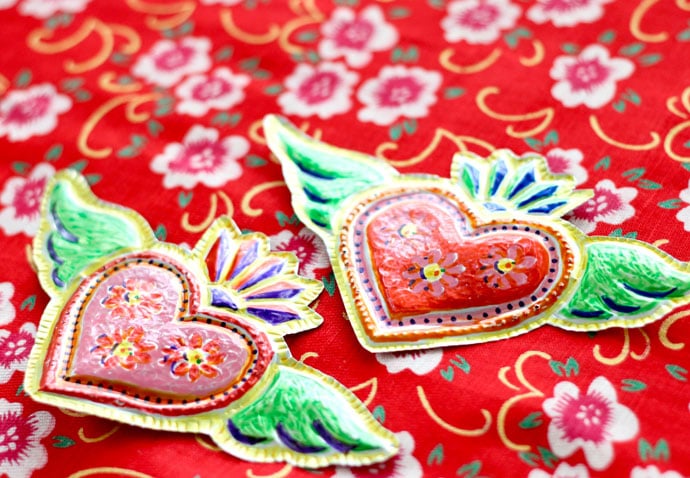
All done! What do you think? I really loved how they turned out. It’s hard to capture the luminosity of the metal through the paint in the photograph, they actually look a lot prettier in real life. I’m looking forward to sketching out some different designs and making some more soon.
Do you like Mexican Folk Art?
LOVE IT? PIN IT!


These are gorgeous I love the colours I think they would make a great decoration or embellishment of something, not quite sure what but pinning for later. Great tutorial as well and great photos, love the red background.
I’d love to see what you come up with x Cinti
This is such an awesome idea, I love that it is made with a can!
Love it! I could make great brooches if I add some varnish or liquid glass. Thanks for the inspiration!
COOL, really cool idea for Mexican crafts! Creative & colorful, INDEED! Your tutorial is detailed & easy to follow. Thanks for sharing, Cintia!
wooow such a beautiful heart this is!!!!!! And thank you for your tute! And of course of the sharing.
I understand finelly those tin crafts, sometimes i think ooooh i must try to buy those tins but , now i know it’s those tin drinks;-D
Thank you very much and as well for the beautilul picts.
jet
Hi Jet, so nice to hear from you! Hope you have been well and the winter has not been too cold. I always think of you when I make recycling projects. Take care, Cintia
Oh’, thank you for sharing this! I just love winged hearts. I cant wait to give it a try
Have fun recycling <3
I really LOVE your heart, how beautiful! I like the idea of trying those markers instead of alcohol ink pens or plain old alcohol ink. Your colors are very vibrant. This also makes me think I could run it through the Sizzix with a Bigz and use an embossing folder… okay you’ve filled my head with ideas lollll!!! Thank you and very well done.
Great thinking. I wonder how well the embossing would work. Report back if you have success.
I fell in love with Mexican Folk art when visiting Austin and finding a great shop filled with all sorts of things I loved. I bought some tin art and other trinkets, but have always wanted more. I’m so happy I stumbled upon your tutorial and blog. Thanks so much for sharing!
do you have any tips for finishing the edges so they are not razor sharp?
You could try sanding them with some sandpaper or a nail emery file. That may help take the edge off.
i used the hammer to tap and rub the edges. i have not used a can but have used vintage tins and metal sheeting.
i found your fab tutorial b/c i just bought a mexican tin xmas tree that is unpainted, and i was searching for tin art & how to decorate/paint it. now i’ll do this, too! thank you!