This tutorial was originally created and published last winter on my (sadly neglected) sewing blog MADE OF CLOTH. It had a great positive feedback so I thought it was worth revisiting.
I recommend this as a project for intermediate sewers and assumes some experience with inserting zips and attaching bias binding.
Last winter Emma had a giant growth spurt, her old sleeping bag is too short for her and a little fitted around the armholes. I had a few hours to spare today and thought it was time to make a nice warm one for this winter. I will share the steps I used to make her new sleeping sac/bag without using a pattern…
1. I choose to use a thrifted vintage woolen blanket which was going cheap due to several holes, some vintage cotton flannel (pre-washed) and the longest zip I could find in my sewing room (I’d probably reccommend buying a new one that locks nicely once zipped up, I used an older one here that opened very easily which meant that Emma could unzip the bag and climb out of her cot). You will also need some bias binding for the neck and arm holes. 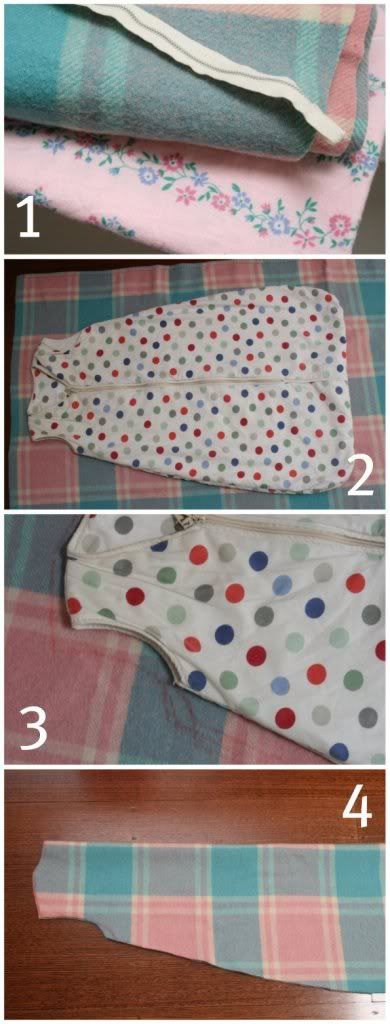 2. You will need to use the old sleeping bag as the pattern template.
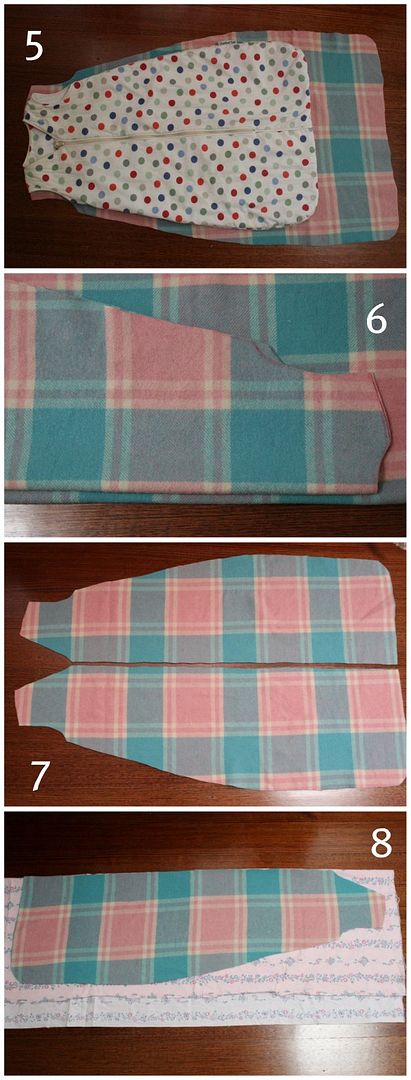
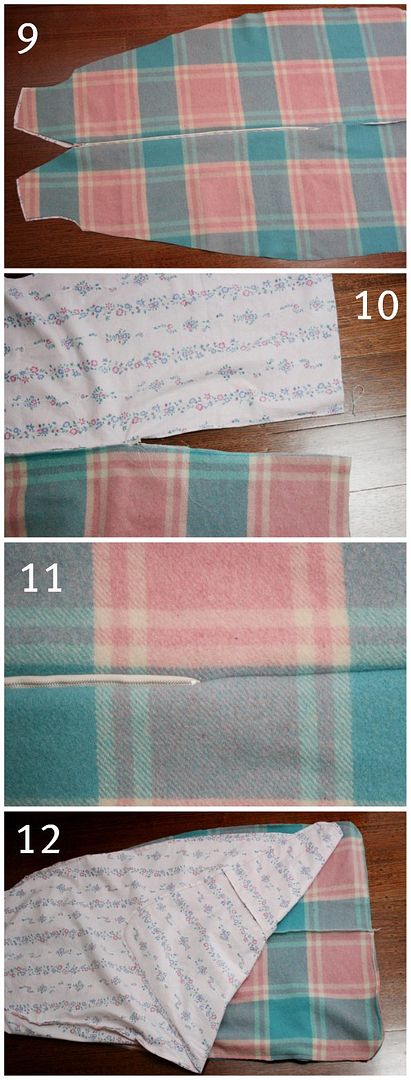
3. With a washable marker roughly sketch the new sleeping bag shape using the old bag as a guide. I added about a 2 finger width on the body, made the armholes a bit deeper and longer and made the total length about 20cm longer. You can tweak the shape a little as you go.
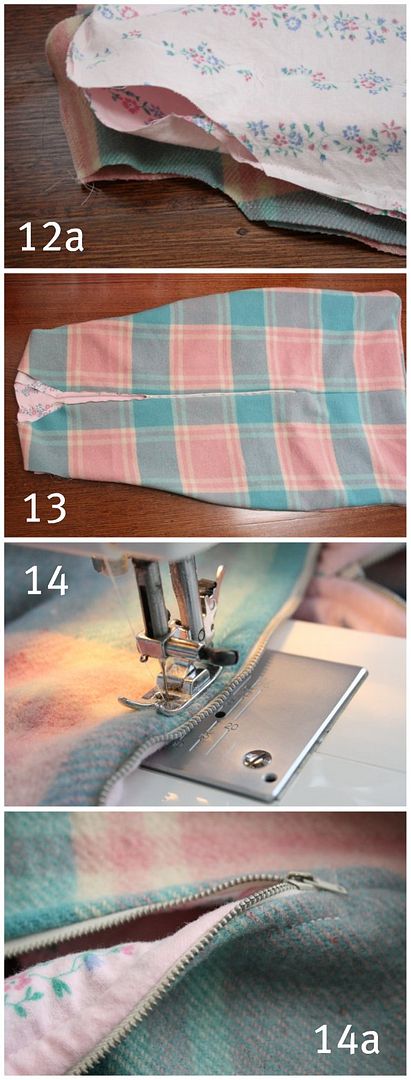
4. Cutting the back: To get a symmetrical body fold the blanket in half and cut on your markings.
5. You can see how much larger the new back panel is compared to the old sleeping bag.
6. Cutting the front: On a fold place the folded back panel to use as your pattern but place it 1cm in, this will be your seam allowance to insert zip.
7. Cut front and then cut along centre fold to make the 2 halves of the front. Cut a V panel out of the front using the original bag as a guide.
8. Use your back and front blanket panels to cut the same pieces in the lining fabric. (It’s a good idea to have the lining a little bit smaller than the outside but I’ll tell you how to adjust this at the sewing stage)
10. Because the zip doesn’t go all the way down, you will need to continue the seam down on the zipper line. Fold your lining onto itself (right sides together and seam, do the same for blanket front panel pieces)
11. Your seam should look like this
12. Now its time to sew the backs to the fronts. Blanket outer, right sides together, 1cm seam allowance, sew around from under arm to under arm, and then the top of the shoulders. Do the same with the lining but use a 1.5-2cm seam allowance. (this will make the lining sit in more comfortably) 12a. Make sure you leave the arm openings open!
13. Turn it all the right way, lining in and outer out.
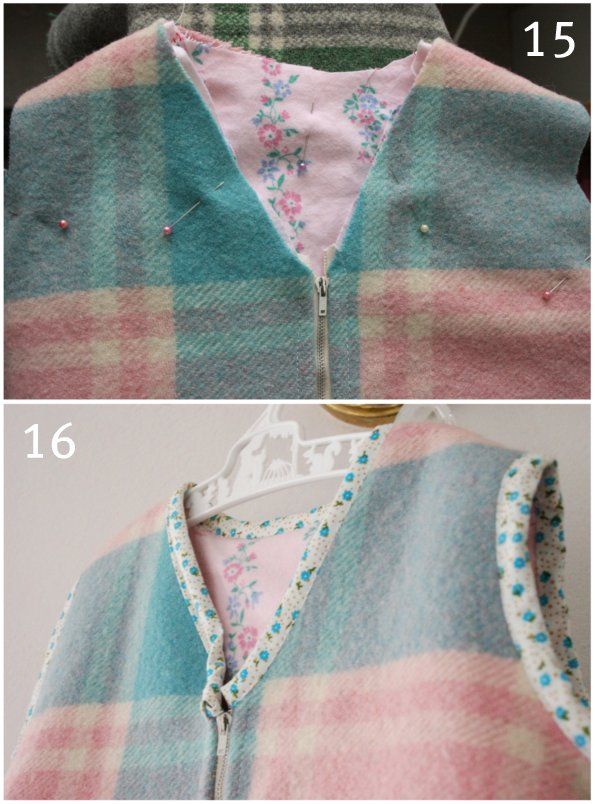
14. So the zip doesn’t get caught in the lining, top stitch around the zip.
15. Pin and trim any protruding lining.
Optional- Adding a little tab with a press stud at the neckline over the zip will help prevent the bag being unzipped by a clever toddler.
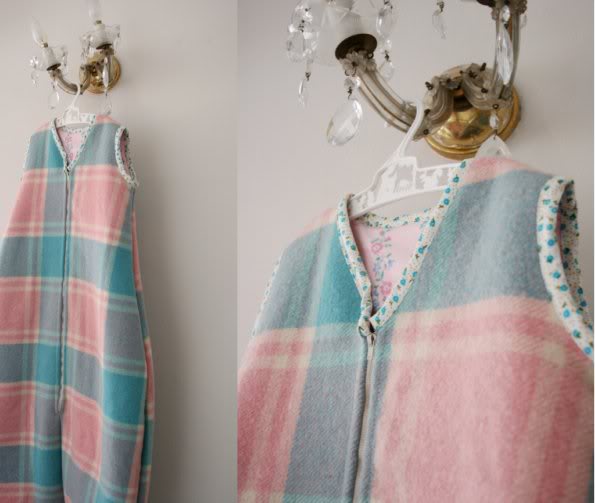
So what do you think. I saved myself around $80-$120, the cost of a new woolen sleeping bag, just by making my own with material from my stash. I think this one would be warmer and much nicer than any bought ones. I am quite pleased with how it turned out, I have a fear of projects with zips so I pleasantly surprised myself. I would love your feedback if you give this a try.
www.mypoppet.com.au


I love this! I've been wanting to make my toddler a warmer version of her sleep sack, but didn't know where to start. Thanks for posting! 🙂
It looks great. I made a winter sleep sac recently too, but I used the wool between 2 layers of flannelette…I didn't think to make it a feature. Nice!
So sweet!
This is so great, I have been thinking about trying to tackle one of these.I have a spare woolen blanket just like this in my cupboard .thank you so much for sharing and taking the time to post. You are very clever 🙂
This is really gorgeous! I am going to try to make one! I think I will put the zip on upside down so it opens from bottom to top and hopefully my little one wont be able to reach the bottom of the sleeping bag to get at the zip fastening… here's hoping anyway 🙂
I sooo have to do this one too! My almost two year old loves his sleeping bag so he will need a bigger sized one. I really didn’t want to cash out $15 for a fleece one when I can just make my own. Now that I have your tutorial it should be easier and yeah, maybe putting the zip upside down might even help with sneaky toddlers and maybe two slits (front and back) for seat/pram belts… You are awesome.
Great blog! I’m perusing for ideas because my2-yr-old granddaughter (whom I am raising) crawls in and out of her crib but she’s not ready to convert to a toddler bed. I’m hoping that a sleep sac will impede her ability to crawl out of the crib. She’s definitely capable of unzipping, though, so I’m going to try a button version of the sac, with the buttons on the shoulders. I may even have to pin it to her pajama top if she figures out how to pull her arms out of the sac. LOL Little monkey is determined! I’m a few inches short on fleece (which I want to use) to make a sac that is long enough, so I’m going to take an existing sleeveless shirt and just add the “sac” to the bottom of it, then open the shoulders and add buttons for the closure. Using the sleeveless shirt will also save me the trouble of cutting and binding the neck and arm holes. Woo-hoo! Hope mine turns out as well as yours! Thanks for your blog!
Great idea re: t-shirt, especially for summer as it’s more light weight. You could also try the buttons on the bottom of the sack so you wouldn’t have to open the shoulders.
Thanks! Going to try making one for my 2yo in a lightweight fabric (it’s the height of summer and some nights are currently 35 Celsius) in the hope it stops his ability to climb out of his cot- rather than spending $100 on one big enough for him without even knowing if it will work.
I’m going to reverse the neckline though and put the zip at the back so he can’t undo it
I think that is a great idea. My kid started climbing out of her cot at 18months so I eventually gave up and just removed the sides as she was persistent an took a few tumbles.
Hope it solves your problem and you all get some sleep.
Yeah we tried taking his bars off a couple of times before and after #2 arrived, but it was a disaster and no one got any sleep, so we’re eager to delay it this time