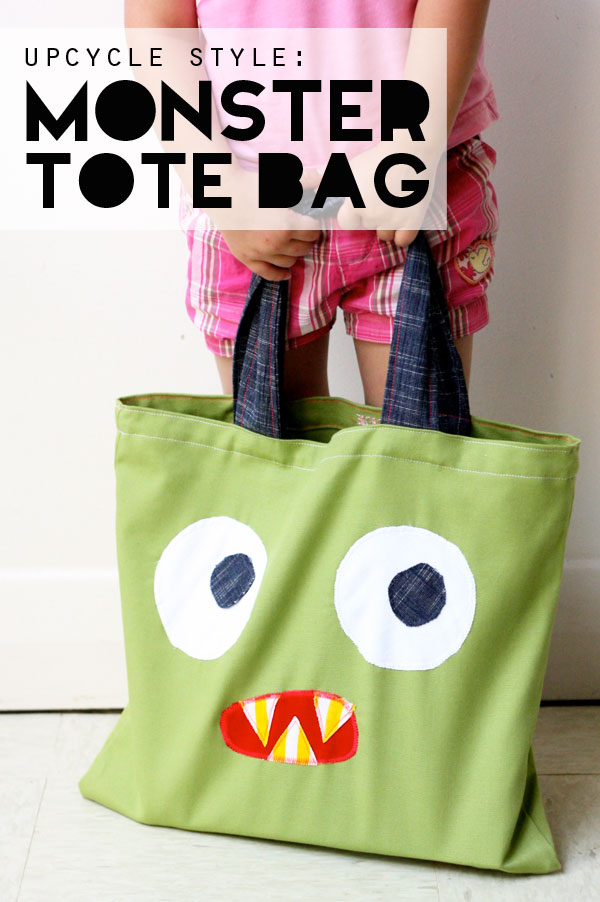
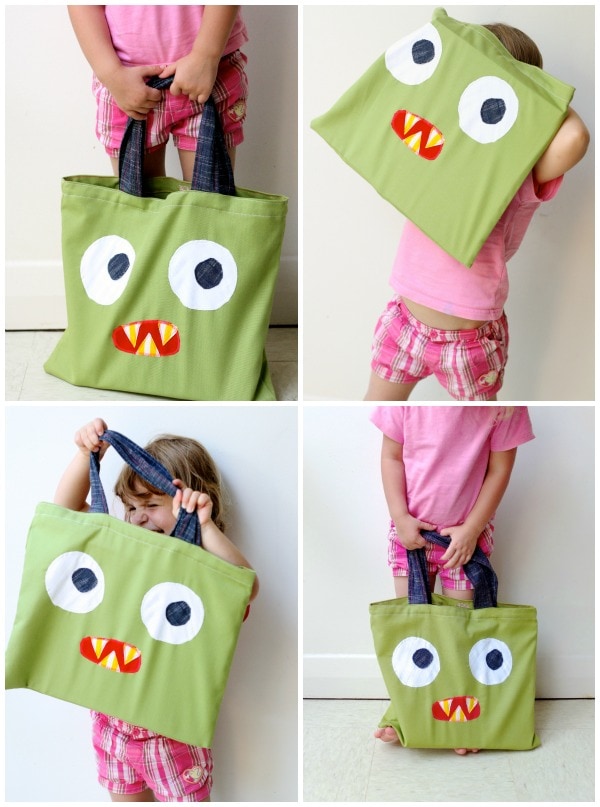
There is nothing I find more satisfying than reusing something unwanted to create something practical. This Monster Tote bag is made from an unwanted cushion cover that has seen better days. The fabric was still good but the design a bit tired, so rather than throwing it away, I put is aside for the right project to come along.
I’m not one to craft or make just for that sake of it, and am more inspired to create an object if there is a need.
I’ve been feeling a little uninspired to craft lately because we just don’t need much stuff at the moment, so when one of the mums at school was a little concerned that she’d forgotten to get a book bag for Library day, I came to the rescue and told her I’d make one.
The truth is, she came to my rescue, because I was needing a project to get motivated to sew again.
This bag is super easy to make even for a beginner, I’ve photographed every step and even created a template for the monster face.
If you aren’t into monsters, you can still use the basic steps to make a tote bag from a thrifted cushion cover you like the design of.
You will need:
- Monster face template PDF
- Old cushion/pillow cover with zippered side – NOT ENVELOPE BACK (or 2 squares of fabric 42x42cm [16″x16″])
- For straps: Strong fabric 2 x 10cmx58cm (4″x22″) pieces
- Fabric scraps in your choice of colours for applique
- Sewing machine
- General sewing supplies
How to make a Monster Face Tote Bag:
I’ve upcycled a cushion cover to make the body of the bag and am using it inside out as I don’t want the faded print to show. If you don’t have a cover that is suitable, sew your two pieces of fabric together on three sides (wrong sides facing) with a 0.5cm seam allowance and go onto step 3.
Using an old cushion cover to make a bag
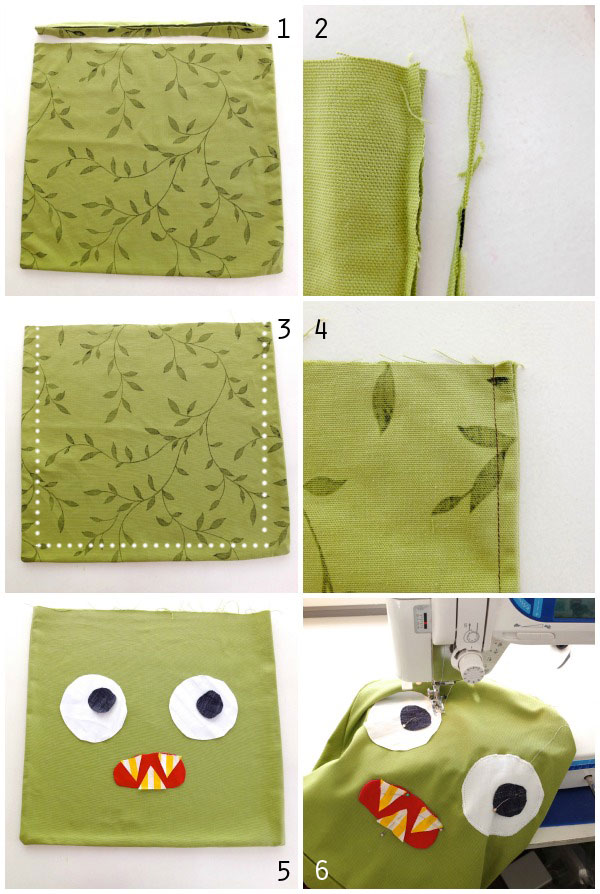
1. Cut the zip off your cushion cover.
2. The seams of this cover were unfinished so I’ve cut off excess fabric to help reduce the bulk when sewing in french seams.
If you want to use the outside design of your cushion cover, go straight to step 5.
3. Turn cushion cover right side out and sew a 1cm seam (1/2″) along dotted line.
4. This is what it should look like. Turn inside out. This will now be the outside of your bag.
5. Print out the Monster face template and cut out your fabric shapes. Arrange as desired and pin. (I cut the appliques by hand freestyle and created the template afterwards. Even though I tried to make it as similar as possible there may be a slight variation in the mouth shape)
6. Sew on using either zig zag (satin) stitch or just a straight stitch. I have used a combination of both.

To make bag handles
6 again (oops!). Cut two pieces of strong fabric (I’ve used a piece from an old denim skirt) 10cmx58cm (4″x22″)
7. Fold in half lengthwise (the right side in) and sew along dotted line. Turn inside out.
8. Press and top stitch as pictured.

To attach straps
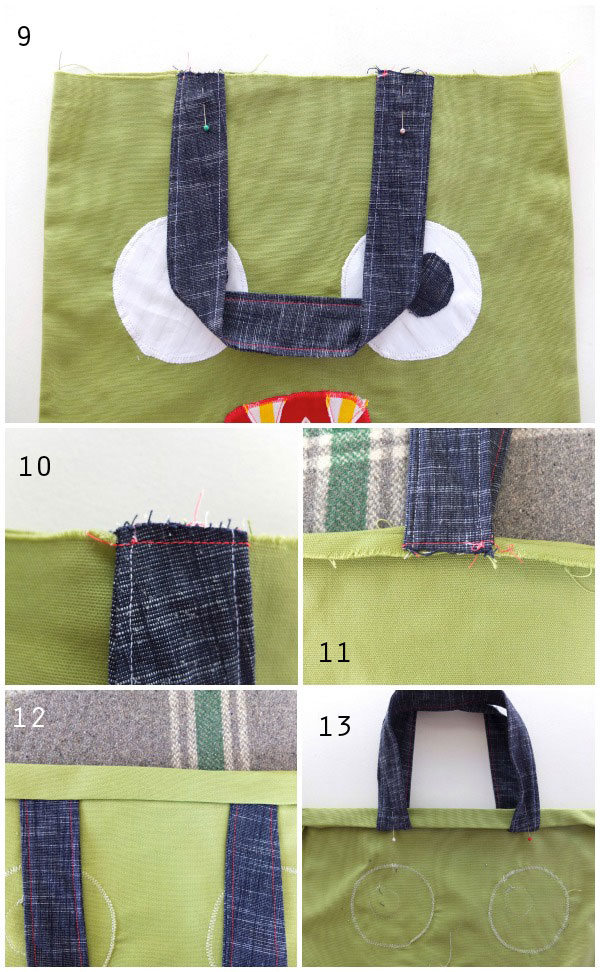
9. Pin straps to desired position on the outside of bag facing down.
10. Stitch in place to hold.
11. Turn bag inside-out and press a hem of about 1cm (1/2″) on the top edge (this should make the handles face up now).
12. Roll over a hem about 2cm (1″) wide and press (handles should face down now.
13. Pin handles to face up.
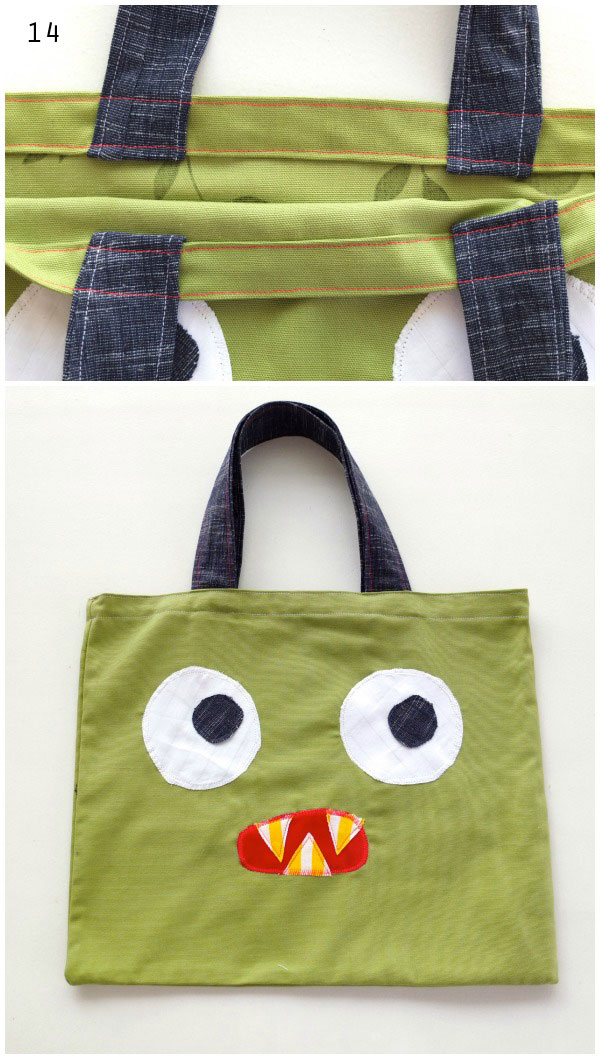
14. Stitch 2x seams as shown in picture.
Well done! You have made a super cool monster tote bag from an old unwanted cushion cover.
This bag is heading to one of Emma’s school friends who loves monsters but didn’t have a library bag. It’s the perfect size for lots of picture books, and unlike a drawstring bag, is really easy to get books in and out of. I’m sure he’ll be looking forward to library day now.

Cute bag! Would be good for Trick or treating too.
Yes, great idea! Extra large for extra candy!
You are a clever girl Cinta, love how simple it is to make and it looks great!
This is very creative- what a good idea! Thanks for sharing.
I love this, recycling that old cushion cover into this lovely tote bag! Thank you for the inspiration! I, like you like to make things because there is a need, althoug sometimes I make things just to try a new way of doing things…
Great and super easy tutorial…into ‘refashioning and repurposing’ now so will definitely bookmark this to try later.
Found you via Sewcanshe.com. I am so excited to make my own monster tote bags. Thank you for your excellent tutorial!
thanks Julia 🙂
This is so cute! It would be perfect for Halloween and trick or treating! Although I would hope that my kids wouldn’t get something that large filled with candy! Haha! Thanks for the idea… pinning! 🙂 Lisa
I love your monster tote!! It’s a great project for kids to do too!!