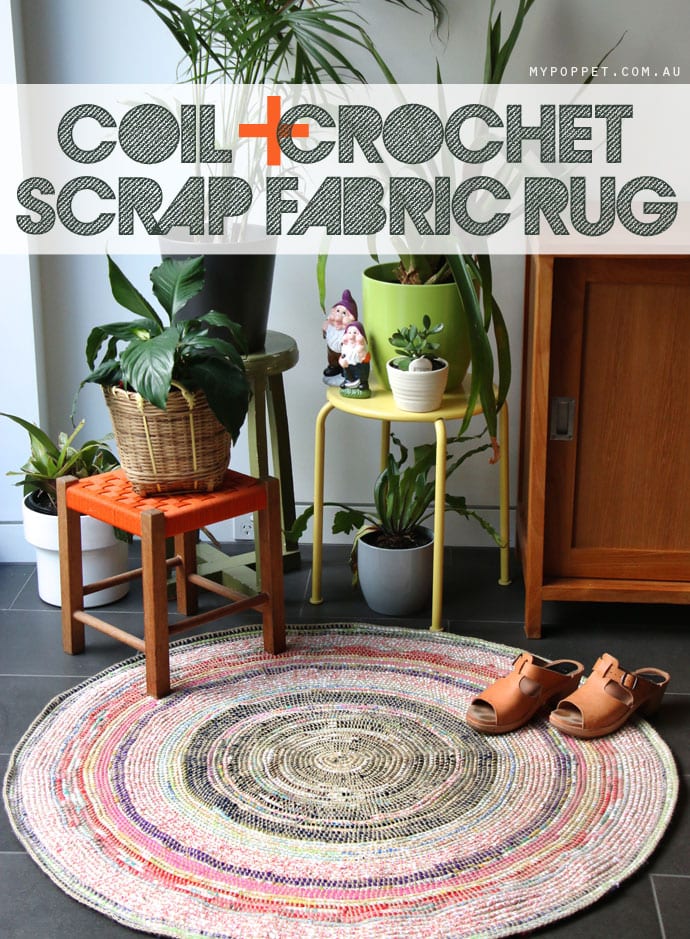
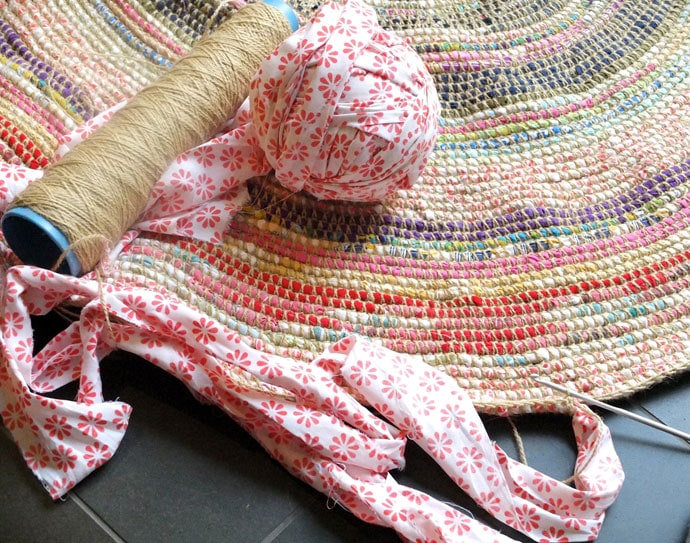
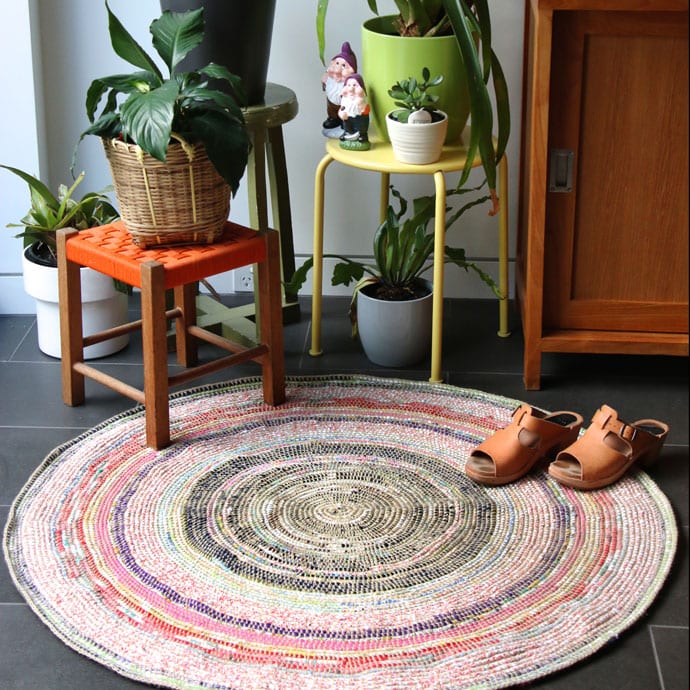
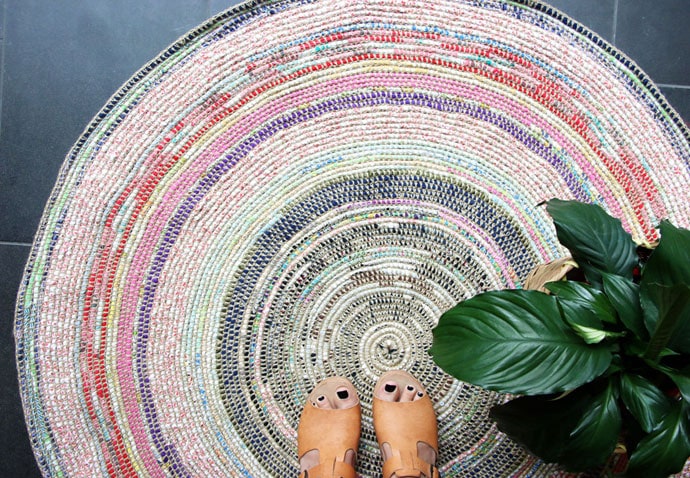
Finally the tutorial you’ve all been waiting for! I’ve been working on this coiled and crochet rug slowly for months and months; now that it’s finished I want to show you how to make your own.
It’s a terrific way of using up lots of scrap fabric that is too worn out or stained for sewing projects, I’ve used old sheets, fabric remnants, and old clothing. All the materials are recycled including the twine I used to crochet with, I actually picked it up at a thrift store for a few dollars and it was absolutely perfect for this project.
The only crochet skills required are single crochet stitch which is fairly basic, I’ll link to a tutorial which explains it fully below.
If you’d like to make your eco friendly fully recycled rug rug for virtually no dollars, read on!
You will need:
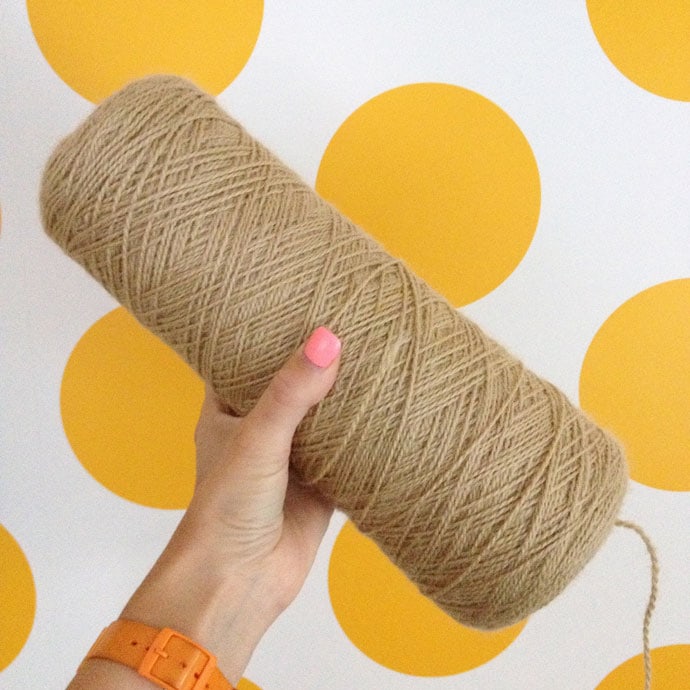
- Strong twine, thin cordage or very strong rug yarn. (I was lucky enough to pick up a large cone of nylon rug yarn at the thrift store)
- Lots of unwanted fabric
- Crochet hook (about 4mm, but will depend on the thickness of your yarn)
- Scissors
- Sewing machine (optional)
- Lots of spare time
- Rug underlay to prevent the rug slipping once it’s finished
How to:
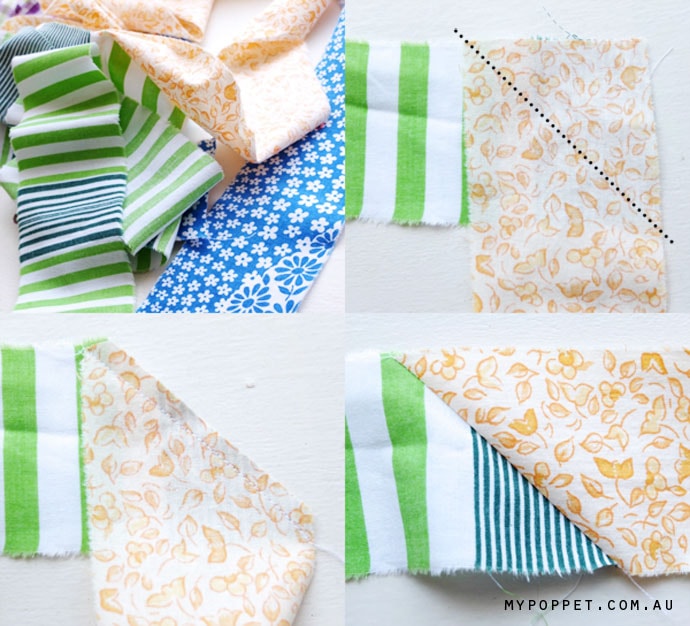
Preparing your fabric strips
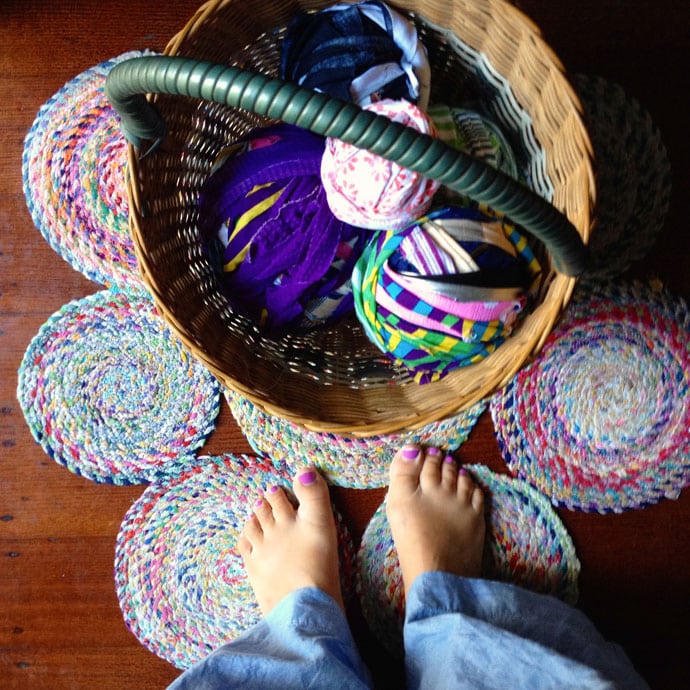
Depending on the type of fabric you have on hand, you will need to prepare your fabric accordingly. The idea is to cut long/continuous 2″ wide strips and then roll them into a ball ready for rug making.
If you are using large pieces of fabric like sheets or tablecloths the best way to cut to give a continuous strip is as per the diagram below.
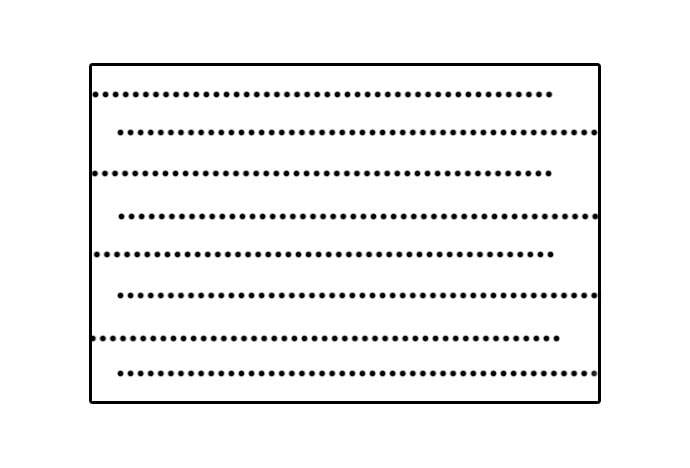
You can just nick the fabric and tear but make sure not to rip all the way through.
If you have shorter strips made of fabric remnants or clothing, sewing them together into a long strip makes the process easier later on. Cut the ends at a 45 deg angle and sew together.
Once you have several large balls of fabric you are ready to start crocheting.
How to crochet the rug
I haven’t created a step by step tutorial to show you how to single crochet around a fabric strip because it’s exactly the same as the technique I used and explained in my Coil + Crochet Rainbow Basket Tutorial.
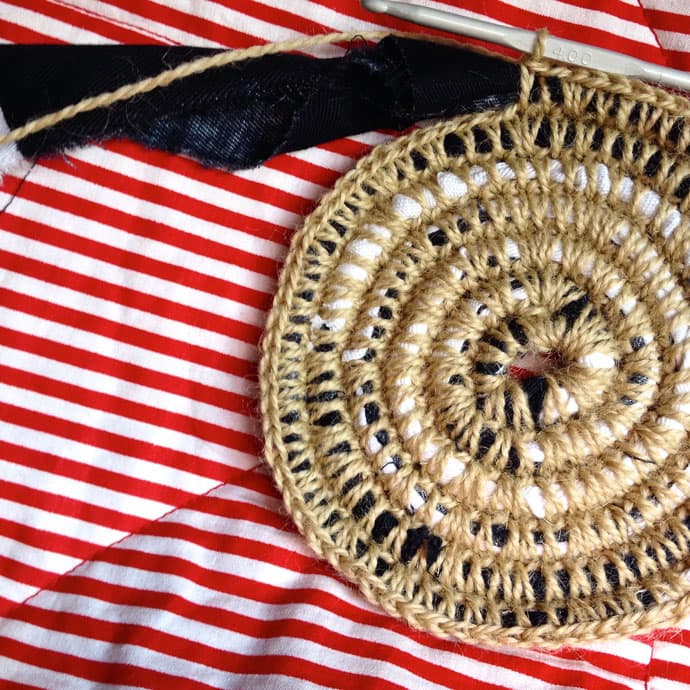
Follow steps 1-4 here and just keep on going until your rug is as big as you’d like.
Tips:
- Twist the fabric strip to form a rope like cord to crochet around.
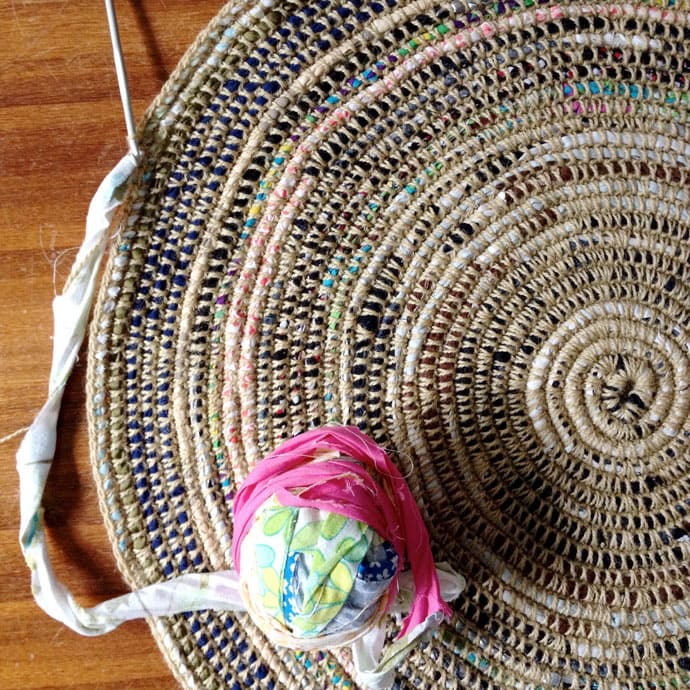
- Work on a flat surface, especially as the rug gets larger to ensure the rug sits flat.
- If the edges start to cup up it indicates that you need to add some more stitches, throw a few increases in there (2 stitches in one.
- If the edges start to ripple you have added too many increases, pull in the inner fabric core gently to tighten up the ripples.
- Don’t stress if you have cupping or ripples, you can always unravel the last few rows to fix it, you will get good at judging how flat the rug is sitting as it progresses.
- When you get to the end of a fabric strip ball you can either sew the end to a new ball, or just overlap the fabric, twist and crochet over the overlapped layers.
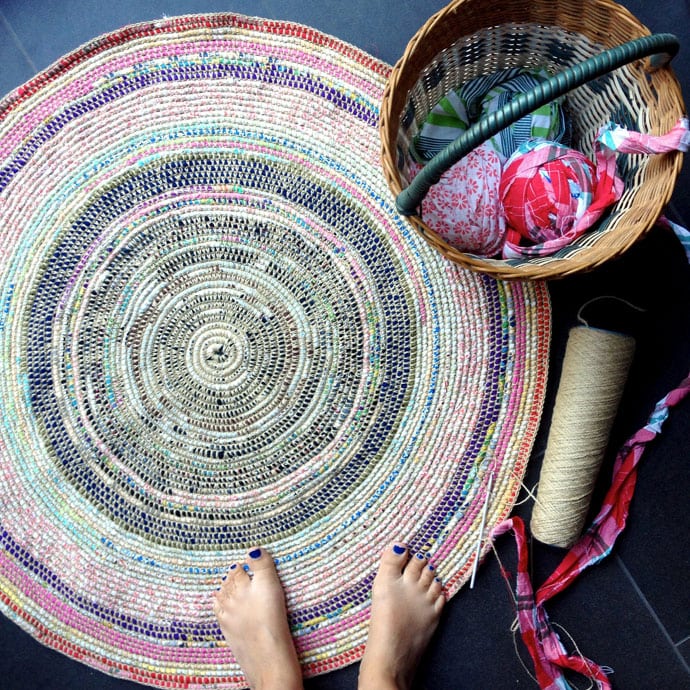
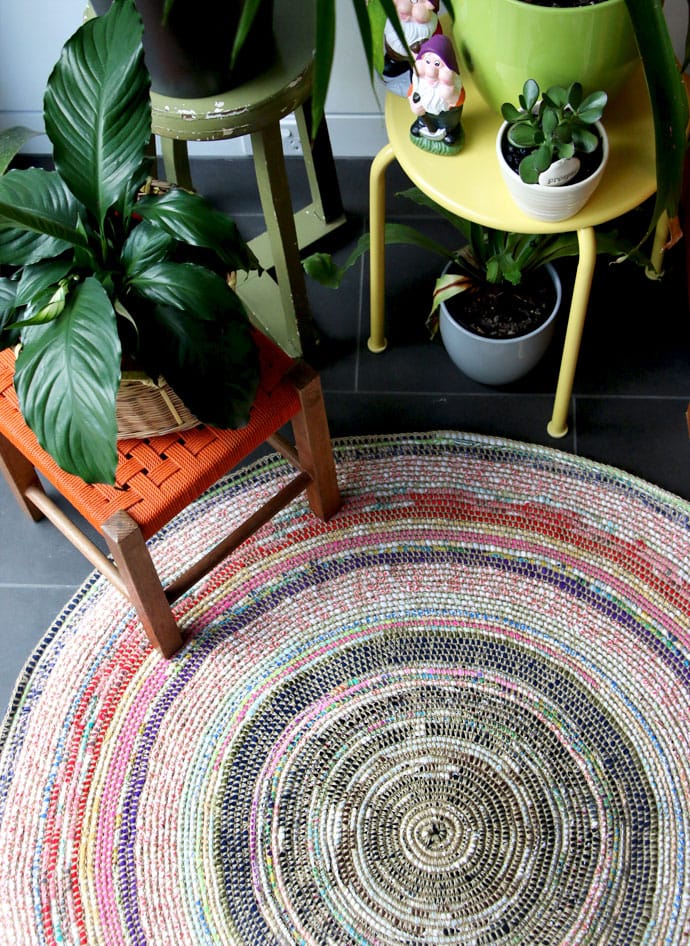
Keep going until you are happy with the size. I stopped when I ran out of twine.
To finish, just cut the end of the fabric diagonally so it tapers off, then keep going with single crochet until you are well past fabric end. Weave in any loose yarn ends.
For safety if you are going to be using the rug on a hard floor I’d suggest adding a non slip rug underlay to stop it moving when walked on. It will also help flatten out any lumps and bumps.

If you have any questions (I may have missed something), just leave me a comment and I’ll try to get back to you as soon as I can.
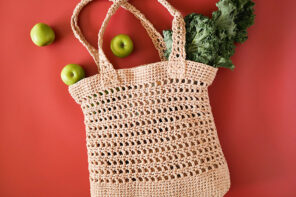
You may also like:
- Upcycle Braided T-shirt Rug
- Felt Hexagon PDF Rug Pattern
- Fabric Twine Spiral Mat
- Handmade Scrap Fabric Twine
Have fun scrapbusting!


Hello Cintia,
I’d be very surprised if you don’t already know this, but another way of joining two long strips of cloth for purposes like this is to cut two slits, running lengthwise with the cloth strip, one near the end of each strip that will be joined and thread each strip through the other so that when pulled “apart” they pull tight. Maybe not so smooth but handy if you don’t have a sewing machine at hand.
Yes that’s a handy no-sew way. I like to use that method when I make my t-shirt rugs. Didn’t think of it this time, thanks for the suggestion.
Magnifique, merci de partager😄😍
No more crocheted dish clothes for me. I am officially moving on to RUGS! Awesome post- thank you!
Great Job on the Rug!! 🙂 🙂 🙂
This rug is sew special and Katie Lloyd thanks for you hint. Bless you both!
This is GENIUS and beautiful!! I can’t wait to give this a try when I get home!
I love this eco-friendly idea of a rug. It’s looks ravishing, I myself love to recycle with old clothing, and all sorts of things.(www.keytocreativity.net) I love your blog very inspirational thanks for the tutorial I can’t wait to make one of my own. It looks so hip.
I love this! Thank you for taking the time to share. I can’t wait to get started!
Aloha from Maui!
Was wondering if there was a way to make this into a square or rectangular shape. Would love to know.
I’m sure you could. Just like in crochet you would have to make the corners sharper, I’ll have an experiment and get back to you when I can.
Rather than rug yarn or twine, you can also use another strip of fabric. Yours turned out really nice. 🙂
Thanks. Yes another strip of fabric would work too but it would be much bulkier.
Your rug is beautiful. Thank you for sharing your lovely project. It’s on my to do list.
Im confused. So you make your fabric balls to crochet right? Where does the twine come in?what are you supposed to do with the twine?
The fabric strip is just a core to crochet over with the twine. You could also use rope instead of fabric
Eu amei esse tapete vi mi espirrei e éstou fazendo um tapete desse com tiras de tecido mais o fio estou usando sacola plástica sacolinha dê mercado eu sou aprendiz mas seu trabalho é muito lindo vou fazer obrigada por tudo
Translation – I loved this rug I saw it and I gasped. I’m making a rug like this with strips of fabric plus the yarn I’m using a plastic bag bag from the market I’m an apprentice but your work is very beautiful I’ll do it thank you for everything.
So i read the basket steps. But im still confused. Are you supposed to use the twine to crochet on the outside of cloth fabric strip? So you encase the fabric inside the twine? Or is the fabric on the outside and twine is on the inside?
Fabric is inside and twine crocheted around it.
I am having serious issues with curling at the edges, no matter how many increases I add 🙁
You may be pulling your core fabric too tightly. Try working on a flat surface like a large table or the floor to make sure the mat is staying flat. Also you need to increase the loop length at the top of your stitches.
This would also be a good way to use plastic bags, (aka: plain), also cutting into strips and joined via the method of slitting and looping strips together. Bags are cut similar to large pieces of fabric.
I love that idea. Plastic bags are such an underused resource. Would be ideal for an outdoor rug, you could just hose it down.
Did you end up trying this with plastic bags?? Just wondering if it grew mold, etc. I love this idea, btw! 🙂
Verdade eu já faço tapete bolsa chapéu jogo de banheiro jogo de cozinha puxa saco também adoro recicla
Hi,
I love this rug and I have some rolls of wool already ready to go. Could I ask you how thick the twine you used is?
It’s probably around 8ply (DK) thickness. Worsted weight would work fine too
Hello, you know how to paste a slip mesh trapillo carpet?
Thank you!!!
I have used a hot glue gun in the past, or you can stitch it on in a few places?
I’m obsessed with this beautiful rug! Projects that make clever use of ‘unwanted fabric’ have a special place in my heart. #allfabricmatters
Gosh, this rug is gorgeous! I’d love to do one the same. How long did this take you?
I honestly can’t tell you because I only worked on it occasionally over a few months. Probably a couple of weeks worth of evenings at least
You mentioned if you crocheted too tight or didn’t add enough stitches, it would “bowl” up. I wonder if you did it on purpose , it would bowl up enough to make a large bowl or basket type design?
You certainly can make a bowl or basket. I used the same technique here but stopped adding increases to build up the sides. https://mypoppet.com.au/makes/2015/08/crochet-coiled-rainbow-basket.html
Did you ever try and make this in a rectangle? I need a very large durable rug. I think the rope might be what makes it stand up to use. Normally I’d grab some T-shirts and knit but I’d like to learn your technique as a rectangle. Thanks,
Rectangle uses the same technique. I was thinking of doing a tute for it if there was interest?
Hi there! Just wanted to know, did you end up doing a tutorial for the square carpet?
Sure have – https://mypoppet.com.au/makes/upcycled-denim-rag-rug-diy/
I love this idea and want to do it, but would rather do it in rectangle. Did you ever try it ?? Thanks for such a beautiful idea !!
Yes it would still work as a rectangle, you need to crochet in rows instead of round and round.
Is this washable? Thank u so much for sharing this. This will be fun to make!
It is made of fabric and twine, so yes technically you could wash it. Best to try by hand as a washing machine may be a little too rough.
Is 42″ long enough for the strips? And would 2.5″ be too wide?
You can always sew the strips together, that’s what I did with my shorter pieces. Any width will do, the wider the strip the chunkier the core. 2.5″ should be ok if that is what you have.
This rug is gorgeous! Did you plan out the colours or just add them totally randomly? We’re all your fabric weights/textures roughly the same? Thanks for sharing!
Thanks. The colours were totally random. Some of the fabric weights varied, but i kept the core consistent by cutting the thinner fabric into wider strips and the thicker fabric into thinner strips.
I also included a bit of jersey, but it’s not ideal as it stretches and can make the rug cup, so it’s hard to control tension.
I commented earlier about wanting to make this rug in a rectangle.
I finally did make a huge wool rug (9 x 12) but had my husband make a loom. I used 2″ wide Pendleton wool blanket selvages that they sell by the lb. We are near the manufacturers in Portland.
I trimmed off the strings, dyed some of them and left the others as is. It’s very durable. Total cost with wood, nails, fabric, dye….$300. I could send a photo but not sure how to do it here.
This was a very hard project just because of the size. I am happy with it!
Wow, that sounds like an amazing project. You can send me a picture [email protected] – I’d love to see it.
I would love to see the pic as well. I too live in PDX and just finished many Pendleton pillows. I used the selvage pieces as bating for all wool and no synthetic parts. My next move was a rug, and am on the hunt for a loom. Any info would be very appreciated!
I sent Cintia a bunch of photos. Maybe she can post them? If not, send me your email and I’ll send them to you. I also knitted pillows with the leftovers. Turned out nice but heavy!
[email protected]
Thank you for giving me the best idea ever for my rugless living room. I do not like a type of rug that can be hard/impossible to wash, or in a size that I do not like. Also, I find that my orange couch has been blocking a little the colors I want to choose. My rug is in process for about two weeks. All thanks to your marvelous idea!
Hello, I am currently attempting to make this rug now, and love the look of it so far!
My rug has about 8 rings now and is larger than my hand, but I’m having trouble keeping it flat. It keeps cupping upwards regardless of how many increases I add in. I’m at the point where I have an increase in each stitch. Do you have any other recommendations for me?
Hi Megan, as the rug grows larger it helps to leave a little space between each stitch – the top bar (the bit that looks like a little V) will need to be longer. It allows room for the rug to flatten out without having to add tons of increases (and also let the fabric show through). I hope that makes sense.
Send me a photo of the problem if that doesn’t sort it. [email protected]
Hi Cintia,
That seems to be working great! Thank you so much for the tip.
Hi Megan, when you made this rug a couple of years back Did you add a chain between your single crochets to add the extra space and correct the cupping problem, or do you recall? Thanks!!
Hi LuAnne, I didn’t do that, but instead elongated my stitches or added extra stitches. But you could certainly add an extra chain stitch instead, I think that would work just as well.
Can I use cotton cord or cotton chrochet thread to chrochet this together? Would like to use something similar to what would be used if I were to just buy a typical woven rag rug. Chrochet cotton is thin, but super strong, so is cotton string/cord.
Yes any strong cord is suitable, as long as you think it can tolerate wear from being walked on, whatever you choose should work well.
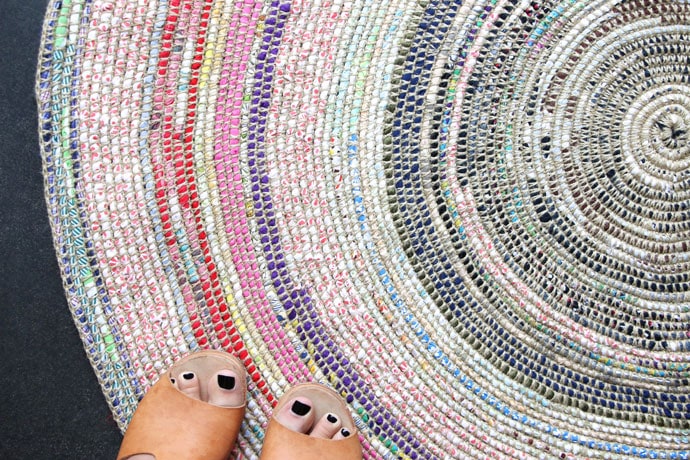
Love the rug! This might sound silly, but I am dying to know where your shoes came from.
Funnily enough they are from the thrift store (op-shop). They are Swedish clogs – similar ones here https://www.funkis.com/clogs-sandals/t-bar-high-natural.html but I only paid $5
Any Idea how much fabric you used to make this rug? I’m thinking of buying scrap fabric, but we’re particular on the color pattern and want to ensure we buy enough and not too much.
Sorry, I just kept making it until it was a suitable size. I’d say the equivalent of 2-3 bed sheets. It does use a fair amount. I suggest make a small sample. Measure how much fabric you used and how large it is, then you can multiply it by the size of rug you’d like. It should give you a rough guess as to how much fabric you’ll need over all.
Hello, can you please advise the measurements of the size of this rug. It looks lovely and I have been meaning to make a rag rug as have collected lots of t-shirts and old bed sheets. Thanks, Leslie.
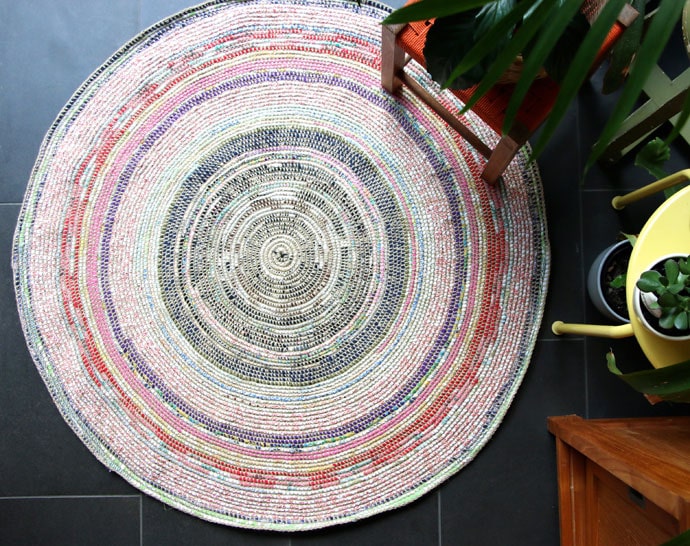
You can make it as big or as small as you like. Mine is 110cm (43″) in diameter
I just finished making one of these for a friend, and I absolutely love it! (Hopefully she will too… >grin<) Thank you so much for posting the tutorial! I wanted to note that I had a bit of trouble keeping the last two or three rows from cupping, and seem to have found a fix; I took them out once and redid them, and it still didn't lie quite flat enough, so because I had enough string, I kept going and did one more whole row just of crochet, increasing one stitch after every five stitches. That seems to have added enough tension to keep the outermost row from curling up, and yet the crochet-only row is elastic enough that it doesn't try to curl. …In case anybody else has similar trouble. I doubt it would fix an actual bowl-shape, but for a slight cup, it works pretty well. Thanks again!
I’m sure your friend will love it. Great tip re: the curling. I found that I sort of got a ‘feel’ for when I needed to increase or not. If you make another one, it will be a piece of cake.
She did! ^_^V Thanks again!
I have found my kitchen rug!
Hello! I’m having so much fun making this. I’ve had to buy smaller things of twine, any advice on how to join together the twine once one roll ends?
Thanks!
Kelly
Just tie a firm knot and crochet over the ends.
Do you know how many yards of twine you used to make your rug 43 inches?
Sorry, I don’t actually know. I picked up the cone of yarn from a thrift store. I suppose you could make a small sample, measure the yarn and then guestimate the total amount from there.
Thank you for the great tutorial. I am struggling to find a yarn that would work. Any recommendations?
Worsted weight (tightly spun) acrylic yarn would work. Need to be hard wearing. Cotton yarn like lily sugar’n cream would also be suitable. If you have thinner yarn hold to strands together like I have in this project https://mypoppet.com.au/makes/upcycled-denim-rag-rug-diy/
Are you saying I can use sugar and cream yarn instead of twine?
Yes, a cotton yarn like sugar’n’cream would work fine. You may just need to use a larger hook as it’s a thicker yarn.
How thick are the fabric strips?
From the post “Depending on the type of fabric you have on hand, you will need to prepare your fabric accordingly. The idea is to cut long/continuous 2″ wide strips and then roll them into a ball ready for rug making.”
Would this idea work to crochet braided tshirt “rope” together to make the rug? Would I need to spaces the stitches out more? I want to make a bath mat for my daughter and like the idea of a thicker rug. Thanks! Love it!
You could always experiment. I think it would work and give a very bulky result.
Hello! I’m really excited about making this rug – my boyfriend and I are going to do a black hole motif with a black center, followed by a small ring of white and rings of yellow, orange, red, pink, and blue.
My question is regarding fabrics – does it make a difference if you mix fabric types? I have some cotton percale fabrics which don’t stretch at all, and some poly blends that stretch a lot (think tshirt fabric). Will it create issues using them both in the rug? Should I stick to one fabric type or the other?
Thank you!
Sounds like a fun design. I’ve used several types of fabric for this rug, but I’d recommend using mainly non-stretch fabrics. T-shirt fabrics are ok, but they can make the rug stretch and curl up, so if you include those, try keeping them to a minimum.
Hi! I Love LOVE this pattern! I have kids sheets that I can’t wait to try this with! For fitted sheets, I’m guessing I should cut the elastic band off? Or maybe just it as the beginning of the rug so it goes in the smallest part of the coil? Thanks so much for posting and replying to all the comments, I read them all. 🙂
You can certainly leave the elastic in. Just make sure not to stretch it. Great idea to use it in the center section.
Heyaa!!!
I followed it but no matter what I do the end product is curled up in the edges.. kindly tell me what to do…!
It does get tricky as the rug is bigger to keep it flat. The best thing to do is to slide the fabric core out a bit and allow a bit more space between the stitches. I also found i had to undo it back to where it started curling and work flat on the floor to ensure I was adding enough increases to prevent curling.
Hey I made this and have a slight problem with the twine covering all my fabric basically. So the colour of the fabric peeks out a bit but it mostly just looks like I have a twine rug. How can I balance not having the cupping with too few stitches, but not covering up the fabric with too many stitches?
I recommend extending the top loop (the one on your hook when you finish the stitch) to allow a bit of space between stitches. Otherwise some peopel add an extra chain stitch between each stitch.
Ohhh this is soooo cute! I’ve been looking at diy rugs for my dorm and I like the look of this one more than the braided one! How long does it take to make something like this?? Thank you so much!
This one took me quite a while, but I was only doing bits at a time. Probably a month?
Hi Cintia! When I began my attempt at this rug, I found there was a gap between each row of fabric around the spiral, right where the new stitches enter the top bar of the previous row of stitches. Any idea what could be causing that? Thank you!
I know it’s a late reply, sorry. There will always be a small gap but if your gap is super big, you may find it’s because the top bar of the stitch is long, or has a loose tension maybe? It’s hard to tell without seeing a photo.
Hi Cintia,
Your rug looks lovely and am going to try and make it.
Wat mm of twine is best to get.
Thankyou
Something quite thin and flexible is best (4mm or less) around a DK (8ply) yarn weight is ideal.