
I’m so happy to finally share this Vintage Saucer Chair Makeover with you. This is a project that I’ve been working on (on and off) for about a year, slowly chipping away whenever I had some spare time and now it’s done!
This is less of a ‘how to’ and more of a ‘how I did it’ kind of post because I didn’t document my process as thoroughly as I normally would for a DIY craft project. The truth is when I started I didn’t really have an end result in mind, there was lots of experimenting with materials and techniques and there were stages where this project sat idle for several months whilst I mulled over the next stage.
I never really intended to blog about it, but now that it’s finished, I really wanted to share the transformation, and show that it’s possible to make something really beautiful out of an old item that was well and truly headed to the tip. I’m even prouder that I didn’t need to buy anything for this chair makeover project (except 4 rubber stoppers), all the rope used to weave the chair seat I made by hand from fabric scraps.
I hope this post inspires you to re-imagine an old piece of furniture, rather than just discarding it on the junk pile.

So this is what the chair looked like before, a shadow of it’s former glory. It actually makes me quite sad to see it, because this chair was once in pristine condition and got this way due to my neglect. Bought for only $25 at the Camberwell Flea Market, it sat on the balcony of my old apartment sheltered from the weather for many years and looked great.
When we moved house, it was relegated to live outside and the elements really took their toll. One day Mr Man sat in it and fell right through – insert sad face here. I’m quite attached to this old chair so rather than throwing it out, I was going to have a red hot go at giving it a new life.
How To: Vintage Saucer Chair Makeover
Step 1 – Cleaning & Painting Frame

Separating the frame was very easy because it’s designed to be removable.
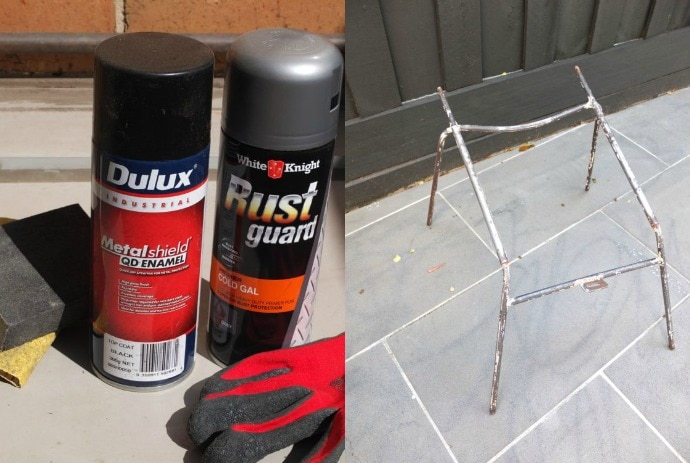
Firstly I sanded all the rust and loose paint off the metal base to prepare it for painting. I used a galvanizing undercoat on the raw metal to prevent rust and then a couple of coats of black enamel spray paint.
Spray Painting Tips
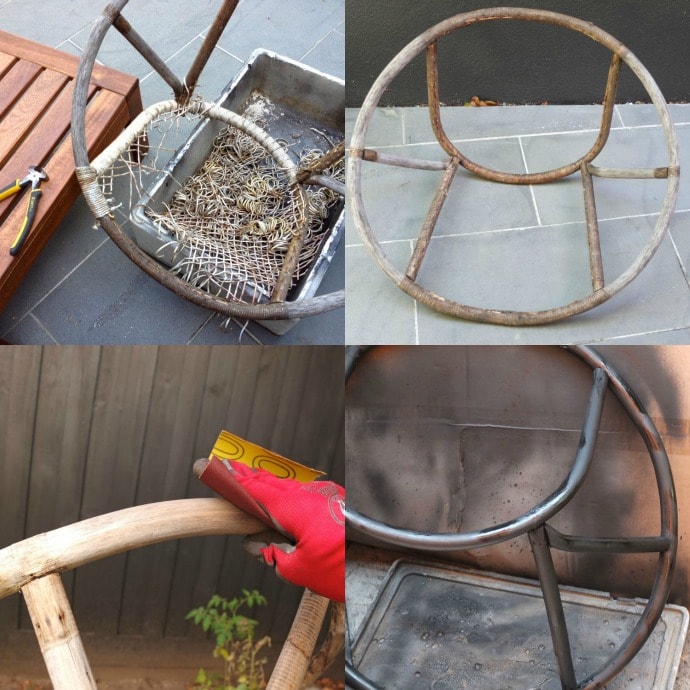
The webbing was very tedious to remove and took me a couple sessions. Because I didn’t know how I was going to re-web the seat (or with what) at this stage, I took quite a few photos at various stages of the removal, just for my own reference. There were so many staples and nails to remove that I decided not to re-web it the same way because the frame was damaged from the nails and new ones probably wouldn’t hold.
I sanded back the grime and my initial intention was to re-varnish, but the bamboo was water damaged and the varnish only accentuated the stains. In the end I settled on a matte black finish to help disguise the imperfections.
Step 2 – Weaving the Chair Seat
Many months passed. I’d been looking for a weather proof rope or cord that I could use to replace the seat but the only ‘maybe suitable’ supplies I could find were going to cost a bomb and had to be shipped from overseas. It really wasn’t worth it for me to spend around $200 on supplies so I came up with plan B, make my own rope.
I’d also been researching ways to re-weave the seat that didn’t require nails and when flicking through this book – Upcycle (where funnily enough my Upcycled Cross Stitch Chair is featured), I found my solution.
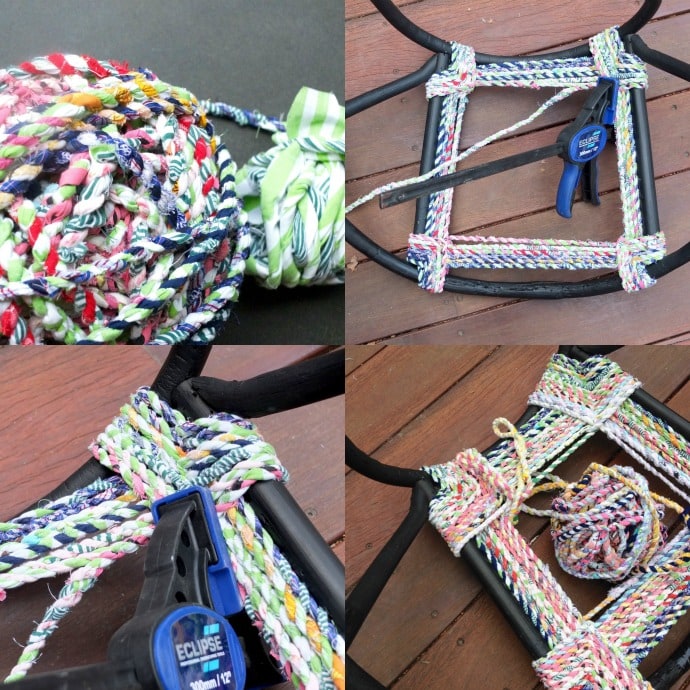
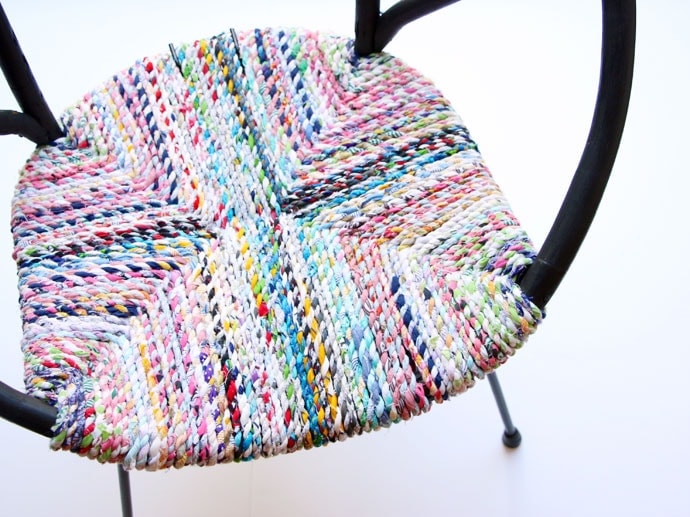
One of the projects in the book – Crate Stool by Segev Moisa, uses a traditional sea cord weaving technique, which I thought would be the perfect solution for my chair dilemma.
The instructions in the book were just enough to get me started and once I got the hang of it, it was just a matter of making enough Upcycled Fabric Twine to complete the project.
Get instructions for Upcycled Fabric Twine
You may notice in the photos above that I accidentally wove the chair back instead of the base. I undid it and started again correctly. The weaving an twine making took several weeks.
If you want to weave a seat like this yourself I have found a brilliant instructional video on YouTube with excellent instructions – How to weave a seat in a Rush Chair. Annoyingly I only found it recently, it would have been a great help at the time.

Step 3 – Finishing
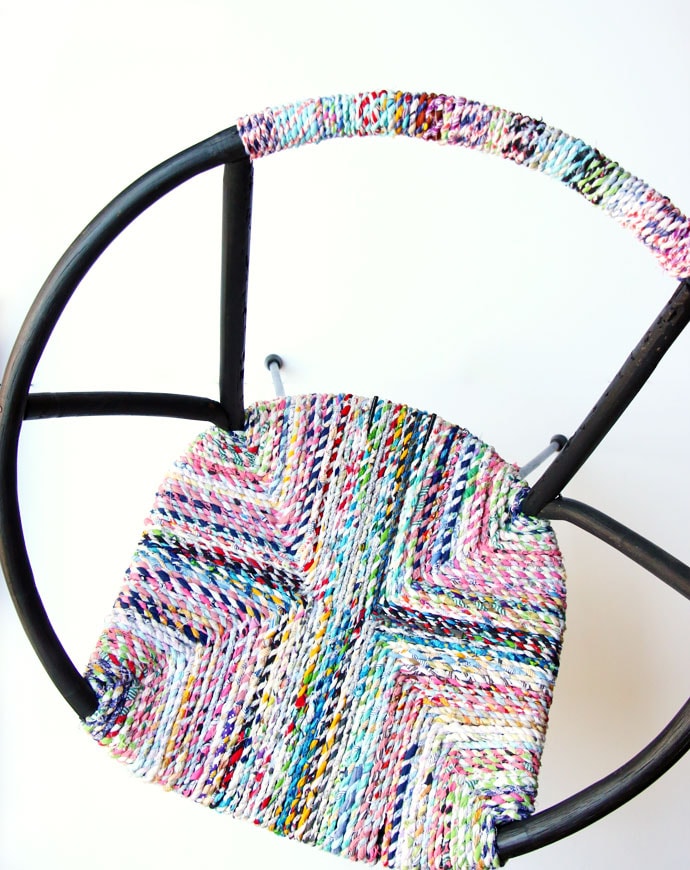
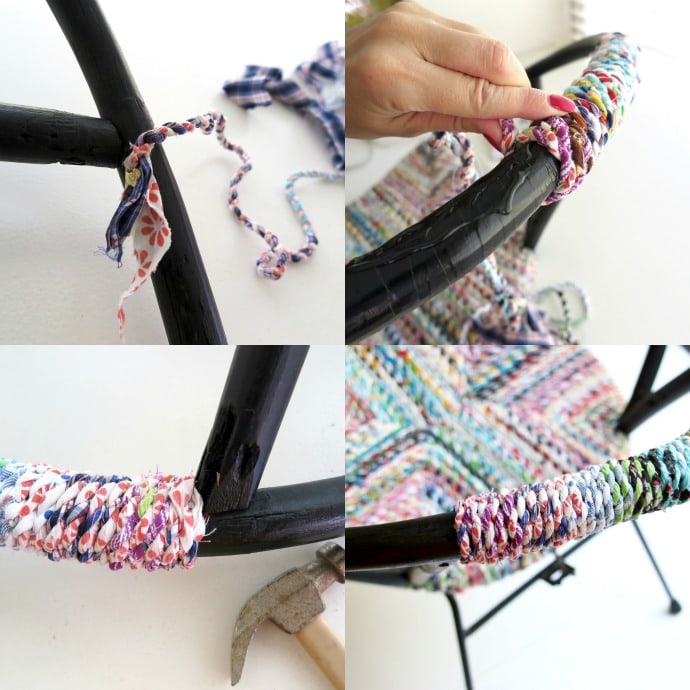 I re-attached the base to the frame and wrapped the back of the chair with more handmade rope. I used a couple of tacks and glue to keep it in place. Looking back I probably should have wrapped the joins also to re-enforce the frame integrity. It’s fairly solid but does have some wiggle, Mr Man is banned from sitting on it now because I don’t think it could take his hefty frame. I find it quite comfortable though, even without a back.
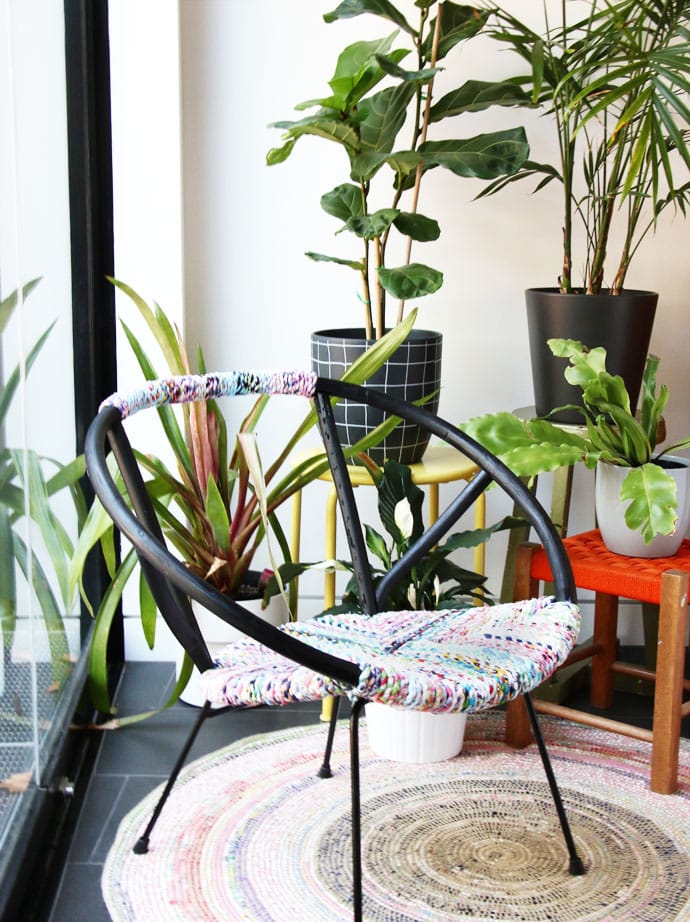
Before & After
Just to remind you of what it looked like before and after.
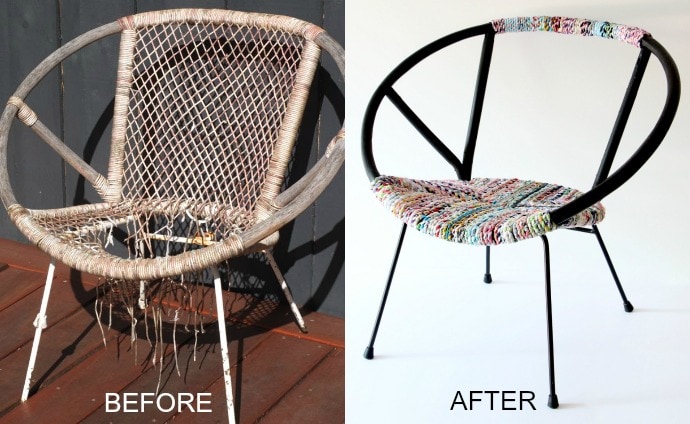
I think you’ll agree, a huge improvement!
I hope you’ve enjoyed seeing the journey of how this once neglected saucer chair got a new lease on life.
The finished chair was kind of difficult to photograph, I’ve done my best to show all of the finished details. It looks much better in real life.
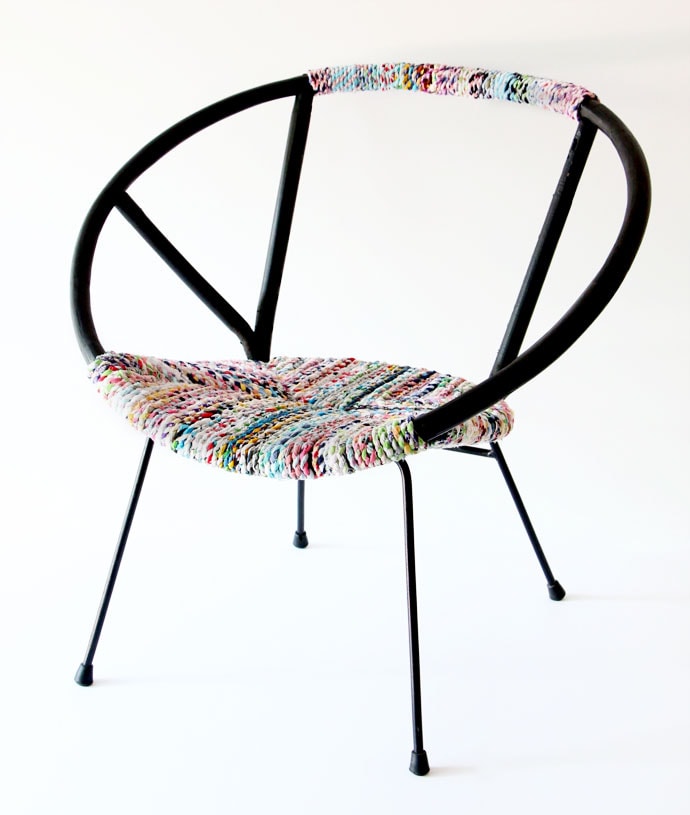
It now lives permanently indoors because the fabric twine is not weather proof, but it’s a fun little chair that now brightens my home.
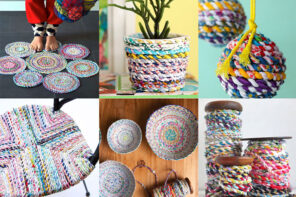
You may also like – DIY Coil + Crochet Scrap Fabric Rug


Cintia you are just amazing. It’s an absolute show piece, to be treasured for many years to come.
Den er blevet helt fantastisk, dejligt at se en gammel stol få nyt liv.
translation – It has been absolutely fantastic, great to see an old chair getting new life.
Lovely, as usual! i’m waiting for each new project you share with us.
Thanks a lot ;)))
oooh! The pressure is on!
Stunning! I really admire your inventiveness, tenacity & patience.
This is absolute genius – beautiful.
It would be worthy of a place in those very trendy interiors magazines with a price to match!
I love your ideas and thank you for sharing.
Its a wonderful vintage saucer chair and looking very pretty and comfortable..
Genius! Very nice!
Thanks 🙂
Love it! Amazing chair and amazing job you did!
I think this one of the most creative upcycle’s I’ve seen. Inspirational stuff, the photography is awesome. I’m going to try to weave an old footstool.
The chair looks wonderful! I have a similar old chair I wanted to upcycle it for a while but I didn’t know how. Thank you so much for the Inspiration!
It’s beautiful. But seems like it would be very uncomfortable to actually sit in with no back support, just the big hole where the netting used to be. Do you have pictures of how it’s used? People sitting in it?
Thanks. The chair is quite low and the back rest sits about mid way down my back. Lots of people are curious about it so I’ll try to take a picture of me sitting in it.
Amazingly Beautiful!!
I love this! You have inspired me to upcycle an old garden chair that has definitely seen better days – have already made 2 big balls of twine – will post a pic when finished 🙂
Great, can’t wait to see it.
Hi! I have photos of my upcycled garden chair I finished weaving yesterday and would love to send you some photos – I can’t seem to include it in the comments box – do you have an email address I could send them too???
Loved doing this – took me 8 hours to weave – did it all in one day 🙂
Manuela
sure, send them to [email protected]
You could weather proof it with clear silicone (bathroom grout type stuff) and mineral spirits.
That’s an interesting suggestion. I may try on a small sample and see what happens.
This is just so gorgeous! I love how it turned out and how you imagined a hopeful future for a sad chair. Great work and beautiful site!
Hello! I know it’s been quite some time since you posted this wonderful DIY, but I’m wondering if you happen to know about how much rope you ended up using for this project. I’m planning to buy some rope to work on a similar chair and hoping you might be able to give a length estimate. Thank you for inspiring me to finally refurbish my old saucer chair! Appreciate your help!
You can probably estimate it by measuring the length and width of your chair.
You need to double the length and multiply it by how many times the rope will go across (depends on the rope width), and do the same for the width.
Hope that makes sense.
Wat een geweldig idee is dit, ik ga er mee aan de slag. Dank je wel voor je duidelijke uitleg.
Hartelijke groet.
Erna
Translation from Dutch (What a great idea this is, I’m going to work on it. Thank you for your clear explanation.)