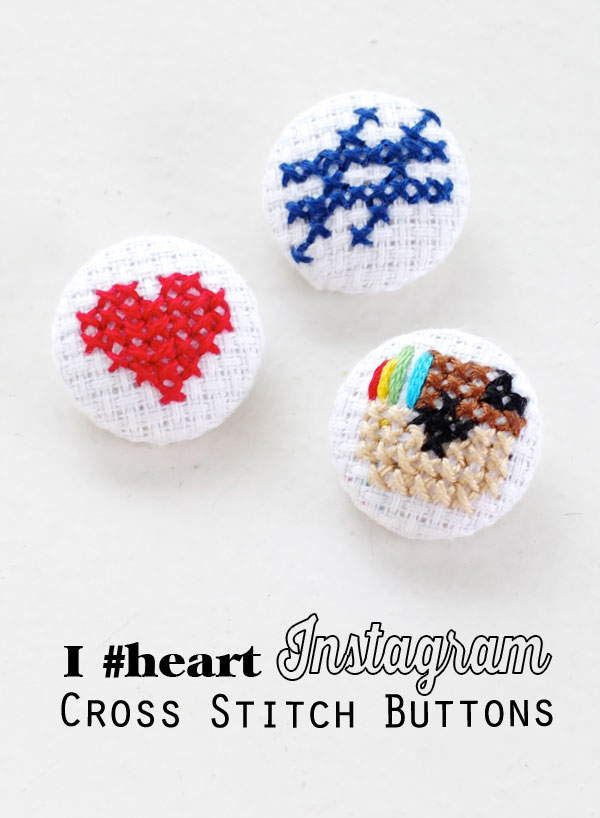
It’s no secret that I love Instagram, so much so that it’s one of the first things I check in the morning before I even get out of bed. I love how it brings like minded creatives together and allows for such immediate communication and sharing of ideas.
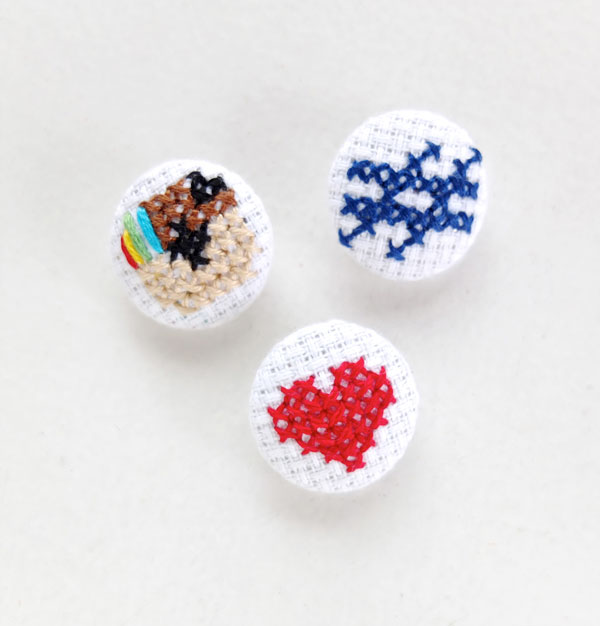
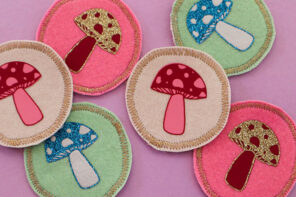
Naturally I had to create a little Instagram themed project, and these cross stitched buttons were a quirky take on the whole ‘Social Media blog button’ thing.
It’s really been years since I’ve done any cross stitch, it was one of the first embroidery stitches I learnt, and was really quite proficient at it as a child of 8 or 9. I’m not sure why it’s been such a long time since I revisited, I really found it quite a meditative process, and the small size of these buttons means that you can finish quite a few very quickly. It’s the perfect beginner cross stitch project because you get immediate results.
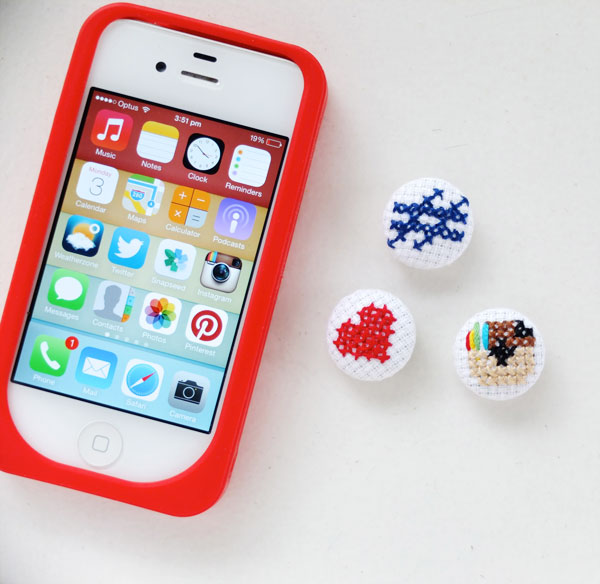
I’ve created a pattern for each motif which you can print out as a PDF. If you don’t want to make buttons, you can use the pattern for other project applications like stitching a phone cover.
I’ve included basic Cross Stitch Instructions and tips, as well as instructions for using a fabric covered button kit.
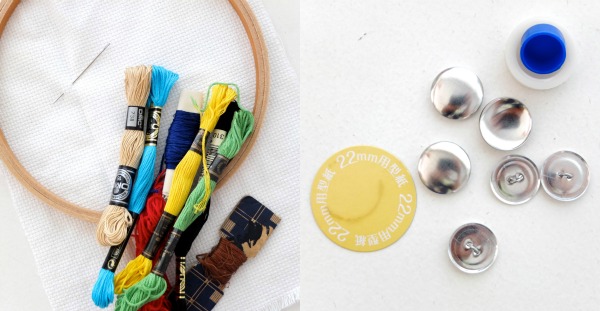
You will need:
11 count Aida cloth (cross stitch fabric), enough to fit in your hoop
Small/med size embroidery hoop
Embroidery needle
Instagram motif cross stitch pattern
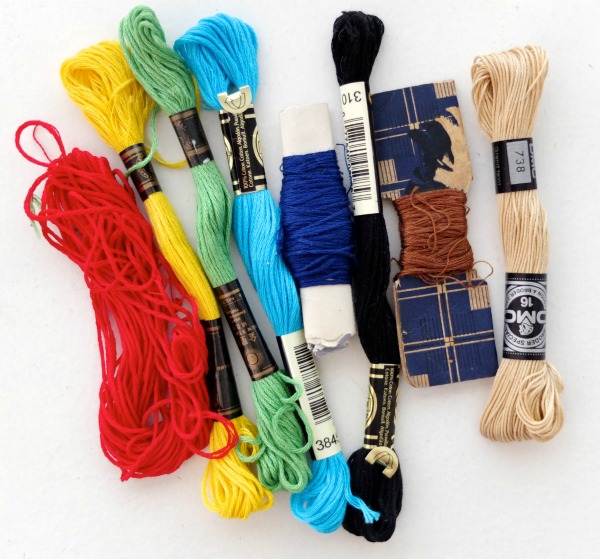
Stranded embroidery floss in colours:
red, navy blue, turquoise, green, yellow, black, dark brown, taupe.
Small scissors
22mm Button covering kit with template or similar (22mm = about 7/8″)
About Aida Fabric:
Aida fabric (or cloth) is made up of groups of threads woven together. Where the thread groups intersect the holes are clearly defined, which helps to make cross stitching easy and accurate.
Aida is classified by its thread count, the number of holes per inch of fabric. When you stitch on 11-count aida fabric you will get 11 cross stitches per inch. The higher the thread count eg. 14, 16 or 18, means more stitches per inch and smaller individual stitches.
Stitches used:
Cross Stitch
Long stitch
How to:
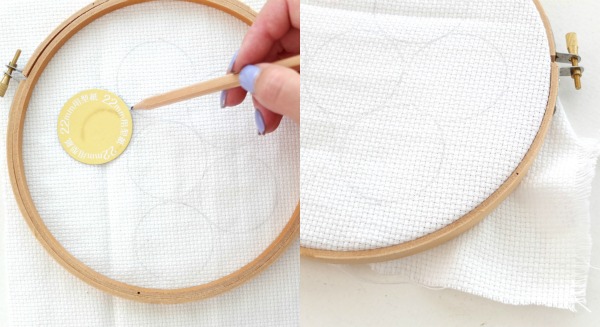
-Place your embroidery hoop over your fabric and trace the button templates onto the fabric. It’s best to mark as many buttons as you think you’ll make and do all the embroidery at the same time.
-Pop your fabric into the hoop. Make the fabric reasonably taught but try not to distort the weave.
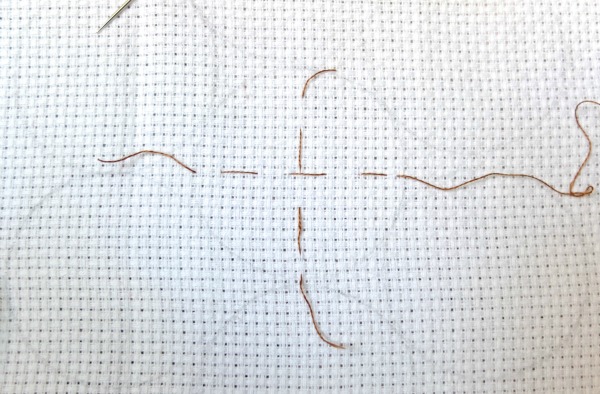
Optional but helpful- Mark the center of each circle with a strand of thread, doesn’t need to be perfect as it will be removed later. This will make sure your embroidery motif is properly centered.
Hint: Most cross stitch patterns will have arrows marking the pattern center.
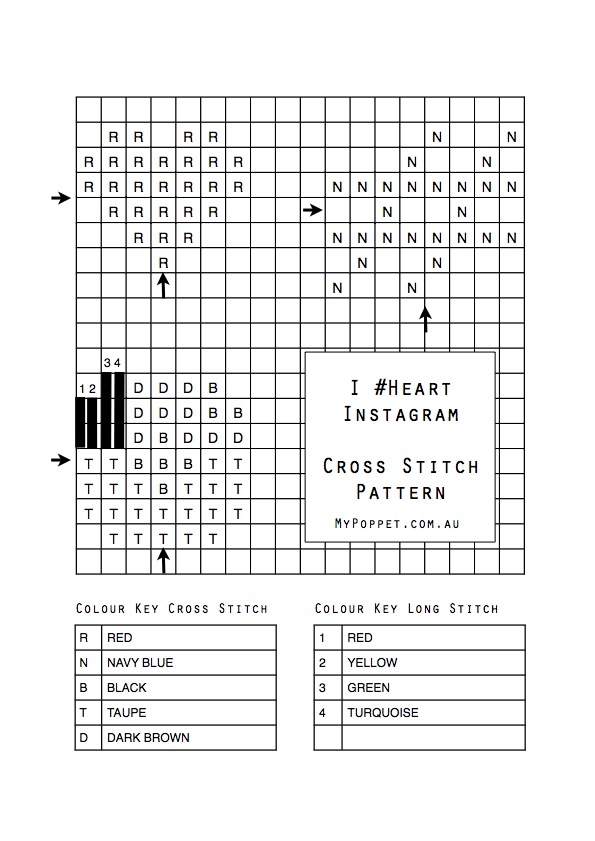
You can print out the pattern here
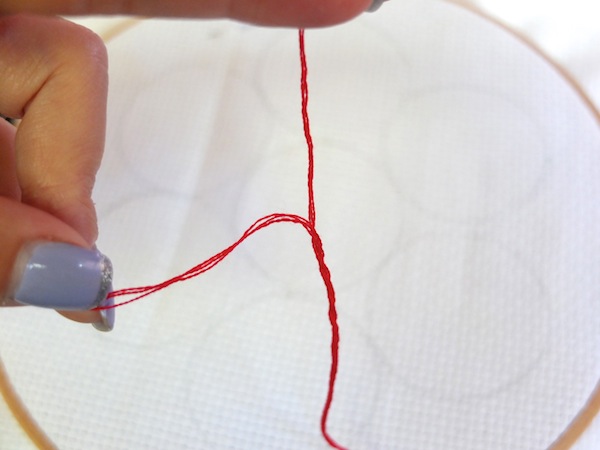
Cross stitches will be worked with 3 strands so you will need to split your thread, floss/thread normally comes with 6 strands. Cut the length of thread and gently pull apart in half.
How to Cross Stitch
As the name Cross Stitch implies, you will be stitching little crosses that look like X’s. If you are filling an area, it’s most efficient to work in rows or blocks.
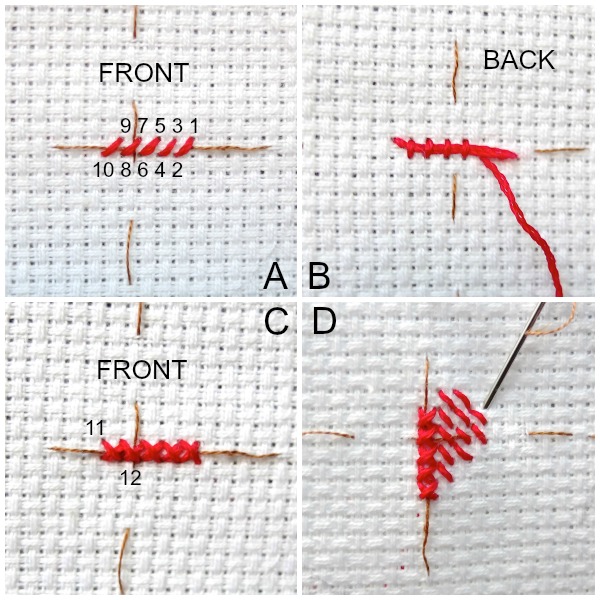
A. Work your first lot of half stitches diagonally into the holes of the aida fabric.
B. Rather than knotting, secure the start of your thread tail with the stitches, by holding the end of the thread and stitching over as you go.
C. To finish the row, half stitch back over in the opposite direction.
D. You can fill whole areas in one direction rather than just working in rows.
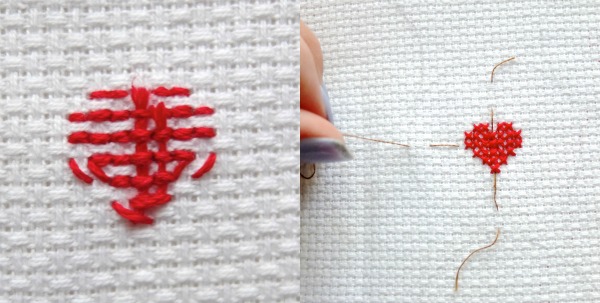
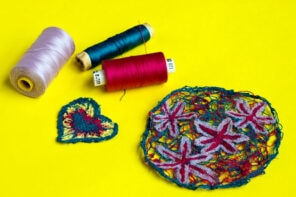
Tip: Try to always work your first lot of half stitches in the same direction on your whole pattern, otherwise your finished result will have stitches that go in opposite directions. Can you see the error I made on the heart? Take a close look at the first photo.
-Once finished, secure your thread by running it under a few stitches then clip.
-Remove guide threads if you used them.
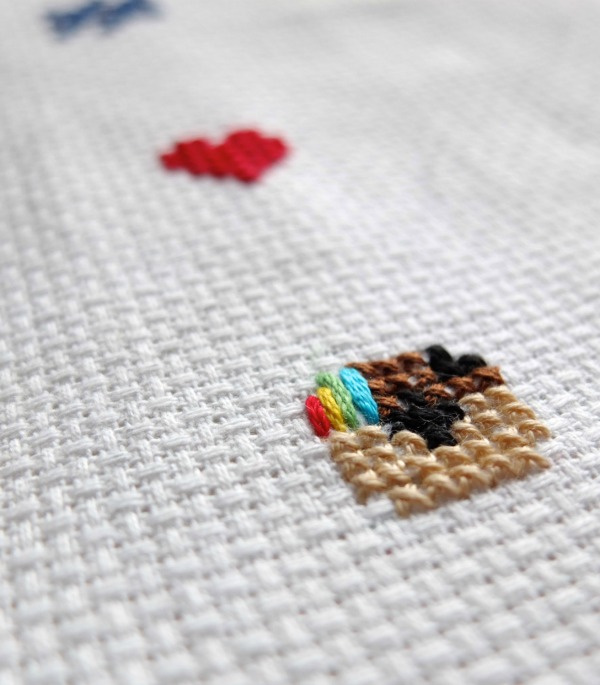
-Leave a blank area on Instagram logo for the long stitches.
-Work the long stitches with the full 6 strands of embroidery floss/thread. Secure end under a few stitches, and stitch as indicated on pattern, then secure ends under a few stitches.
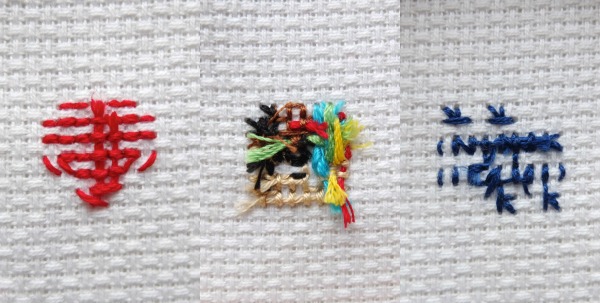
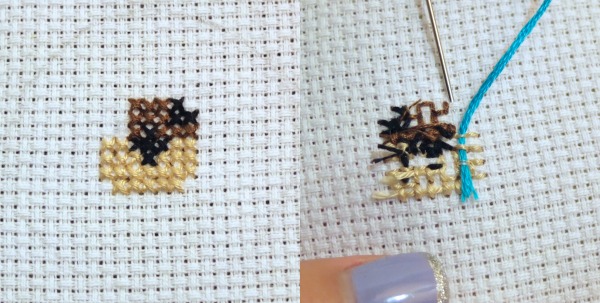
Try and keep the backs as tidy as possible, I know it’s hard when the designs are so small. The Instagram logo is the messiest as it has so many different thread colours in such a small area.
How to make fabric covered buttons
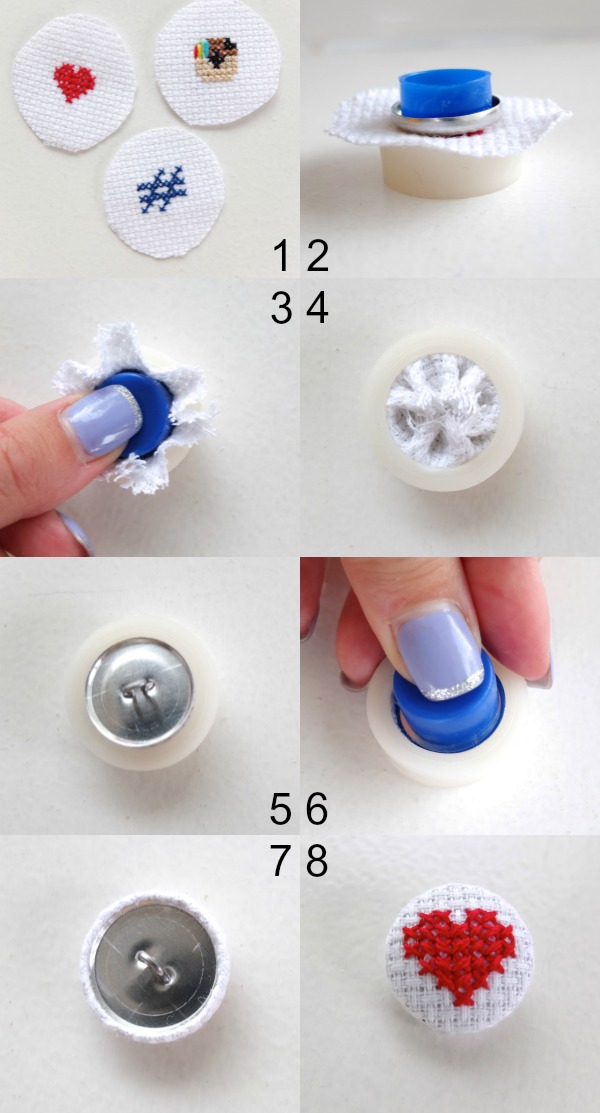
1. Cut out your fabric circles (marked with template).
2. Layer in this order: fabric circle motif centered and facing down, metal button top and then push tool.
3. Push down into mould.
4. Tuck edges of fabric in to center.
5. Place button back over the top.
6. Push down firmly until the back clicks in.
7 & 8. This is how the finished back and front should look.
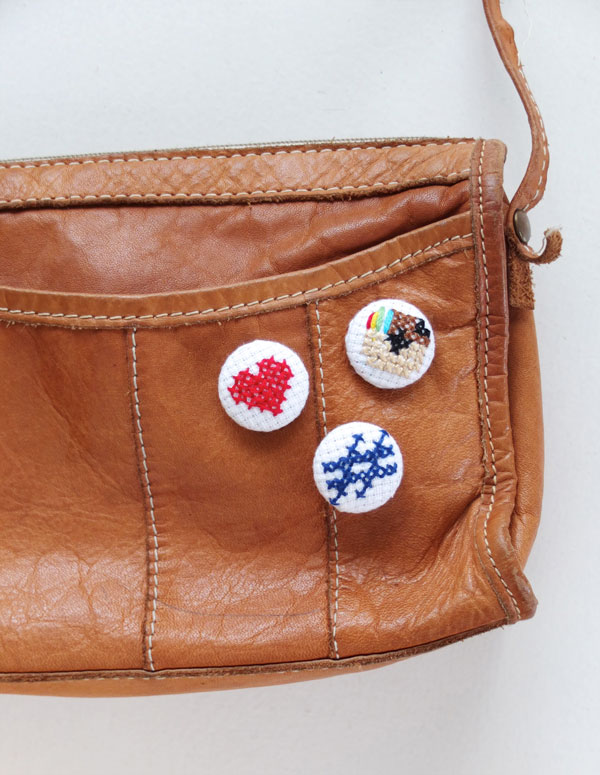
What will you do with all your new buttons? They are great for embellishing accessories like bags. You could even replace the buttons on your cardigan or pinafore.
Oh and if you want to find me on Instagram just search @mypoppetblogs

I bought a button making kit from Hobby Lobby (size 60, their brand not Dritz) and I’m having a super hard time making these. I can’t get the back to press in without my fingers throbbing of pain. I’ve tried using a spool of thread with some fleece to protect my palm and that didn’t work either.
Did you find the backs hard to push in when you were doing this?
If the fabric is very thick I sometimes have trouble. Try with a thinner fabric and see if that makes a difference.
Do you have any ideas for weather proofing and therefore protecting your buttons?
You could try Scotchguard spray, but I’d keep them as decorative and treat them like any fabric covered button on garments.