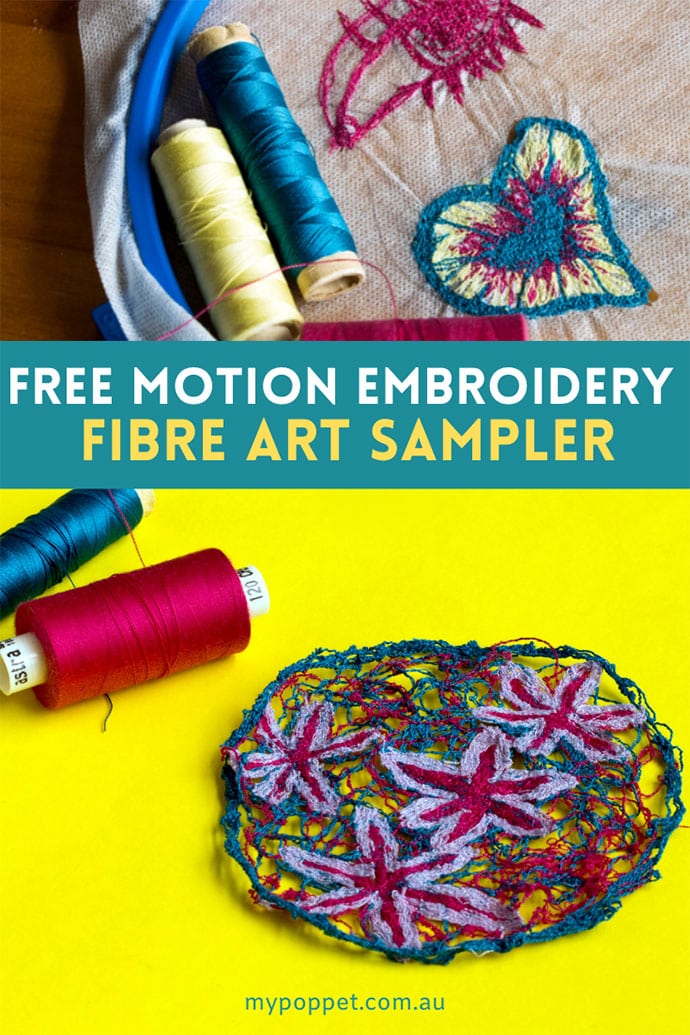
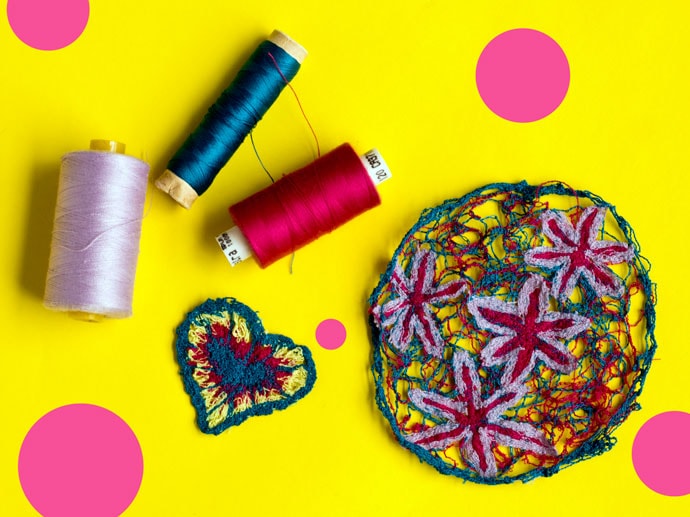
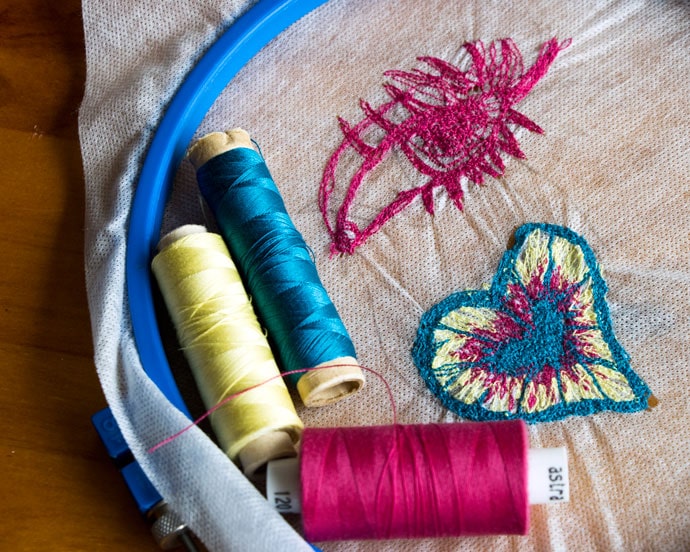
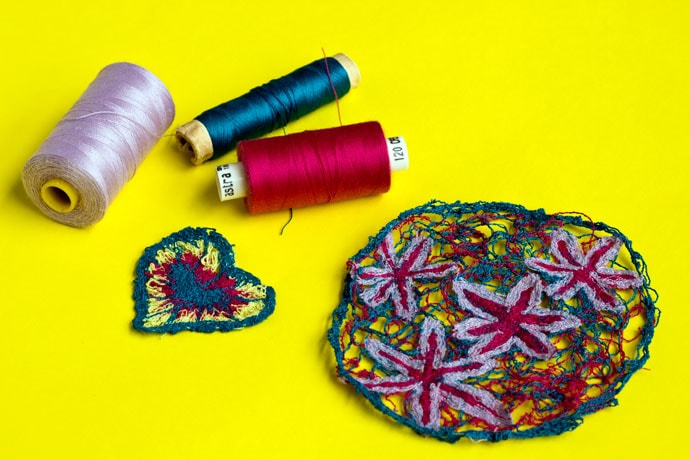
Use your sewing machine to draw with thread – Free motion embroidery on water soluble fabric creates interesting mini textile artworks that have a lacy quality.
Fabric interfacing can come in a varied range of thicknesses and materials, including iron-on varieties.
So imagine my astonishment when quite recently I learnt that there is such a thing as water-soluble interfacing.
My astonishment was taken up a notch when I learnt that water-soluble interfacing (also known as embroidery stabilizer), could be used to create one of a kind, lace like embroidery. Mind. Blown. Wide open.
Can you imagine the possibilities of such a thing? I can!
I could make place mats, coasters, shawls, hair ornaments, jewellery, bowls, detachable collars, bookmarks, wall art, doll clothes, mesh fruit bags, you name it.
You can tell can’t you, just how excited I am by this? So excited in fact I had to get started making something, anything, even just a small sample if I could.
I enjoy illustration, find beauty in lacework, and marvel at paper cut silhouettes. There is something about water-soluble fibre art that reminds me of these three forms.
I have seen lace work in progress and it is a fine detailed art form. So if you too are an admirer of lace and perhaps don’t have the patience or the power in your hands for such a thing, you may find water-soluble embroidery a very happy alternative.
Making water-soluble embroidery is actually a straightforward process. However if you’re doing this for the very first time you’re going to have a lot of questions. And rightly so! So I’ll do my best to share with you what I do know.
So what exactly goes into this so-called free motion, water-soluble fibre art?
The main components are water-soluble interfacing (naturally), an embroidery ring, sewing machine with a darning foot, and, of course, thread.
What is a darning foot?

A universal darning foot, also known as a free motion quilting foot can be purchased to fit most sewing machines. Buy online from Etsy
The darning foot, also known as a free motion foot, is an interchangeable sewing machine presser foot accessory. It is commonly used tool in quilting because it allows the sewer to freestyle their stitches and sew in any direction. To use it, the feed dogs (little teeth under the presser foot) need to be in the lowered position. In comparison other sewing machine feet provide control to feed fabric through evenly and sew straight lines.
Why would I need a darning foot for this project?
The sewing that takes place in this project is not so different to drawing and colouring with pencils. For this reason you need a sewing machine foot that gives you the freedom to stitch in all directions like you were drawing on paper.
How does the stitching hold together?
The reason why this process works so well to create a new textile is because as you sew you overlap the stitches giving an effect similar to lace or netting. It’s fine to have gaps in the embroidery as long as the surrounding stitches are creating a framework that will hold together.
Without further ado let’s get started on our Free Motion Embroidery Sampler project.
You may also enjoy:
Sew Free Motion Embroidery Art using Water Soluble Stabilizer
If you’re trying this technique for the first time, I recommend sewing your embroidery with no particular pattern or shape in mind. Get used to the feel of holding the embroidery hoop ring and moving it around.
Rather like bringing both hands together at the piano, at first free motion sewing will feel awkward but after awhile you will grow comfortable with the speed and the movement.
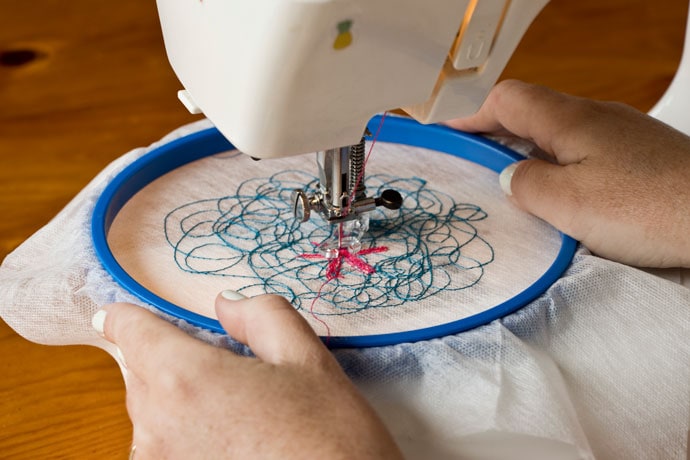
It is very likely that your first sampler will turn out like a Jackson Pollock painting. Mine did and I think it’s an awesome representation of a nucleus.
You will need:
- Water soluble stabilizer for embroidery
- Embroidery hoop
- Sewing machine
- Darning foot
- Thread (assorted colours)
- Bowl
- Water
- General sewing supplies
Note:
If you’ve had made enough samplers to be comfortable with the process you may wish to create a specific design. This is when a pencil and tracing comes in handy.
You can draw straight onto the interfacing before setting it up in an embroidery ring. Not to worry about visible lines after you’ve finished sewing, because the interfacing will dissolve in water.
If what you’re creating is to be larger than the embroidery ring you can work on one section of the interfacing, move the ring to another section and keep working.
How to:
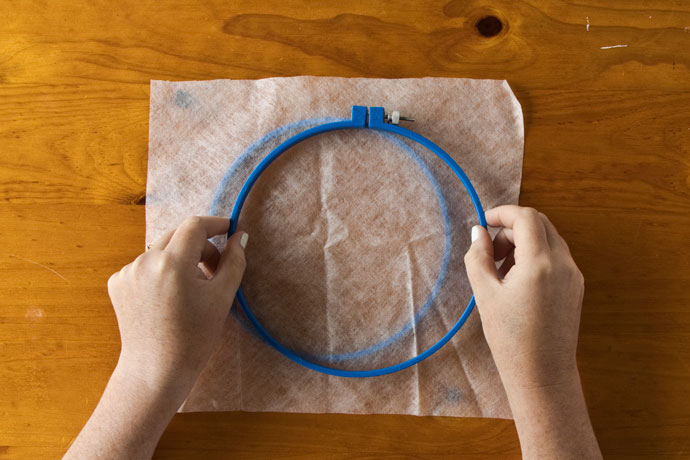
1. Fit a piece of water soluble interfacing into an embroidery hoop.

2. Feed your chosen thread into the sewing machine. Remove the regular sewing foot from the sewing machine. Slide the fitted embroidery frame onto the sewing machine with the hoop facing up.

3. Install the darning foot onto the sewing machine. Drop the feed dogs (the metal teeth under the foot), by pulling a switch at the back (or front) of the sewing machine. Switch the foot pedal setting to slow – for learners. I like using the slow setting for intricate sewing.
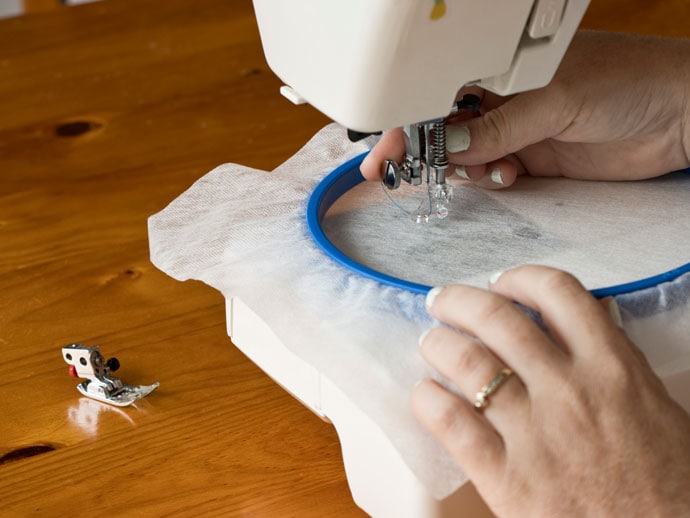
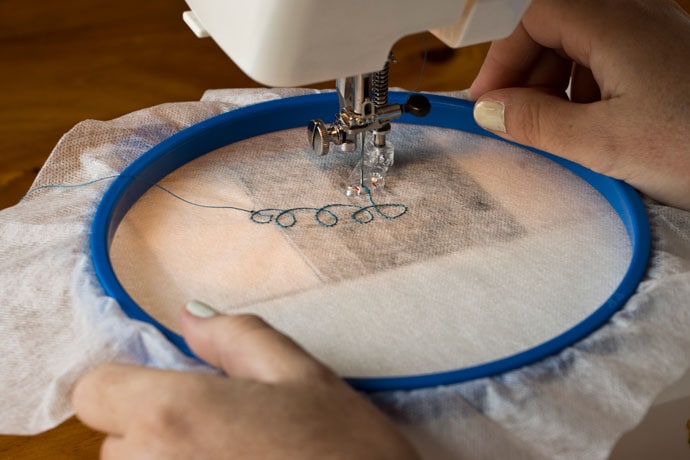
4. Hold the embroidery ring in both hands. Gently press down on the foot pedal (you can accelerate once you’re comfortable). Move the ring around slowly so that you are sewing smooth curved lines onto the interfacing.
If you move the ring around too quickly it will result in wider stitches and we don’t want that. I recommend making tiny movements to control the stitch size.
5. Continue stitching, creating any pattern or image that pleases you. Our motivation at this point is making the stitches overlap and connect. At any point in your sewing you can change the thread colour.
6. When you’ve finished making the sampler cut the threads, remove the darning foot and the embroidery ring from the sewing machine. Snip off loose threads. Loosen and pull apart the embroidery ring, and lift the interfacing.


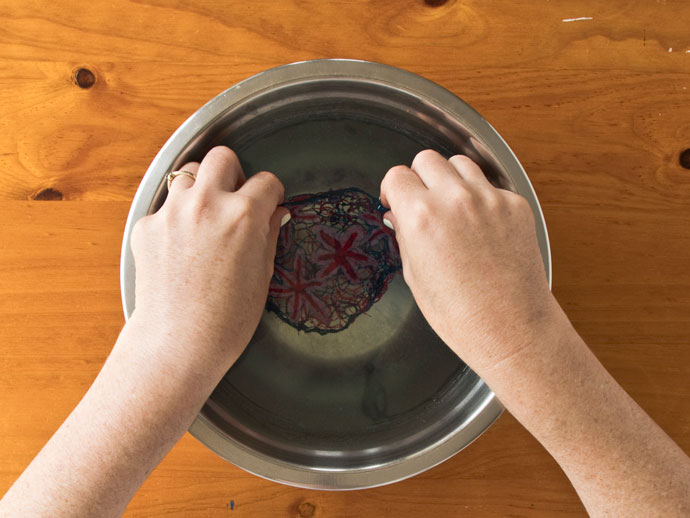
7. Fill a bowl with water. Submerge the interfacing into the water and watch it dissolve. The stitching will hold together if the stitching sufficiently overlaps. Slosh the sewing around in the water to make sure the last of the interfacing is dissolved. You may wish to give the embroidery a little rinse in the sink.

8. Now give the free motion embroidery sampler time to dry.


 Melissa is a hyper creative artist, and content creator.