This post contains affiliate links
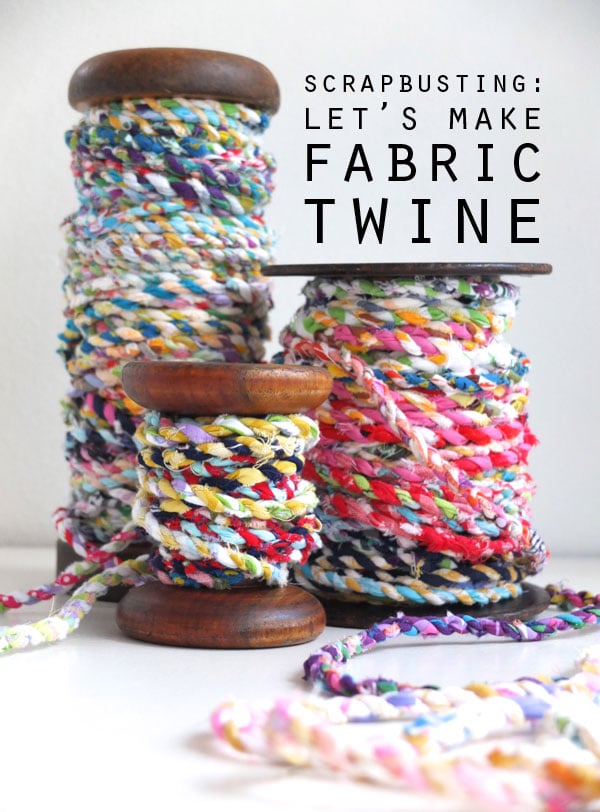
Here it is, by popular demand… How to make rope from scrap fabric. It’s an idea that came to me whilst I was in the process of tidying up my sewing space.
I tend to keep all my fabric scraps ‘just in case’ and all those really long thin pieces were tangling together and making a big mess.
After doing a bit of online research on rope making, I found this video showing how to hand twist rope from tree bark, so I’ve used the same technique with fabric scraps to make fabric string, and it works a treat.
I’ve made a video tutorial showing you how to make twine rope, to go with the instructions.
Using up scrap material is my favourite thing to do and this method can easily be adapted to make paper twine or yarn rope. Once you learn this basic method for how to make twine, you can really use any materials you have at hand.
You will need:
- Lots of scrap fabric strips in assorted lengths (max 1″ wide). The best twine material is a light weight woven cotton, or poly-cotton blend fabric. Jersey and stretch fabric can be used but doesn’t work as well.
- Scissors – These are my favourite
- Something to wind your fabric twine on to – I’ve used Vintage wooden spools similar to these but a piece of cardboard will do too.
- Time and lots of it!
How to make Scrap Fabric Twine:
- Gather all your fabric, you may need to cut some of it into strips, tearing is fine.
- Tie 2 strips together with a small knot to get started.
Tip: It’s easier to use one long strip and one short strip to avoid tangles.
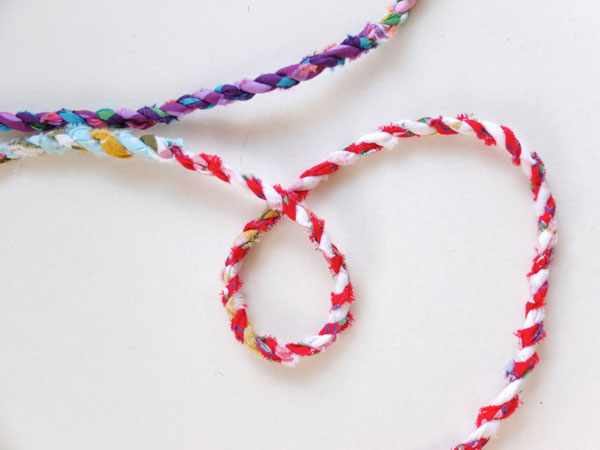
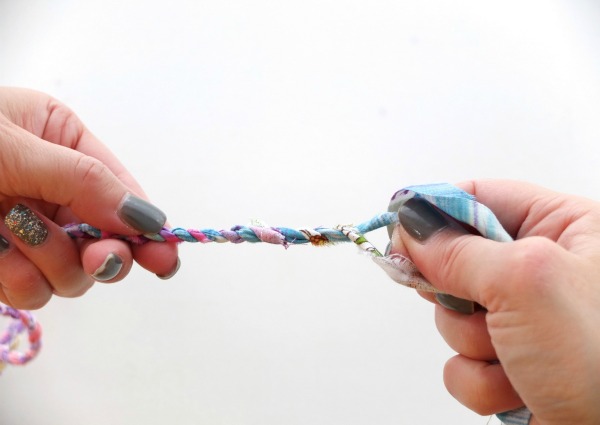
Start twisting
Step 1: twist strip away from you
Step 2: pull that twisted strip over towards you
Repeat

Tip: The tighter you twist, the firmer your twine will be.
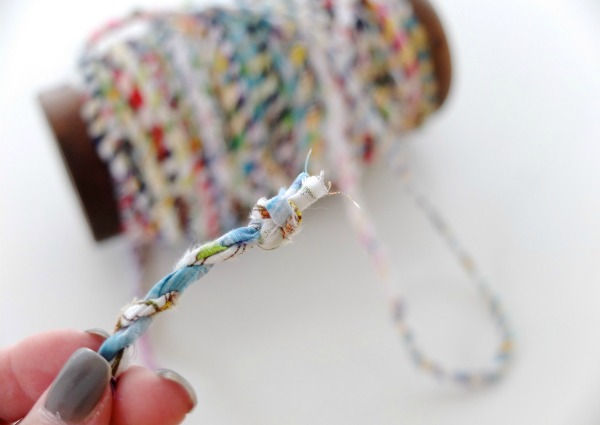
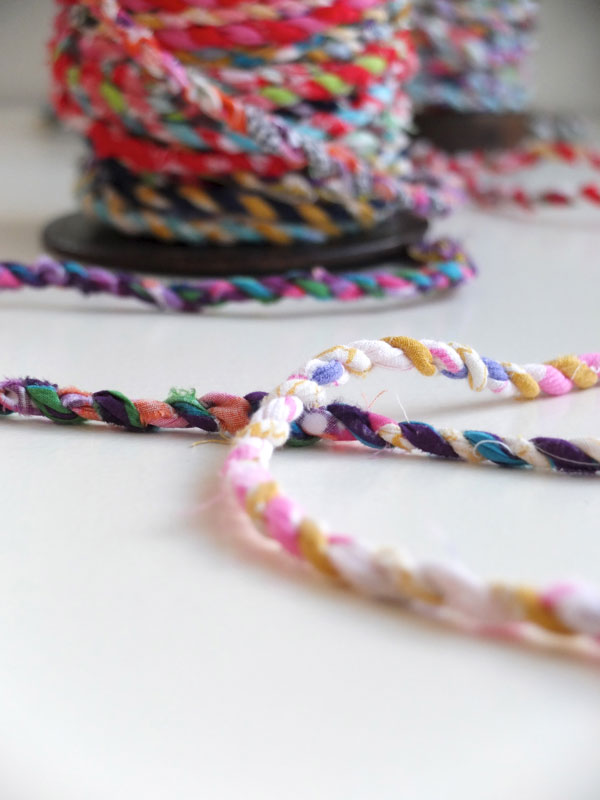
How to join fabric strips
Joining is easy, just leave a tail of about 1″ and wrap the new strip around it.
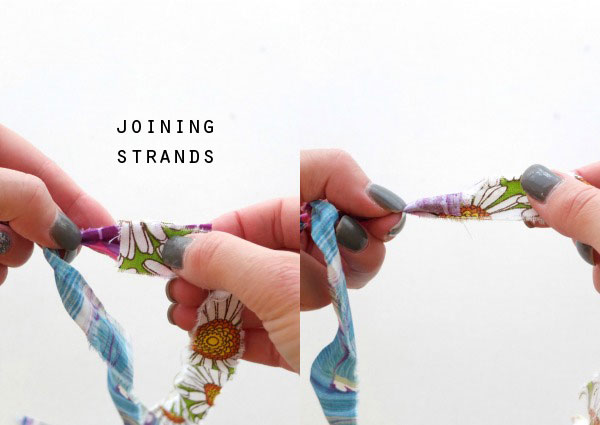
Keep twisting as usual.
The join will remain quite strong.
Tip: Make sure both your fabric strips don’t finish at the same time or your join may be weakened.
I’ve made a video that clearly shows you how to make fabric string, and it explains how to twist the twine and join the fabric strips.
It’s super addictive and sort of meditative, I made meters and meters of it. My hands did cramp up a bit, so make sure your take little breaks because the twisting action can also be a bit hard on the wrists.
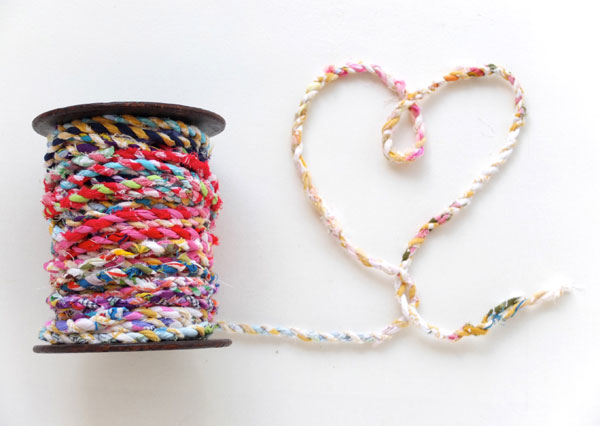
Using fabric strips in contrasting colours really shows off the twists and sort of makes it look a little bit like baker’s twine. I’m sure you could find a million uses for it, I’ve made a project that I’ll share with you soon. I think it would look great tied around brown paper wrapped parcels.
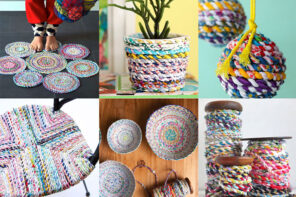
Here are some more fabric twine projects. Check out what else I’ve made with Recycled Scrap Fabric Twine:
- Fabric Twine Spiral Mat
- Vintage Saucer Chair Makeover
- Recycled Fabric Twine Planter
- Fabric Twine Gift Wrap idea

What will you do with your handmade scrap fabric twine?


This is a fabulous idea, I have so much scrap fabric around this place!
It would probably be great for crocheting too!
Thanks for the inspiration, Have a great day, Julie x
Can we twine with t-shirt fabric? i have a lot of old t-shirts that i can cut up into one inch scraps.
Yes I think you can but the cord will be stretchy. You may need to experiment with how much twist you add as it may want to unwind because of the stretch. Tell me how you fare.
Well I haven’t tried using t-shirt material for the specific project, I have worked with it often and have found that the ease of use happens if you stretch it slightly after it’s been cut the edges roll together really well and it tends not to stretch as far the second time. I would not necessarily suggest it for hanging projects like a purse strap but something like a rug it would be ideal for.
I have watched the video and tried twisting fabric unsuccessfully. I just don’t get it.
The trick is to twist each strand in the opposite direction to the twist of the rope.
That is absolutely gorgeous! I’m afraid I lack the patience to make it, though. I was also thinking that it would be fantastic on gift wrapping, but I bet you could loop various strands of it together to make a cool necklace or a belt, too. Thanks for the tute and I will pin it just in case I ever decide to spend some time twisting twine, perhaps while watching a movie! 🙂 Lisa
Yes there are so many possibilities. My friend also suggested making a necklace with it or macrame!
OOoooo…Macrame! That would be lovely..
More how to please.Cant get enough Information.Great products.More please.Thank you.Grama Bonny ?
I’m actually making this in a few main colors for each strand, green, red, blue, rainbow, and white, and I’m using that to make a sort of friendship bracelet style belt.
This is genius!! I’m looking forward to trying!
I made a melon basket by twining handmade fabric string. It is also used in basketry to make coiled and stitched baskets.
The same technique may be used with bread bags (split down the sides and cut the resulting plastic rectangle into 2 strips) Also dampened dried plant fibres may be used in the same way (try corn husks or bulrushes.)
Cut the ends of your join pieces on an angle to get a finer join.
Join all the fun of the National Basketry Gathering in March 2015 to learn these and other basketry techniques.
Cheers from Anne
I’d love to learn basket weaving, I just recently borrowed a book with basketry techniques and it’s fascinating.
I used to go to the National Basketry Gathering and would like to again; can you give me the web site to get more information on this year’s? Thanks!
Thank you for sharing this really fun idea.i cant wait to get started.
Hello! Nice nice!
Can I knit this? What do you use them for?
Thanks!
Yes you probably could but it’s a bit firm so you’d probably need very big needles
Big needles or an arm! I recently found this fun quick scarf/shawl idea, and all you need is yarn and your arms. And it crossed my mind that I would love to try to use some of my old t-shirts as ‘yarn’ so through idea searching I found your fun colored rope.. Yep! I’ll try it out and see what happens for this–
https://www.kollabora.com/projects/triplet-shawl-arm-knitting-pattern
You’ve created a winner here! Looks terrific on the spool, just leave it like that and enjoy the visual feast!
Thanks. The spools are gorgeous but just on loan, sadly I’ll have to return them to their generous owner.
I think I would coil it to make circular mats. You could get adventurous and try and make a bread basket or similar
Fab idea, thank you for sharing the know how x
I was wondering if a spinning wheel would work for the twisting part?
Someone has added a great comment just below that may be helpful in regards to using a spinning wheel.
I think I’m going to do this, then twist two of these together into thicker strands to make something more like a rope. Them I’m going to use that to wrap around the scratching posts on our cat tree which have huge bare spots.
One of the best diys I’ve ever seen!! Can’t wait to try it 🙂 and then make some jewelry!! Or a bag maybe…
I love this idea. Want to see video.
Love it! Can’t wait to try it!
Brilliant! I’m seeing coiled circular placemats for a cheery dinner or birthday celebration. Thank you so much for sharing.
This is the most fun craft! Thanks so much for the video!
This is so cool! I am sharing this on my FB page….what a great way to use scraps : )
Wonderful! I’m going to put a bucket of scraps near my TV-watching chair. Thanks for sharing.
Be great for crocheting or knitting a rug or extra thick blanket 🙂 ty for demo now Iknow what to do with this big tub of scraps 🙂
A spinning wheel works just great for this project, but it will need a bulky head flyer and very large orafice.
I actually made some “yarn” like this about 10 years ago, but never thought it could work for anything. Now I’m thinking I might use it to crochet a bath rug.
A variable speed drill can also be used to twist, but it needs to be set at the LOWEST speed.
Yes, I originally thought about a spinning wheel but don’t have one. It would make everything much faster. I’m keen to try spinning as I love working with roving.
I use my Fiskars hand drill for twisting many materials. Available at Michael’s and Joanns Fabrics.
Thanks for sharing, Cintia.
I’m curious about the use of a drill … if you only twist a bit at a time, then wouldn’t a drill be more cumbersome than helpful? Or are you saying that you can twist the entire length of fabric and then twist the entire length of the other piece of fabric, and then do the twisting of the two lengths together???
Hoping you’ll see this and reply! 🙂
my OCD tendencies find this idea a breath of fresh air…I’m so glad that you thought of this and that you shared it with us…thanks…
As a spinner, this tutorial was intriguing! I love it when principals from one craft can be morphed into a project that anyone can do, sans the specialty tools 🙂
My first thought was to spin it, but I don’t have a spinning wheel. I did watch some spinning videos to look at ply technique.
I’d love to give yarn spinning a try, I think I’d really enjoy it.
That is beautiful! What a great idea to use up all those fabric scraps.
This is so gorgeous. I’m readying for a plane trip and will have some layover time. I think I’ll use this downtime to make some twine.
I plan to couch it onto a skirt. So pretty!
Perfect for travel craft! It would look amazing on garments, I was thinking about using it like piping on a jacket.
Wow, it would be fabulous piping a denim jacket! So cool….
I suggest you work with damp/wet fabric as it is easier to twist and don’t tie a knot just start with the first piece folded over.
Great tip. Thanks
You Tube video link shows an error message and won’t play. I went to YouTube and won’t play there either.
Thanks for the heads up. Not sure why, seems to be a google thing. I’ll investigate.
It’s back now 🙂
i have a dress in a museum collection in Australia, hand twined from silk scrap, dyed with plants. Nalda Searles, textile artist from West Australia taught me the technique. Elizabeth Wayland Barber writes beautifully about the importance of string in her book “Women’s Work, the first 20,000 years”
sounds stunning. I would love to see a photo, do you have a link to a image? I think what I enjoyed most about the process was the feeling that it was part of a long tradition of the evolution of textiles, and also each fabric scrap has a history for me so it’s like a little memory rope.
I haven’t seen anyone that sells any, it’s quite time consuming so would probably be a bit expensive. You should try making some, it’s not hard to do.
Hi, hi
i have made those years ago but why aren’t you using a spinning tool.
or your drill of making a spinnning tool of just a cd and a stick.
that is working much better and you haven’t the cramps in your fingers and hands.
Okay, i have a big spinning wheel and as well those hand using tools because of my interest in historical methodes in crafting.
I know that i saw in the 70th’s a woman using her kitchen mixer.LOL
soooo smart and it worked.
allthought… i have broken mine by using it to made fine paper mache pulp.
I thought it was just a strong one, but looking after he was broken all the parts were made of plastic. so be careful what you will use.
but the looks from your new made yarn is gorgeous, and very pretty. so mind is tellling me to start as well;-D
thank you for the sharing and the tute. really like this;-D
you could also use a navajo spindle much less expensive than a spinning wheel & u can make yarn too 🙂
There’s a contraption used to twist a dolls hair. Turn a crank and it twists both the individual material and the two together all at once. It’s plastic and probably not durable, but I am sure there are some models out there on Make, and YouTube, that are fairly easy to make yourself.
Save time and hand cramps.
Awesome idea!!
This looks great, but the video won’t play either on your website or youtube. It only plays for a few moments then comes back with a playback error. I’m from the UK does that make a difference?
Not sure why. I think it’s a you tube problem. Happened earlier today then it was fine. The help page says the issue will resolve in around 30min. I really don’t have control over the you tube side if things. Hope it resolves soon.
I will try!!!
Thank you so much for sharing!
♥ Kerstin
make a drop spindle, I mAde one from a you tube video for spinning paper strips, it works beautifully for this too.
What a great idea for all those fabric scraps! The scrap twine is so beautiful too!
LOVE this! Your spools are so beautiful, and I really love the idea of using this fabric twine for embellishing clothing. Really makes me wish I hadn’t donated my huge fabric stash when I moved across the country a couple years ago.
So. Many. Ideas! Thanks so much for sharing. I want to make a hundred things with this yarn and finally use up all my scraps at the same time. If I make any tutorials I’ll make sure I link back to you! You flippin genius!
I am unable to stream this video….I even tried by going to U-tube but I can’t get beyond the first few seconds. Can you please help?
I’m having the same problem on my phone, but seems to be working fine on my laptop. Maybe try on a different device?
A drill would twist this a lot faster. 🙂 I used a drill to twist crepe paper into paper twine.
Using a spinning wheel would mean twisting each strand separatly, then using two bobbins-full to ply together – not nearly as satisfying, nor portable as this by-hand method.
I do like how beautifully it illustrates plying: taking two singles spun in one direction and plying in the opposite way provides a balanced yarn.
Beautiful idea! My daughter has a plastic game for twisting dolls/girls hair too, I’m going to try it out. It would be lovely to use this technique with Shantung silk to make special jewellery!
This could also be used for rug weaving or crocheting.
I think you could weave or braid this into beautiful placemats!
Since the video doesn’t work for me right now, how do you keep the twisted strands from untwisting after you are done?
The twists in the strands hold themselves together like a rope. They don’t unravel
Would make some interesting macramé!
This looks absolutely gorgeous! I love it! I am definitely going to try making some strands with my fabric scraps. Thank you so much! I
Ah, nice! Just saw a post from A Beautiful Mess about making your own rug out of scraps, and twisting it around some sort of rope. Guess this will work as well! Hmmm. I can see a new project emerging!
I use leaves from my daylily plants after they have dried. I have to clean them out of my garden anyway and I always have a ball of twine to tie up other plants and vines. It lasts a long time even outdoors. It’s an ancient rope making technique. Good for you bringing it to the next generation.
Diane
Yes it’s very ancient, maybe the first type of spinning. I’m looking forward to experimenting with different materials.
That is awesome! I am going to try this using my drop spindle!
My local quiltshop posted a link to your post on Facebook. How LOVELY! Thanks for sharing
:c)
I have to try this with a wheel and then crochet the scrap twine into something. Oh the possibilities are endless.
what a wonderful idea. of course I see it after I clean out my stash of small strips. Now I just have to start saving more.
How very pretty. It could make good handles on a homemade gift bag, maybe a belt. Depending on how sturdy it is it would make a cute dog leash. Thank you for sharing this.
I LOVE this idea and it made me remember something that I saw on TV many years ago on the Carol Duvall show. I don’t remember exactly what her project was but she used a drill to twist something. I’m thinking that you could possibly twist each individual strand with the drill in forward direction, then maybe twist 2 (or maybe even 3 or 4) strands together in the reverse direction! You ‘ve got my wheels turning…can;t wait to try it! Thanks for the fun idea and inspiration!
Fabulous tutorial. Wish you sold the finished product in your shop!!
I have done a similar thing but have plaited three strips of fabric together – love the idea of putting it onto a spool
I’m thinking it would make for some really great filler in place of clothes line in those coiled fabric baskets. Fabric inside and out! Great tutorial. Thanks!
Great tutorial Cinti! It’s such a simple technique with a great result. I learned it at the MCA last year as part of an exhibition of indigenous Australian weaving. They make string from plants and leaves in the same way then use it to make fishing nets, woven baskets, etc. Super strong!
I can’t wait to try this at summer camp – I’ll send you pics!
Thanks for a great idea!
would love to see pics. Have fun at camp 🙂
This is such a great way to use up scraps! The rope looks so amazing and, of course, is a very useful result, too. What I like as well: I can do it while sitting on the balcony and enjoying the sun. Great!
I send you lots of greetings from Bavaria/Germany
vonKarin
The perfect craft to relax in the sun with.
Thanks for this great tutorial! I got all the instructions right away and in two days I made more than 20 m of the stuff!! Like you say, it addictive and satisfying. The only downside is that I stayed put in my chair for hours on end, got a stiff back and neck! Aaach!!! This morning I got the idea of coiling the thread around old CDs and turn them into attractive coasters… we’ll see how they come out.
Cheers!
xx
Yes, I found my wrists did get sore after a while. Great idea re the coasters.
I LOVE this — finally a simple way to use up my left-over fabric. I started tonight, while watching the Stanley Cup Finals and probably have 3 or 4 meters!! Thank you SO much!!
Fantastic idea! You could easily sew together baskets, bags and bowls out of these. I’ve been doing this with cotton clothesline and scraps of fabric as suggested in the “It’s a Wrap” book. It’s loads of fun. This would add a wonderful texture as well. Thanks for sharing this.
This will be great for weaving rag rugs! Thank you for posting.
I”m so excited to find your tutorial. My daughter has several long appointments with her cancer treatment and I know what I can take with me to keep my hands busy.
Sorry to hear about your daughters illness. Crafting is such a great way to get your mind off things even for a short time. Waiting for appointments are the pits, hospitals are so depressing.
Fabulous idea. Thanks for the inspiration.
I made a lamp shade with my scrappy rope!!
I took the fabric off of a old lamp shade frame and then wrapped my coil around the frame.
Wow, great idea, I bet it looks amazing! Would love to see a finished pic. 🙂
Thanks for this great craft tip, I have loads of scraps and didnt know what to do with them. I am making rope to use as garden twine, to tie up bean wigwams, and tie up the raspberry canes ect.
What do you wrap the fabric around?
Can someone explain how to use the drill or another spinning tool?
The fabric is twisted around itself. The two strands of fabric twist against each other.
WOW! I can see place mats, rugs, coasters and I always have scraps – plus I’m sure I can find odd pieces of fabric at yard sales cheap to cut up. I have a loom…and I can crochet…what a fun idea! Baskets? That might be another fun thing to try! As I said, “WOW”!
Love thus- could someone please explain about using a drill for the twisting?
TiA.
Brilliant! Thank you for such a wonderful tutorial!
How do you finish the end to be stored? Does it not unravel?
Just tie a knot. It doesn’t unravel once knotted.
Love this idea! Most everyone has a hand mixer in the house…only insert one beater, attach the fabric, and turn it to the speed you’re comfortable with. I do it with yarn twisting all the time. Use it for other fiber crafts as well. Happy crafting :0)
Thanks for the tip.
Can’t wait to try it! Thanks!
Love it I have gone a little crazy making this twine and things I can do with it. Check it out on my facebook page recycle crafts by leigh
Two “sittings” later, I have to say this is a lot of fun to do. Now that I’ve gone back and read a lot of the comments, several ideas I had while doing it show up as good ones: using a drop spindle and wetting the fabric first. I don’t see why you can’t use yarn scraps in the mix as well; something I plan on trying next. I love the basket and coaster ideas for using this colorful twine. Thanks again for sharing this simple craft.
Great! Thanks for the tip. would love to hear how you go.
I would use a drop spindle , then ply together, easier.
Love this…very meditative. I have found that if I use pieces of fabric 1/2 to 3/8 inch wide, I can fold them in half and twist them between my thumb and forefinger which cuts down the strain on my wrist. Also, I had a really skinny piece and got adventuresome…I added in a third piece and started doing this using the strands…I LOVE how it looks…not sure if I can attach a photo here for you, but I could email it…basically I twisted in a new piece the way you join at the end of a stand, although it was about 6 inches from the end. After about 3/4 inch I separated it out. I have gotten in the habit of holding the twine as if I were knitting in my left hand…through my pinky, over my index finger, around and where I’m twisting I hold it together with my left thumb and middle finger. So with three strands, I hold the three spread out as if I were braiding, except after twisting I don’t move it to the middle…I move it all the way to the front. I’m planning on using it as ribbon in Brown paper bag wrapping paper since that’s so popular right now!
Thanks for sharing your technique. I’d love to see how your twine looks. You can probably post a link here if the image is hosted on instagram or somewhere else on the web.
I’m sure readers would like to try the 3 strand technique.
cheers Cinti
Thanks for sharing! This is awesome and I can see my next project! A new rug. Scraps…..here I come!
This is so great! I love using every bit of things and recycling and have been making t-shirt yarn bowls. I can see this twine making some beautiful small bowls for holding jewelry, paper clips, pins, etc. Thank you so much!
Thank you so much for this tutorial! It´s so fun to make these fabric twines, can´t stop 🙂
Gun, Sweden
This is the best video and tutorial I have seen on making fabric rope. I have been making really thick fabric rope but it is def not as good as yours. Lynne
I too would love to see a tutorial on how you do it with three strands.
Great link Susan, thanks for sharing. I think I may try thigh spinning, but maybe with lighter weight fabrics. I’ve also been very curious about trying a drop spindle for wool spinning so am keen to read this whole article.
This is so pretty, but I’m wondering what happens if you try to cut it (say for wrapping a gift). Does it unravel or do you have to make sure you tie off the end again?
It tend to hold itself together, but you may want to tie a knot if if will get lots of handling
BRILLIANT! Let me say that again, BRILLIANT! I am one of four women fiber artists that share a studio. We have loads of scraps for our various projects. I love love love your idea. Thank you so much for the video tutorial – my dyslexic mind appreciates it.
Fantastic. I love putting scraps to good use
My grandpa had an actual wooden ‘rope maker’ that would twist strands of twine. All you had to do was turn the crank. We fought over who got to play with it. It would be so much easier on the hands. Mine has been lost (borrowed/stolen?), or I would show a picture…it makes me very sad indeed.
Great simple craft idea! I also have a stash and can’t bear to throw little pieces away.
I used to make string quilts but haven’t wanted to do big projects for awhile.
I am currently making yarn and fabric bracelets and think this will be a great way to design one!
I have seen other fabric rope used as jewelry that is not as tidy or as pretty as yours!
Thanks so much!
I wanted to make a big rug. So thought about making twisted twine “rope.” I cut up old woven shirts, 2” wide, then folded in half. As I go twisting along I feed in quilt batting. Basically twist wrapping the batting inside each strand. It makes the finished product finger-size diameter “rope.” A little tricky at first, but it works! Im going to try the drill idea mentioned for this, now, too. And I’m inspired to make twine-sized twine, too! I have my Great Grandmother’s spinning wheel and spindles. I never knew what to do with them other than decor.. Now I’ve looked at some of the comments’ references sighted. A whole new world to explore! Thank You for the innovative ideas and conversation! How Fun!
very pretty. I had rolled made some of this from all denium about 30 years ago. I think I ended up making rugs out of it. Thank you so much for the idea again.
Oh wow, this is so beautiful! I am late to the post, and I love reading all of the comments and suggestions. I wonder if I could make a variation on a friendship bracelet with the fabric twine after I make some? Oh, so many possibilities…
I think it would make lovely bracelets 🙂
Awesome idea! Found this on pinterest as I am really interested in spinning, and i’m sure it was already suggested using a spinning wheel (a lot of tutorials on twisting fabric into yarn with a spinning wheel), but because I know how expensive a spinning wheel can be, why not use a drop spindle (I have a drop spindle with a top whorl), which can not only quickly spin these fabrics into yarn to save you time and a hand ache, but you can take it with you anywhere from the home, to the park, to a coffee shop, to even the car (i’m guilty of taking my drop spindle with me everywhere in my purse haha)! You can spin anywhere with a drop spindle! Best part? It’s super cheap (compared to a spinning wheel). I bought my spindle for only $12.
Just something to think about! Other than that, this is awesome! 🙂
I’m really interested in getting a drop spindle – I think I’d enjoy portable spinning 🙂
This informative craft is priceless to me! Thank you!! I took a picture of some lawn furniture that I fell in love with a few years ago at Hobby Lobby but was Way to expensive even at half off. It was an iron rectangle base with fabric strands woven for the table tops. I took the picture with the hopes of some day trying to make “fabric rope” and so very lucky to have found your site!
And as things sometimes go, my brother just so happened to be giving away 2 end tables and a coffee table that have glass tops that I am going to remove and then weave the fabric twine on 🙂 So Excited!
Thank you!!
This might help your hands, we used to make friendship bracelets when I was younger with yarn by twisting it. We tied off ends to the back of a ladder back chair or attach to a wall with a cup hook stretch off a lengths of different colored yarn, and attach it to a hand held mixer beater, turn your mixer on low slowly start twisting, when making the bracelets you would twist them then grab the center length, remove both ends and bring them together, when you let go, the tied off ends wall and beater end would twist themselves together like a spring letting go. Believe it or not, they would stay that way. Tie a small knot to join bracelet.
So many ingenious methods. My readers are the cleverest. Thanks for the tip. I’d love to hear if someone tries it out. X Cinti
Love the cording! We basket makers do this with all sorts of materials. It would make a lovely gift.
Thank you, thank you, thank you! I’ve so much scrap fabric that I can’t bring myself to throw out but have no reason to keep! This is the perfect solution. A million times thank you!
I’m going to use my dd’s hair twisting tool (used to me mine and my sister’s from the late 90’s, lol). That ought to speed it up. Thanks for this- I just culled MORE scraps from the bin last night, so I’m happy to see new ways to use them up!
Excellent idea. I’ve been looking for one of those without success
This is so much easier using a spinning wheel. Can’t wait to get started. As if I needed more yarn….
Lol, we all need more yarn like a hole in the head, but that hasn’t stopped us!
Looks awesome…but what about when you get to the end? If it’s just twisted together, won’t it just unravel when you let go?
The twists hold themselves together (like a rope) but a little knot in the end can prevent unwinding if it has a lot of handling.
Just found this on Dollar Store Crafts post. Absolutely love it! I’ve posted it on reddit, pinterest and all my social networks. Thanks so much!
Nancy
Thanks so much for sharing Nancy. I’m glad you like it.
Bravo
I make a lot of scrappy rugs. These “ropes’ would be good for weaving or knitting into rugs. Not sure if it would help but tassel makers who twist cord will use a hand drill to do the twisting (which is not as nice as the finger work done with your method).
I have loads of scraps I can’t wait to try this. It is esp appealing on the spools. I can’t wrap my head around how to use the spindle or drill though. Thanks for sharing! Pamela
They look so great on old spools Pamela. I find hand making gives a tighter more consistent twist. Haven’t tried other methods yet.
Just found this on Pinterest, I work in a fabric shop and it is always great to find new ways to recycle scraps! I am addicted
Yay! I’m always trying to find a good use for scraps. And yes very addictive
love the look!
thanks for your tutorial. One of my favorite crafts is to make backyard boho banners. I have always used jute twine, or double-fold bias tape for the stringing cord. This would make a unique, vintage strand. It could be coordinated with the triangles in the banners. Thanks for the great tute!
Just thought I’d say thanks for the great idea of what to do with all that left over fabric! I made placemats for our patio table. Then I sprayed with scotchgard to help protect them. They are so colorful, perfect for outside. I use Fiestaware so I made them 11 1/2 inches in diameter but you could make them any size. Thinking about making a runner for the table next.
What a cool way to make string which is unusual & using what would be scrap…..looks so beautiful! Thanks for sharing this idea with everyone. And you’re an Aussie, good to see local talent!
This is so colorful and pretty! I have a few of those old spindles that I use to set candles on for arrangements of candles of different heights. I think I’ll make some fabric twine and wind them on the spindles and add colorful candles. What a pretty centerpiece that would made on the dining table. Thank you for the video tutorial.
I’m braiding 3 of them for a purse handle on a hooked purse
Thanks Lindsay, some great projects in that roundup.
Terrific idea. I’ve been looking for a way to use burlap textured bed-sheets that were on clearance at Ikea (they looked good online).
Now I can make my own rope and use it to re-cover my cats’ scratching posts. They go through the carpet pieces so quickly. Maybe this method will take them a while to destroy.
We’ll see if I have the patience to make this.
I saw this project months ago, and it’s been perking in my head ever since. Then last night I was watching some episodes of Quilting Arts I had recorded, and they were wrapping their scraps around clothes line. That made me remember this post, and I hunted it down. I probably have 3 or 4 meters, just from an hour or so.
I like this idea better than the clothes line, because I am just using my scraps, and not buying something else. I am using thinner scraps, about 1/2″, since I have a bunch like that, and I like the thinner twine. I see lots of jewelry coming. I could start weaving beads right into it.
I do my joins differently. I do them like when you’re making a toothbrush rug. I cut a small slit lenghtwise at the end of my working strip, and a small slit on one end of the new piecce. I push the end of the new piece wih the slit, through the slit in the old, or working piece, then take the tale of the new piece and push it through the slit in the new piece’s end that I just stuck through the old piece (I only push it through enough so the slit is through) Then I carefully pull the end I just pushed through, until it comes toghether with the old piece in kind of a small slip knot.This way I can use up ALL of my short pieces as well, without having to hold them while I twiist. There is less overlap, but it seems to bee just as strong, as the entire knot and any tails get twisted in. Sometimes there is a tiny bet to trim off.
If this doesn’t make sense, look up toothbrtush rugs on youtube. They demonstrate it much better than I describe it.
Thank you so much for your wonderful tutorial and video, I am havin a blast using up my scraps!
Fran
Thanks for the joining tip, I’ll look it up. Glad you are enjoying it, I’m currently making some for a woven chair seat.
Thanks for the great tutorial! What happens when I want to cut a piece for gift wrapping? Should I tie a knot on each end?
You could tie a little knot at each end of if you wanted something a little more discrete maybe a little dab of glue on each end?
I have done embrodery thread on the bobbin winder of my sewing machine. I’m going to try and twist each fabric line seperately and then try twisting them together. I love this but my hands won’t allow me to do this with my hands any more. will let you know if it works! thank you for the wonderful idea to use up my scraps!
Hi lovely idea, ?can I combine cotton fabric scraps and polyester fabric scraps ?
Yes. I have it’s a great way to use up unwanted poly fabric
Good Morning!
I made this rug for my mom for Christmas and she LOVED it! Thank you soooo much for the inspiration!. I now have a couple of friends asking if they can buy one. Could you possibly tell me how much a rug of this style should sell for in USD? I haven’t been able to find anything like it on line to compare prices.
Thank you!!
Misty
Your video is not working and I need to “see” it to comprehend it.
That’s odd. Here is the direct youtube link https://www.youtube.com/watch?v=-XfpFhnh8xg
Cintia,
Your tutorial inspired me to make my own fabric twine rug. Help. Around the edge the rug is wavy. Any thoughts about what I’m doing wrong?
Love your site! Monika
Hi Monika. It’s likely that you’ve fed in a little too much twine as you were sewing. Try giving it a good steam press and if that doesn’t work you may need to un stitch the wavy part and re sew.
I absolutely LOVE this idea!
I’ve started doing my own just yesterday. I have heaps of scraps and other fabrics that are less than attractive that came in a bundle with fabrics I actually did want, so now I’ve got a use for them!
My only question is have you had problems with tension strength as far as the joined pieces? I’ve tried to make sure the pieces are a good bit inside the first piece and wrapped well, but when I just mentioned to test it a little bit, thinking it would be fine, it completely pulled it out. Have you had this problem?
I have, for the time being, resorted to just tying knots as small as possible to attach the next piece of fabric. I don’t mind it so much, but I do like the seamless look much better.
Any advise would be much appreciated, and thank you for the brilliant idea!
It’s really important to stagger the joins. There is no issue with breaking as long as both of the strands don’t have joins in the same place. Also make the twist quite tight and it will hold together.
Hi! Thanks for the idea and explanation! I have a school project where we can only use gingham, and I am using the twine I made with strips of it to decorate the rest of the garment in swirling patterns! It’s gorgeous and brings a lot of fun and texture to my dress, so again, thank you very very much!
Love it when someone thinks outside the box! Thanks!
Is there anywhere I could buy this beautiful fabric twine already made?
There is a seller on Etsy which sells it in 5 yard lots – the following is an affiliate link – Fabric twine 5 yards
Thank you so much! 😉
Hi Cintia,
Found your tutorial very inspiring but somehow when i loose the thread that i just started the winding unwind, what am i doing wrong?
Thank you
Sounds like you are twisting the main string in the wrong direction. The single strands should be both individually twisted away, and the main strand should be twisted towards.
Take a look at the video again, it should show in clearly. Hope that helps.
Hi Cintia,
Have only just discovered your site via Pinterest so this is a question about an ‘old’ post – scrap twine. Just wanted to know if it is best to use cotton scraps or will synthetics work to. Also, it I wanted to make a fatter cord, could I work with three strands?
Thanks – Stephanie
Hi Stephanie, yes you can use synthetics. Polyester and poly-cotton blends should work fine. Some fabrics with high amounts of spandex may not hold the twist.
If you want to make a fatter cord just cut thicker scraps, this could be a bit hard on your wrists though so take lots of breaks. I haven’t tried it with 3 cords but in theory it should work (may just be a bit of a handful).
I love love love this! Thank you for sharing! I’m definitely going to be making some of this and hopefully making a crochet rug from it 😀
I hope you don’t mind, that I’ve added it to my blog… Obviously linking back here xx
I love the look of your twine and have several feet of it made. The best part is you can work on it, put it down and come back to it and not worry about raveling or counting. I’ve found that mine isn’t something that I would want to crochet but I can see it being woven without much difficulty. Currently I’m working on some garland for a girl’s bedroom in pinks and browns that I think is adorable!
Garland sounds perfect! Yes it’s the perfect project to pick up and put down when every you need something mindless to work on.
Perfect Chanel jacket embellishment.
Hi!
Great, great, great project! But I wonder, is there a way to “end” the twine? Also with a knot? Or how would you do it? I’d like to make this in my spare time and then use it as decoration on gifts, but I want to know how I can secure the ends so it doesn’t come apart on the gift…
If anyone has tips, they’d be welcome!
Thanks in advance!
I just tie a little knot in the end.
I’m so excited to find this use for scraps! I have several long bits that I didn’t figure would be useful for much, but I’ve held on to them…. This will be perfect! I’m selling at a market in a few weeks, and thinking this would be a great way to stay busy if it gets quiet during the hours I’m there, or a great way to strike up a conversation! Thanks for the info on both the twine-making and the cute mats you made with it.
I love this crafty idea and have been making fabric twine since I first saw your post… I have used it to decorate gift wrapping. But my favourite use has been to make rope handles for my paper bags. I use these bags to wrap up quilts I have sold and the rope handles just work so great to bring the whole package together. I have also made rope bowls and potholders with my fabric twine and they are a hit.
That sounds wonderful. Great idea using them as paper bag handles. Thanks for sharing.
Hello. Thank you for providing this tutorial! I found you from Pinterest. I’ve made yards and yards of fabric twine. And started stitching a round rug. I am very pleased with the results!
I’m working on a blog update and would like permission to link back to you. Thanks in advance for your response. Wishing much happy crafting to you!
Looking forward to seeing your finished project. Yes of course you may link back to my post. Thanks for asking.
If you want to have a look, I’ve updated my blog.
Thanks so much. I’m really pleased with my fabric twine project. I do have more project ideas and will continue to link back here.
https://hitaswhimsy.blogspot.com/2018/07/rag-rugs-scraps-new-technique-not.html
MERCI !
WOoooWW ! That’s such a good idea ! it’s so nice !
Thanks for sharing !
Merci !
Hi Cintia,
I love it!!! I have made a coaster and now I am making a mat but it keeps wanting to curve how can I stop that.
Cathy
It tends to curl up if you pull a bit too much as you are sewing. Try giving the cord a little more slack.
Thank you for the clear tutorial! I’ve been looking for an interesting way to use my fabric scraps that could be used for other things as well. Once I have enough accumulated, I plan on making a cornucopia — using a wire frame and fabric twine to decorate for fall in the lab break room.
The scrap fabric twine looks beautiful. Was originally going to buy some soft rope to make my own plant hangers, but there’s a virus going around and I’d rather not go out of the house. I can make my own twine and it will be more beautiful than anything I could buy.
I am struggling. How do you keep it from unraveling? I am doing it tight but as soon as I can’t hold enough of the twisted twine in my hand it starts to loosen do you clip it together every six or 8 inches? Please help!
I suspect you are twisting both the individual twisted strips and the paired cords in the same direction. If you watch the video closely, the fabric strips need to be twisted in the opposite direction to the rope twist. It will hold itself together.
Thank you so much. I think I was doing them both in opposite directions, so yes, that makes sense. It’s working now. Appreciate your quick reply.
I love the look of your twine and have several feet of it made. The best part is you can work on it, put it down and come back to it and not worry about raveling or counting. I’ve found that mine isn’t something that I would want to crochet but I can see it being woven without much difficulty. Currently I’m working on some garland for a girl’s bedroom in pinks and browns that I think is adorable!