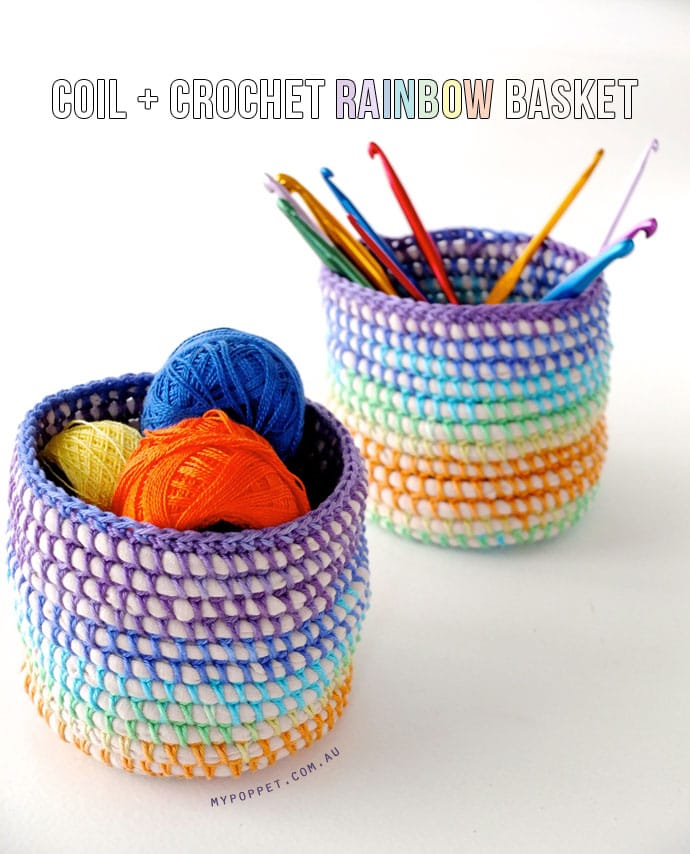
Little crochet baskets are so handy for corralling small miscellanea that seem to end up all over the house, you can never have too many. I’ve created some lovely rainbow hued ones with a simple coil basket making technique.
This post contains affiliate links.
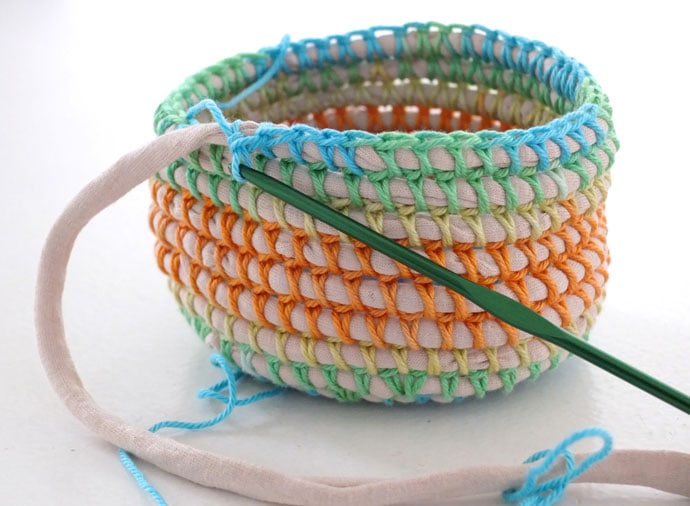
There baskets were actually an experiment in using variegated gradient yarn. Instead of weaving I’ve used crochet which makes the process go a lot faster.
I received a few samples of 4ply cotton Mornington Yarn (now discontinued) with a self striping rainbow pattern through it. I love the idea of variegated yarn but am often dissatisfied with how it pools when knitted or crocheted, so it was time to experiment.
This yarn would be a good substitute to achieve a rainbow effect.
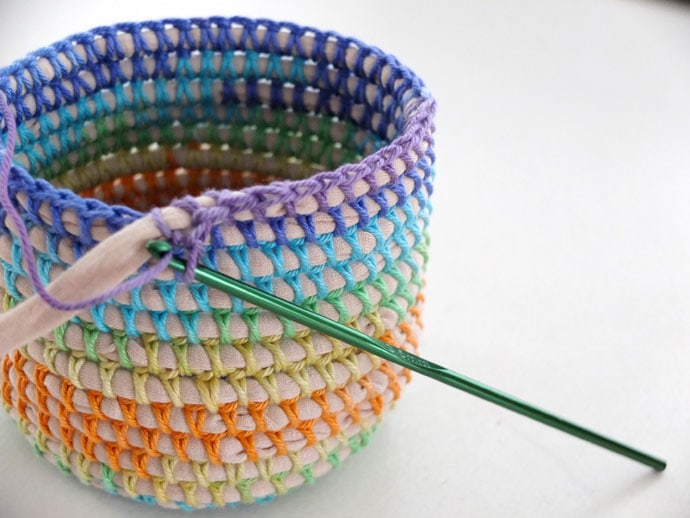
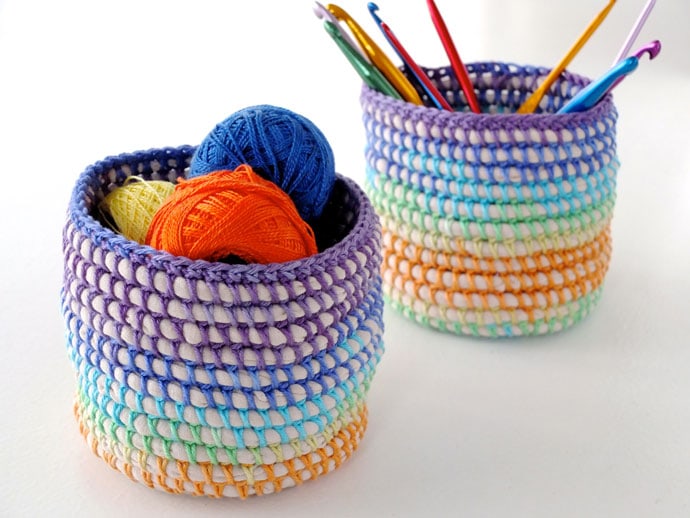
These Crochet Coil Baskets show of the rainbow gradient perfectly, I’ve sized them to make the best use of the yarn’s pattern.
If you have yarn with a less prominent gradient/variegation, you can adjust the size of your basket accordingly.
Because I’ve used t-shirt yarn as the core, they are nice and floppy but if you want a firmer basket consider using thin rope. You can even make them fit around an old jar and hey presto, a new vase!
MORE CROCHET BASKET PROJECT IDEAS:
- Scrap Yarn Crochet Basket
- T-Shirt Yarn Rainbow Storage Basket
- T-Shirt Yarn Heart Shaped Basket
- Basic Nesting Basket Tutorial
Let’s Get Started Making a Coil & Crochet Basket
You will need:
- T-shirt yarn or thick cord for the core
- Gradient rainbow yarn cotton yarn – The yarn I used is discontinued – this rainbow yarn should work well.
- 3.5mm crochet hook
- Scissors
Finished size: 9cm diam x 9cm tall
How to make a crochet basket:
Crochet stitch used = single crochet (Sc)
How to do a single crochet stitch over a cord
Single crochet over a cord is much the same as tapestry crochet, the idea is to form your stitch around the cord and encase it. The stitch mechanics remain the same. I’ve taken some step by step photos and made an animation to help you if you are not familiar with the single crochet stitch.

1. Insert hook through top of stitch in previous row.
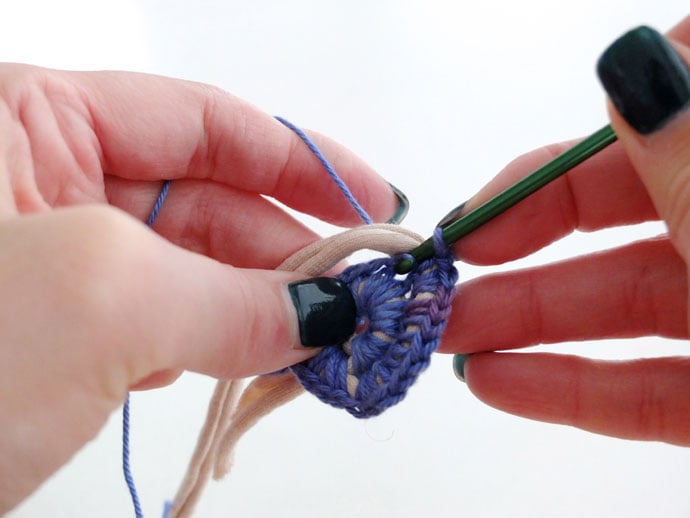
2. Pull yarn through (yarn over)

3. You should now have 2 loops on your hook.
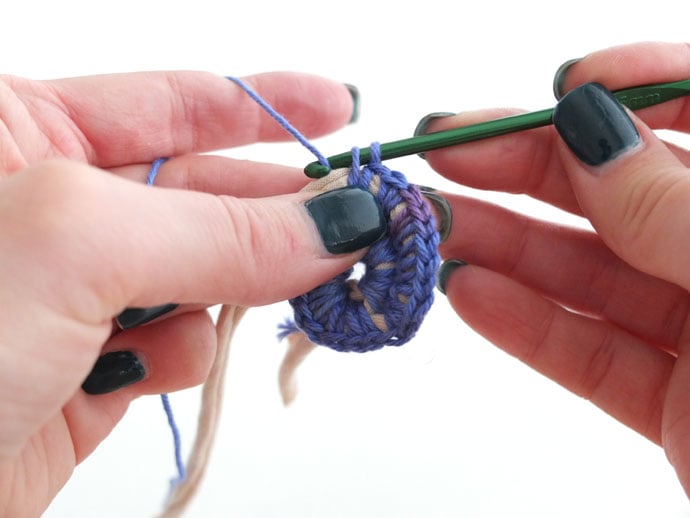
4. Yarn over – over cord
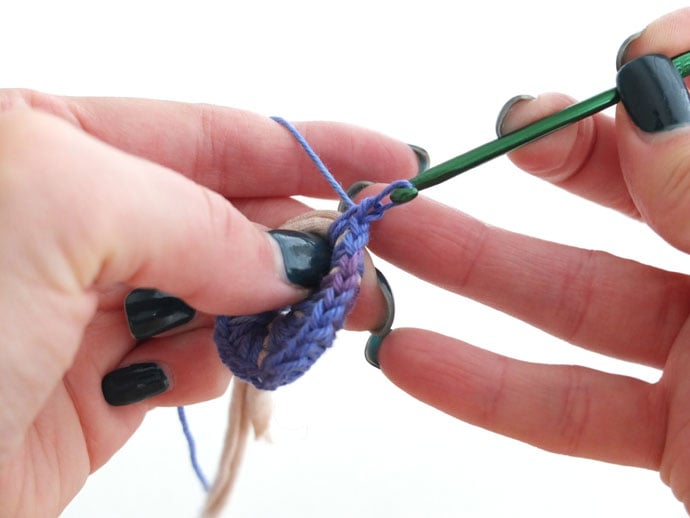
5. Pull yarn through both loops. Stitch complete
Here is a short animation of all those steps put together.
How to make the crochet basket – Base
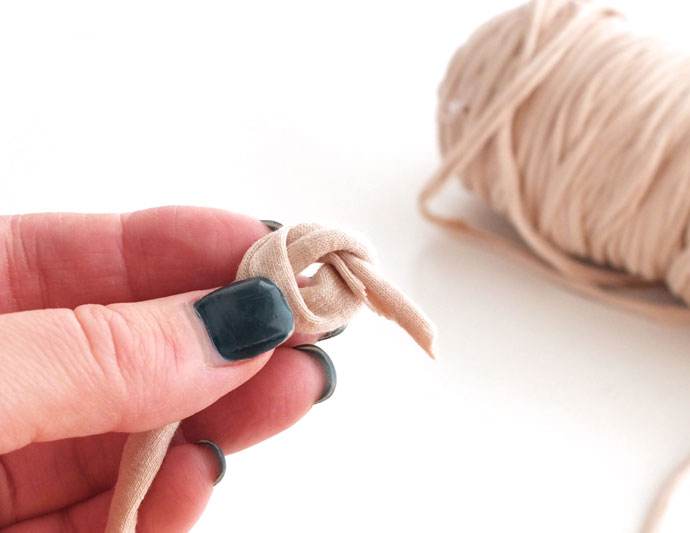
1. Wrap the t-shirt yarn (or cord) into a small ring.

2. Sc closely together as many stitches as you can fit around the ring. If you have a small tail hanging out that’s ok.
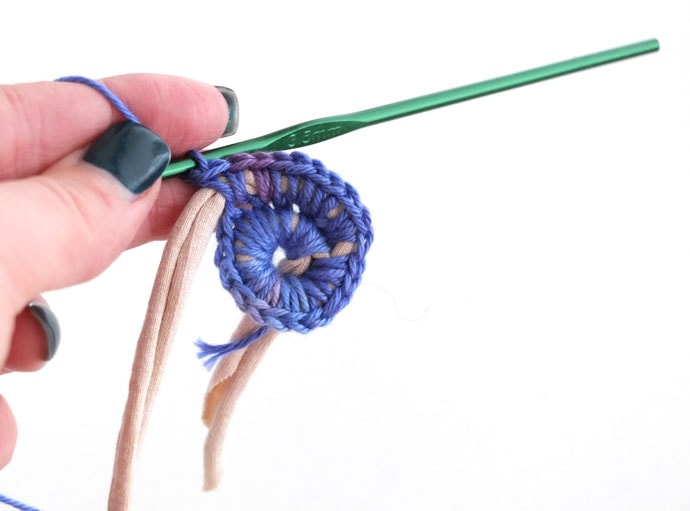
3. Sc all the way around until you are back at the start (that was round 1). You will now work in a spiral with the hook going into the corresponding stitch below (from previous rounds).
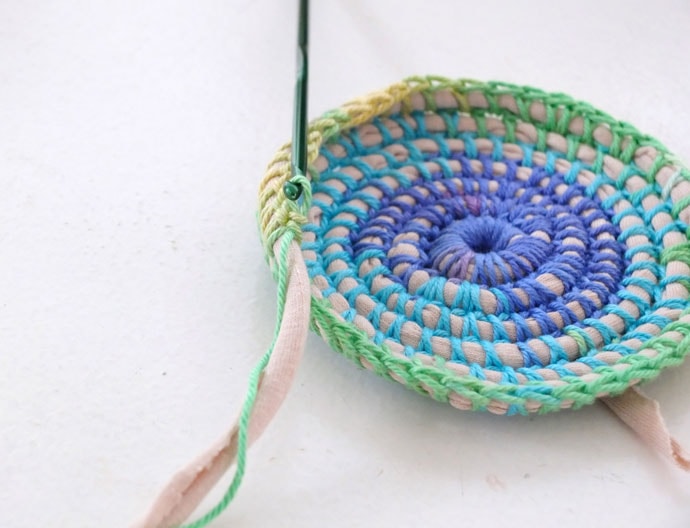
For round 2, Sc 2 stitches into every stitch from the round before.
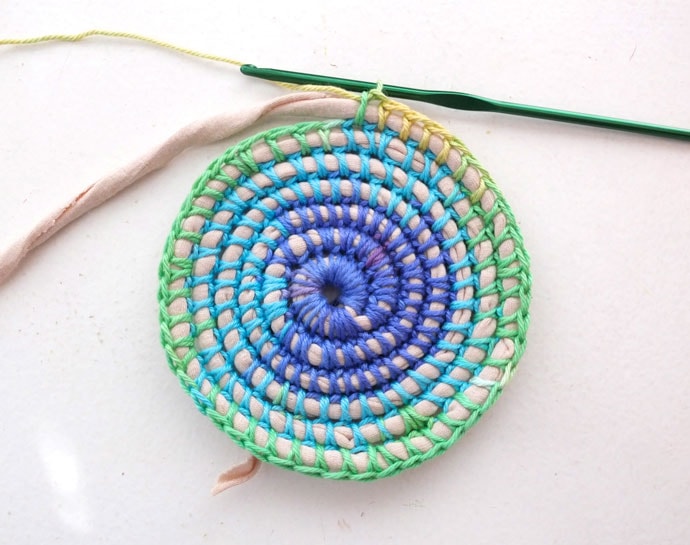
4. Carry on in a spiral with and occasional increase (2 stitches in one), checking that the work lies flat after every round. If it starts to cup, you need to add more increases. There is no strict formula for this as the tops of the stitches elongate over the cord allowing for it to sit flat.
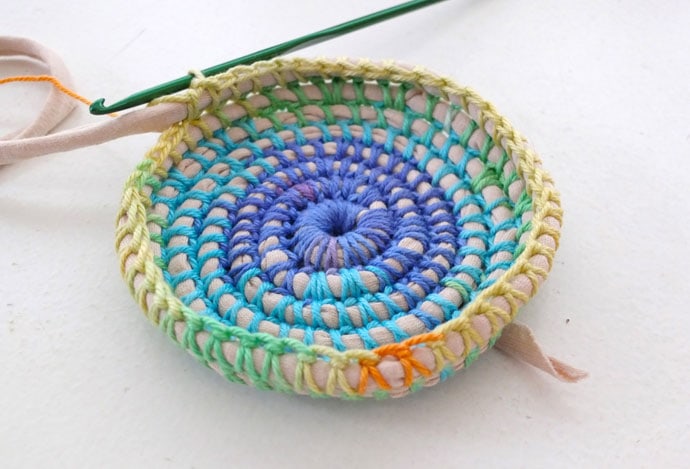
Crochet to the desired base size, mine was 9cm.
How to make the crochet basket – Sides
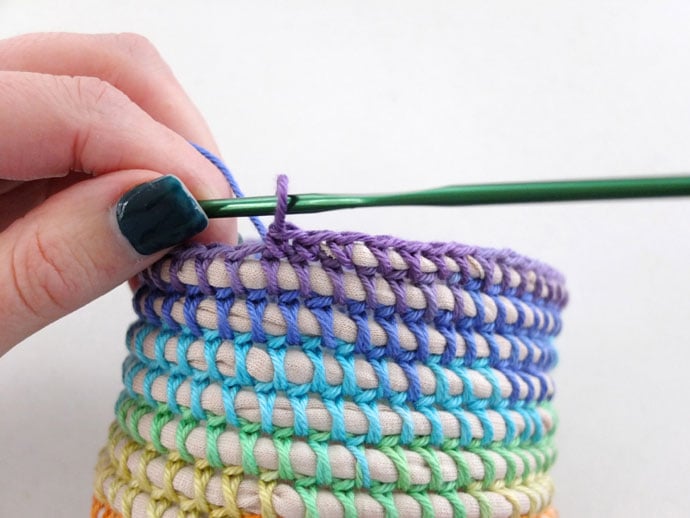
5. When it’s time to build up the sides, re-position the cord so it sits up (as opposed to flat), continue Sc with no increases.
How to make the basket – Base
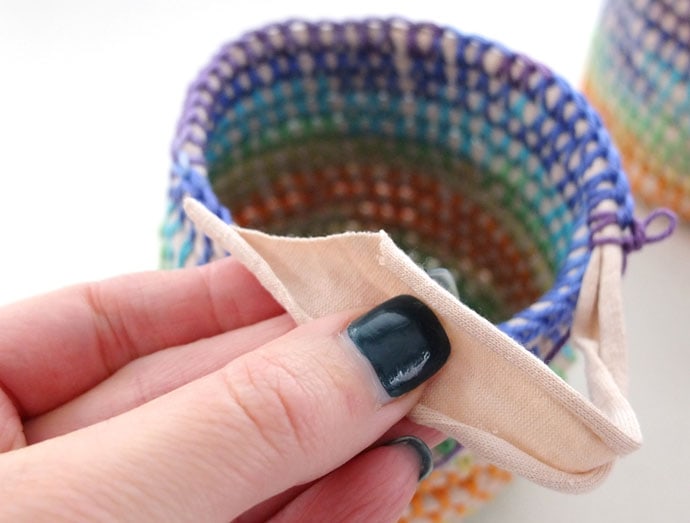
6. You should notice the edges start to curve up once the first round of the sides is finished. If it’s sill sitting flat give the cord a gentle pull to gather the stitches in.
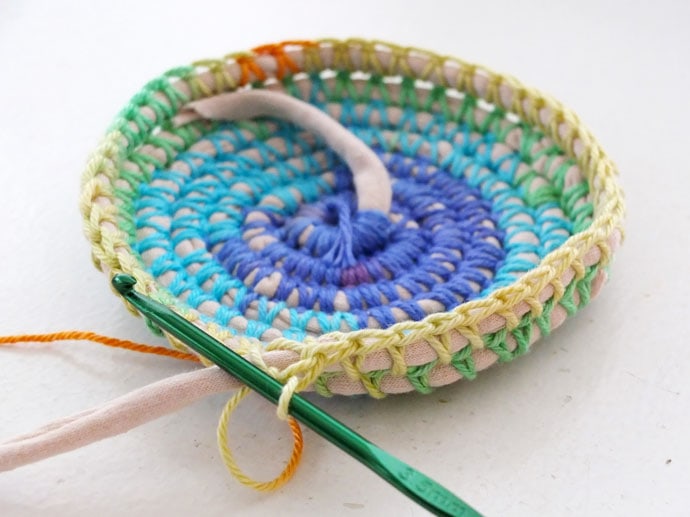
7. Flip your work over so the right side will now face out as you continue to crochet.
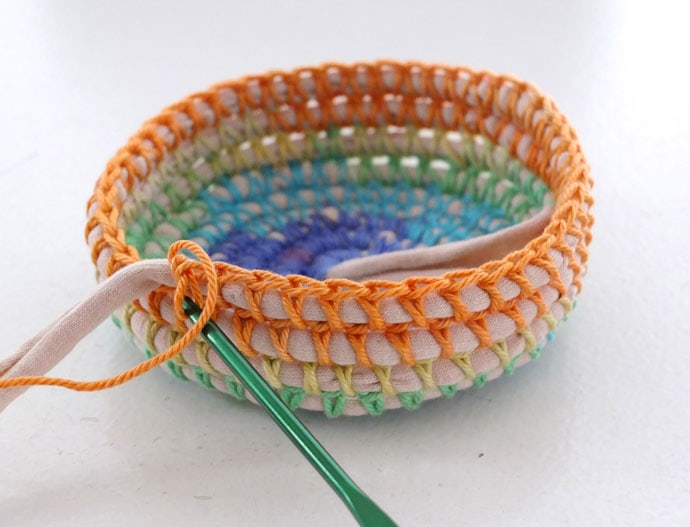
8. Work your sides up…
…and up…
…and up.
9. When you are happy with the basket height (mine was 9cm) taper your t-shirt yarn or cord.
10. Sc until the end of the cord is fully covered, it should taper off gradually.

11. To finish off, crochet a final row of Sc then break off yarn and weave in ends.

All done! Don’t they look smashing? I love how the colour gradually changes up the sides of the basket.
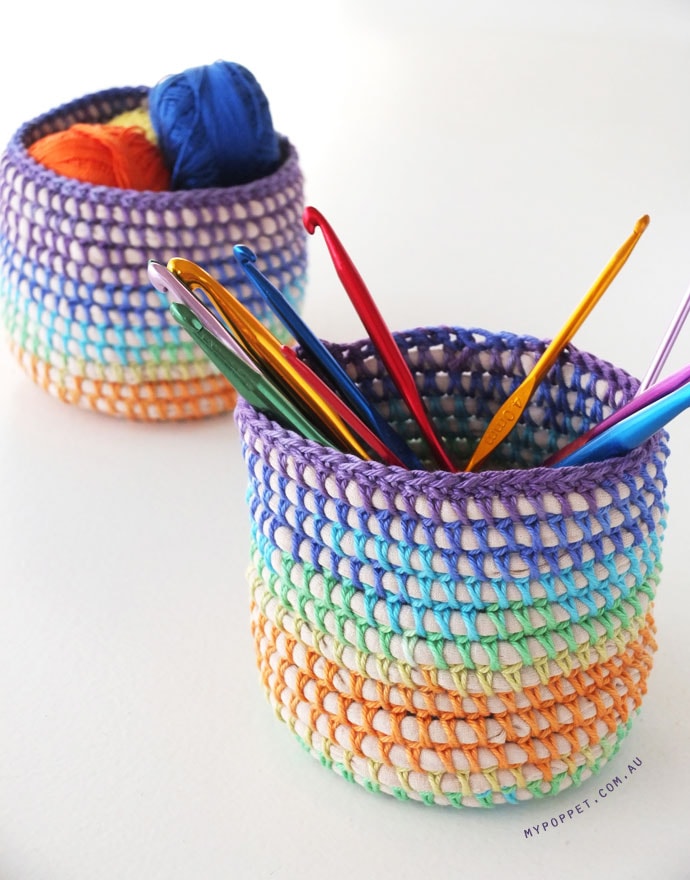
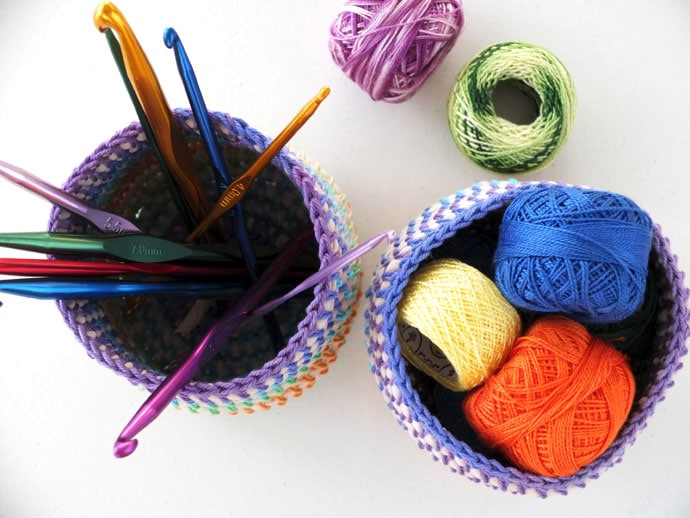
They are the perfect size for storing all sorts of little bits and pieces in. Use them to store craft supplies, stationery, jewellery, makeup, toiletries, small toys…the list is endless.
They would also make a great gift for a friend filled with treats, like a mini hamper.
Now you know how to crochet over a cord, you can adapt the same techniques to a bigger project like this crochet rug.


What a beautiful project and such awesome instructions – love it!
Thanks Chelsea
These will be perfect in my new (and Bigger) craft room. Keep up the great ideas…
OOH! big craft room, that’s exciting!
Gasp! These are gorgeous! That rainbow yarn is amazing and I love how you worked it so that the color moves up the basket. I’ve tried making this type of basket before, but failed miserably. However your tutorial is so clear and makes it look so easy, I’m just going to have to try again! Thanks! 🙂 Lisa
Thanks so much Lisa, you always leave the nicest comments. I really appreciate it. I’d love to hear how your basket turns out. My first attempts at things aren’t always perfect.
These look amazing Cintia! Would make fabulous presents.
These are beautiful!!
What adorable baskets…love them!!!! Thanks for the tutorial…can’t wait to make some :o)
I like that that’s very nice it’s real easy I’m going to try that I want to learn how to try to do a base like that 😀☺️
Love these! The baskets are so cute and I’m a sucker for rainbow anything – plus the step-by-step tutorial is so easy to follow. Love!
Thanks Tonya, glad you like them.
This is fabulous Cintia, I’ve been wanting to make some coil baskets, and crocheting them is certainly a great way to go! I’m going to try it with some homemade yarn from sheets possibly, I”ll let you know!
Great, can’t wait to see them 🙂
Hi Cintia! Just wanted to let you know that (after my failed attempts to find the mornington yarn for the coasters) the yarn is in store now! I picked some up on Monday. 🙂
Sheree
Great, thanks for letting me know. I must have gotten an early preview.
Just loved the scrappy fabric. You are truly an inspiration and one very clever lady (although – if you lived in NZ instead of Aussie, then you’d be an exceptionally clever lady)! Kidding. Thank you so very much
Love the baskets and want to try them but can’t find the yarn.
I clicked on the “Spotlight” link in the supply list but can’t find the “Gradient rainbow cotton yarn – 4ply Mornington Yarn”
Their yarn stock is quite seasonal so they may have sold out their supply. I’ll have a poke around the online store and see if it’s still available. Otherwise any other gradient style yarn will give similar results.
I wonder if you could make spool knitting or i-cord with the Spotlight multi-color cotton that you’ve used for these little baskets, then use that cord as the base for another set of baskets with white size 10 crochet cotton as the material to crochet the basket together. I wonder if you’d get the opposite color effect in a way that would look good paired with the bowls you have made up here? If the i-cord wasn’t sufficiently stiff, a person could run a length of drapery pull cord or something of that sort through it, I suppose, possibly even as you work up the i-cord or spool knit. I really like the ones you’ve shown here. I’m seriously tempted to start a project like it!
I think that would work great but you are right in saying that the icord would be too soft to hold a shape. Running a small cord/rope through it would make it ideal.
I’d love to see the result if you do give it a try.
Thanks for your comment and idea, I may give it a try too.
Could you possibly adapt the crochet stitch for us “lefties”? Great tutorial!
I’m not a leftie, but here is a handy tip I learnt from a vintage craft book. Hold a mirror 90deg to the screen (or book) and the reflection will be the leftie version 🙂
Hope that helps a little.
Simply and nice
This is great! I love the look of coil baskets and your tutorial makes it look really easy. Love the use of the rainbow yarn! Thanks for sharing this.
Spotlight (Auckland, NZ) do not stock T-shirt yarn and I haven’t been able to find anyone else here that sells it.
I am very keen to make the small baskets.
You have suggested ‘cord’ as an alternative. What sort of cord is that – is it upholstery cord?
I love your projects.
Thank you.
you can cut your own t-shirt yarn (refer to my latest post) or thick piping cord will work too. Check out your local hardware store for thin cotton rope.
Thank you Cinita. I will try your alternative suggestions. I will be in Brisbane later this year so if all else fails here then I may be able to get it there.
I would love to know what yarn you used for the single crochet part. It’s gorgeous, and I can’t find anything like it locally (USA, Oregon). I’m thinking about cutting up a sheet and using that as my core, what do you think? hoping to create some hanging baskets for the kids’ toys.
It was a variegated cotton yarn (which is no longer available here either), any rainbow gradient yarn should work. You can absolutely use a sheet as the core. I’ve made a rug here using scrap fabric as the core with the same technique. https://mypoppet.com.au/makes/2015/10/coil-crochet-scrap-fabric-rug-diy.html
Thanks for the beautiful DIY craft! I a currently making a basket myself. I am new to crocheting but the basket is going great so far. I struggled a little bit with the start, since I couldn’t use the step by step tutorial for the first spiral, but I made due.
My question is, did you add any increases up the walls? Mine seems to want to cave in a little as I move upwards.
Thanks in advance for the tips!
Hi Megan, the walls have no increases. I suspect what may be happening is that because t-shirt yarn can be stretchy (some types more stretchy than others), as you are crocheting it you are pulling it. When it relaxes it is pulling in like elastic. To reduce this happening you may need to adjust your tension a little looser so your yarn isn’t under tension as you crochet. I hope that helps.
I am going to learn to crochet so i can make one (or two) of these.
Hello! Please please tell me you know how to “taper off” a basket using plastic tubing and in the spiral! I have a great basket, T-shirt yarn over tuning, but at the top there seems to be NO way to end it off without a huge hump.
Do you have any suggestions??
You could try cutting the tubing diagonally so it thins out at the end?
Adorei!!! vou iniciar um tapete ,as gostaria de um retangular
do you keep increasing SC each row? you said 2 in each and then continue, but 3rd row just one SC in each and continue with rounds? Or are you saying 2 SC in each for every next round? confused. sorry. 🙁
There is no strict formula but you do need to increase a few sc in every round or the shape will start to cup up. In the 2nd round I’ve put 2sc in every stitch but in the 3rd I’ve only put 2sc in every 3-4 stitches.
“Carry on in a spiral with and occasional increase (2 stitches in one), checking that the work lies flat after every round. If it starts to cup, you need to add more increases. There is no strict formula for this as the tops of the stitches elongate over the cord allowing for it to sit flat.”
Hello
Do you think I can make a square rug using that technique? If so how would you do it? Thank you such a great tutorial
Yes you can. A few readers have asked a similar question so I will create a tutorial for it.
I love this idea!
Can I sell the finished product?
If so, what do I have to write?
Hi Emma, yes happy for you to sell the finished product in limited production if you are personally making them. If you are selling online please mention the original designer as My Poppet with a link to mypoppet.com.au. If you are selling at a craft fair or to a store, please mention ‘original design by mypoppet.com.au’ on any tag attached.
Yell out if you have any further questions.
Thank you! I love your pattern/idea and I hope to see more of your tutorials 🙂
Cintia,
I’ve been crocheting for 50+ years. I recently found your baskets on Pinterest and had to make some. I’m having trouble getting the internal cord to show through the stitching. The only way I’ve had any luck is to ch 1 and skip1 on previous round. Have tried 2 different cords and 2 different weights of yarn, and larger hook. Please advise what I am doing wrong.
You aren’t doing anything wrong. To space out the stitches without having to add an extra chain stitch, try elongating the top (last) loop of each stitch. That will space out the stitches.
Hi there,
I have just discovered your site and love it. Can you tell me if there is a way to download your tutorial?
Thanks,
Suzanne Q
I have a printable option for some of my tutorials but have not yet had a chance to implement to all of my archives. If it’s for personal use, I am happy for you to copy and past into a word doc for your personal reference if you need to print.
I came here for instructions on how to start the crochet rug and I’ve looked at the picutres and read through this page 100 times but I still don’t get it…
Is it the crocheting over a fabric that stumps you? Or working the start from a ring? If you have a specific step you are stuck on maybe I can elaborate.
I’m really stuck on how to even start crocheting over the rag yarn. I can crochet easily, but my spatial reasoning is struggling to add the rag yarn in as well
Try to think of the rag yarn as a stitch you are working into.
Hi Cintia,
Thank you so much for taking the time to write and share this tutorial with us. I couldn’t wait to try the pattern – so grabbed some old (left over from the 70’s) macrame yarn and crocheted over that, worked great. The pattern is so forgiving you can use pretty much any weight of yarn to crochet over the core. Thinking I will make Easter baskets for my grand daughters using this technique – they can keep their hair ties in the baskets afterwards. Thank you.
Hello, Cintia,
I just discovered “My Poppet Makes” this morning and found it inspiring and fun. Is there a way to subscribe to your site?
Thank you
Thanks. Yes, you can sign up to my newsletter on the form at the bottom of this post, https://mypoppet.com.au/makes/scrappy-corner-to-corner-crochet-blanket/ or if you would like a notification of new posts automatically i think there is an option to tick a box (Notify me of new posts by email) when you leave a comment.
Bom dia! Tem como fazer essa tecnica com fio de malha na forma retangular, ou seja, um tapete, jogo americano,almofada est…ao inves de fazer redondo?
Yes, make the base a rectangle of crochet before building the sides up.