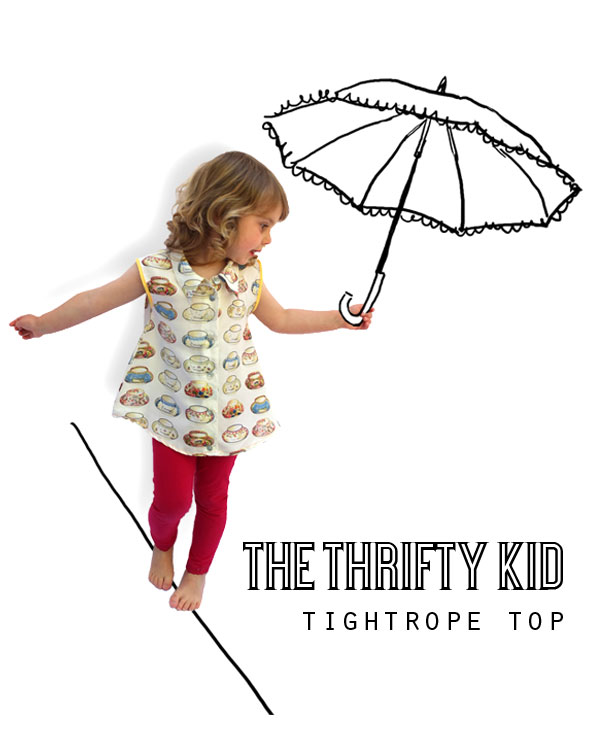
With Spring well on it’s way here in Melbourne, it’s time to start thinking about Emma’s summer wardrobe. This Swing Top that I’ll be showing you how to make today, is one of my quick ‘go to’ refashion designs when Emma needs something a little nicer than a t-shirt to wear. It’s really so easy to make, and the flowing, breezy design is lovely to wear in warm weather. Keep the length short to make a top, or go longer and you have a dress.
I found this original shirt in an op-shop and bought it because I loved the tea cup print and feel of the fabric (it’s silk), but the garment design was awful and boxy so it was perfect for refashioning. This refashion isn’t limited to kids clothes, you could also use the same technique to modify a blouse for yourself.
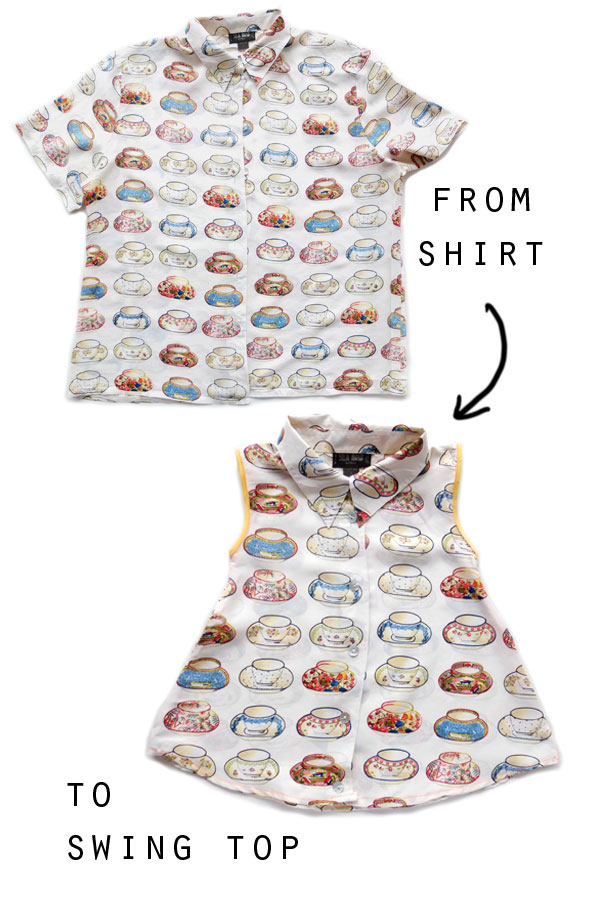
How to choose a garment for this project:
Style – Shirt or blouse with button down front and collar
Fabric – Light weight flowing fabric with a soft drape like silk (or polyester), crepe, georgette or even light cotton voile.
Sizing – Smaller sizes are best as the collar will be smaller and look in proportion with the child.
Garment features to keep
Collar and button placket
Supplies:
– Suitable shirt or blouse
– A top or t-shirt that still fits your child to use as a cutting guide
– Bias tape (commercially bought is fine)
– Scissors
– Sewing machine
– General sewing supplies (thread, pins, iron etc…)
Note: Sewing with slippery fabrics for the first time can be tricky but is not so hard once you get the hang of it. I always recommend using a new/sharp sewing needle, pinning pieces to prevent too much movement, and going slowly.
How to:
Yellow dotted line = Cut
Red dotted line = Sew
Cutting
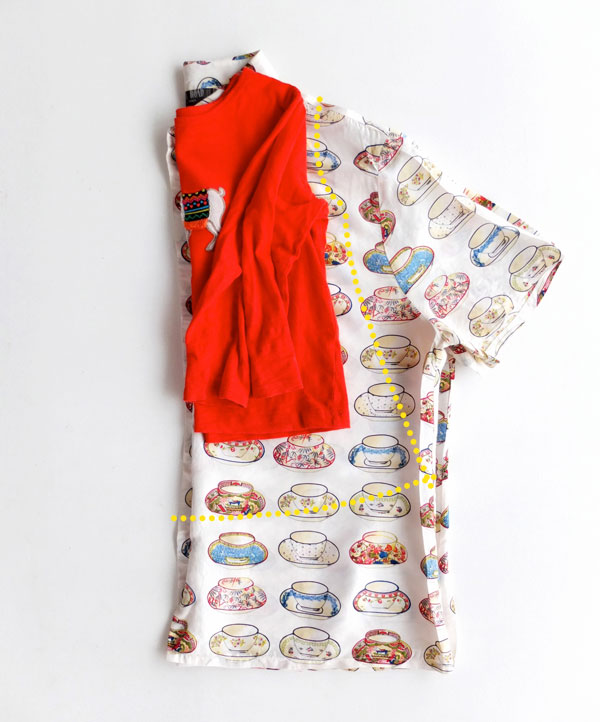
1. Fold shirt in half and place child’s top over as a guide lining up neckline and shoulder seams. Take note of the width of the shoulders and size of armholes, you will use this as a guide as to where to cut. Cut as indicated by yellow dotted line. As you can see I’ve cut it flaring out with a longer curved hem. Make sure to include seam allowance of about 1/2″ (1cm) and 1″ (2cm) to bottom hem. The armholes will be bound by bias tape so no seam allowance is required.
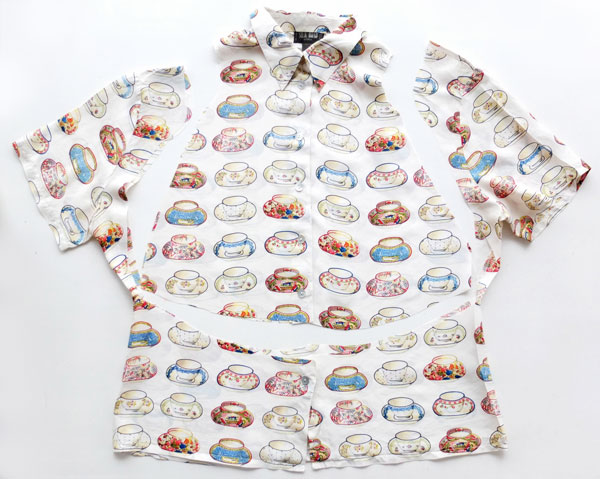
Note: When deciding length (for cutting) make sure you leave enough clearance around buttons on button band to add hem. Don’t cut right over button hole.
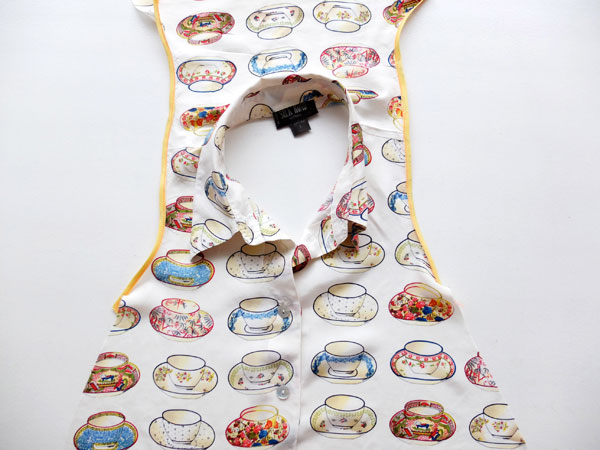
2. Add binding to arm holes. It’s easiest if you lay the shirt flat like this.
To bind armholes
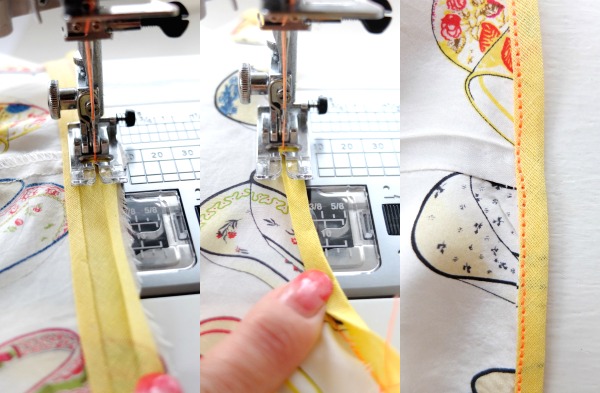
2a. Open up the binding and on the wrong side of garment line up the edge of binding (outside of binding down) and sew along the creased line of the binding.
2b. To finish, fold the binding over the raw edge and sew close to edge. No need to worry about catching the back.
2c. Press.
Notes on binding: For best results use a thread colour to match binding, I’ve used a neon thread for clarity. Wider binding will be easier to sew if you are inexperienced, but any width you have on hand is suitable.
Finishing
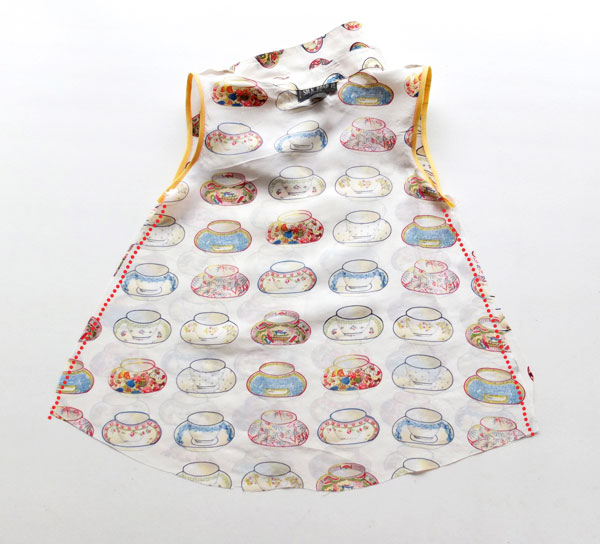
3. Sew side seams with garment inside out (right sides of fabric facing). Straight stitch is fine, but I also recommend going over the raw seam edges with a zig zag stitch to stop fabric from fraying.
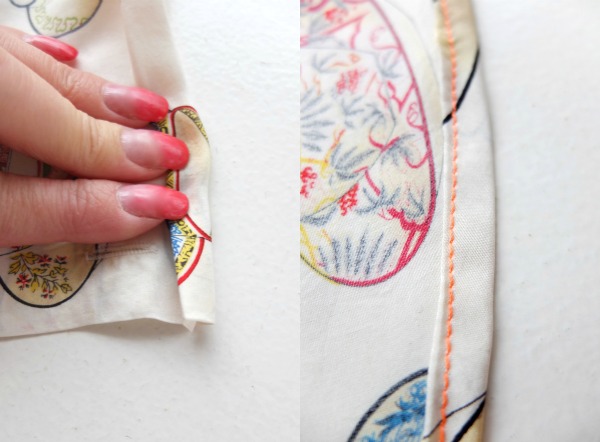
4.Hem the garment by folding over the bottom edge twice. This is called a double turn hem. It’s easier if you fold over about 1/4″ (0.5cm) and press, then fold over again, as before and press. Pin if required and stitch. This gives a very tidy finish with no raw edges showing.
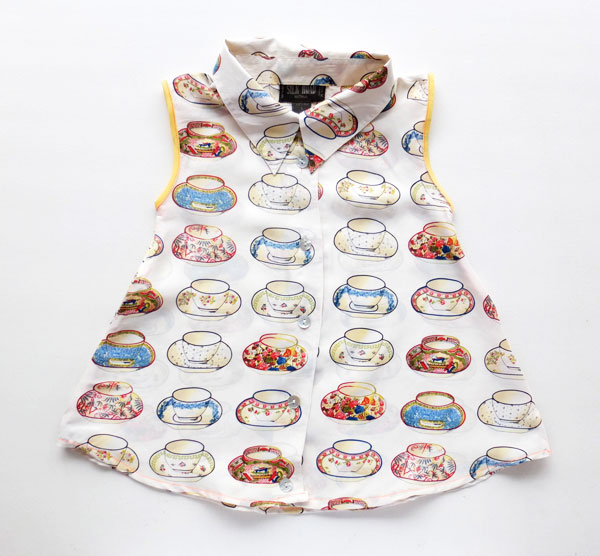
All done!
I think you’ll agree, this top looks more difficult to make than it really is. There is no way I’d make this style of garment from scratch, just thinking about getting the collar inserted right and sewing all those button holes brings me out in a rash. But if there is anything I can do well, it’s finding a short cut.
I hope you give this a try. It’s a fast way to whip up some pretty summer blouses for your little girls and would look great on tweens and teenagers too.
If you’ve enjoyed this tute, share the love on pinterest or facebook. Sharing is caring.
x Cinti


So cool and clever!
Gabulous!!! And so simple!!! As you’ve got some tessute from your shirt, you could do a ribbon for Emma’s hair, or something like that… what do you think?
This is so cute. I can see why you bought the shirt. The fabric is fabulous. I’m thinking a man’s Hawaiian shirt changed like this for me for spring.
AGAIN A UNIQUE GIRL’S TOP, A SWING TOP . . . re-purposed/refashioned from a larger sized shirt. I LOVE the different colored tea cup designs and the fabric is SILK! EASY to sew following your 4-step tutorial. Your young girl, Emma, will be HAPPY to wear this Swing Top as it coordinates with EVERY color skirt or pants! She’ll no doubt get compliments GALORE, too. INDEED, she’ll be proud that her mom made this top for her sewing LOTS OF LOVE into it! BRAVO! Thanks for sharing your sewing talents, Cintia. Sarah in Minneapolis, MN USA
Oooh, fantastic! I have so many collared shirts, which I never ever wear, (not sure why.. i pick them up in op-shops because of their fabric or pretty collar, then find them irritating to actually wear), suddenly I see a stack of new dresses for my girls. This would work as a winter top over a skivvy and tights as well.
I’m so happy I found your blog, this is exactly the type of sewing I’m interested in/(capable of?), and your tutorials are so easy to follow. Fun!!
Fantastic. I’d love to see what you end up making. It’s such satisfying sewing, especially the recycling part.
I am trying this today and I will let you know how it goes. We have a facebook group on reducing waste in our local area and I think some people will be interested in your website. I will be sure to add a link. Great Idea. I’m very new to sewing so wish me luck!
I have a few shirts pre children which do not fit right which would be perfect for these projects.