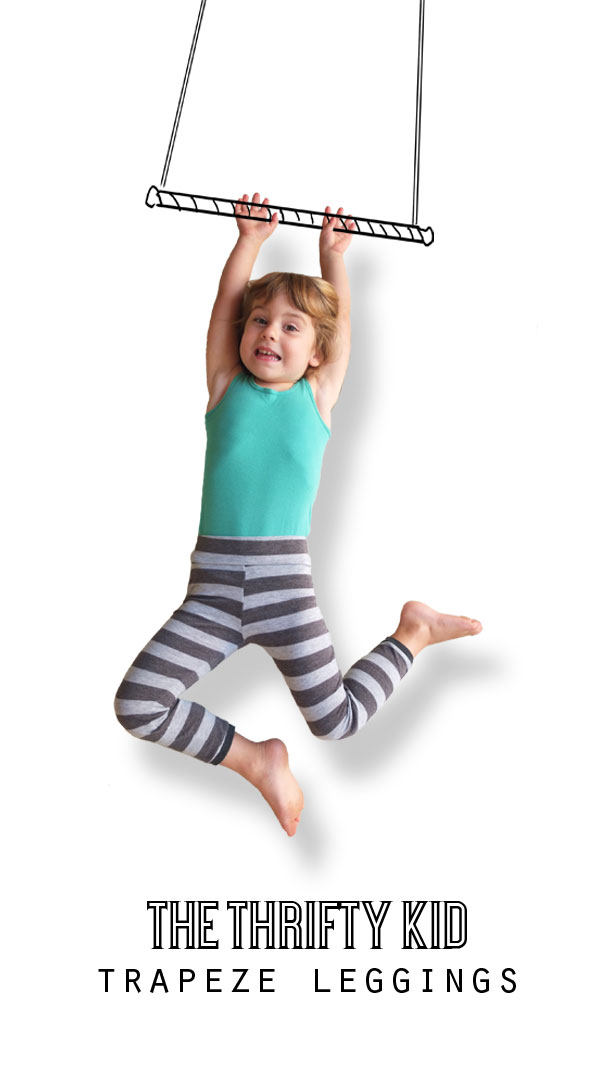
Welcome to the first post in The Thrifty Kid series. Today I’ll be showing you how to refashion an unwanted top into a pair of child size leggings.
This technique for how to make kids leggings is very versatile and can be used with an assortment of garments with long sleeves to make pants.
I’ve made quite a few pairs of these leggings for Emma from jersey knit tops and even sweaters, garments with stretchy fabric works best.
You can also use the same instructions to make track pants of you use a sweatshirt.
I’ve named these the trapeze leggings because Emma looks spectacular wearing them on her flying trapeze!
The Thrifty Kid: List of clothing refashion tutorials
- How to make Kids Harem Pants from a tank top
- How to make a Girl’s Swing Top from a shirt
- How to make Kids Legging from a top
- How to make a Girl Sundress from a skirt
- How to make a Toddler Knit Dress from a woman’s top
- How to make a kids T-shirt from a Man’s t-shirt
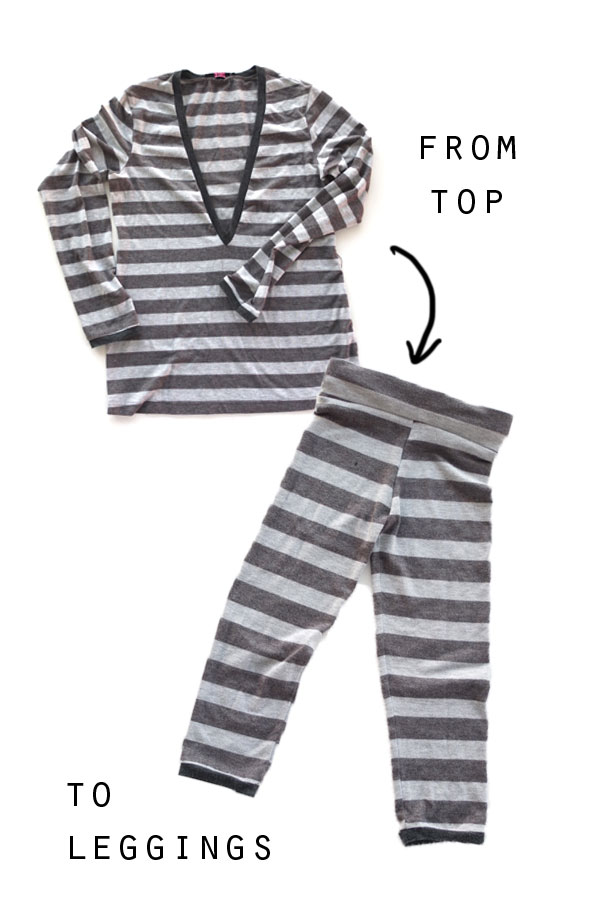
How to choose a garment for this project:
Style – Long sleeve top with sleeves and cuffs that are in good condition
Fabric – Stretch fabric knit or jersey which may have some spandex
Sizing – The sleeves need to be as long as your child’s legs. The taller the child the longer the sleeve. Consider using a men’s top for older children, a ladies top is fine for babies up to preschoolers.
Garment features to keep
Sleeves and cuffs – Sewing neat hems on stretchy fabric can be tricky, especially on small openings like cuffs, so keeping the existing cuff finish give the leggings a professional finished look and saves time because it can be the the most difficult part.
Supplies:
- Suitable top
- A pair of old leggings that still just fit your child to use as a template
- Elastic for waistband (2cm/1″ wide and the length of your child’s waist)
- Scissors
- Serger (overlocker) preferable but sewing machine is fine
- Stretch/jersey needle for sewing machine is recommended
- General sewing supplies (thread, pins etc…)
Note: I’ve used a serger to make these leggings but if you don’t have one a sewing machine will do just fine. You will need to set your stitch to a medium length very narrow zig zag which will allow the fabric to stretch without breaking the stitches. Here is a handy post about sewing knits with a zig zag stitch, don’t worry about fancy sewing machine feet at this stage, your normal foot will work fine.
How to make kids leggings from the sleeves of a top:
Yellow dotted line = Cut
Red dotted line = Sew
Making the legs
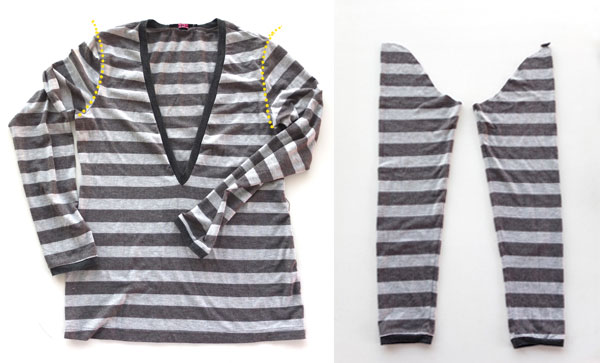
1. Cut sleeves off top as closely to the seam as possible. Keep body aside, we will be using a portion for the waistband.
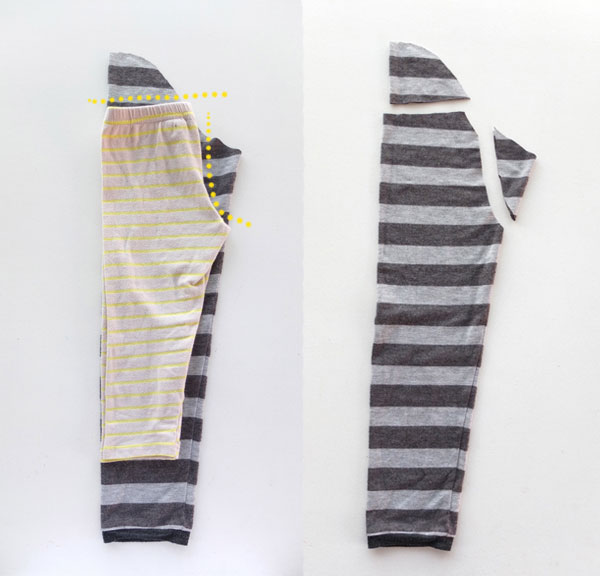
2. Place the sleeves flat on top of each other, making sure the seams match up. To use a pair of old leggings as a template, lay them on top of your sleeve to with the seam side facing the seam of your sleeve. Mark the curve of the crotch, and cut. Notice these leggings I’m using as a template are much smaller than the new leggings? I have allowed for extra length in the legs and some height in the waist, but the hip/crotch still fit ok.
Note: If your child is still in nappies you will need to allow extra room in backside. If you have leggings or pants that you are using as a template, notice how the front of the crutch seam is a bit shorter than the back one. You can replicate this on the sleeve by cutting as shown then in the next step (when the sleeves are inside each other) cut a slightly deeper curve in the back half of the crotch (the part that will be the back). You may also want to add a slightly wider waist band to stop the nappy showing when crawling.
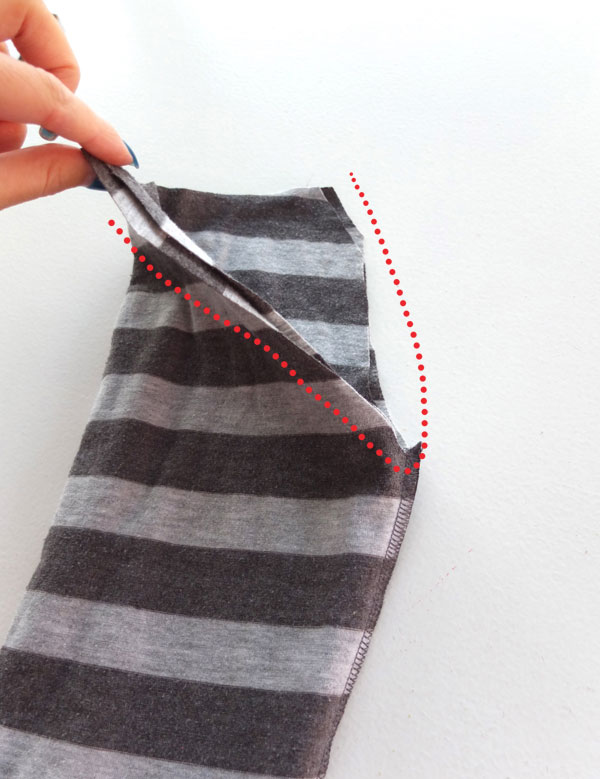
3. Turn one sleeve (now leg) inside out and keep the other right side out. With the inside out leg outside, slip the other leg inside it. They should have the right sides (outside sides) facing.
Sew the raw edges together, this will be the crotch seam.
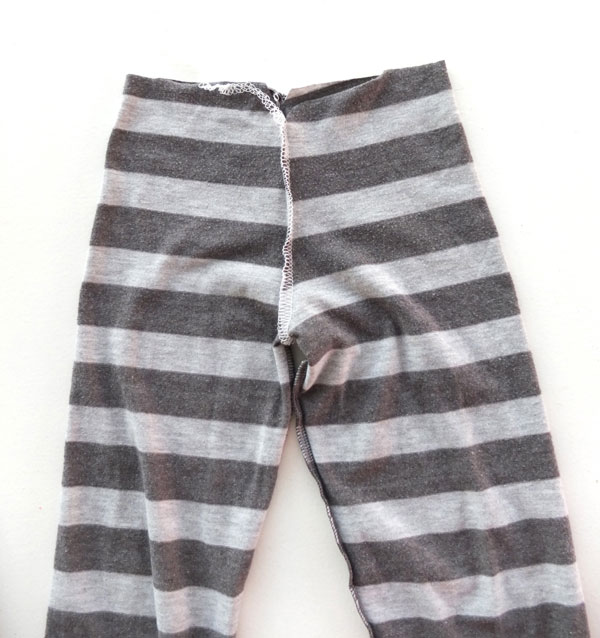
It should look like this when you turn the legs out.
Making the waistband
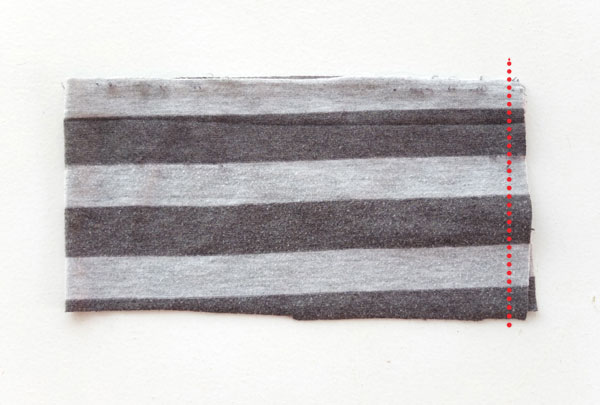
4. Cut a rectangle of fabric from the body of the top. The length should be the circumference of the waist at the top part of the leg section (plus any seam allowance) and the width should be at least double the width of your elastic plus seam allowance on each side. You can make it wider if you need to add length and make a higher waisted legging.
To check your length is correct, fold the rectangle in half (shortest sided matching) and it should be about the same as top of the pants section when laid flat.
Sew the short side edges together (as indicated in picture)
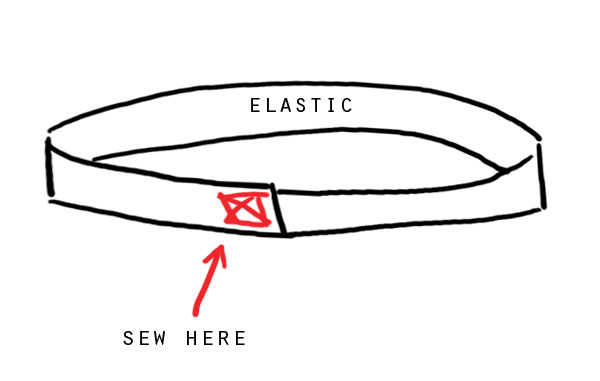
5. Measure your child’s waist to determine size of elastic. It needs to be firm but not tight. Cut elastic to length with about 1″ extra. Sew the ends together securely with about 1″ overlap. Make sure there is no twist in your elastic, it should be like a hoop.
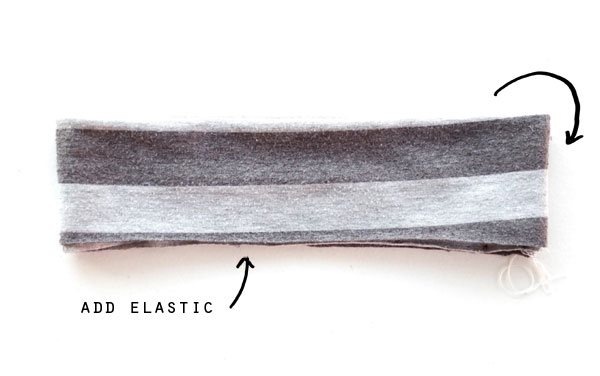
6. Fold your waistband in half so the seam is on the inside and slip the elastic inside.
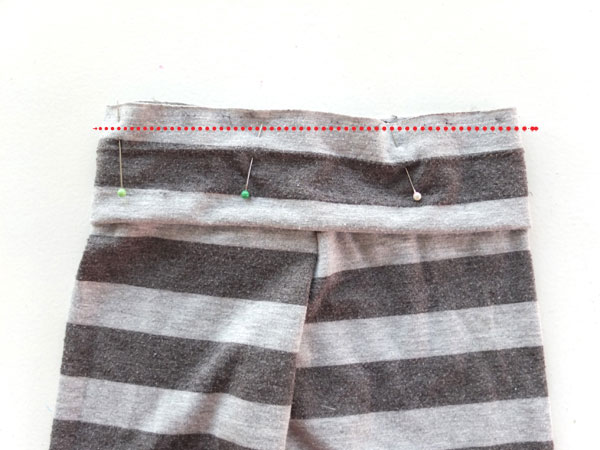
7. Turn leggings the right way out and pin the waistband to the top so the raw edges are matching. Take care to align the waistband seam to match the back crotch seam, so you know which is the back later. It also looks tidier when the seams align.
Sew the waistband to the leg section.
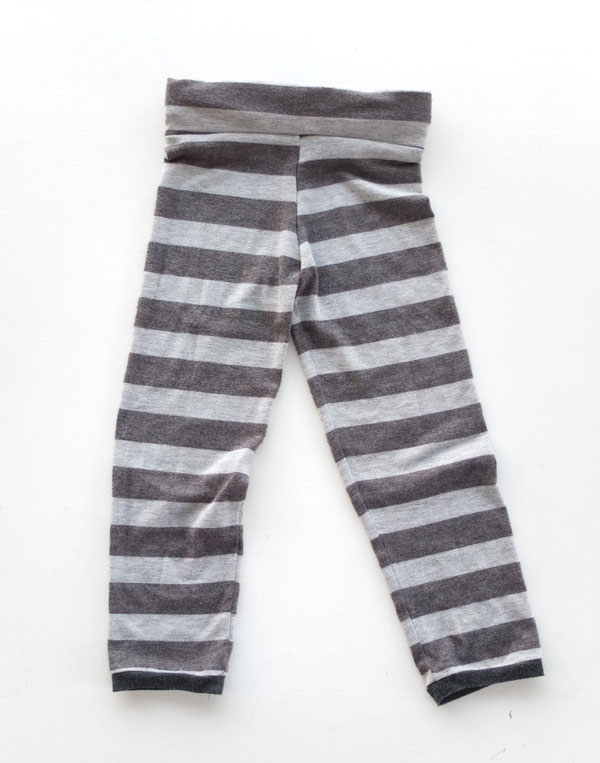
Trim threads and you are done!
That was actually only 3 main seams, I bet you didn’t think it would be that easy.
Have a go at making a pair of these. It’s a good way to try out sewing with stretch fabric if you have been a bit unsure in the past.
Keep an eye out for tops and sweatshirts with interesting cuff finishes like contrasting ribbing or other fun details to make your leggings extra fun.
If you are wondering what to do with the body of your top, try this refashion for how to make harem pants for babies.
Once you get the hang of it you can whip up a pair of leggings or track pants in no time. Go share your knowledge and teach family and friends how to make kids leggings from their unwanted garments as well.
I hope you’ve enjoyed this tutorial. There are plenty more refashions to come in The Thrifty Kid series so stay tuned.
x Cinti


I love your Thrifty Kids ideas … especially using the sleeves for the leggings … no hemming is my idea of bliss!!
Your site is EXACTLY what I have been looking for…..I have just gotten into upcycling old clothes, and it’s something I’ve always wanted to do…I am just yearning to get into it….but needed a tutorial like yours to start me off and brush up my skills! Please don’t stop! Your descriptions, steps, and photos are the best of any tutorial I have seen….on the internet – how awesome to have your talent spreading it’s wings to people like me.
I am so excited I am now scared you might abandon ship….please keep these fabulous tutorials coming. I am so grateful and will follow you all the way through (I am in Australia). Love Ella x
Thanks for your lovely comment Ella, it’s readers like you that keep me going and help encourage me to share lots of fun and easy projects. There are still a few more refashion projects in the series to go, so I’m sure you will have fun brushing up your skills.
I’d love to see some of your finished garments and share them with other readers to inspire them too.
xx cintia
These are great! So cute! A great way to use tops that have a stain on the bodice.
Thank you so much. I have been making this little pants for my grand kids for a couple of years now. I cannot understand how I missed this when my own kids were young. I did do makeover stuff like from winter to summer stuff, but these pants just make so much sense. I don’t use a sewing machine, so I take advantage of the existing seams when possible. I also found that if I leave the seam attached from a sweater, I can make these … no unraveling where the crotch is especially. The upper part of the sleeve gets folded down making two side pockets for elastic. None in front or back. It still works great. Recently I was challenged to make a boy a pair of skinny sweat pants from a larger men’s size sweat shirt. I added length at the top by cutting the modified ‘waist’ up to the neck line. I needed a 28″ inseam.. I only had to add the stretchy bottom binding as the waistline casing for the elastic and they fit him. I was so happy. Thanks again for showing this method to others.
Great tips thanks. Good to know you can make these without a sewing machine, and the elastic pocket is a genius idea.