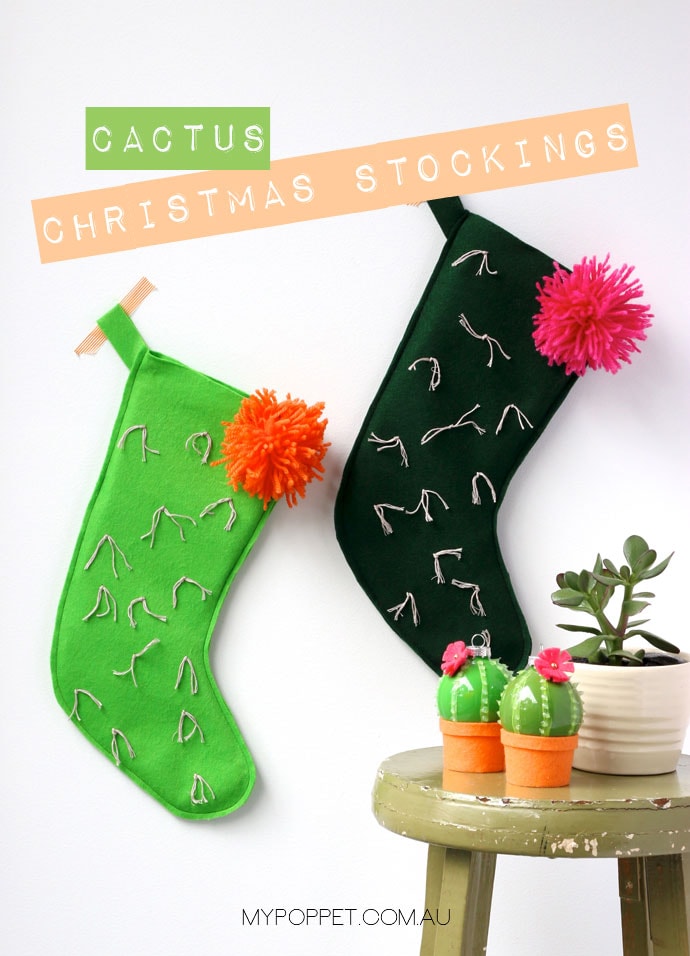
It’s that time of year again when every thing starts getting ‘Christmafied’ with faux snow and traditional red and green decorations – boring! I live in Australia where Christmas falls in the middle of summer so decorating with snow and icicles just feels silly. If you’ve been reading for a while you know I like to decorate my home with non-traditional themes and colours during the festive season and this year I’ve been inspired by Cactus Craze of 2015 and designed some amusing Cactus Christmas Stockings.
They have a real Palm Springs mid century vibe and wouldn’t look out of place in a 60’s ranch home. Their colourful pom pom flower makes them super festive and you can get creative and make them in all sorts of colour combinations.
You will need:

Pattern template – download it here
basic christmas stocking pattern
Craft felt in green both wool or synthetic are suitable, invest in the best quality you can afford.
Scissors
Sticky tape
Sewing machine and matching thread (you can also hand sew if you don’t have a sewing machine)
Quick dry craft glue – the clear smelly stuff works best. Avoid white craft glue as it can seep through the felt.
Taupe Embroidery floss
Embroidery Needle
Bright Yarn Pink or Orange
General sewing supplies
Assembling the Basic Christmas Stocking Pattern
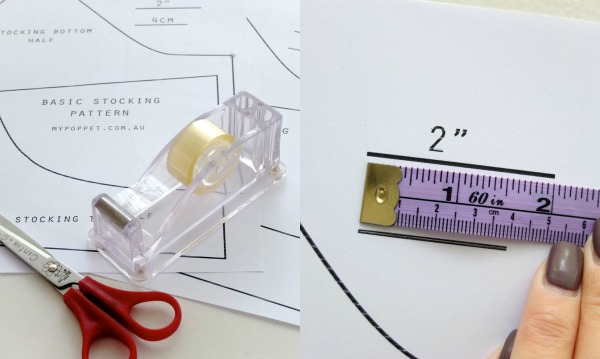
-You will need to print out 2 (two) copies of the basic christmas stocking pattern at 100% size. I’ve designed them to fit onto an A4 page. There is a measurement guide included to check your sizing is correct.
Of course you can print to any size you like, just make sure that your sizing is consistent over all the templates.
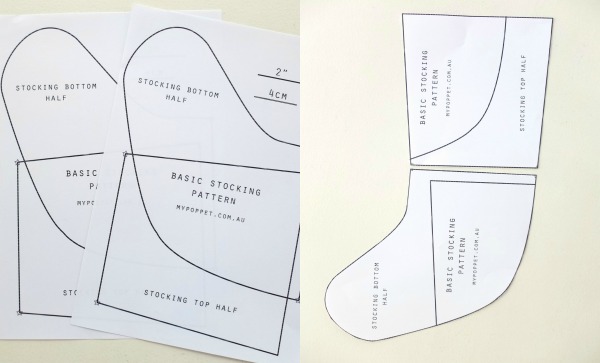
-To make the full stocking, from one page cut the stocking bottom half, and from the other cut the stocking top half.
-Match the little corner stars and tape together.
This is the base pattern to use for all the stocking.
How to:

-On a double layer of felt pin the stocking pattern and cut to make 2 stocking shapes. No seam allowance is needed.

-For hanging loop, cut a narrow rectangle about 5″x3/4″ (12.5cmx2cm)
On the front stocking panel:
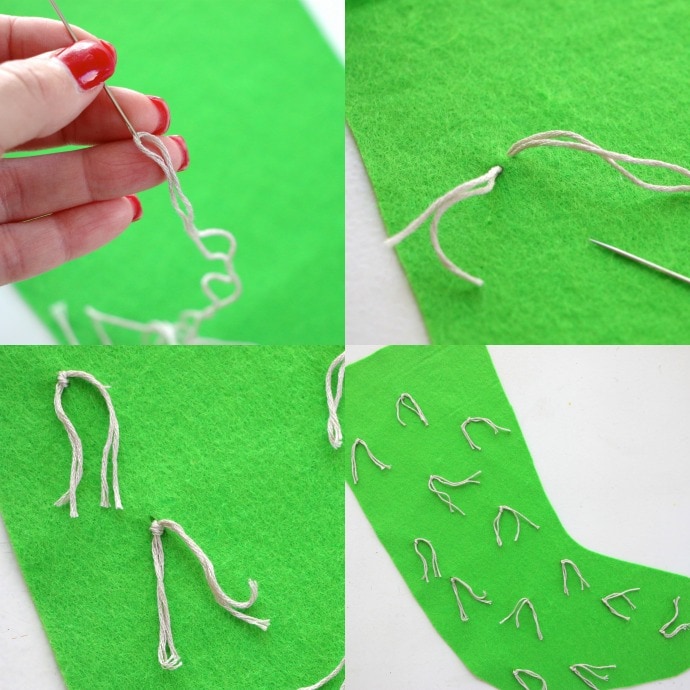
– Thread embroidery needle with double length of embroidery floss
– Stitch through and trim lengths to about 1.5″
– Tie a knot to secure
– Repeat stiching randomly over front panel

-Lay back and front of stocking pieces together and pin loop in between on an angle.
-Sew around stocking edge, leaving the top open. A 1/4″ (0.5cm) seam allowance is fine. Your loop should be nice and secure.
TIP: If you don’t have a sewing machine you can always just hand stitch around the edge.
How to make the Pom Pom Flower:

-Wrap yarn around your hand.
-Tie securely in center.
-Cut through loops.
-Fluff up.


-Glue pom pom flower onto top corner of stocking, and leave to dry.

-All done! How awesome do they look!


I really hope you enjoy making these as much as I did! I went to a lot of effort to design a free printable pattern for you so I’d love you to share it all over the interwebs, but please link to this page and not directly to the pattern download pages. This pattern is for personal non-commercial use only, if you want to make a few to sell at your local school fundraising Christmas market that’s totally cool, but no online selling please. Feel free to contact me with any questions.
Looking for more DIY stocking fun? You may enjoy
For more non-traditional Christmas decorating and gift ideas, check out my Handmade Christmas Inspiration Guide


