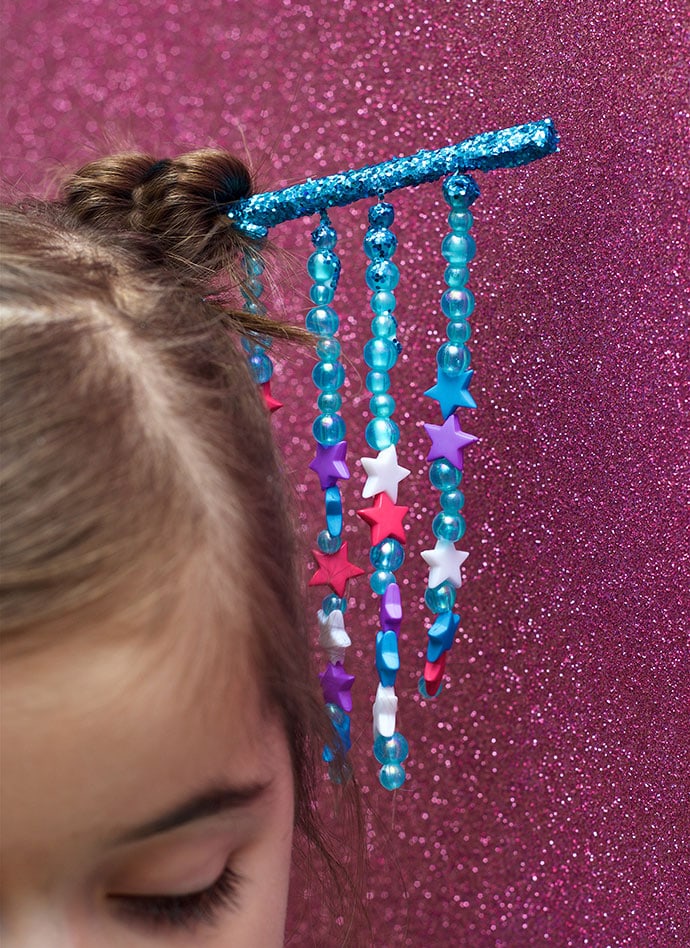
Add a bit of sparkle to your next hairstyle with a glittering Chopstick Hair Accessory. Inspired by Kanzashi, traditional Japanese hair ornaments, this sparkly hair stick will be a real ‘head turner’.

Many a year ago I read an immersive book, Memoirs of a Geisha. Later I watched the cinematic adaptation, and was completely mesmerised by each and every single detail on the screen, from the acting performances, to set design and costuming. One of the many things to catch my eye, were the Japanese hair accessories.
Still to this day I am enamoured with this traditional Japanese style of hair ornamentation. And so, I decided to make my own crafty interpretation of a Japanese hair accessory, using an easily accessible product, the humble chopstick.
If you prefer your chopstick hair accessory to be a little more understated, skip the beading and just go for a touch of glitter or pretty paint.
Crafting a Chopstick Hair Ornament

You will need:
- Chopstick
- Round Beads
- Star Beads – or your desired shape
- Nylon thread or fine fishing line
- Glitter
- Craft glue
- Scissors
- Needle
- Paint brush
- Pencil
- Ruler
- Topcoat spray varnish
How to:
1/ With a pencil and ruler mark a spot 8 cm from the chopstick end.

2/ Take a long length of nylon (roughly 100 cm), and tie it onto the chopstick end. The result is two 50 cm lengths of nylon dangling from the same knot (I call this a line). Repeat this step 3 more times, attaching nylon lines across the chopstick (not going past your pencil marking).

3/ Sort through the beads and stars. Plan the pattern for each decorative nylon line.

4/ Thread the first nylon line onto a needle, and feed 12 cm of beads and stars onto it.

5/ Loop the nylon through the final bead and knot it up. Then trim off the remainder nylon length.

6/ Repeat step 4 and step 5 for the remainder three knotted lines of nylon.

7/ Coat 8 cm of the chopstick end in craft glue. You can use a paintbrush to smooth out the coating.

8/ Sprinkle glitter, coating the craft glue.

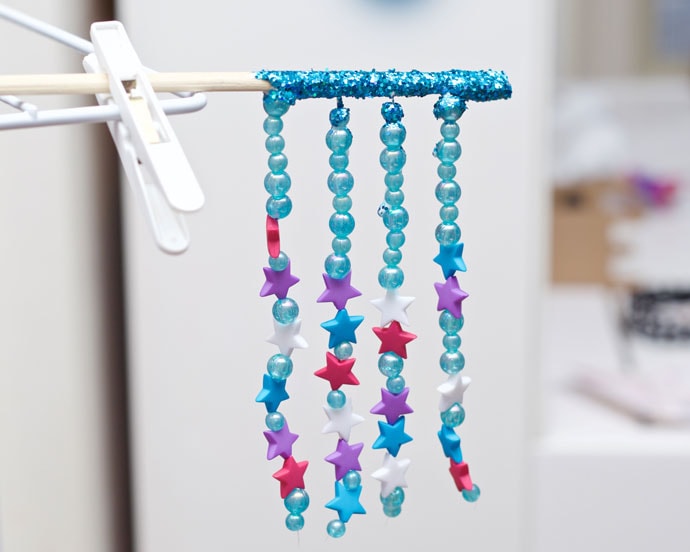
9/ Peg the chopstick onto a clothesline, and let the glue and glitter dry. Once it has dried you can spray on a couple of topcoat layers to prevent the glitter from coming off, and again peg to the clothesline to dry.
10/ Once you are done you can feed your chopstick hair accessory through your tied up hair, whether it be in a bun, or a high ponytail.

Looking for another Chopstick Craft idea? You may enjoy:


This would be such a fun activity for a teen girls’ sleepover activity. I love my short hair, but I’d totally do this craft if I had long hair again.
Thanks Priscilla!
QUE IDÉIA LINDA !!!
Amei tudo isso!!
Obrigado Giselle!
Thank you!
That is such a pretty and fun idea! I also love this look and loved the book! 🙂 Lisa
Thanks, Lisa!
The book! Oh my gosh, it is one of those stories that I can never tire of rereading.
Thank you for sharing such a wonderful project! I am so excited to try this!