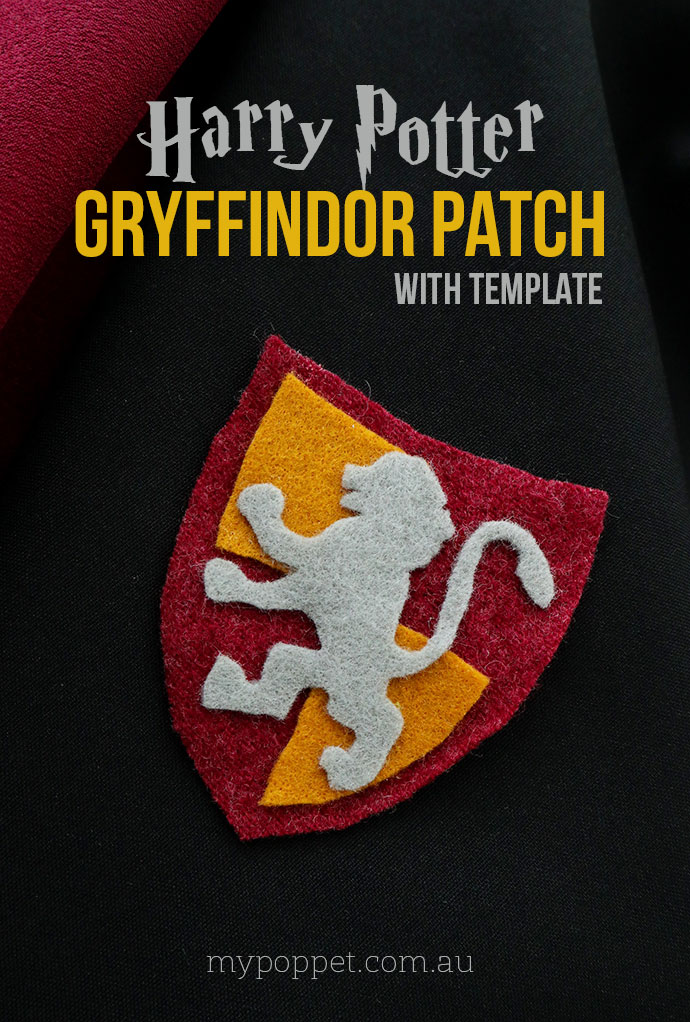
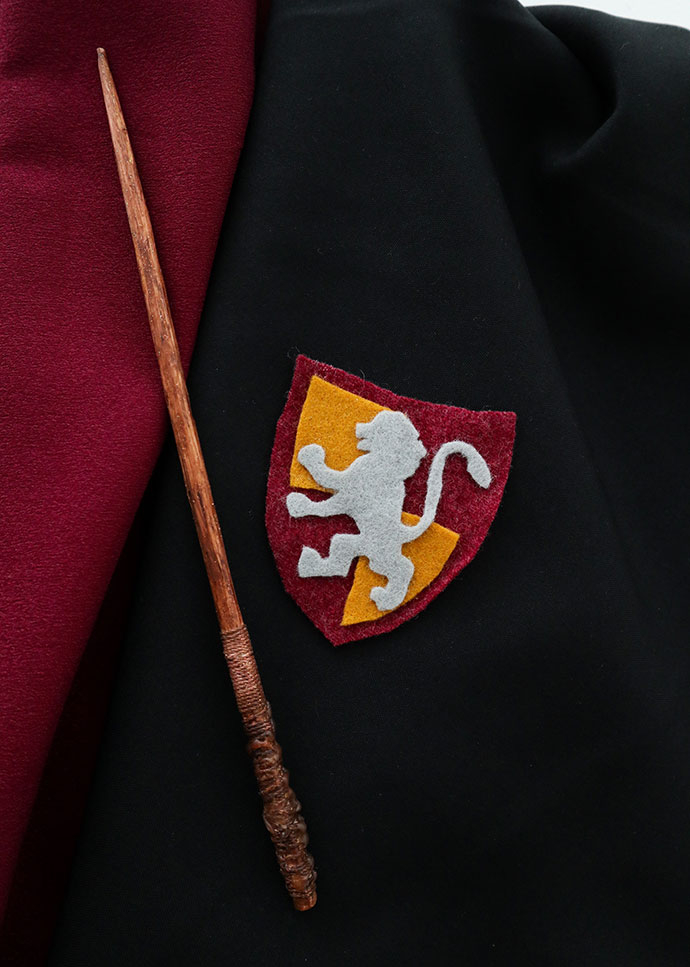
Do you have a young Witch or Wizard that that has been sorted into Hogwarts Gryffindor House? You may even be a Gryffindor yourself. Well you’ll need a Gryffindor crest patch for your robes then, and I’ve designed an easy no-sew version that can be whipped up before you can say ‘Repello Muggletum’!
This post contains affiliate links
Emma is super obsessed with everything Harry Potter at the moment and for her birthday this year she has requested a Harry Potter Birthday Party. I’ll be making a set of robes for her and her friends (I don’t know what I was thinking when I agreed to that!) and every Hogwarts student wears their house crest on their robes, so of course I had to make one of those too.
Even though I suspect the sorting hat would place Emma into Hufflepuff, she wants to dress as Ginny Weasley for her party, so her and her friends will be Gryffindors on this occasion.
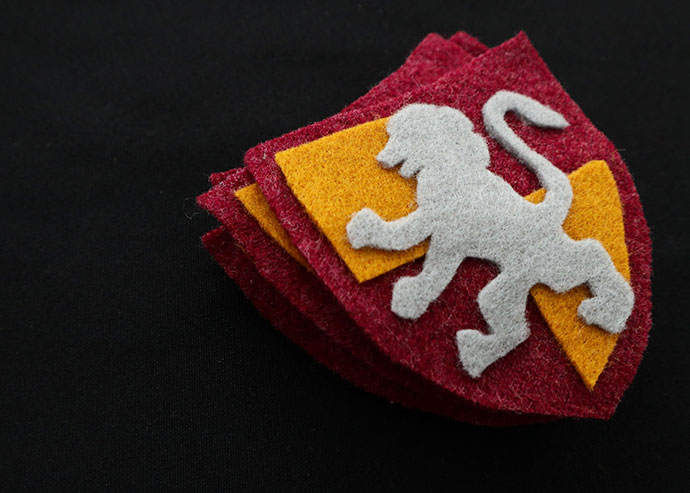
I was contemplating hand embroidering a Gryffindor Crest Patch, but because I had to make five, I simplified the design so I could make if from felt and just glue it together.
If you aren’t super adept at sewing this is the project for you. I’ve created a pattern template of my own stylised Gryffindor crest patch design that you can print out and easily assemble – No sewing required!
I’ve also included a handy tip to make cutting out the fiddly felt shapes easier.
How to make a No-Sew Gryffindor Crest Patch

You will need:
- Template – Print at 100%
- Felt in Scarlet (red), Gold and Grey
- Small sharp scissors
- PVA or fabric glue
- Small brush
- Glue stick (not pictured)
- Heavy book
How to:
1. Print out the template at 100% (or desired size of your choice).
2. Cut out felt shapes from the colors indicated on the template following the handy tip below.
To cut out template shapes

Use a glue stick and apply a small amount of glue to the back of the paper pattern piece you are cutting out.
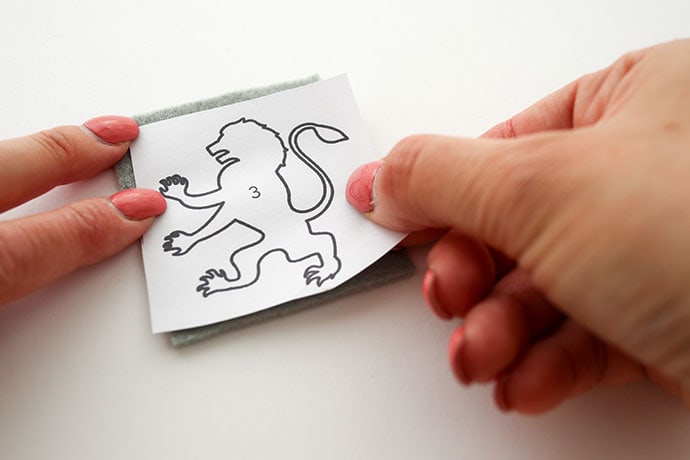
Stick it onto the felt.

Cut out shape. The glued on paper template should provide extra stability for the felt to stop it stretching and moving around when cutting out detailed shapes. Remove paper promptly once cut to prevent glue from setting.

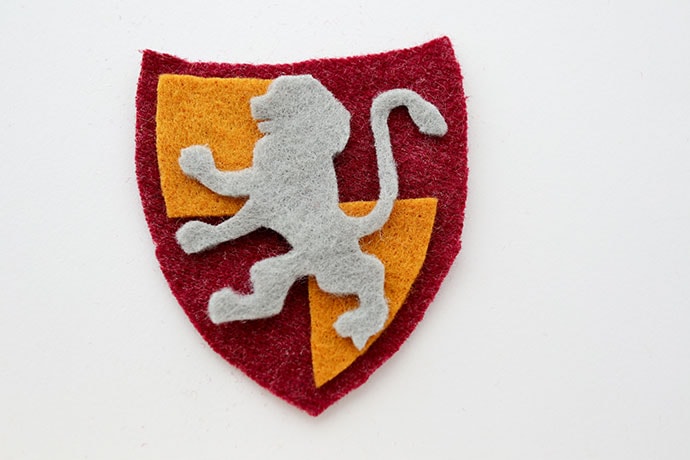
3. Use the image on the printable template as a guide to position your pattern pieces.

4. With a brush apply a good amount of PVA (or fabric) glue to the back of the pieces and stick down. Make sure all the little details like the lion’s tail and feet are well affixed.


5. Place under a heavy book and allow to dry for a couple of hours.
All done! Now your Gryffindor patch is ready to sew onto a black robe, or embellish a garment of your choice. Perfect for a DIY Harry Potter costume this Halloween.
Stay tuned for more Harry Potter themed DIY projects coming your way. I’ve got plenty of robes, wands and decorations to conjure up before the next full moon. After that I think we’ll be almost set for our own year at Hogwarts!


I wanted to thank you for making the Gryffindor patch template available. I am assembling a Harry Potter themed gift basket for a coworker who is pregnant and created a diaper cover with the Gryffindor patch on the rear. It turned out very cute. Thanks again.
Thank you for the template. This will be a nice way to decorate a pair of jeans we will be using with a costume.