This post contains affiliate link
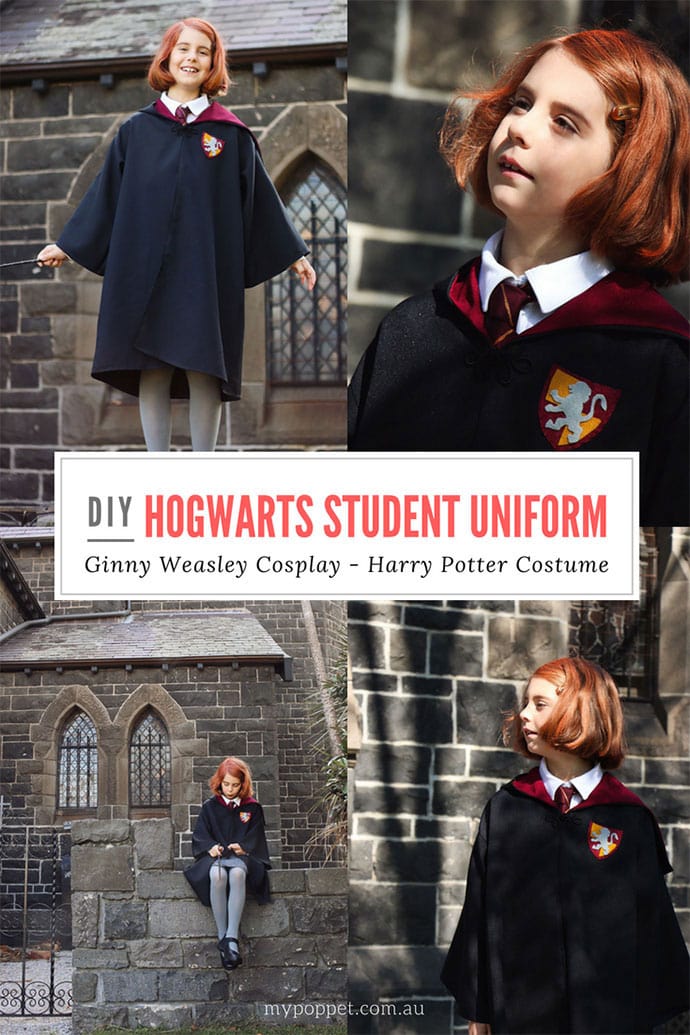
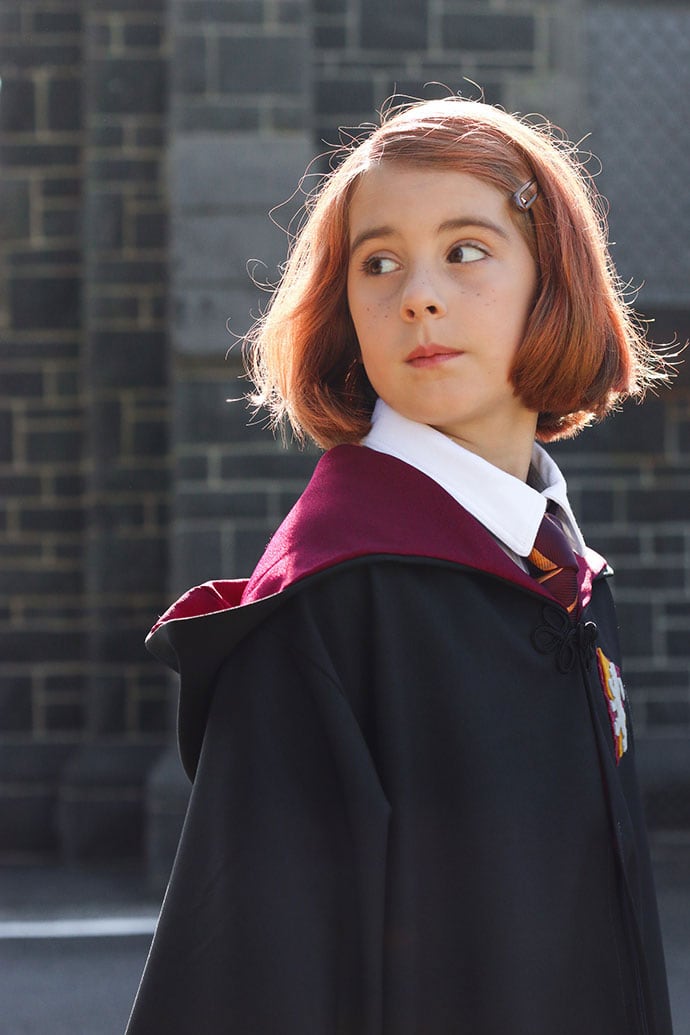
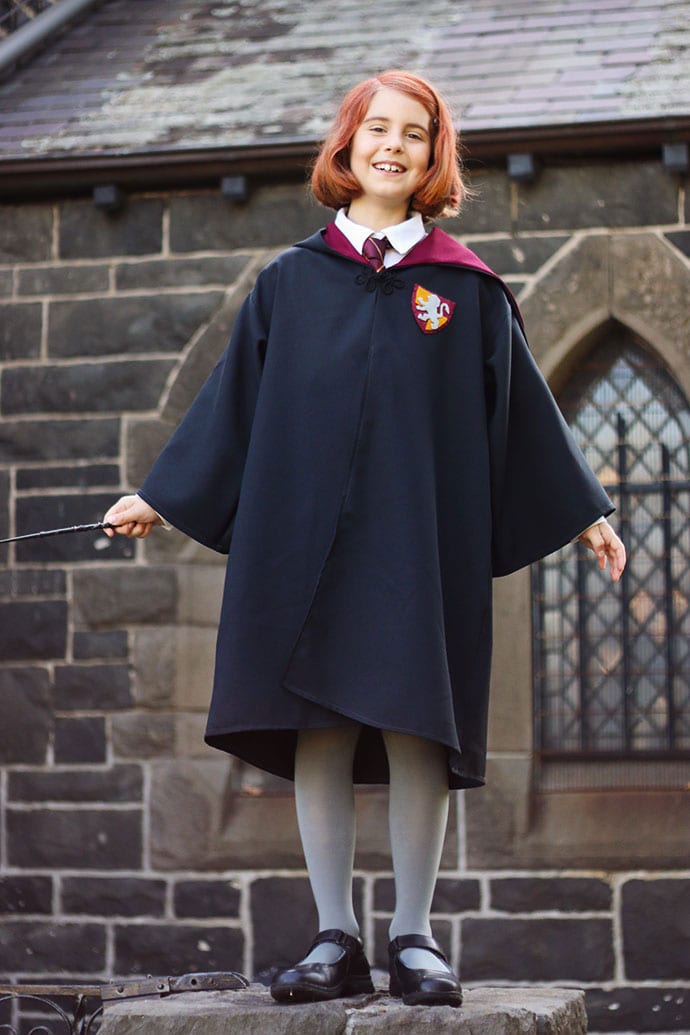
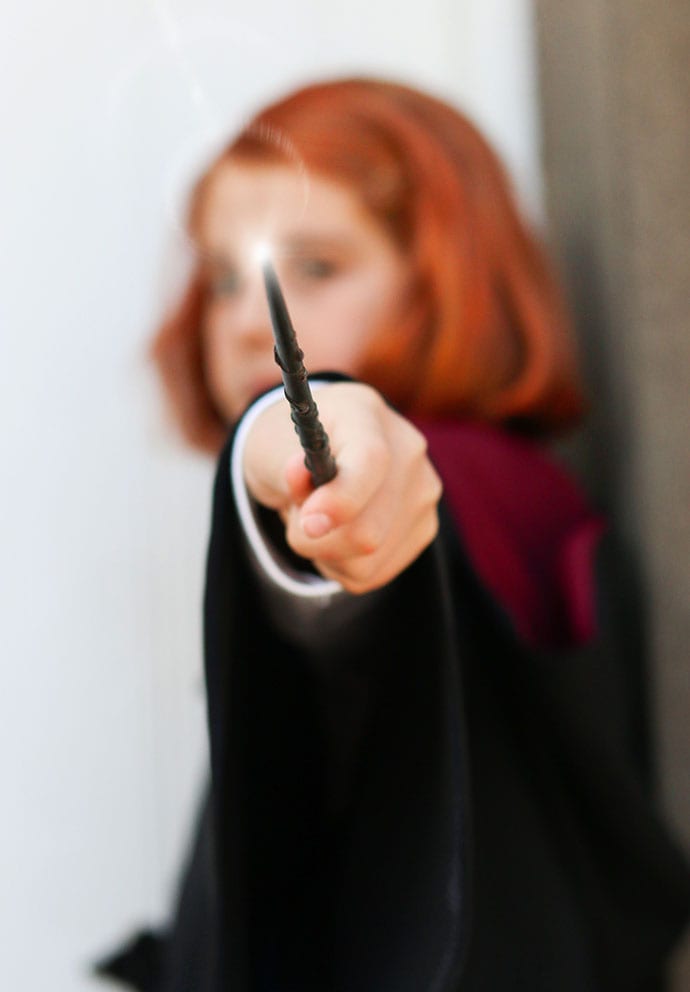
I’m so excited to finally share the photos of Emma as Ginny Weasley in her finished Hogwarts Robes, that I made for her Harry Potter Birthday Party. The party was weeks in the planning (and making) and you can read all about it on My Poppet LIVING now.
Emma is really into all things Harry Potter at the moment, it’s practically all-consuming. As she gets deeper into the books (she is listening to the audiobooks at the moment), she’s discovering interesting peripheral characters that she can relate to and enjoy.
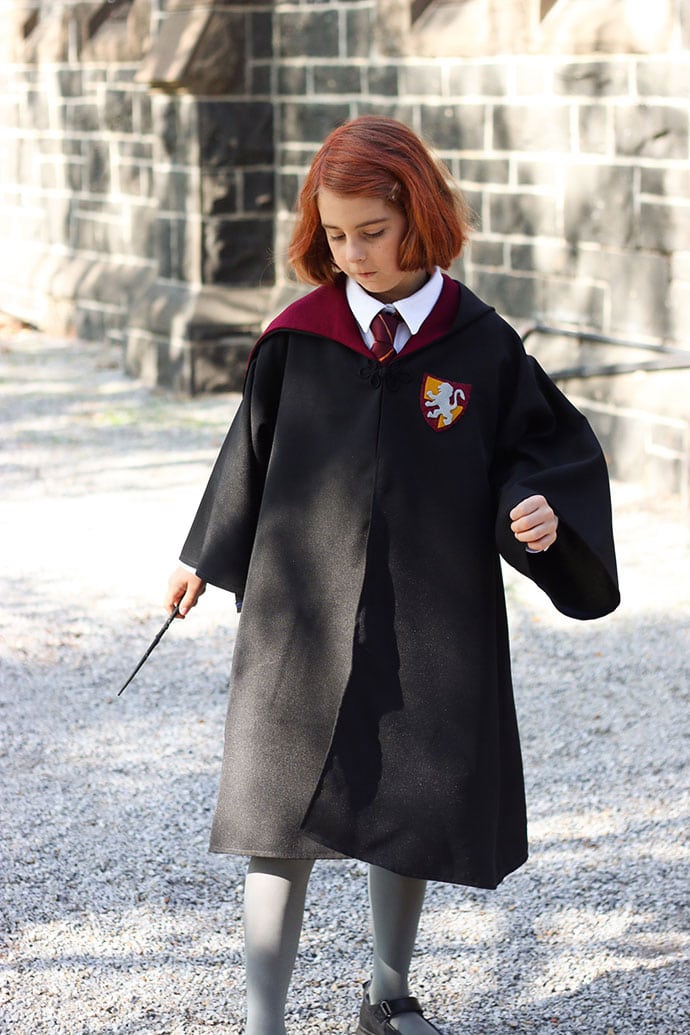
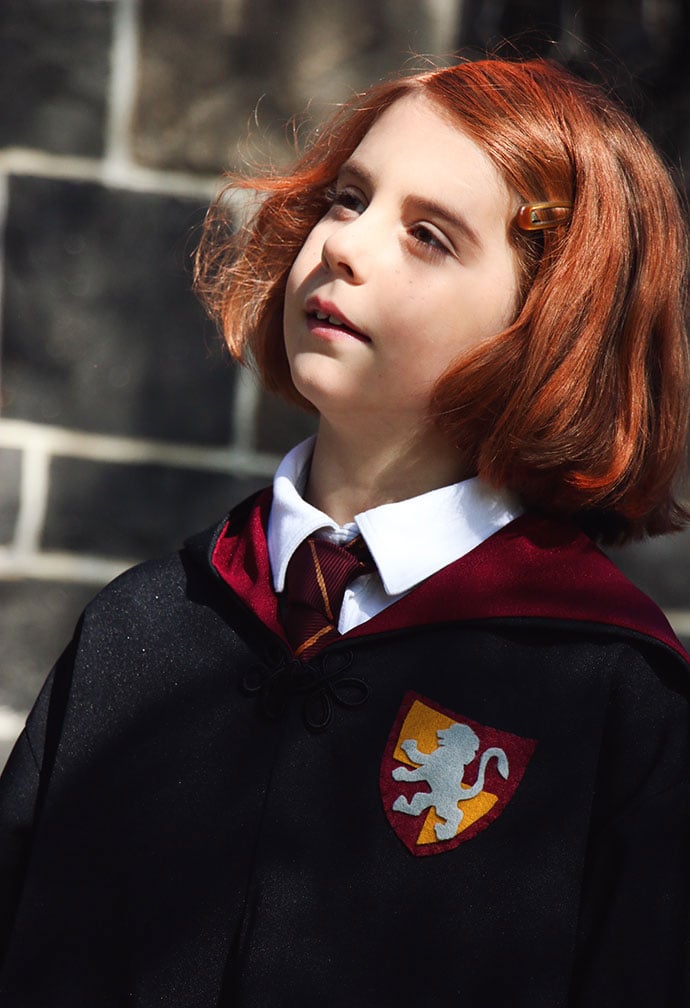
For her party, Emma wanted to be Ginny Weasley who is the youngest child in the red-headed Weasley clan. Ginny is quite a strong female character in the books and also a very good Quidditch player.
You all know how much we both love a little bit of cosplay fun – getting dressed up and taking fun photos is becoming one of our fave pastimes.
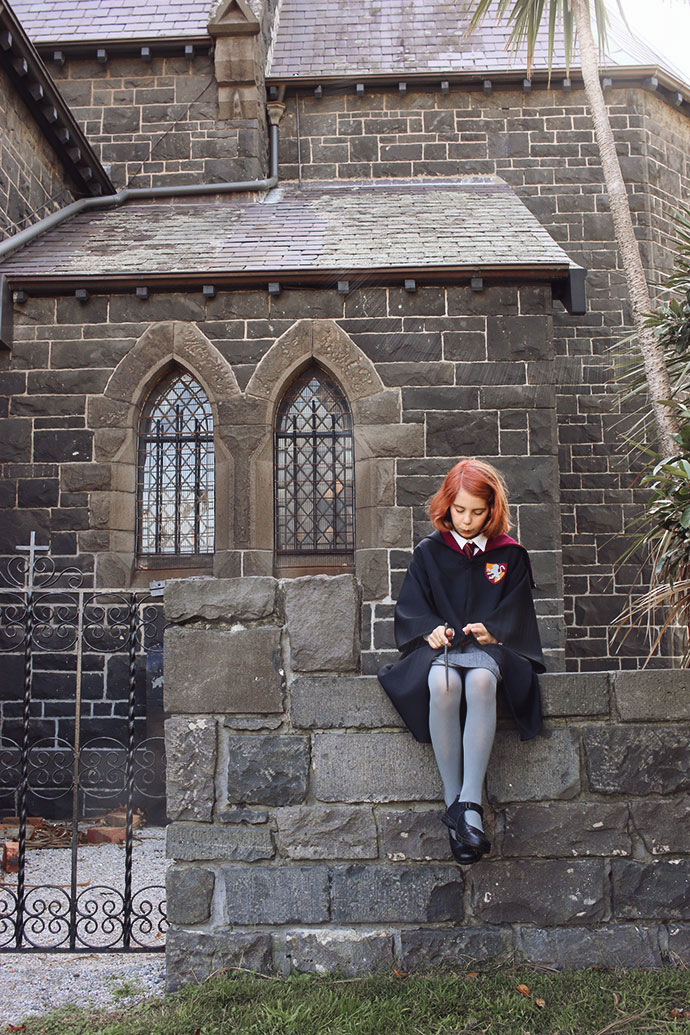
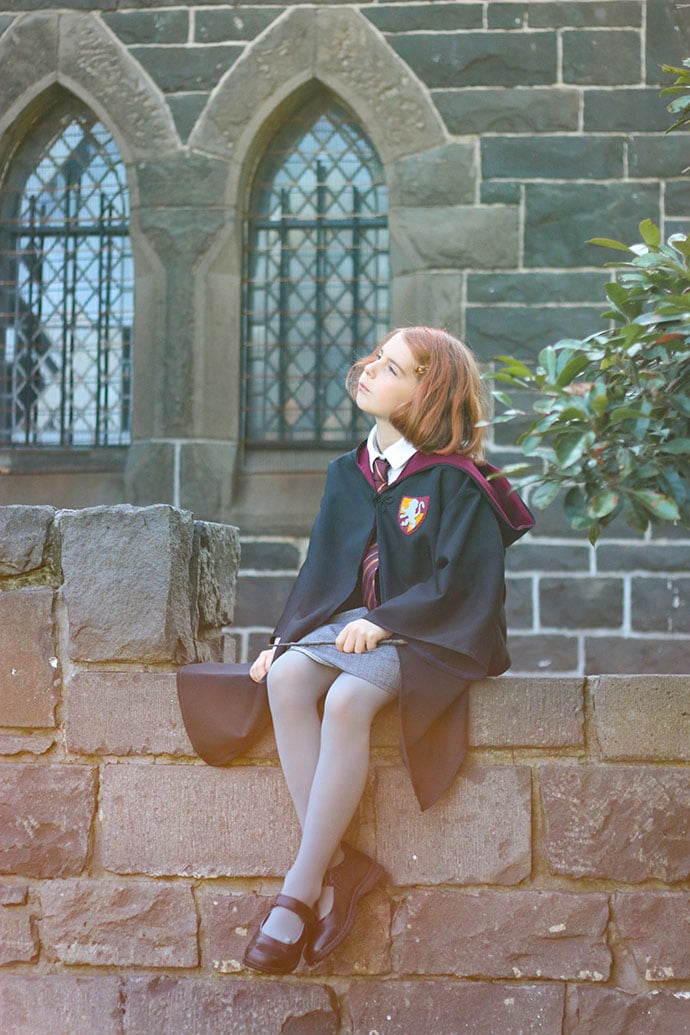
The day before the party we found a Hogwarts-esque looking location for a fun little photo shoot to show off Emma’s Ginny Weasley cosplay.
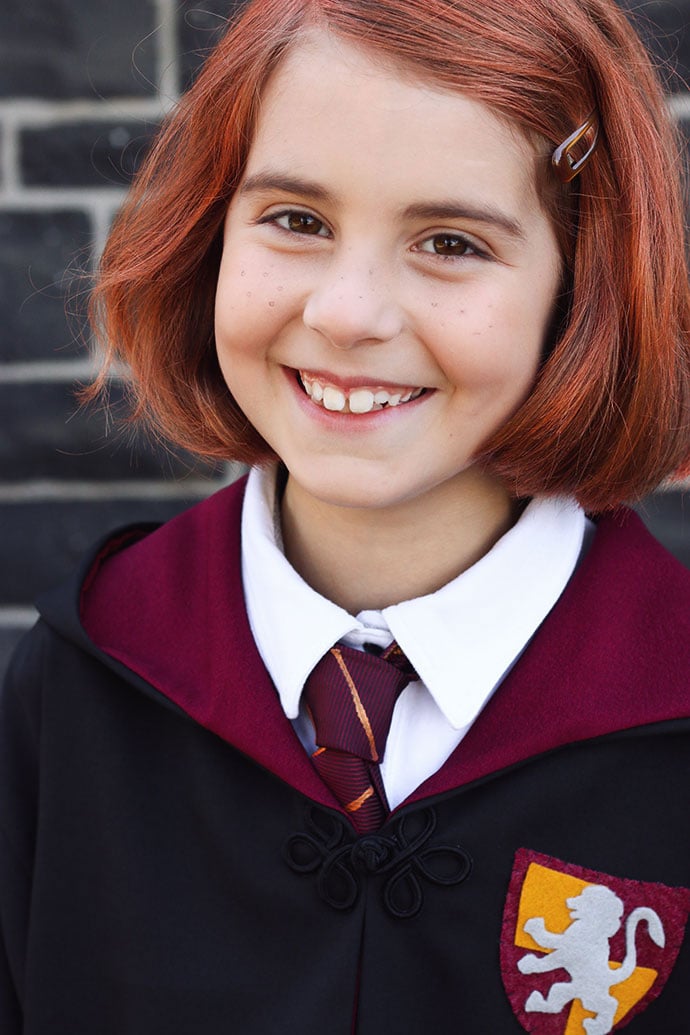
It was easy enough to colour Emma’s hair red with some coloured hair spray, and add a few freckles with an eyeliner pencil.
I hope you enjoy the photos, there is a ton here, but they all turned out so great, I couldn’t bear not too include all the best ones.
Looking for more details about the costume? Keep scrolling.

How to make your own Harry Potter Hogwarts Robes
Of course I could have easily purchased the Hogwarts robes and uniform online, but what’s the fun in that? Most of the robes I saw at costume supply stores were not very well made, and the fabric was awful! I prefer to spend that money on quality materials and invest a little bit of time in making a really nicely finished costume, especially because I know that Emma likes to wear them more than once.
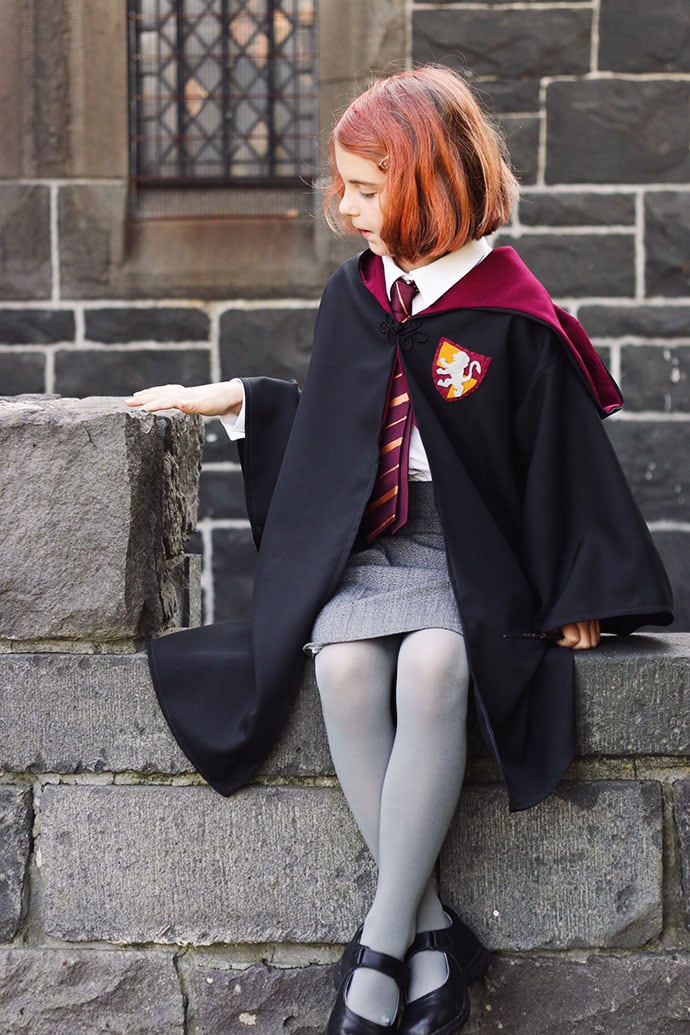
All of the other accessories like the tie and skirt were thrifted and altered to complete the full Hogwarts costume.
How much did I spend in total? Read to the end where I reveal all!
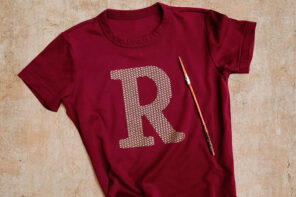
DIY Gryffindor Tie
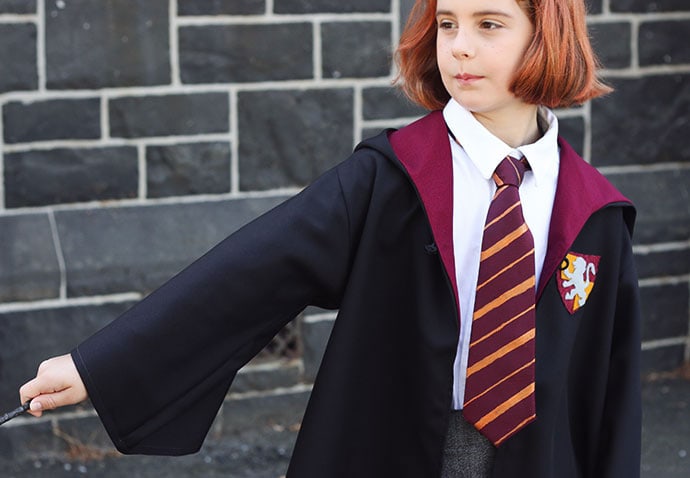
I was almost going to buy a ready-made Gryffindor Tie at a party supply store when I stumbled on a plain burgundy coloured men’s tie for only $2 at my local thrift shop. It was easy enough to paint some stripes on it with orange/gold fabric paint that I just happened to have in my craft supply stash.
Admittedly if I didn’t already have the paint, and needed to purchase it just for this project, this Hogwarts Tie DIY would have been more expensive than just buying one ready-made. Gryffindor Ties are pretty easy to find (because Harry Potter is a pretty popular character for Halloween and party costumes), but if you are dressing up as a student from a different Hogwarts house, ready-made ties are a little harder to come by, so this DIY option may come in handy.
As this was a men’s tie it was quite long on Emma. I shortened it but cutting off a piece of the widest end section and hemming it back up before I started painting.
You will need:
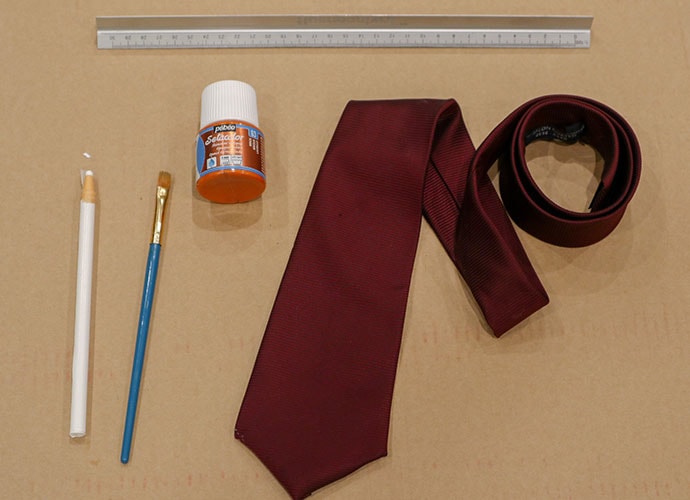
- Burgundy (dark red) tie – look in your local thrift store
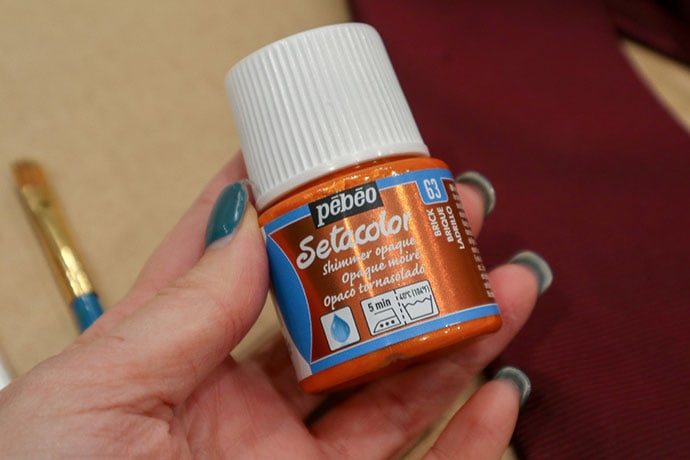
- Gold fabric Paint (or regular craft paint will do)
- Ruler
- Tailors chalk or chalk pencil
- Flat head paint brush
How to:
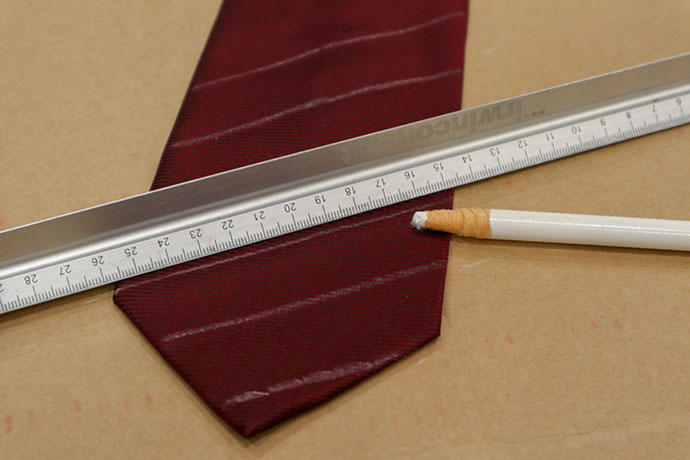
1. Rule diagonal lines onto your tie at about a 45 degree angle with tailors chalk. I’ve used the width of the ruler as a guide to keep the lines the same distance from each other. It’s a good idea to mark how far up the tie the knot will be to make sure you don’t stop the lines too soon. I didn’t paint the skinny end of the tie because I was pressed for time and it wouldn’t be seen anyway.
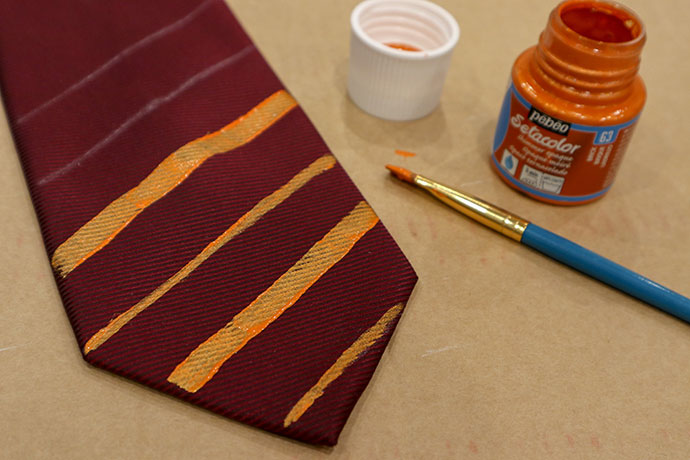
2. Neatly paint on the lines alternating between thick and thin. I just painted freehand, but if you are a real perfectionist you can use some masking tape as a guide to get a perfectly clean edge.
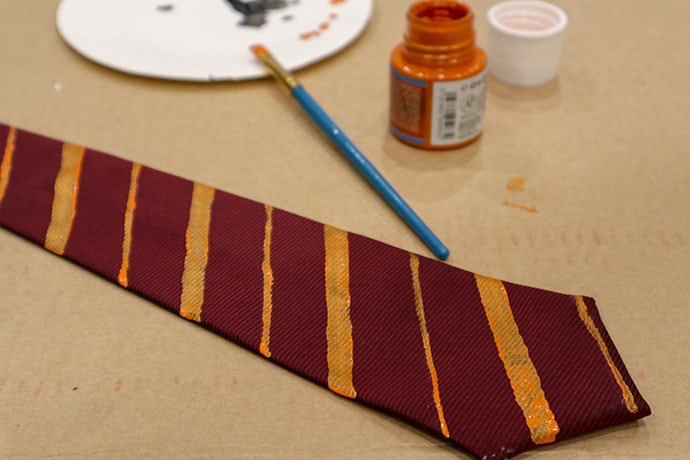
3. Finish painting all the lines and then allow the paint to dry thoroughly. Because the tie won’t be washed I didn’t bother to heat set the fabric paint.
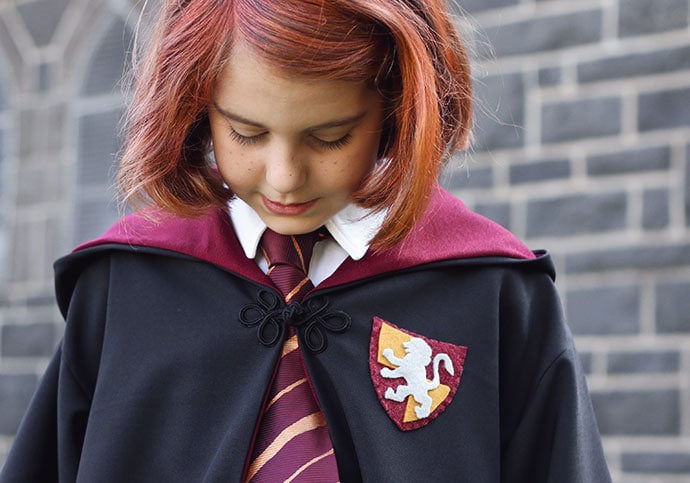
All done! How great does this DIY Gryffindor Tie look?
I was really fortunate that this paint had a metallic shimmer which gave the finished result a really nice sheen and blended perfectly with the satin fabric of the tie.
DIY Hogwarts Robes
When I committed to making not one, but five robes for Emma’s Harry Potter party, quickly realised that I needed to make the Hogwarts robe pattern as simple as possible. Initially I looked at some commercial sewing patterns, but the fabric requirements were just too much considering I had to multiply everything by 5.
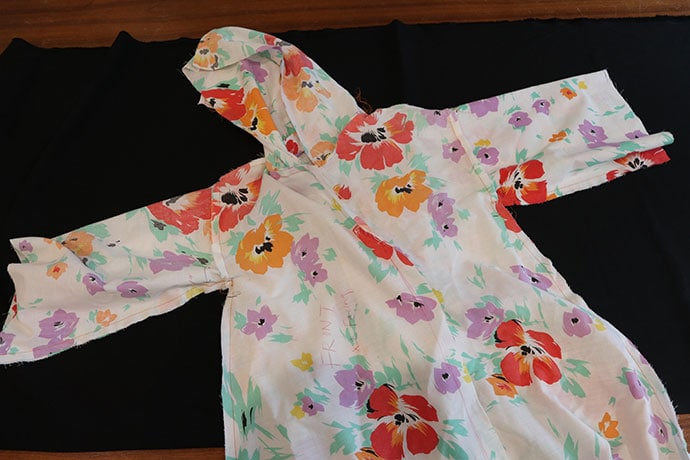
In the end, with the help of my mum, we drafted our own robe pattern and made a muslin out of an old sheet to then use as the final pattern.
Sorry, this isn’t a detailed How to make a Robe tutorial as I did most of my sewing at night and it was too dark to take photos. I also had 5 robes to make so I was a bit short on time.
If you aren’t confident enough to draft your own pattern I’ve found a downloadable PDF pattern from a UK Etsy seller, Sewing Pattern Pixie.
- Wizard Cloak PDF sewing Pattern (lined version)
- Wizard Cloak PDF sewing Pattern (unlined version) – good for beginner sewists
The great thing about using an old sheet to make a practice robe was that we could draft the pattern directly onto the fabric, sew it up roughly, and then make adjustments as necessary.
Once I was sure the robe pattern would fit well I unpicked the stitching and used the pieces as the pattern to cut into the good fabric.
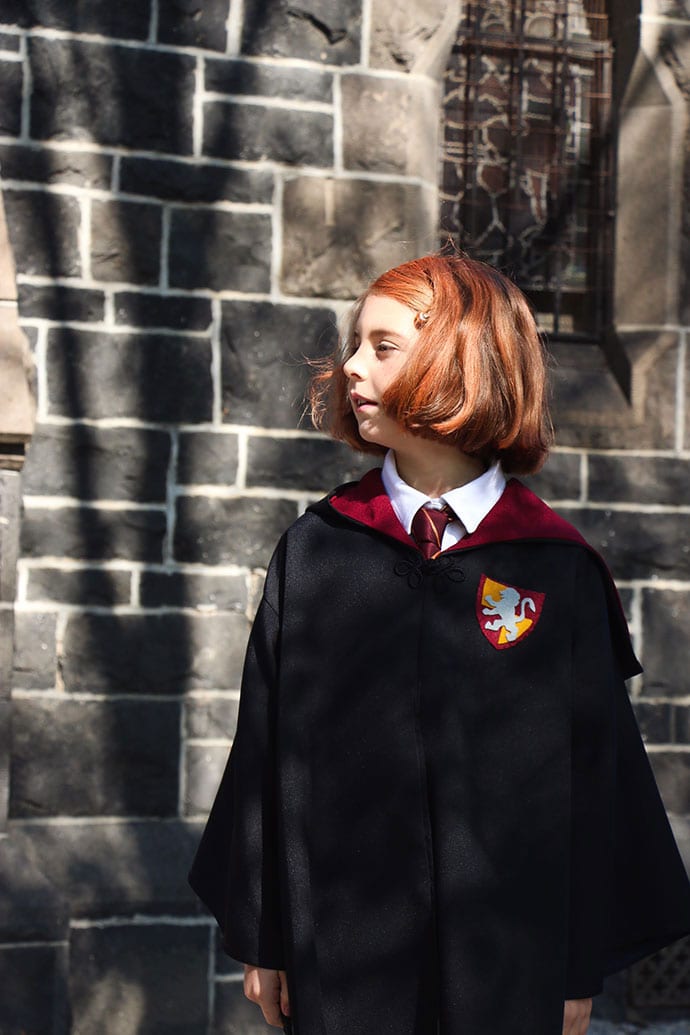
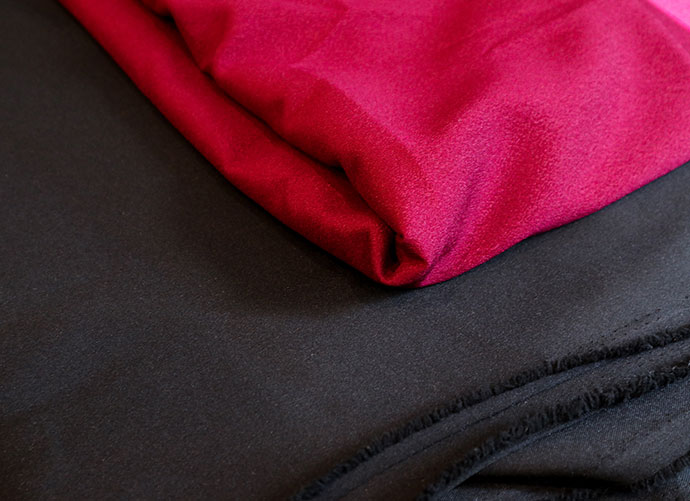
Fabric choice is important if you want the robe to have a nice drape without clinging to itself, I opted for suiting fabric. I think the robes in the movie would have been made out of a wool suiting, but because by budget didn’t stretch that far I purchased a polyester suiting fabric.
When you are fabric shopping, try to pick a 150cm wide fabric as you’ll only need a little more than one body length to make a robe if you are clever with your pattern layout.
Fabric was purchased from Lincraft – here are the details:
- Black Poly Suiting 150cm wide
- Burgundy Satin Back Crepe 112cm wide
Lincraft kindly supplied me with a gift card to purchase the fabric for this project.
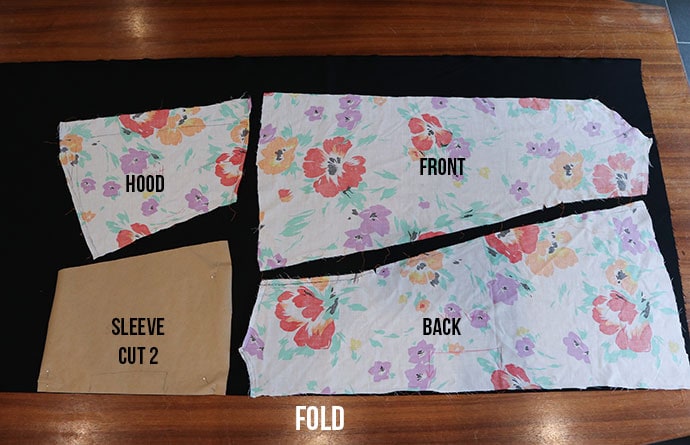
I used approximately 1.5m of black poly suiting for each child sized robe, and with some creative cutting about 40cm of crepe lining for the hood.
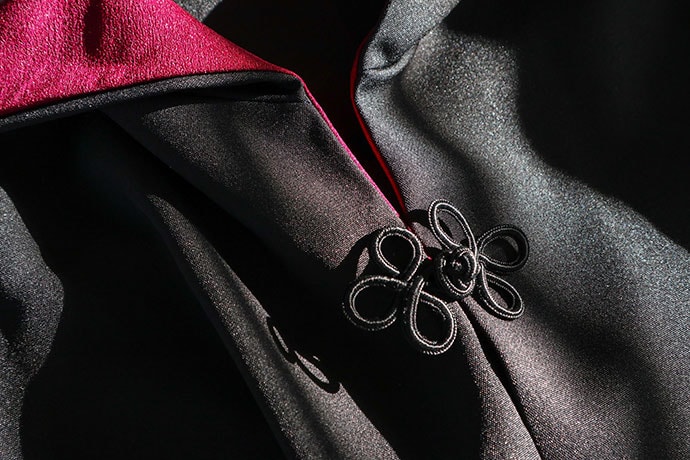
I had a black braid frog closure in my stash which was a nice way to finish off Emma’s robe.
And the finishing touch was to attach the Gryffindor Patch which I’d made from felt. You can get the template and instructions to make a Gryffindor House Patch here.
Hogwarts School Uniform
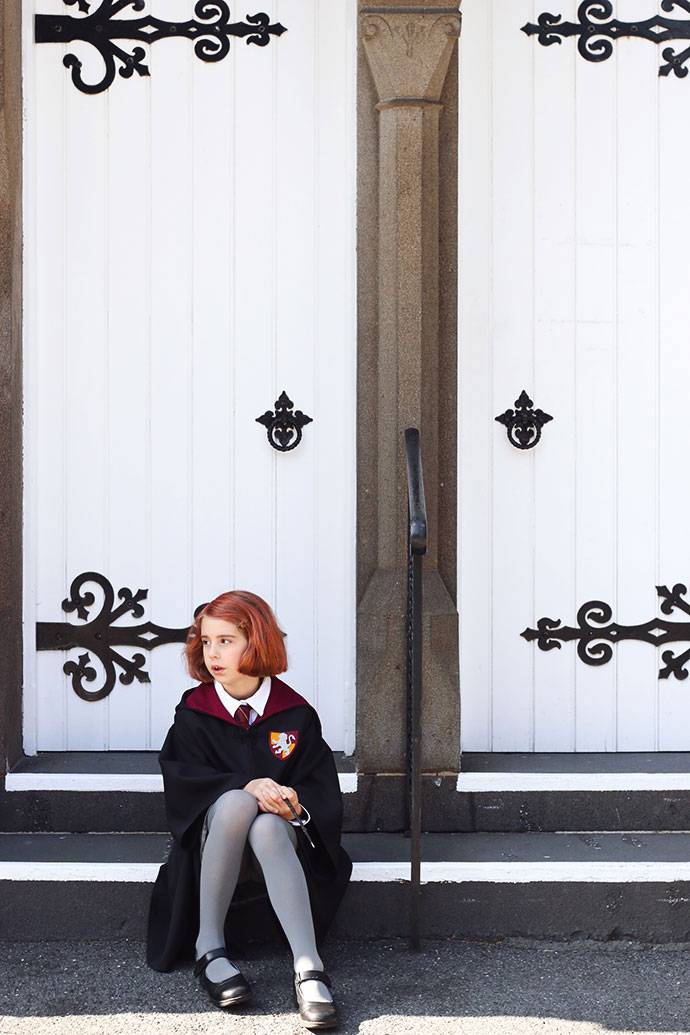
The rest of the uniform (apart from Emma’s school shoes) was purchased from an op-shop (thrift store). I was lucky to find the grey school tights new, still in its original packaging ($2). The white shirt ($2) was in the boy’s section and the grey skirt ($6) was a ladies size which I altered to make smaller and shorter.
The wand was also home-made, you can get DIY Wizard Wand making instructions here.
All up I spent around $32 in materials for this costume – not too bad for authentic looking Hogwarts Robes & Uniform.
Emma loves her Hogwarts Robes and has already worn them twice to several Harry Potter themed occasions. She was planning on going as Ginny to Oz Comic-Con this year, but changed her mind at the last-minute and decided to go as Luna Lovegood.
Get the Luna Lovegood costume making instructions here.
I hope you’ve enjoyed these photos and have inspired you to make your own Hogwarts Robes.
If you have any questions, please feel free to leave them in a comment below and I’ll try to answer them as promptly as I can.
LOVE IT? PIN IT!

Brilliant!!!
I am impressed. I have made this same costume for an American Girl doll for Christmas, but I think yours is much more impressive. Bravo.
I’m sure your doll costume is amazing. I actually find sewing doll clothes harder than real size clothes as it is much smaller and fiddly.
Muito bem feita!
Todas as suas criações são muito originais.
Sempre expostas de forma belíssima em fotos muito bem tiradas.
Parabéns!!!
Thank you.
Translation from Portuguese :
Very well done!
All his creations are very original.
Always beautifully displayed in well-taken pictures.
Congratulations!!!
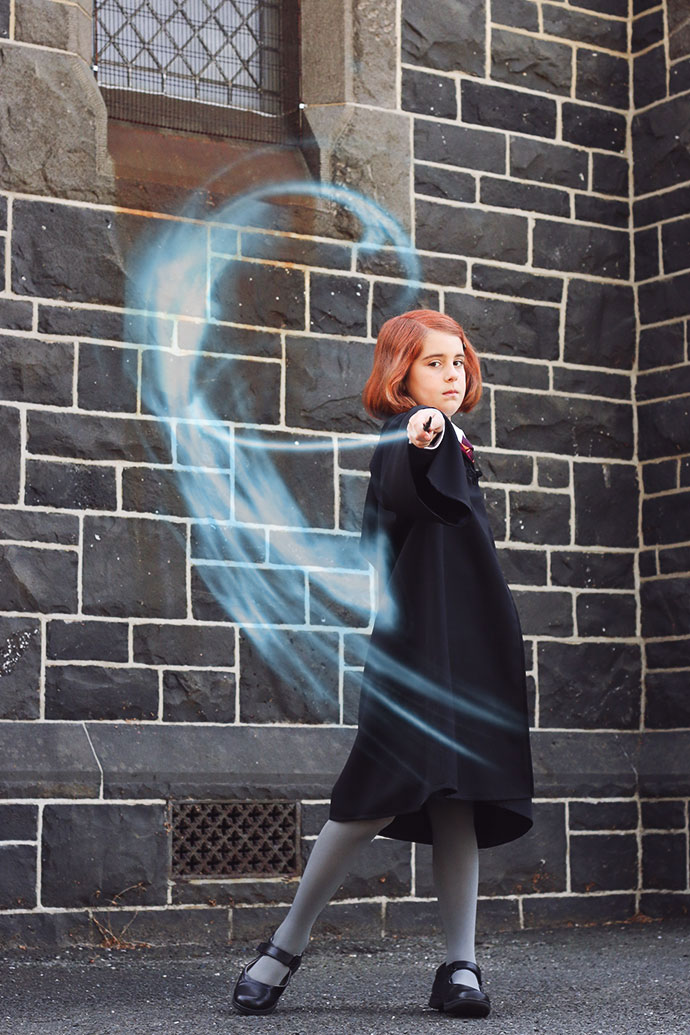
Congratulations on a job truly well done! Your party looks amazing! In the photo of Emma using her wand facing the camera, how did you get the gorgeous magic swirl to appear, please? Thank you!
A little bit of photoshop magic!
Thank you Cintia! I appreciate your reply. Will try to replicate that cool effect!
Ive never used and probably never worn the type of fabric you linked. Does it get hot? We live in a tropical climate so I was just going to just use cotton, but I like the drape of the robe you made.
Hi Charlene, as it’s a synthetic fabric it can get a bit sweaty in tropical climates I imagine. Cotton is a good substitute if you want breath-ability but it won’t have that same drape that comes with the heavier crepe style fabric.