Sew a tiny festive forest with my easy to follow mini felt tree instructions. You’ll only need a few felt scraps to make these cute conifers.

This post contains affiliate links
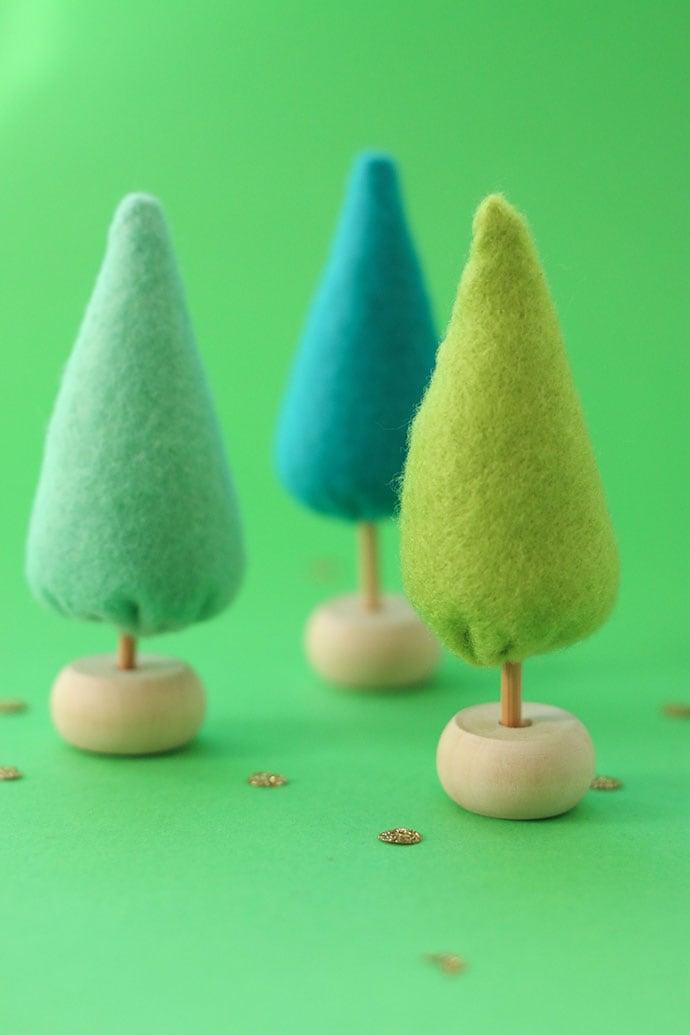
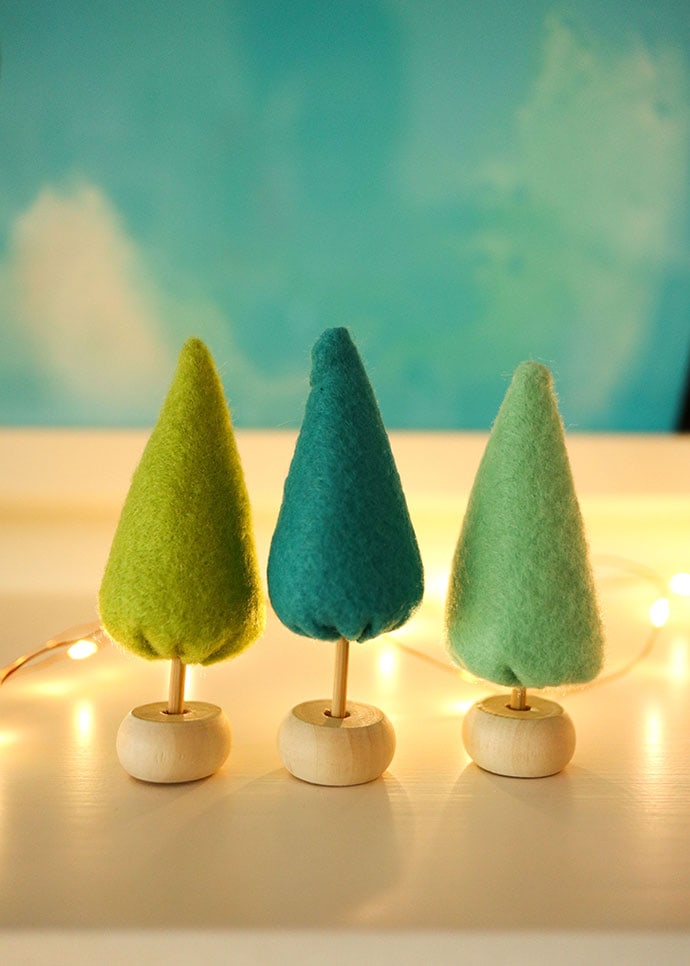
I’ve downsized our Holiday decorations this year! Instead of putting up our big ol’ Christmas tree, I’ve made a mini forest of teeny tiny felt trees to grace our mantelpiece.
These mini felt trees are so cute, and are fun to play with all year round. Kids will enjoy the infinite possibilities of imaginative play.

Make them to add to a little Christmas village vignette, pop one in a doll house, or use them to add to a farm or forest scene when playing with animal toys.
Their simple minimalist design has a Scandi feel about them don’t you think? They would look amazing paired with these little wooden house village set.
This project is part of the Festive Sew a Softie blog hop where makers from all around the world create hand sewn softies to teach and inspire kids and adults to get sewing!
Take a look at my past Sew a Softie projects:
Let’s Make some Mini Felt Trees
Make these little felt trees any size or colour you like – you are limited only by your imagination.
I’ve made mine around 9cm tall, with the template dimensions I’ve specified, but if you would like a larger tree, just make the template larger too.
To make these mini Christmas trees even more festive, you can embroider, paint or glue some decorations onto them before you start sewing.
They would look great speckled with white paint to mimic snow, or with a sparkly star sequin stitched to the top.
I’ve used a bamboo skewer as the trunk, because it’s what I had on hand, but a garden twig would make an amazing more natural looking trunk.
Treated gently, these mini trees will last for many years.
CAUTION WITH SMALL PARTS – This project contains small parts which may pose a choking hazard to small children (under 3yo). Supervised play is recommended.
You will need:
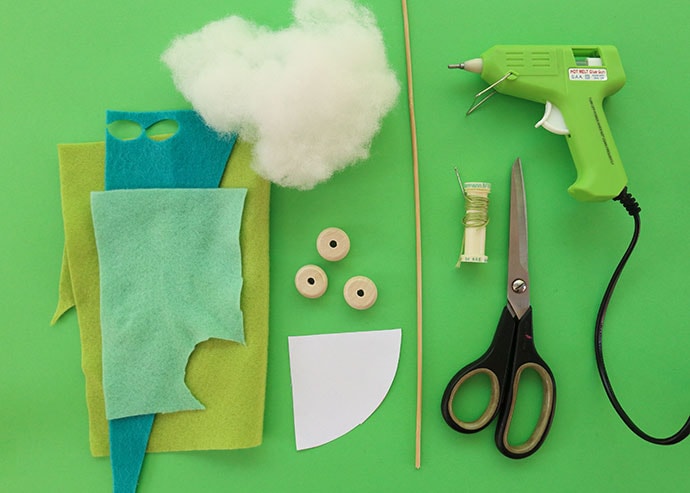
- Felt scraps
- Paper, pencil and plate (for template drafting)
- Flat wooden beads
- Bamboo skewer or wooden twig
- Needle and thread
- Scissors
- Toy stuffing or yarn scraps
- Hot Glue gun and glue stick
Note: If you don’t have a flat wooden bead on hand, you can also made a base with a small amount of air dry clay or polymer clay shaped to suit.
How to:
Making the template
The template for the conical tree is based on a quarter circle shape. It’s easy to make your own – here’s how.
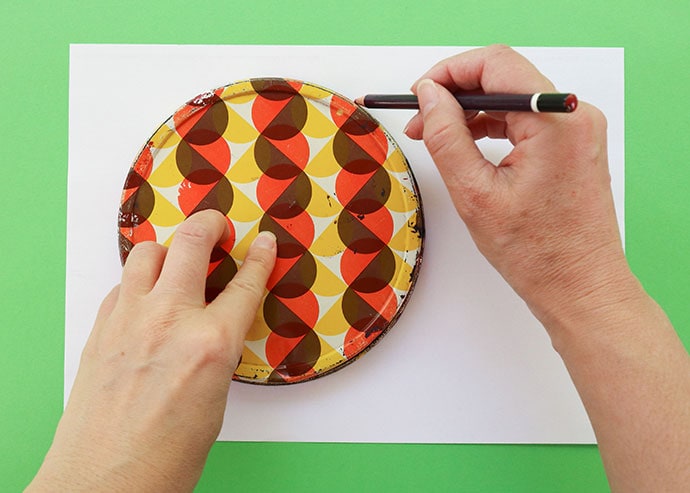
1. Draw a circle onto a piece of paper by tracing around a small plate, tin lid or with a compass. The circle should be around 16cm in diameter for a 9cm tree. (If you would like a bigger tree, use a bigger circle. Remember to upsize your base and trunk accordingly.)
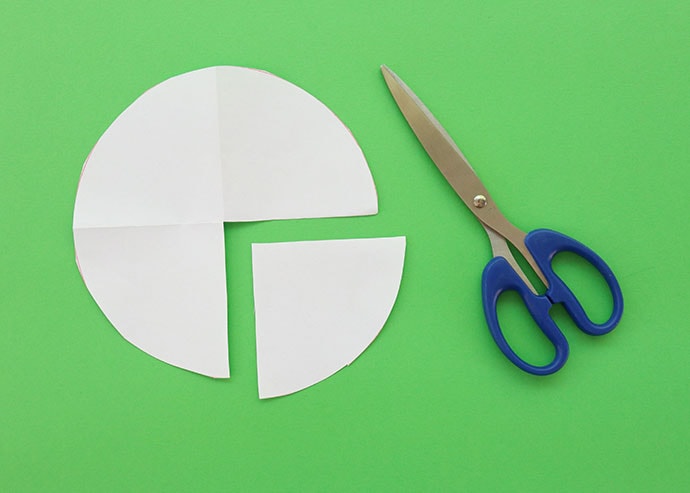
2. Cut the circle out and fold into quarters. Cut out one quarter of the circle, this will be the pattern for cutting your felt pieces. The length of the straight sides should be around 8cm (radius of circle).
Making the mini trees

3. Use the quarter circle template to cut felt pieces. Cut one per tree.

4. For each tree, fold the felt matching the straight side edges together.

5. Hand sew a seam with small stitches, closely along the edge of the felt, making sure you catch both sides.

6. Turn cone shape inside out. Use a pencil or tip of scissors to make sure the tip of the cone is nice and pointy.

7. Sew a running stitch around the base of the cone shape, (make sure your starting knot is on the inside of the cone). Leave the needle on the end of the thread (see step 9).

8. Fill cone shape with stuffing. Add a little at a time making sure it reaches right into the tip of the shape. Stuff firmly but not too much that the cone shape gets distorted.

9. Gently pull the thread to gather the stitches and close the opening. Stitch to secure closed leaving a little hole to insert a mini tree trunk.

10. Cut or break your skewer or twigs to around 6-7cm in length. Just long enough to have about 1cm of trunk showing with the rest sliding into the cone and base bead.
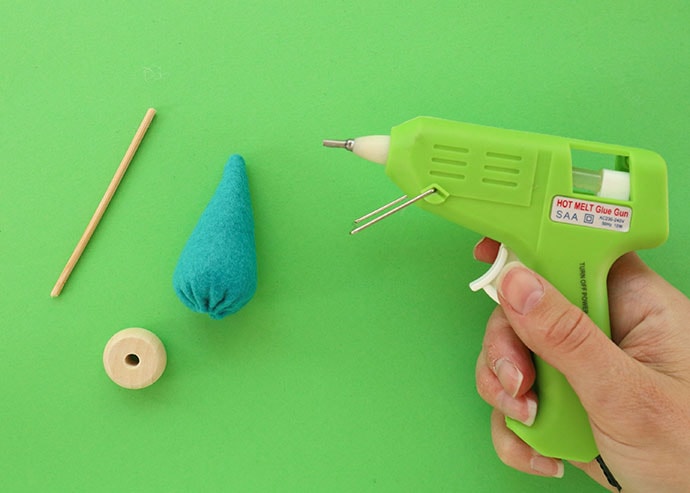
11. Use a hot glue gun to secure the parts of the tree in place. Firstly gently insert the trunk/skewer into the cone shape, then add a dab of glue to secure. The add and glue the bead.

12. Make sure the base of the bead is flat and there is no glue or stick protruding.
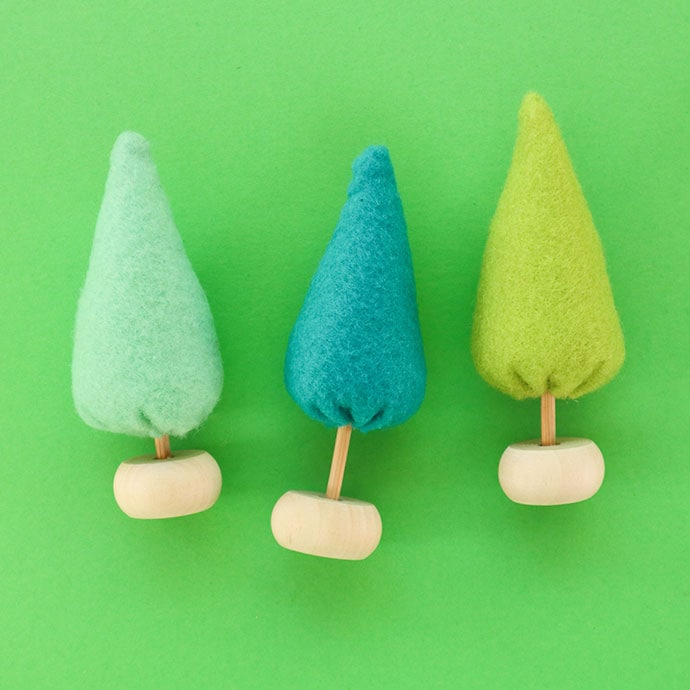
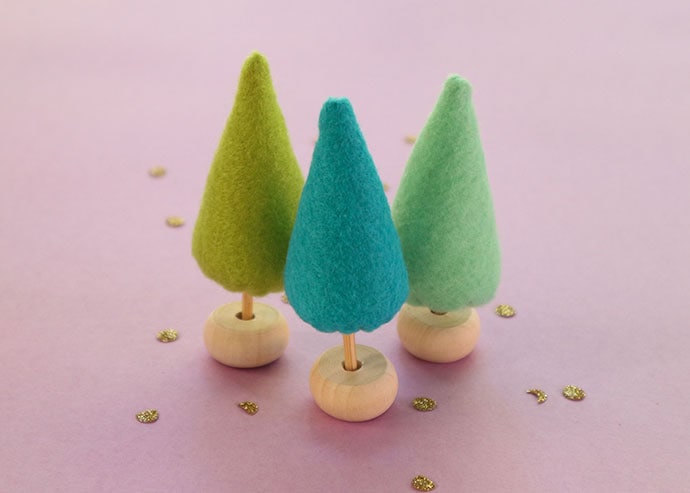
All done! Don’t these mini pine trees look super cute?