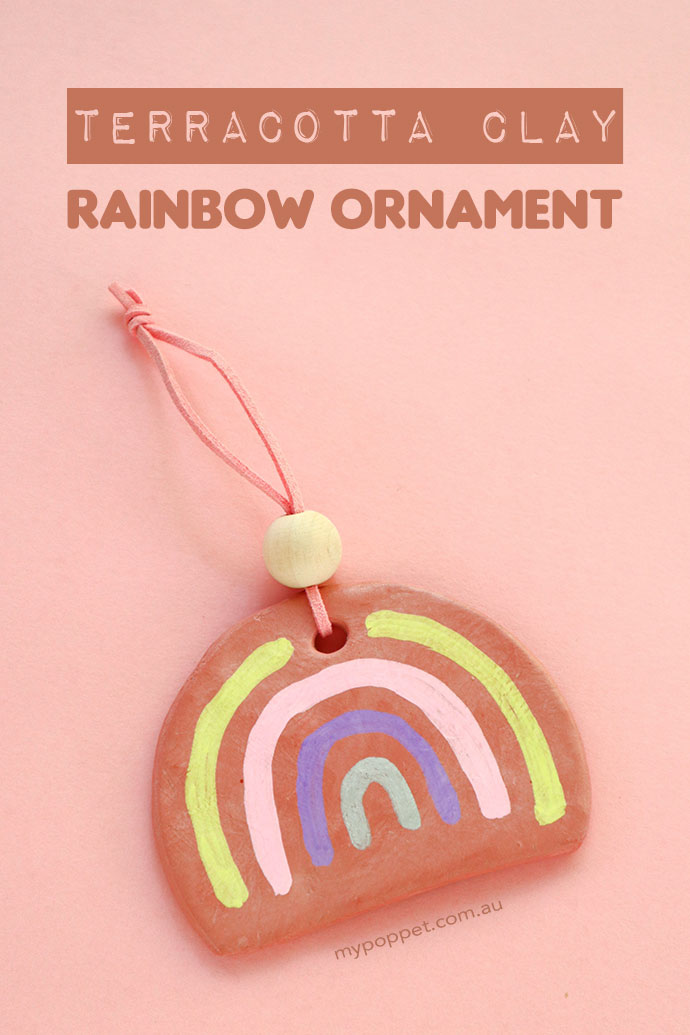
Here’s a cheerful little clay rainbow ornament that looks great on your Christmas tree and is subtle enough to enjoy all year round.
This post contains affiliate links
After having fun making a batch of Terracotta Clay Essential Oil Diffusers as gifts this year, I thought it would be fun to use the leftover clay to make a little Christmas ornament.
Because it’s been a bit of a challenging year for most of us, I thought that a little rainbow of hope was just what we needed.
A modern Clay Christmas Ornament Idea
Made from air-drying terracotta clay, which has a lovely earthy warmth to it, this rainbow charm is the perfect modern holiday ornament with a Boho twist.
More than just a Christmas Decoration
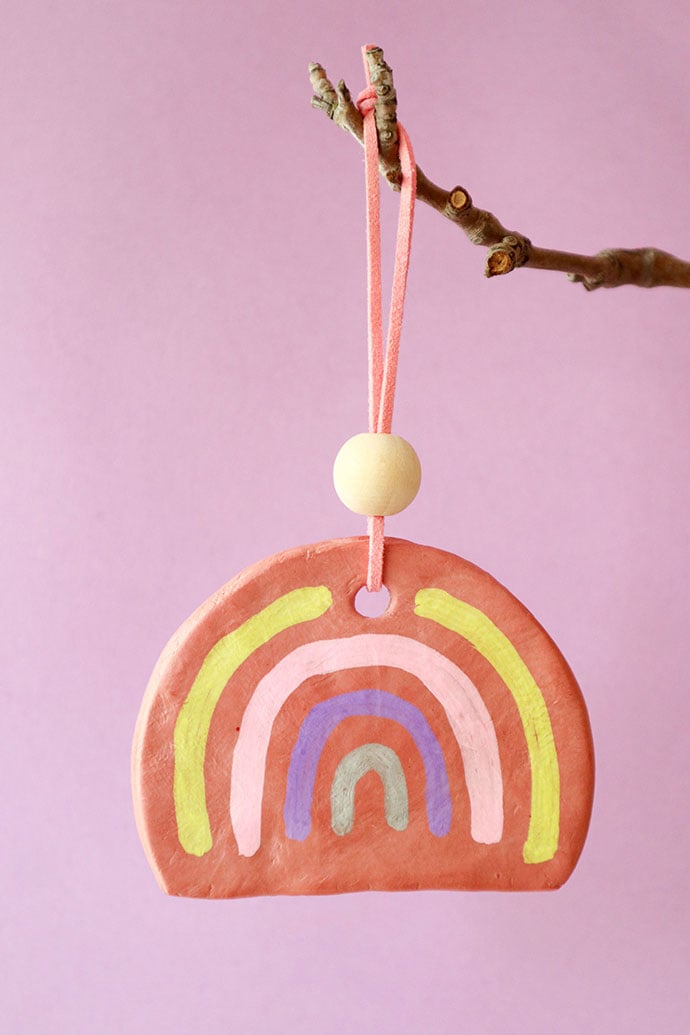
Enjoy it as a Rainbow Christmas decoration, then when you pack your tree away, hang it on a door knob or from a small hook on the wall to bring a smile to your face right through the year.
You could also add it to a gift as a special keepsake gift tag. Write a sweet message on the back, or press the recipients name in the back of the clay ornament when the clay is still damp.
Don’t limit yourself to making just one. Why not make a whole batch of sweet rainbow charms and share them with friends.
Even better, you could have a crafty afternoon and gather your friends or family together for this fun and festive craft project idea.
Kids can easily make these clay rainbow ornaments as little gifts for friends, and they would look great as room decor too!
Not just for Christmas, this pastel rainbow ornament would also look great as Easter decor.
You may also enjoy:
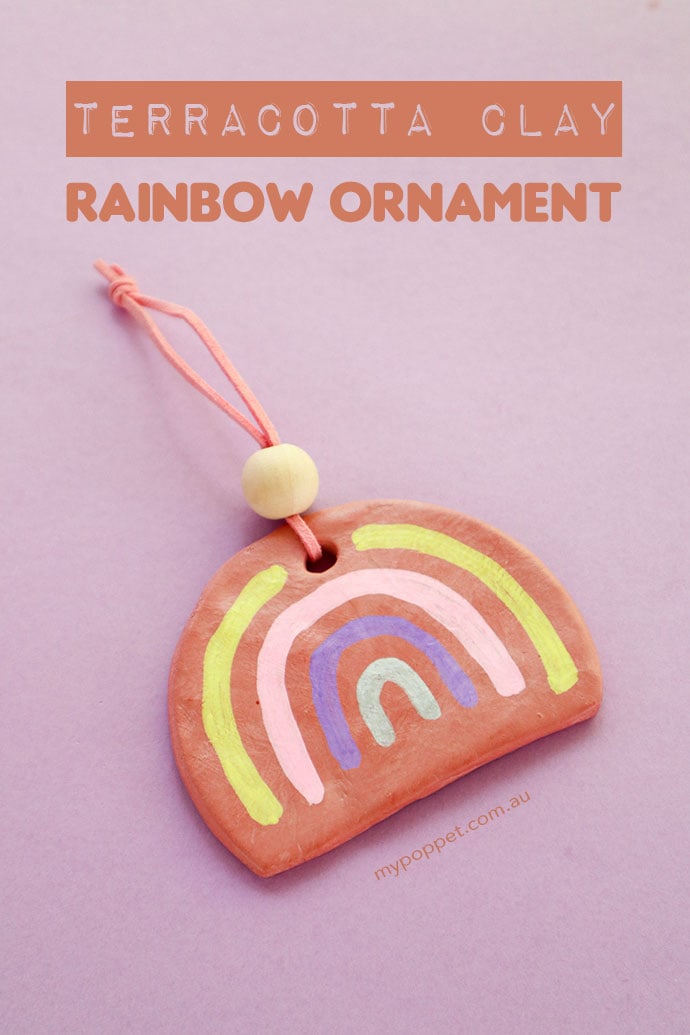
How to make a Terracotta Clay Rainbow Ornament
Air dry clay is so easy to work with, and is the perfect material for making this modern, boho style Rainbow Ornament.
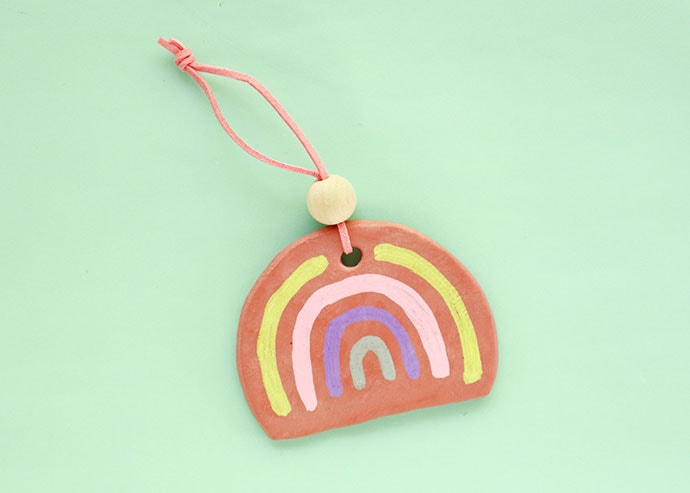
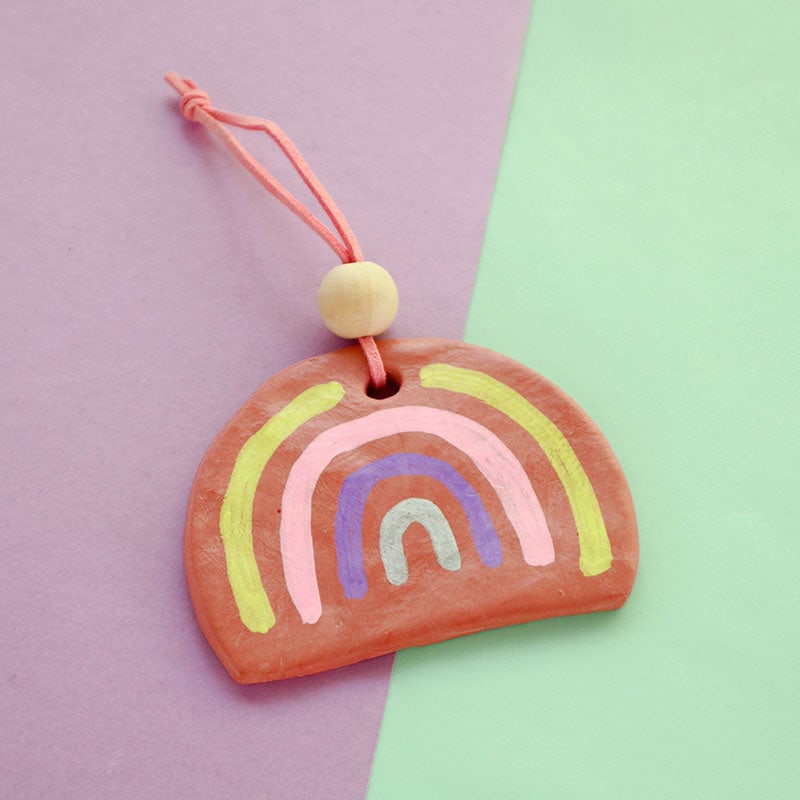
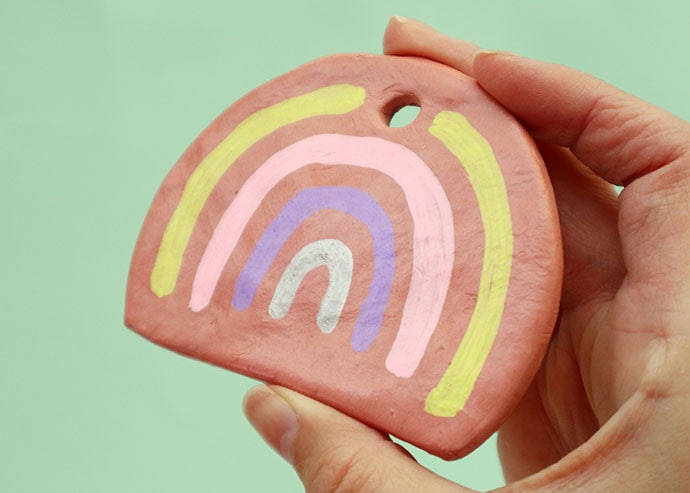
I’ve gone for a soft pastel rainbow of lemon yellow, baby pink, lilac and silver. But don’t feel limited, you can choose to make your rainbow ornament in any colour combination you please.
Quick drying paint pen markers make it easy to add a rainbow design without having to use messy paint. But if you don’t have paint pens handy, acrylic paint will do a good job too – just make sure the paint isn’t too watery or it may soften the clay.
For best results, allow air dry clay to dry out thoroughly before painting and waxing.
You will need:
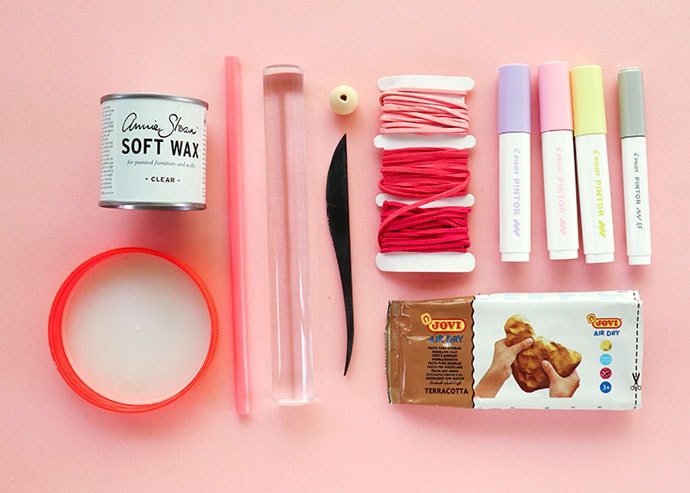
- Terracotta Air dry clay
- Rolling Pin – I use this clear rolling pin
- Large jar lid or small plate
- Drinking straw
- Assorted clay tools – knife (Amazon | Etsy )
- Paint pens or Acrylic Paint – pastel colours
- Soft Furniture Wax – Clear
- Lint free cloth
- Wooden bead 20mm
- Leather or suede cording – ribbon or string will also work
- Baking paper as a non-stick surface to work on
How to:
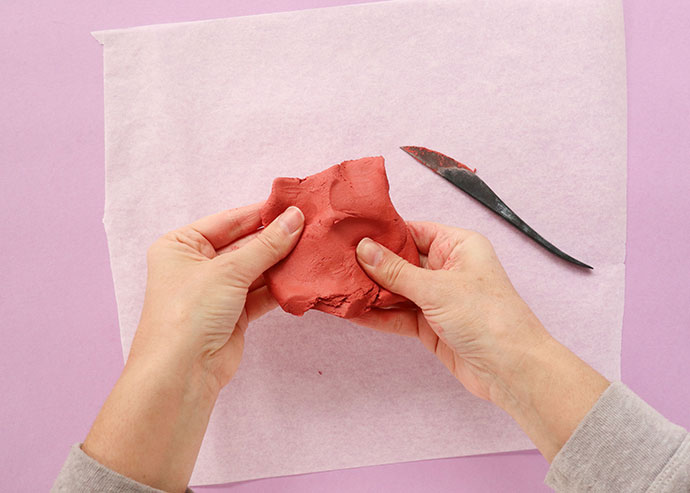
1. Knead clay to soften and get rid of air bubbles.
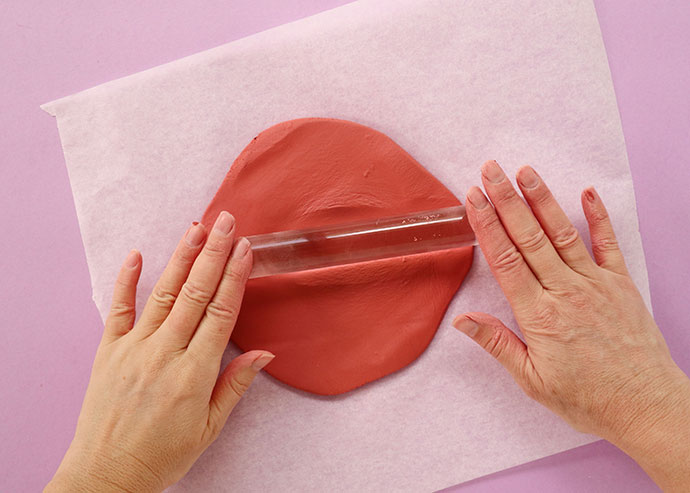
2. Roll out a slab of clay to just under 5mm (1/4″) thickness.
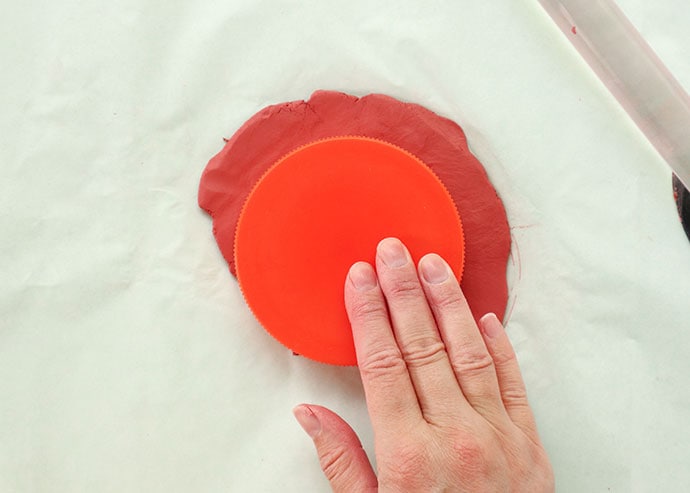
3. Use a large jar lid or small plate to cut a circle shape from rolled out clay.

4. Slice the bottom of the circle off about 3/4 of the way down to make an arch shape.

5. Smooth any rough edges with a slightly damp finger or sponge dipped in water. Use just enough water to make the clay smooth without getting it too wet.
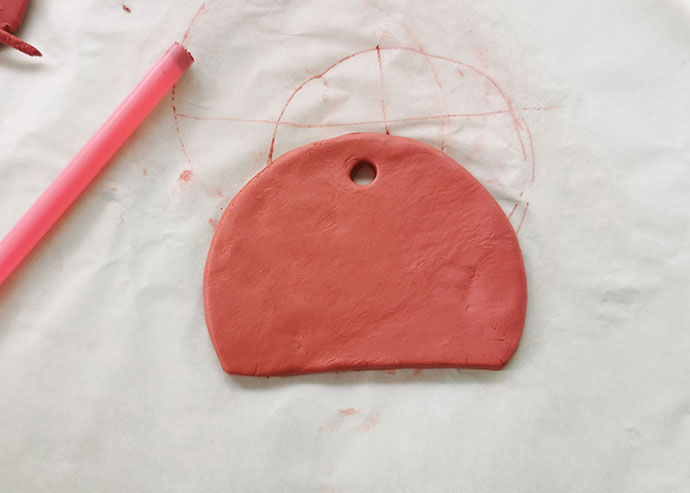
6. Use a drinking straw to cut out a small hole at the top of the clay shape for easy threading later.
Note: You can press a date/year, or message onto the back of the clay with letter stamps at this stage.
7. Leave to dry for 24-48hrs (Drying time will depend on the weather, ours took 2 days to dry fully). You may need to flip the shapes occasionally for even drying. The clay will lighted to pale pink colour when fully dry.
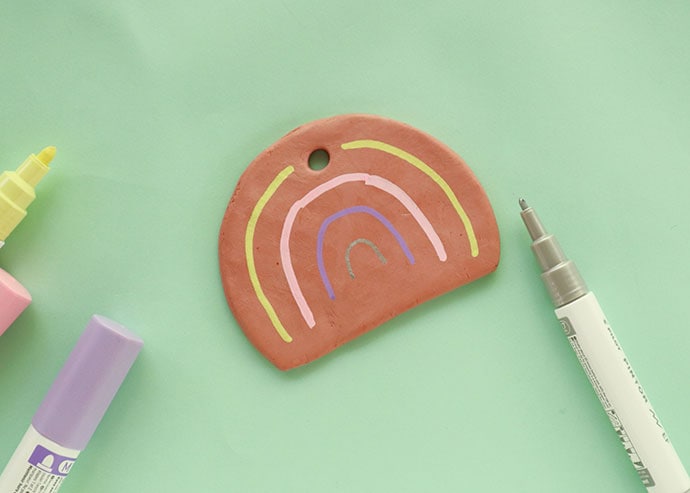
8. Use paint pens (or paint an brush) to draw nesting arc lines as a guide for the next step.

9. Thicken the arc lines to make a rainbow. Leave a gap between each colour.
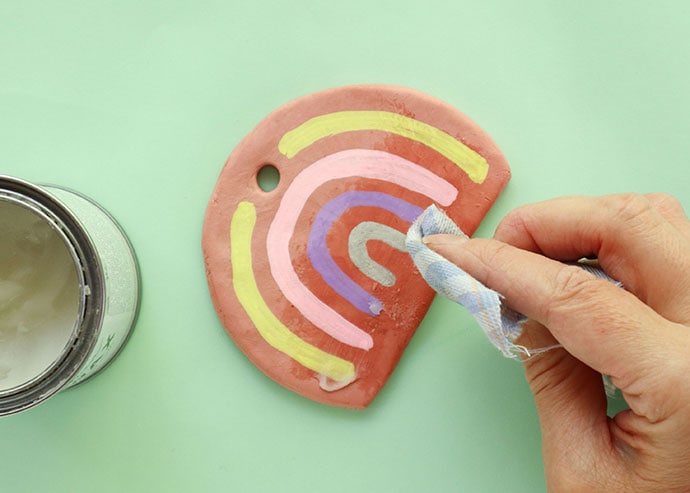
10. When design is fully dry, use a small amount of wax and gently rub over the front and back of clay ornament. Use a soft cloth to buff the wax to a gentle lustre.
11. The clay will absorb the wax to create a protective moisture resistant coating with a leathery finish.
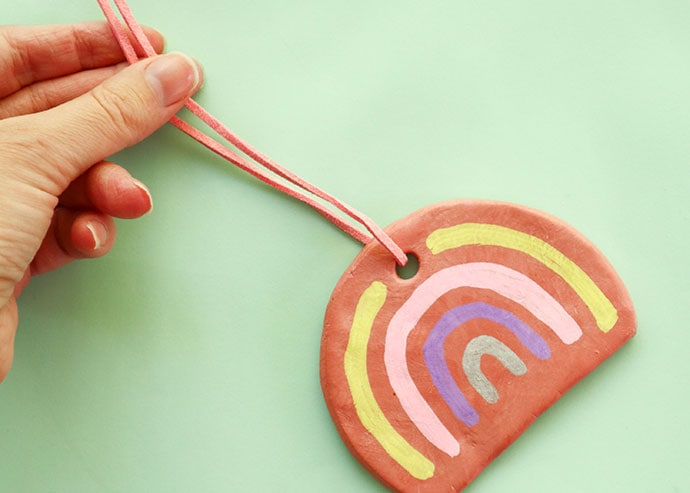
12. Cut a length of leather/suede cord to about 12″ and thread one end through hole.

13. Thread both ends of cord though wooden bead, and slip the bead down close to clay shape.
14. Knot the cord ends to secure.
All done! Your rainbow ornament is ready to hang and bring the Cheer!


Nollaíg Shona Dúit Cinti from Ireland, and many thanks for all your inspirational work this year
BB
LOVE this idea! I have done clay crafts with my kids before, but always with oven bake clay which tends to stay flexible and crack. Once this clay is dry is it hard or flexible? I can’t wait to try clay crafting again with them. Thanks for the DIY inspiration!
Air dry clay dries hard but can be brittle, especially if rolled very thinly.