This post contains affiliate links
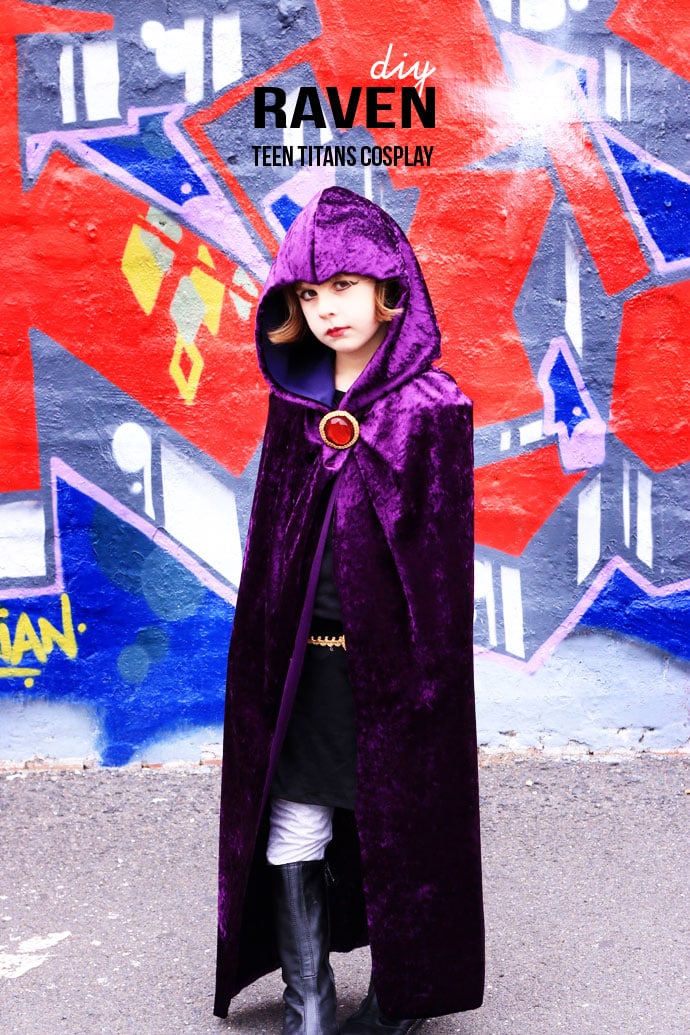
Emma loves to dress up and role-play, so when the opportunity came up to visit Oz Comic-con recently, I was really happy because I knew seeing all the cosplay would be really exciting for her.
I offered to make her whatever costume she wanted and after a some deliberation she chose to be Raven from Teen Titans.
If you haven’t heard of Raven I’ll give you a little rundown. Raven is a comic book character from the DC Universe. She is a half demon and extremely powerful with magical psychic and telekinetic powers as well as the ability to manipulate energy, emotion and shadows.
Emma likes her because she is mysterious, and is also quite a sassy character in Teen Titans GO! where she lives in the Titans Tower with her buddies, Beast Boy, Cyborg, Robin and Starfire.
I must admit to being secretly pleased because the only major sewing on my part was making a cloak, and with only half a day available to get the Raven costume made, the simpler the cosplay, the better.
I didn’t use any patterns for the cloak and sort of improvised as I went, so I haven’t included any exact measurements, more the method which can be adapted to anybody, child or adult.
Lots of cosplay characters wear cloaks, so this costume can be adapted to suit your needs.
Here is a picture of Raven so you can see how I’ve interpreted the Raven costume.
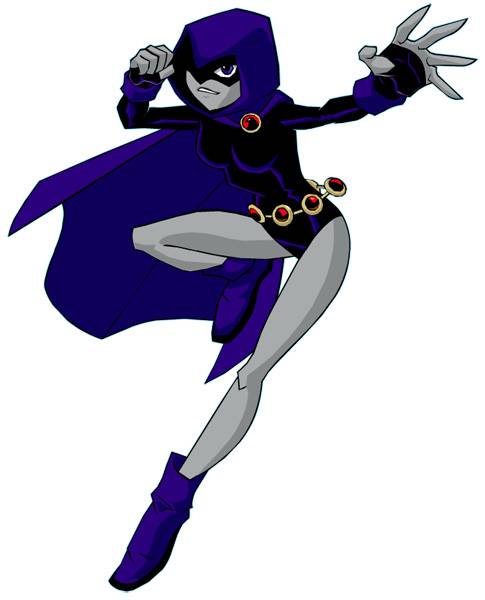
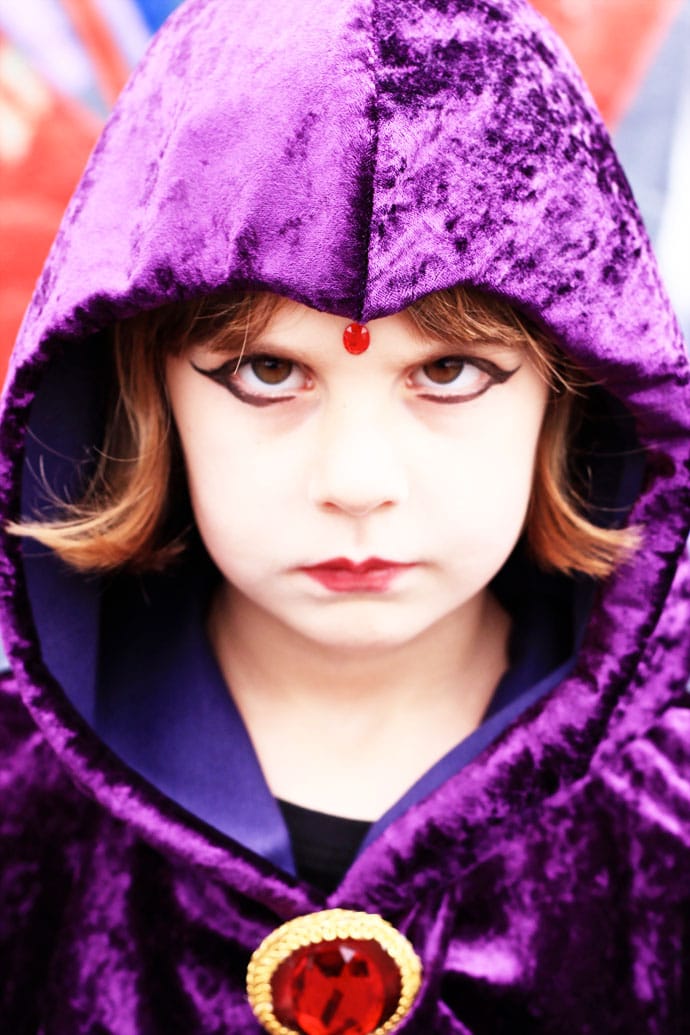
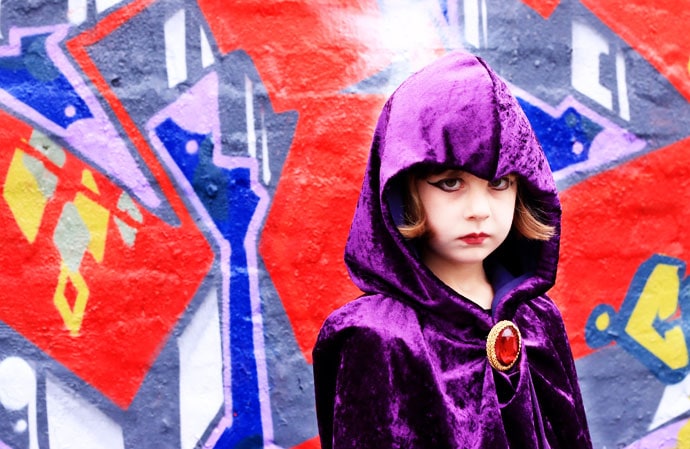
Raven wears a cloak with a pointy hood, a black leotard (her skin is grey) and purple boots.
Her cloak wraps fully around her body and hangs straight down rather than flaring out like a cape.
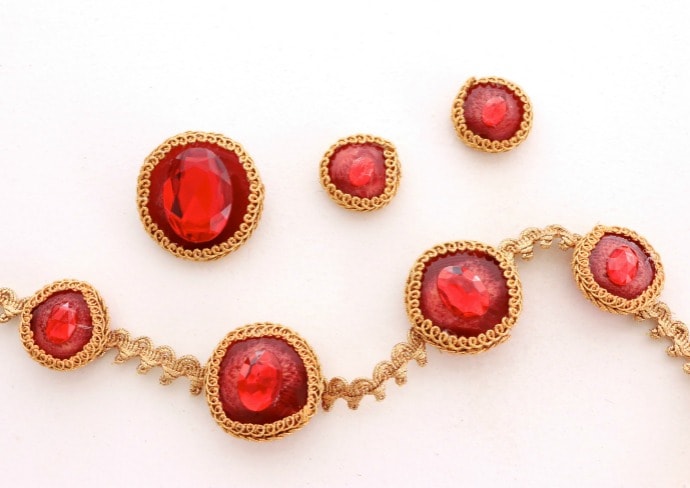
Raven has a red stone brooch with gold trim and similar stones on each cuff and on her belt.
I didn’t fancy sewing a black leotard so I bought a black long sleeve top and sports skirt instead, Emma was fine with the slight change when I explained how hard leotards are to go to the bathroom in!
Raven Costume Purchased clothing items
- Grey tights or leggings
- Black long-sleeve leotard or top and bottoms
- Black or purple boots (Raven wears short purple boots, but I picked these black boots up at a thrift store and had them on hand)
Making Raven’s Cloak
You will need:
- Dark purple or violet fabric, wide enough to wrap around shoulders with some overlap and length from back of neck to ankles + extra for hood.
I chose a synthetic crushed velvet because it was cheap, but with the knowledge it would be difficult and slippery to sew with. I recommend a jersey knit if you aren’t a confident sewer. - Heavier knit fabric for lining of hood
- Matching thread
- Stretch/jersey sewing needle
- Sewing machine
- General sewing supplies
How to make a cloak:
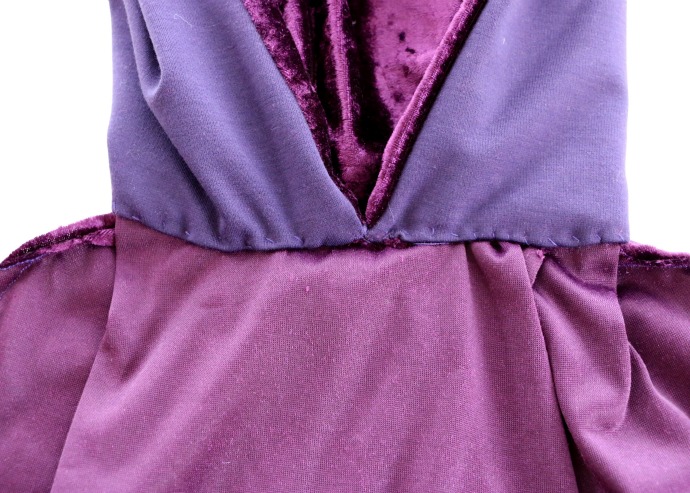
I recommend using a short and narrow zig-zag stitch setting for all seams. Front and bottom of cloak has been left un-hemmed as this fabric has minimal fraying. I’ve lined the hood for extra structure.
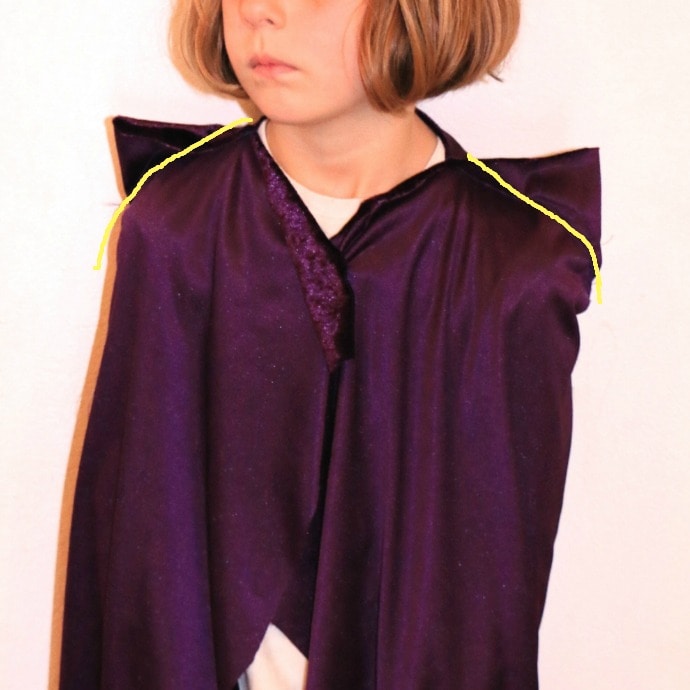
1. Wrap fabric around body loosely right side facing in and top edge of fabric at base of neckline. Pin along shoulder line and sew a curved seam (see yellow line in picture) where you have pinned. Try to make the seam follow the line of the body to avoid pointy shoulders. Turn inside out and check for fit. Adjust if necessary then cut away excess fabric.
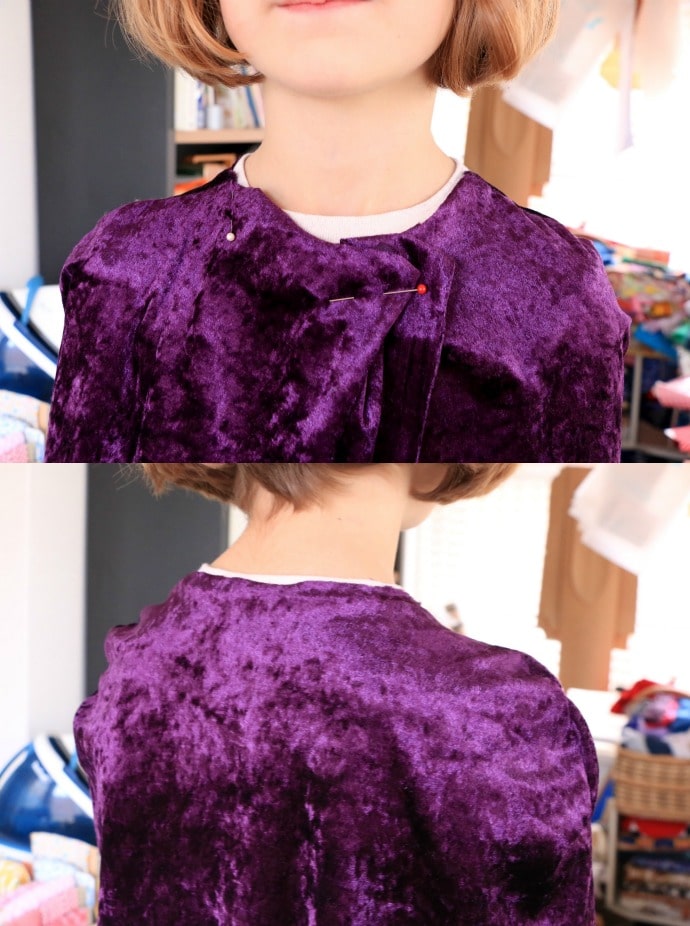
2. Gather and pin fabric in place on front of cloak (at this stage you can cut excess width of fabric if there is too much at the front. Trim around neckline to make a curved shape at front and back, make sure the neckline is large enough for head to fit through without unpinning.
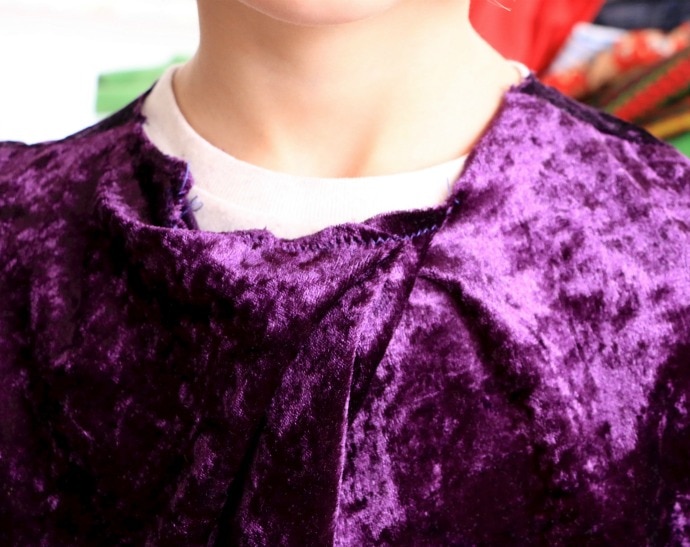
3. Sew collar of cloak front to secure. (fabric was really slippery so it looks a bit crooked in picture but will be hidden when hood is attached.)
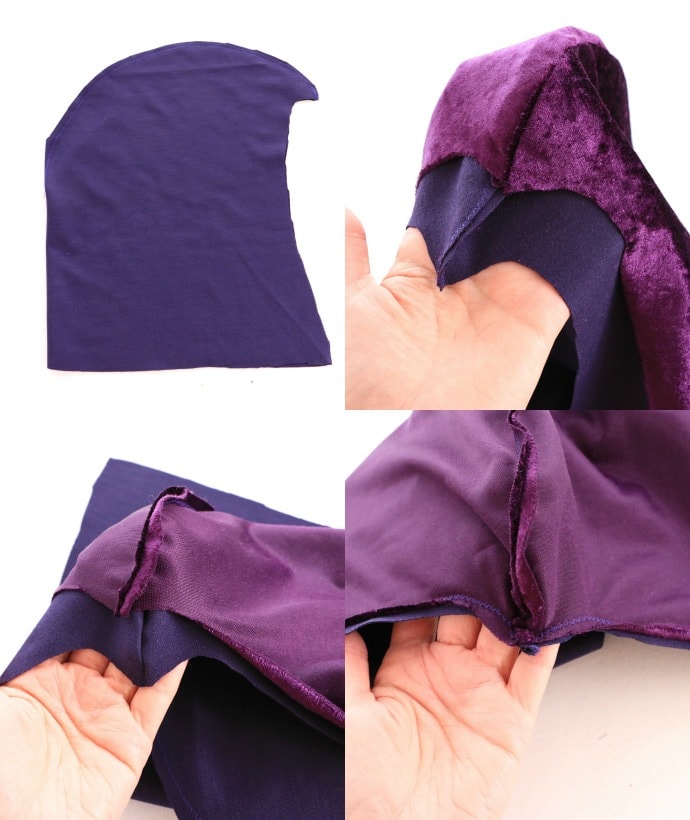
Note: I cut the hood free hand using a hoodie hood as a template and enlarged it, you may want to draft yours out of scrap fabric first to see how the shape sits before you cut into your costume fabric.
4. Fold lining fabric in half and cut hood shape with a small peak at the front. Sew along top to close.
5. Cut exactly the same shape from outer fabric and sew with right sides facing.
6. To assemble, place lining and hood outer with right sides of fabric facing (seams are outside) and sew along hood edges.
7. Clip curves and excess seam bulk in point of hood and turn inside out.
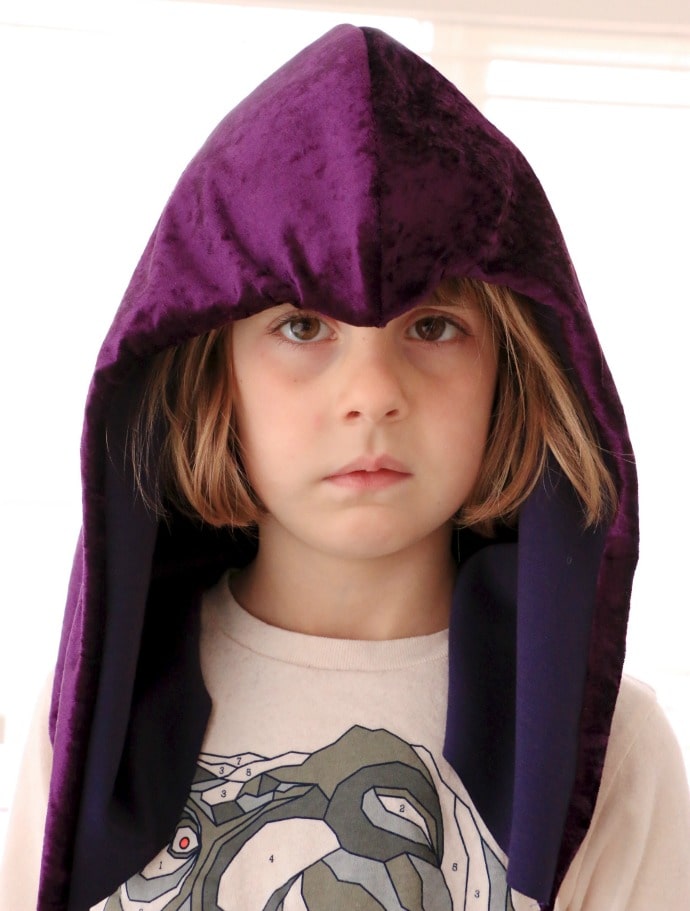
Hopefully it should fit nicely.
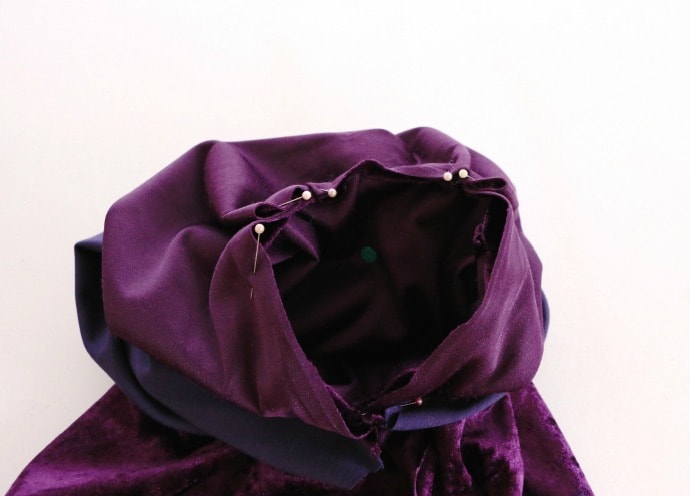
Attaching the hood to the cloak. This part is a bit tricky.
8. With cloak the right way out, peel back the lining of the hood and pin only the hood outer fabric edges to the collar. If the hood has extra fabric (which it should if you want a slouchy effect, make some pleats in the hood fabric towards the back to gather up the excess so it fits the size of the collar. Make sure the front of the hood faces the front of the cloak. Sew in place.
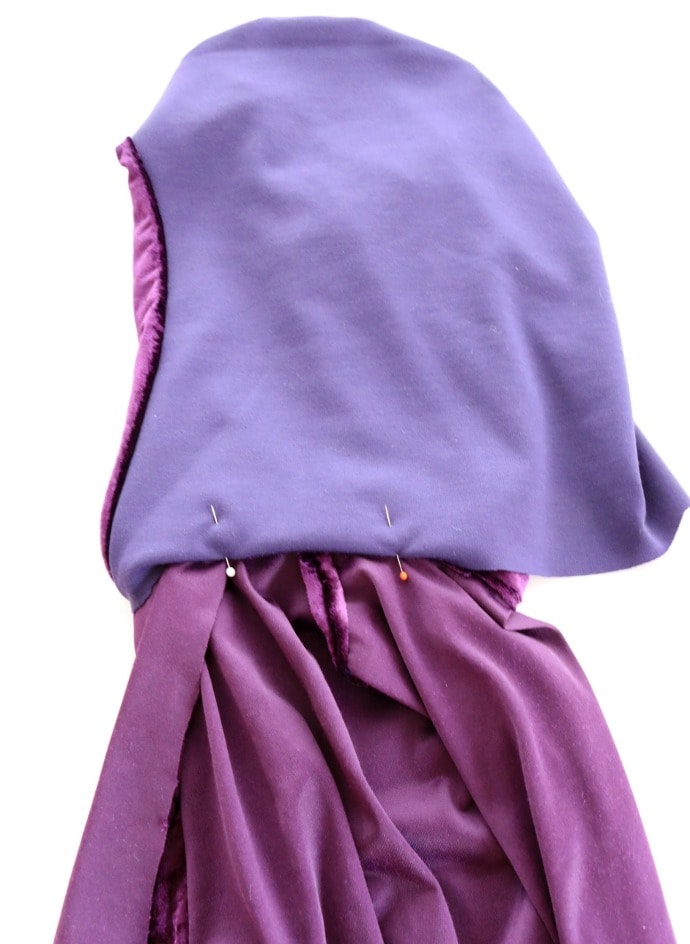
9. Turn inside out and pin lining of hood around collar hiding seams inside it. Gather excess as before.
10. Hand stitch in place.
Make sure it fits over the wearers head, ours was just a bit firm but still went over.
Making Raven Costume Accessories
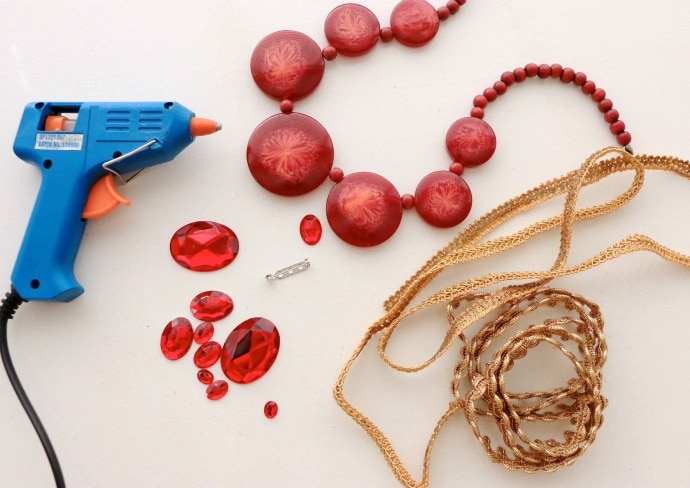
You will need:
- Red flat beads or plastic disks 1x large for brooch, 6-8 smaller ones for belt and arms- I’ve sacrificed a necklace that was perfect for this project. Check out your local thrift store for something similar.
- Red glue on plastic gemstones – for added sparkle
- Brooch back
- Gold rope or braid for belt
- Gold braid for trimming red stones
- Hot glue gun and glue sticks
- Red felt (not pictured)
- Scissors
How to:
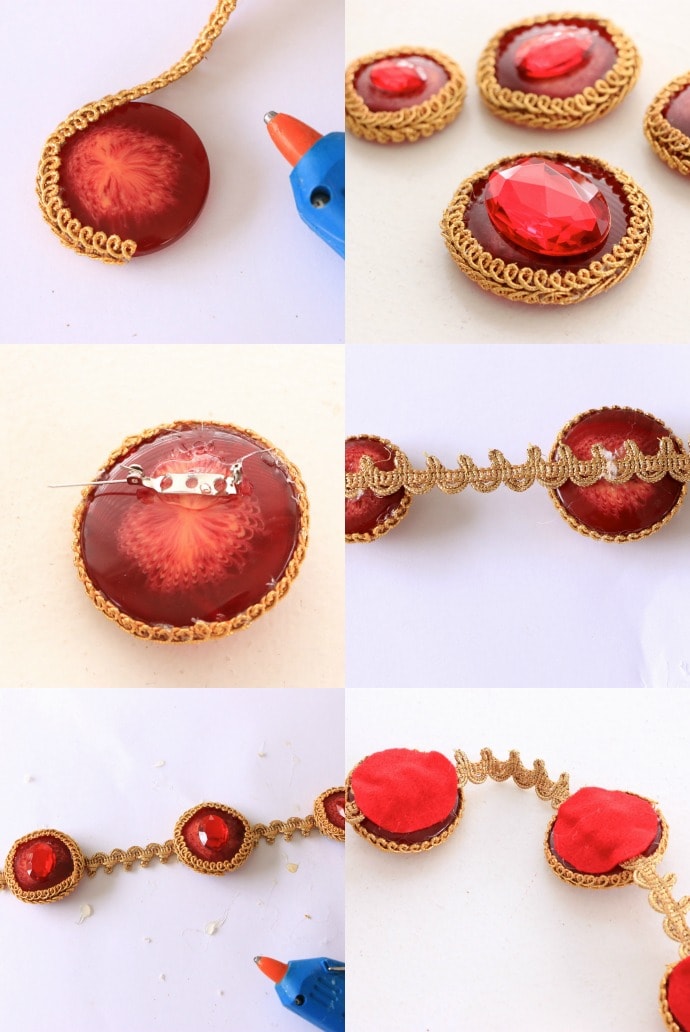
1. Glue gold trim around beads.
2. Glue gem stones to center of each bead.
3. Glue brooch back to largest stone to make brooch.
4. Measure and cut length of braid or cord for belt, make sure to allow for tying up. Arrange stones at desired intervals on belt (keeping two in reserve) and glue in place.
5. Cut felt circles slightly smaller than the stones and glue onto back of each stone for added strength.
To Finish

Stitch remaining stones onto ends of cuffs on black top (optional, add elastic loop to thread finger through so sleeves create a V shape over hand)
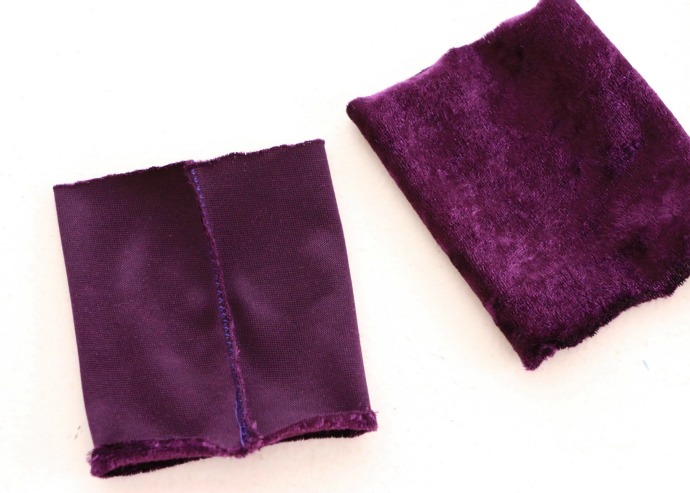
From scrap fabric, cut 2 rectangles to fit around wrist, sew into a tube to make cuffs.
Make-up as desired and don’t forget to save a small red gem for wearing on the forehead.
Emma really loves her Raven costume and she had lots of fun getting into character for the photo shoot.
Raven doesn’t smile, she is dark and brooding. It’s interesting to note that Emma doesn’t like being photographed much but was cool with it whilst in character. I added some Photoshop magic to give the images a real comic book feel.
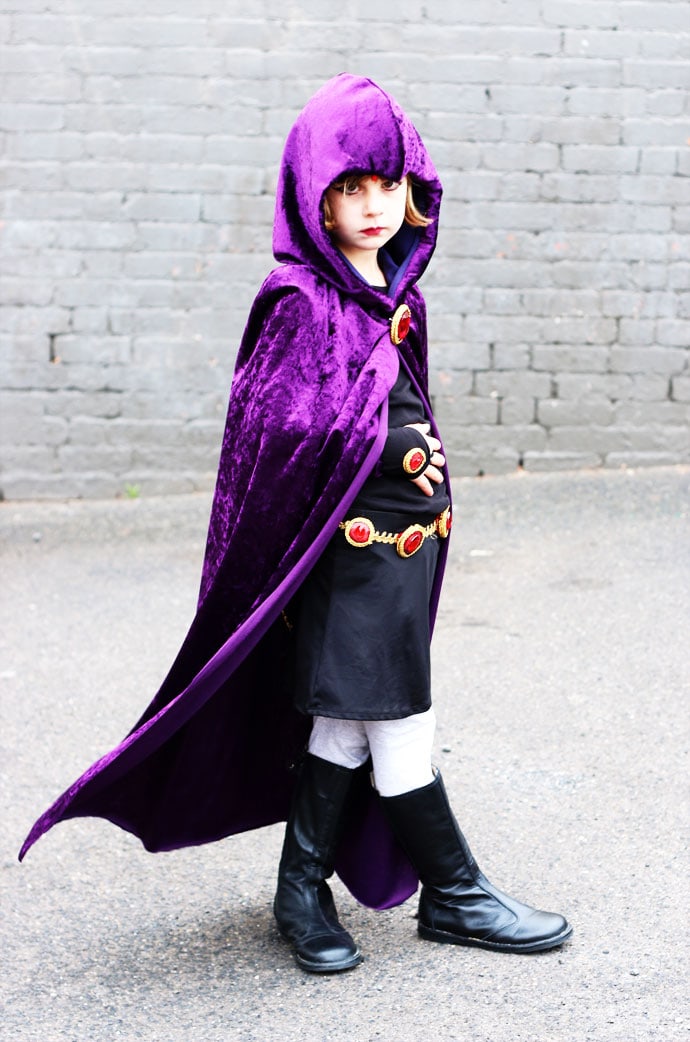
I’m pretty pleased with the result considering we just came off a 25 hour flight the day before and I had just a day to make the Raven costume. I’m thinking with a little adapting the cloak will work well for a medieval themed costume too.
Emma entered the Kids Cosplay play parade at Oz Comic-Con and was chosen as one of the favourites, I’ve shared some photos of the event over here.
I’d love to hear about any cosplay you have made, leave me a comment with a link so I can check it out.
See more DIY Kids Costume and Kids Cosplay ideas:
AWESOME Raven costume! Awesome Mom to design & sew elaborate outfit for Emma! Tutorial of 10 steps for the purple hooded cloak plus another for the accessories, both easy to follow. You mentioned you finished in a day– horray! Looks like lots of Mom’s LOVE! Fab photos: Emma looks fantastic as RAVEN! Thanks for sharing.
Do you think you will have the time to make one for my 6 year old this year. (Cloak and assesories) I know life may be busy. So let me know. I’m located I atl.
Sorry, I only make things for my personal use and to feature on the blog. Maybe ask around your community to see if anyone is handy on a sewing machine. Also I’m in Australia.
Your daughter looks about the same size as my daughter. I have just been asked to make a Raven cloak for her! Please could you tell me how much fabric you used? Would about 2 metres be enough?
The width was wide enough to wrap around, I only purchased the length required plus a little for the hood. You will probably only need 1.5m
Thank goodness for creative people such as you! My daughter wants to be Raven this year and I am absolutely reading your step-by-step and making it happen. Thank You!