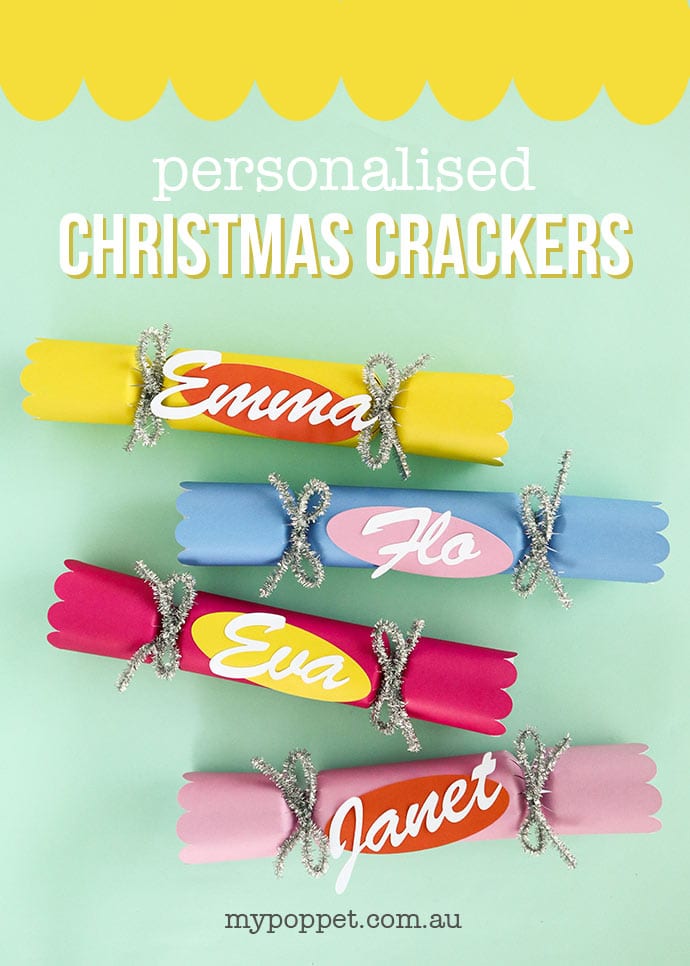
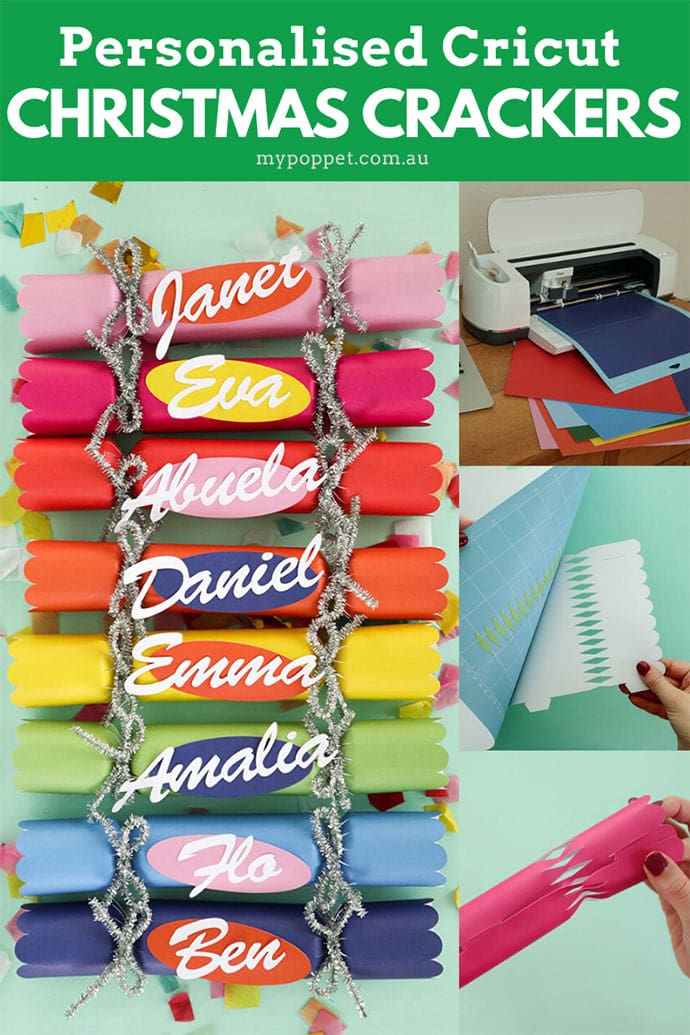
Christmas Crackers or Christmas Bon Bons? Whatever you call them these colourful and personalised crackers are a fun addition to your festive table. Add a touch of tinsel to get the party started!

This Christmas Craft post is a collaboration with Cricut – This post contains affiliate links
I was so excited to receive a very special Christmas gift from the lovely people at Cricut earlier this week. My very own Cricut Maker cutting machine and other assorted Cricut supplies. Yay!
I’ll be creating some fun craft projects over the coming months using my newly acquired Cricut products, so stay tuned!
Now, I’m a Cricut machine newbie, so I thought it would be fun to take a basic template from the Cricut Design Space and then challenge myself to add my own twist. There were a few hiccups along the way, but because I was using paper, it wasn’t a big drama. I just learned from my mistakes and tried again.
Today I’m starting with an easy Christmas craft project that can be made with just a few inexpensive craft supplies – Personalised Christmas Bon Bons with names to use a table place markers for our festive celebrations this year.

They look very fancy, but once you know your way around the design program, this project comes together quite easily.
I’ll show you the tricks I picked up along the way, so you can make your own Christmas Crackers successfully from the get-go.

Of course if you don’t have a Cricut cutting machine, (they are a big investment), you can cut these crackers by hand using this basic Christmas Bon Bon template from Gathering Beauty.
Because we call these ‘Bon Bons’ and ‘Crackers’ here in Australia, I’ll be using the term interchangeably. What do you call them?

You may also like:
How to make Personalised Christmas Crackers with a Cricut
I’ll walk you through the design steps I used to create these Personalised Christmas Crackers in the Cricut Design Space, so you can customize them with your own names or phrases.
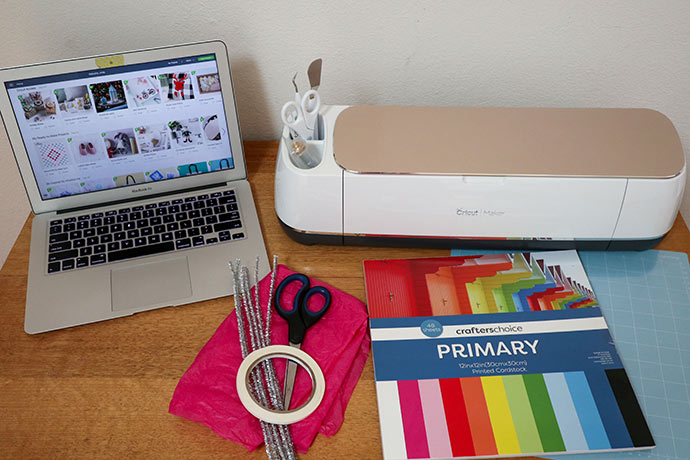
You will need:
- Cricut cutting machine with fine point blade (Amazon US | Cricut)
- Cricut Design Space account (free to sign up)
- Cricut access subscription (optional)
- Computer, ipad or smart phone
- Cricut Light Grip mat (Amazon US | Cricut)
- Cricut basic tool set (Amazon US | Cricut)
- 12″ (30cm) light cardstock in assorted colours
- Tinsel Chenille stems (pipe cleaners)
- Glue stick or double sided tape
- Scissors
- Bon Bon snaps (optional)
- Tissue paper and gift (optional)
How to:
Setting up the template on the Cricut Design Space and Cutting
I’ve already set up this project in the Cricut Design Space, you can find it here – Personalised Christmas Crackers

I’ve used the following elements and fonts:
- Xmas Cracker (free for December)
- Circle (small fee for usage)
- Font = Brush Script Std (you can choose any cursive font from the design space or from your computer)
Tip: Some elements and projects in the design space have to be purchased, but if you sign up for the ‘access subscription’ (there is a 30 day free trial period), nearly everything is included for unlimited use.
Let’s Get Started!
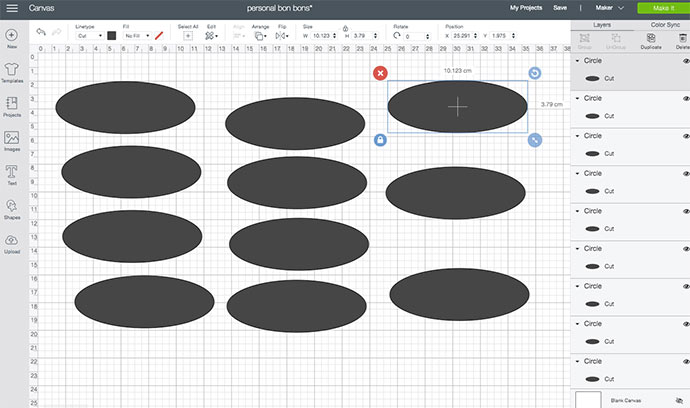
1. Choose the ‘Customise’ button and open the Canvas to customise your names in the design.
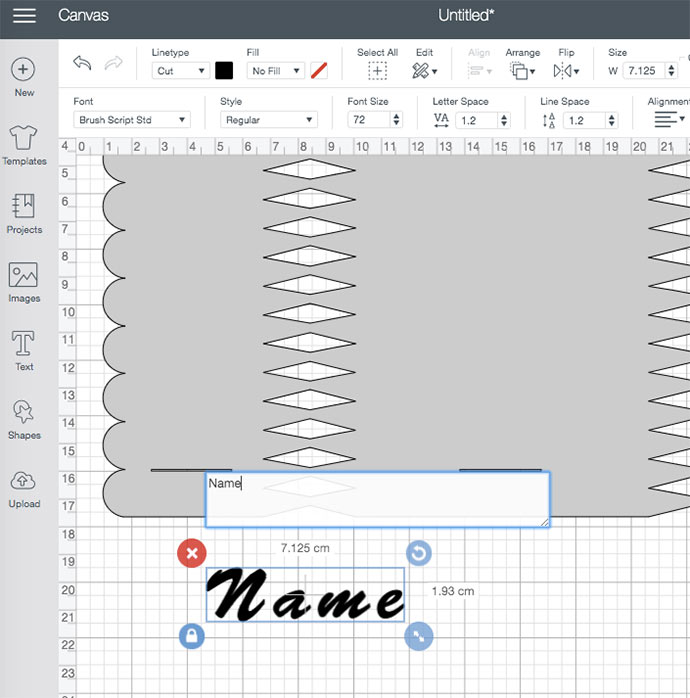
2. From the left side panel, choose ‘text’ and add your name. Select your desired font.
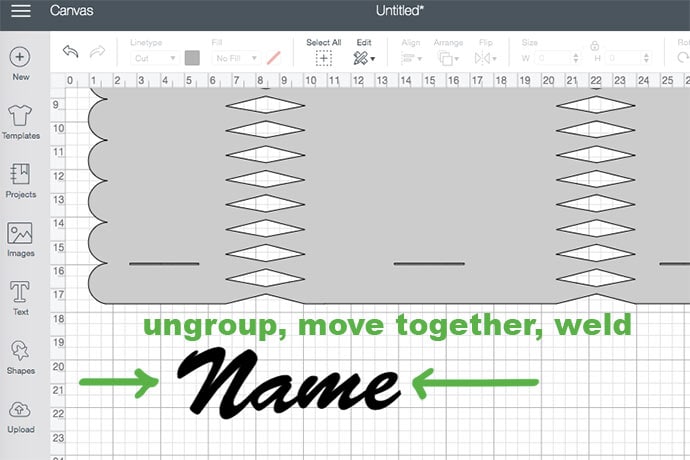
3. You’ll need to join your letters together so the name will cut out in one piece. Do this by selecting all the letters –> Ungroup –> move them to desired location — > select again then ‘WELD’. This will join the lettering permanently.
Note: If you forget to click ‘weld’ the letters will all cut our individually even if they are ‘attached’ or ‘grouped’.

Here is a handy video tutorial that I only discovered after I worked this tip out for myself – Watch the video tutorial here
4. Once you’ve added all your names, select the paper colours for each component. Click on ‘Make it’ and the program will lay out your cutting mats accordingly. Load your sticky mat with paper.
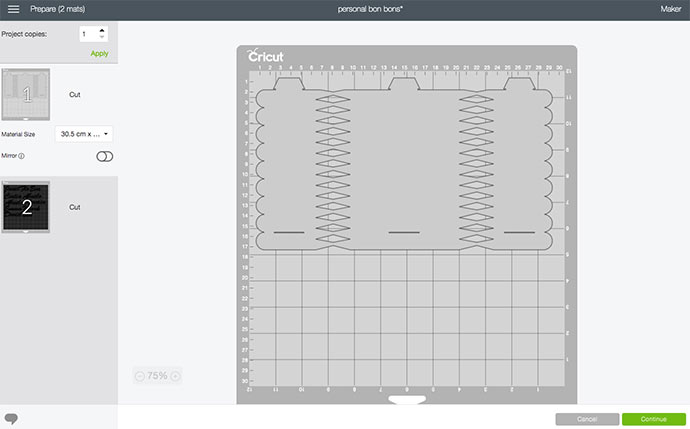
5. Select the material and the program will walk you though every step from loading the mat, to cutting.

6. The program will choose the most efficient cutting layout, but you can adjust it to make the most of paper scraps if you are only cutting a small design.
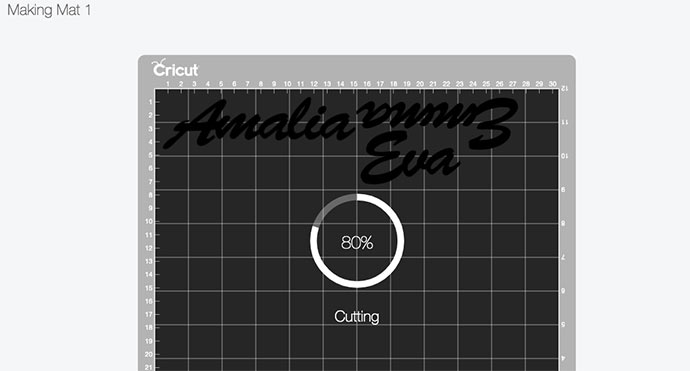

7. Cut as many cracker shapes as required by deselecting the name designs (in the right hand column) and only cutting the Xmas cracker template.


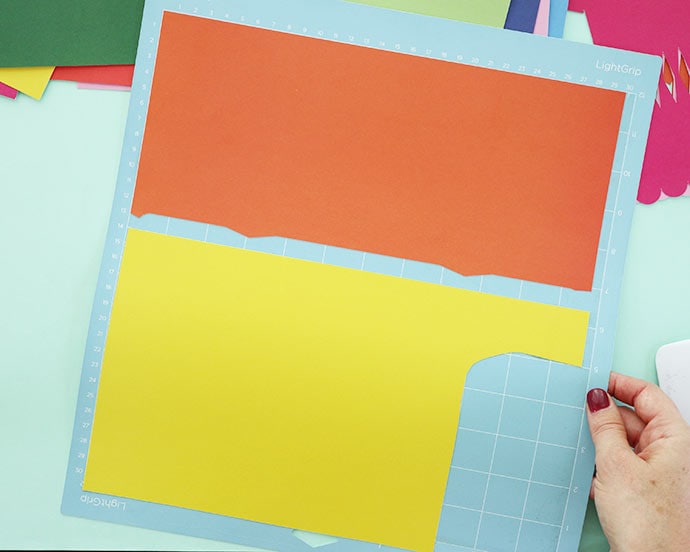
8. After cutting each sheet of paper, remove from the sticky mat by gently peeling the mat away from the paper (this prevents the paper from curling). You can use the scraper or small spatula tool to help gently remove the paper from the sticky backing mat.


9. Scrape off any unwanted paper with scraper tool to clean the mat for next cutting cycle.
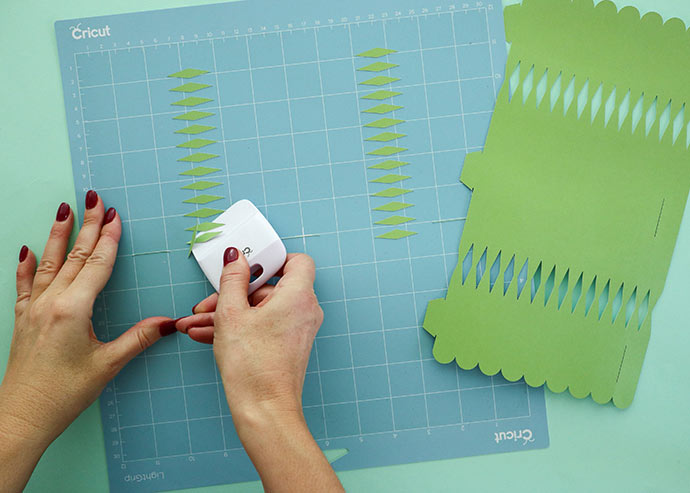
10. With the paper left over from the cracker template cutting, cut out as many ovals as required. Arrange the shapes on the ‘making mat’ screen to align with your paper scraps.
Assembling DIY Christmas Cracker

For each cracker you will need:
- 1 x Xmas Cracker Bon Bon template cutout
- 1 x Oval shape cutout
- 1 x Name cutout
- 2 x Tinsel Chenille sticks (pipe cleaners)
- Glue or Double sided tape
- 1 x Bon Bon snaps (optional)
- Tissue paper and small gift (optional)
11. Roll up the cracker/bon bon cut out and alight the tabs to the matching slots. They should lock in place. If you are adding a Bon Bon snap, glue it in before you roll up the crackers.

12. Stick name cutout onto oval shape at a slight angle no make a name plaque.

13. Fill the Christmas cracker with a small gift wrapped in tissue paper. Pinch the section with the cutout diamonds and tie off with glittery Chenille sticks (pipe cleaners). You can also use ribbon or yarn.

14. Glue or tape name plaque onto the top of the bon bon and you’re all done!
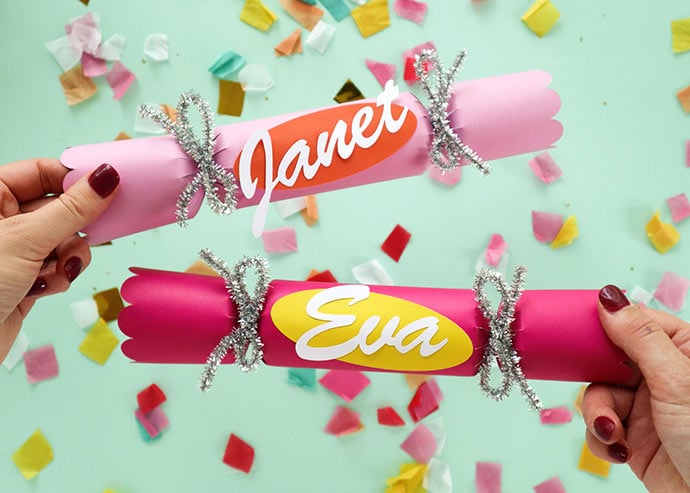
I really love how they turned out. So festive! Each one contains a small gift for each recipient. Nothing fancy, just some fragrance samples for the grown-ups and small trinkets for the kiddos.


I’m so impressed at how crisp the lettering looks, it’s really a very professional result. And best of all, all the materials were from my craft stash!
Feel free to leave any questions about this project in the comments below and I’ll try to get back to you as soon as I can.

Have a lovely Christmas break!
x Cinti
LOVE IT? PIN IT!