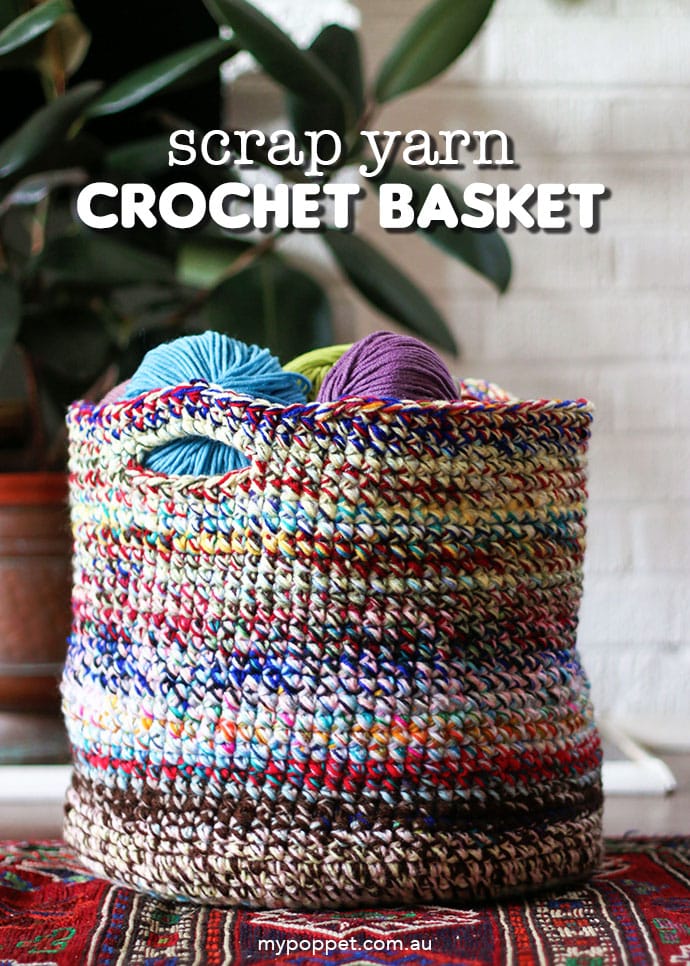
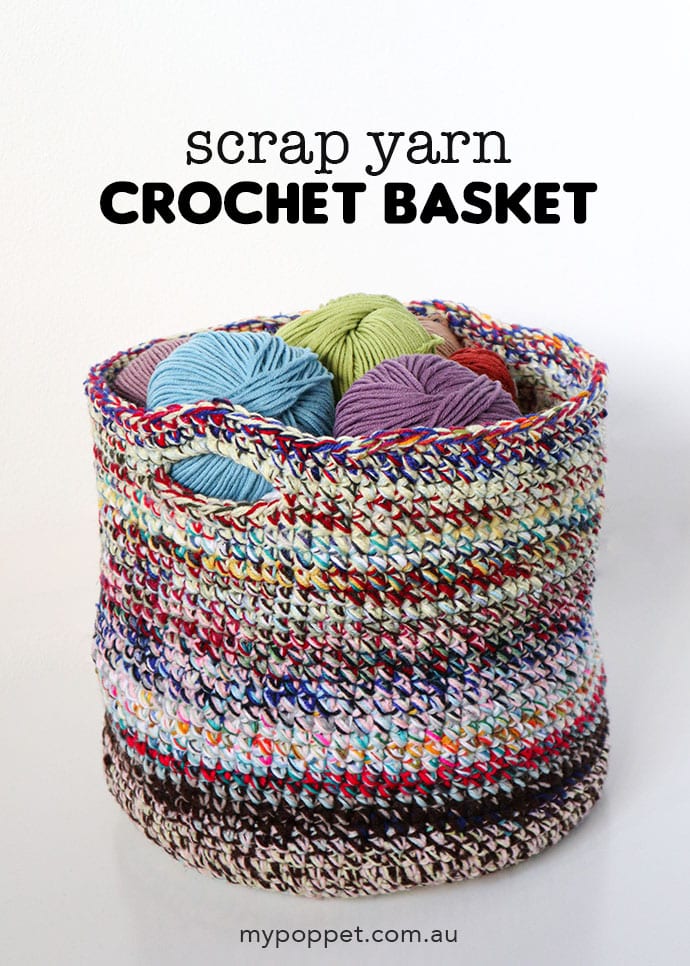
This crochet basket made from scrap yarn is the perfect craft project to use up all those leftover yarn ends that just seem to multiply.
This post contains affiliate links.
After making several Scrappy Crochet Blankets a little while ago I’d almost depleted all my yarn scraps. All I had left was a random pile of yarn that was totally unsuitable for blanket making.
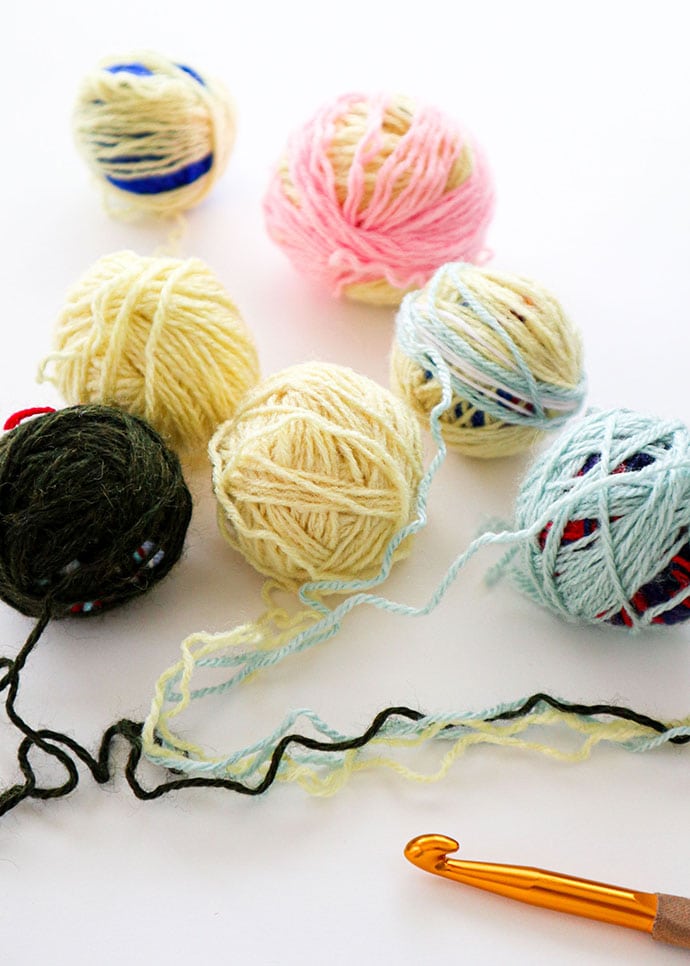
Left with some fairly ugly yarn that was too scratchy, too thin or too thick for making blankets, the options were either, throw the yarn away or make something useful.
What do I mean by ‘Ugly Yarn’?
I’m not a yarn snob, but sometimes I seem to find myself with yarn that is just truly awful.
Maybe it was passed on from a friend’s cousin, or found in a thrifted bag of craft supplies. In the end, someone didn’t want it, and now it’s taking up room in my craft stash.
I’m talking yarn that is so acrylic that it feels like plastic, wool that is too scratchy to wear against the skin, variegated yarn that looks like vomit when its knitted, or yarns that just aren’t enjoyable to knit or crochet with due to their texture.
Go look in your stash, I bet you have a few balls of yarn that you really hate.
If you’ve acquired a pile of not very nice yarn and don’t know what to do with it, making a Scrap Yarn Crochet Basket could be just the yarn project you’re looking for!
Why making a Scrap Yarn Crochet Basket is the perfect Scrapbusting project
1. Any yarn weight is suitable
Because its crocheted using several yarns held together, you can really use nearly any thickness of yarn to achieve the desired yarn weight. Hold 2-3 strands together for thick yarn or 5-6 strands for thin yarn (or any combination of the two). I’ve used yarn as thin as 4ply (fingering), right through to Super Bulky.
2. Colours don’t matter
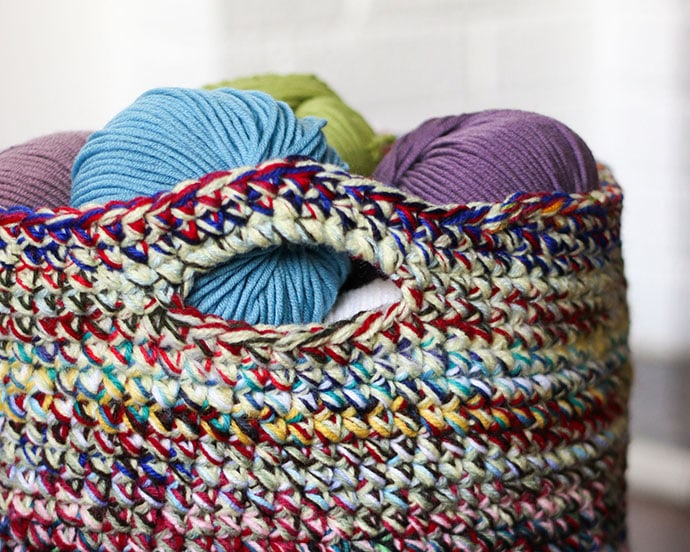
It doesn’t matter what colours you use because mixing up the yarns makes a pleasant speckled effect which disguises even the ugliest of colours. Variegated yarns seem to work especially well.
3. It’s ok to mix fibers
Don’t worry about mixing fibers, it’s unlikely you’ll need to launder this project, so combining cotton, acrylic and wool is fine.
4. You won’t spend a cent
Using up yarns from your stash is free, so it’s the perfect money saving craft project to keep you busy right now.
5. Uses up a lot of yarn
This crochet basket is a real yarn eater! In short, making a scrap yarn crochet basket is the perfect way to use up leftover yarn from random projects and get rid of all that ugly yarn taking up precious space.
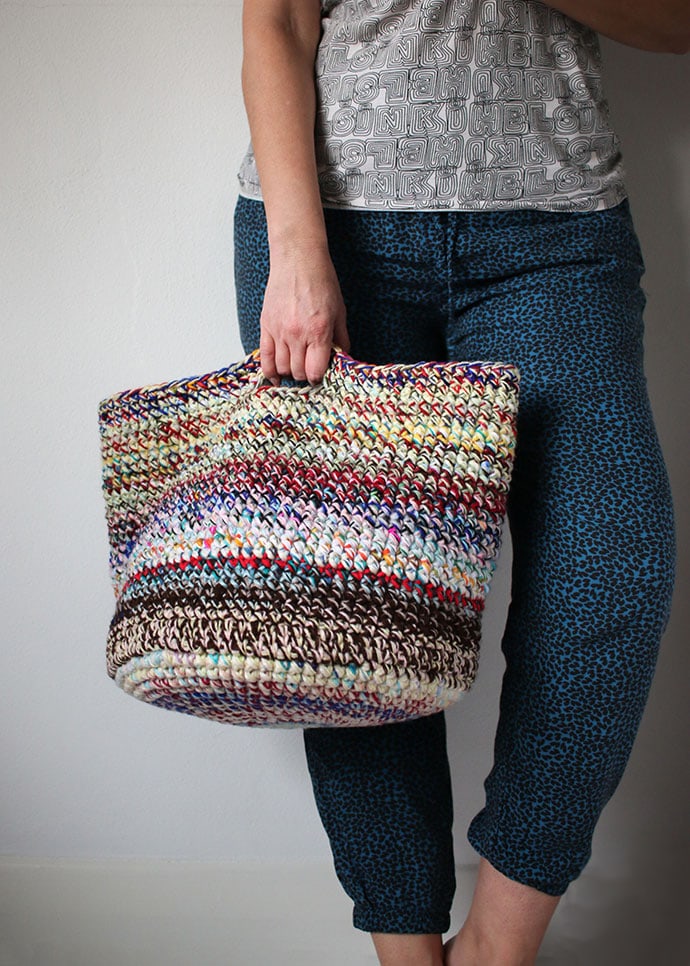
So many uses!
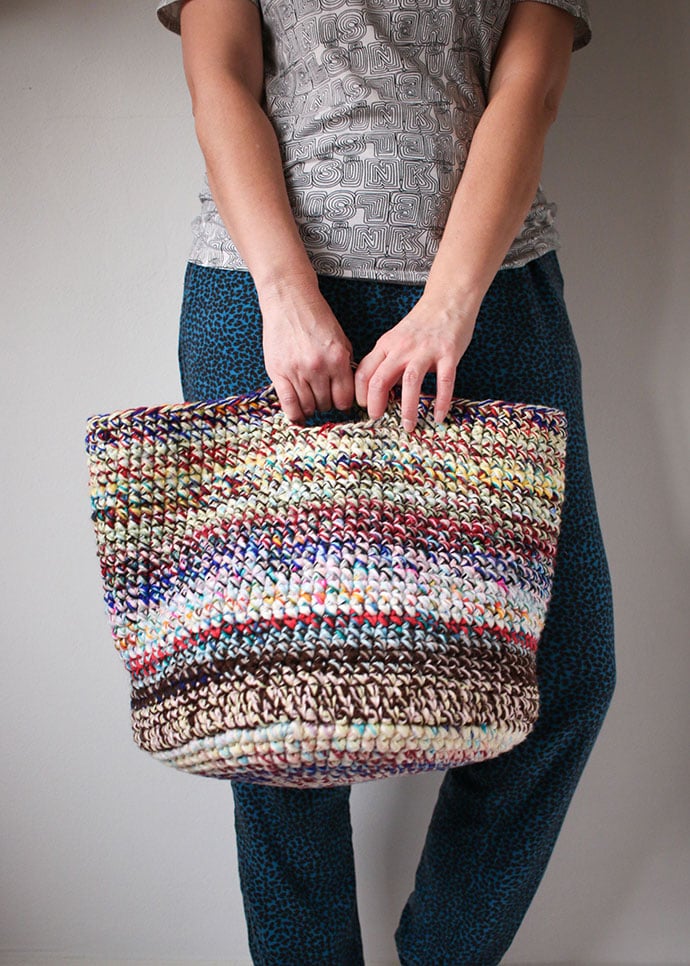
I’ve already found so many practical uses for this crochet basket.
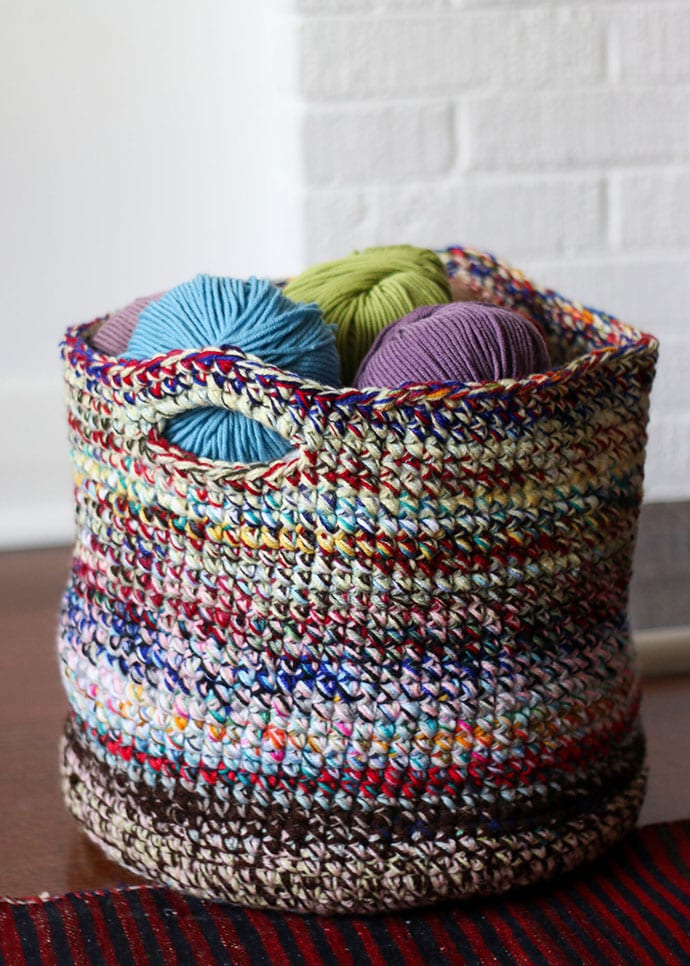
It makes a perfect craft project bag. Nice and big to hold lots of supplies and whatever I’m working on. The handles make it easy to move everything from room to room.
One can never have too may storage baskets and the large size of this crochet basket makes it perfect for storing toys, blankets, yarn, and clothing. When not in use it packs away nice and flat.
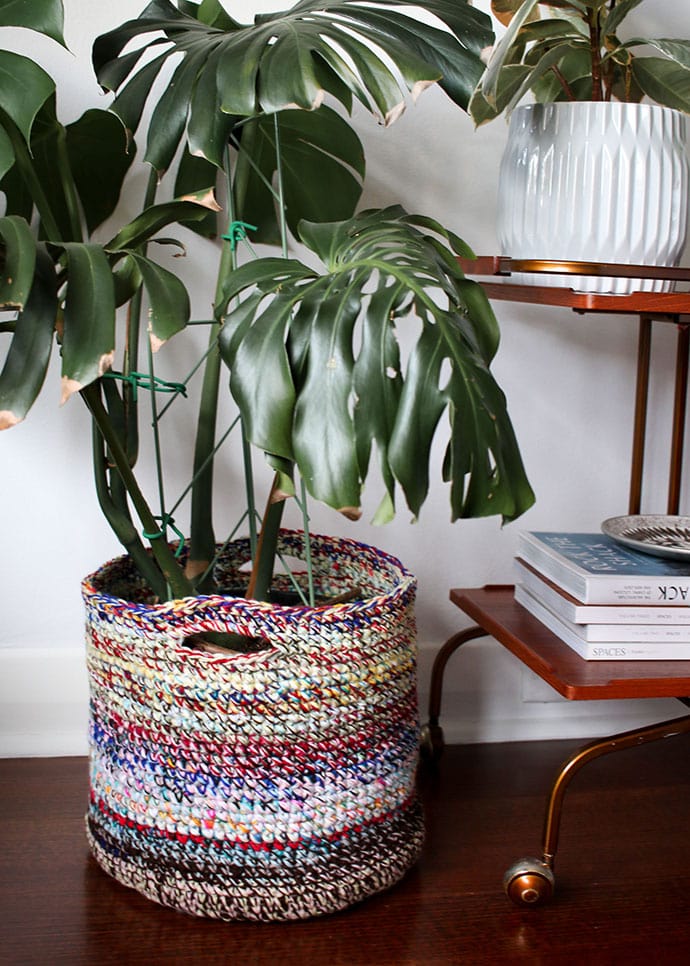
I really like how it looks with a plant in it. This handmade basket is a great way to hide ugly plastic pots, and the colour and texture certainly cheer up a room. Don’t forget to add a plastic tray to protect your crochet planter basket from getting wet.
You may enjoy these crochet basket patterns:
How to make a Large Crochet Basket from Scrap Yarn
Love to crochet? Need to improve your technique? Get over 80 crochet classes on Creativebug – Start your free trial here
Rather than a crochet basket pattern, I’ve written more of a ‘How to make a Crochet Basket’ recipe. No matter what kind of yarn you use, my crochet basket instructions will help you make a super practical scrap yarn basket every time.
I’ve included a finished size and hook recommendation, but once you know how, you can make your own basket in any size you like.
You’ll need to know some crochet basics to make this basket, but it’s fairly beginner friendly and stress free to make.
I used a 9mm hook and held about 4-5 stands of DK (8ply) yarn together to make a really firm fabric with Single crochet (US) stitch, (Dc UK).
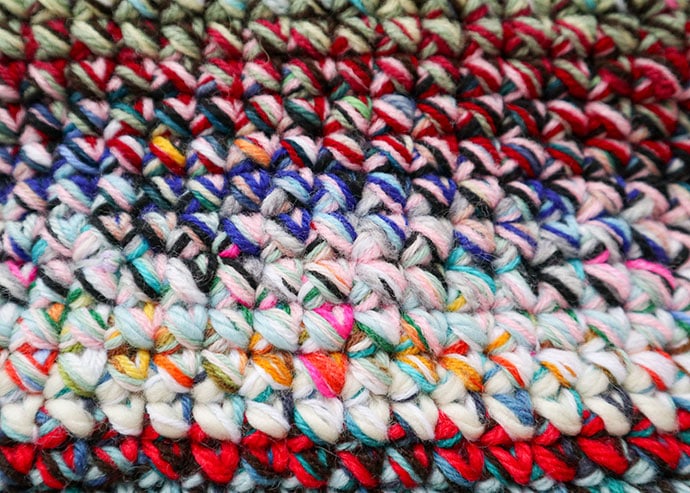
The finished gauge is around 9.5st and 10 rows per 4″ sq (10x10cm). You can make a little sample swatch before you start, but gauge is not super crucial. The important thing is to get a really tight robust crochet fabric, so adjust your hook size up or down as needed so the stitches are quite tight.
A firm fabric will help the basket stand on its own.
If you have lots of little yarn ends, make several balls of yarn just by knotting the ends together similar to a magic yarn ball, but the joins don’t have to be invisible.
The knots will be out of sight, inside the basket, so don’t waste your time joining ends too perfectly.
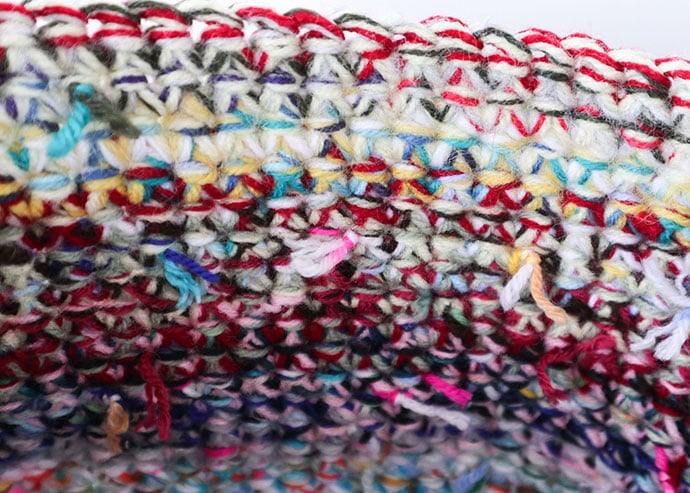
Finished size: 30cm (12″) tall, 35cm (13.5″) wide
You will need:
- Scrap yarn – assorted weights and fibers
- 9mm crochet hook
- Crochet stitch markers or safety pins x 6
- Scissors
- Measuring Tape
Stitches used & Abbreviations – US terminology used
Magic loop
ch chain stitch
sc Single crochet (US) = double crochet (UK)
ss Slip Stitch
st(s) Stitch(s)
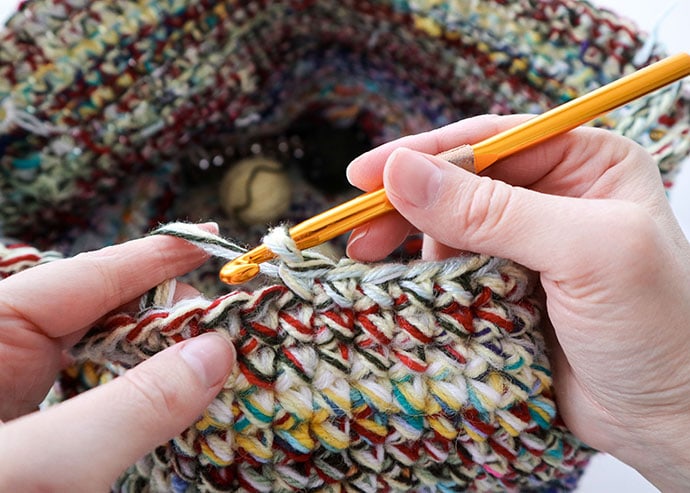
Pattern Notes:
This pattern is worked in the round (spiral). See instructions for how to make a Single Crochet stitch.
Several yarns are held together to create a super bulky weight yarn. Any knots should be positioned towards the inside of the basket.
How to:
Crochet the basket base
1. Crochet the base of the basket using a basic circle pattern. The exact pattern will vary depending on the thickness of your yarn but use the following as a guide:
R1 – Make a Magic loop and sc 6 stitches into it
R2 – 2 sc into every st
R3 – (sc in next st, 2 sc in next st) around
R4 – (sc in next 2 sts, 2 sc in next st) around
As a general rule, with every round, you work one more regular stitch between your increase stitches.
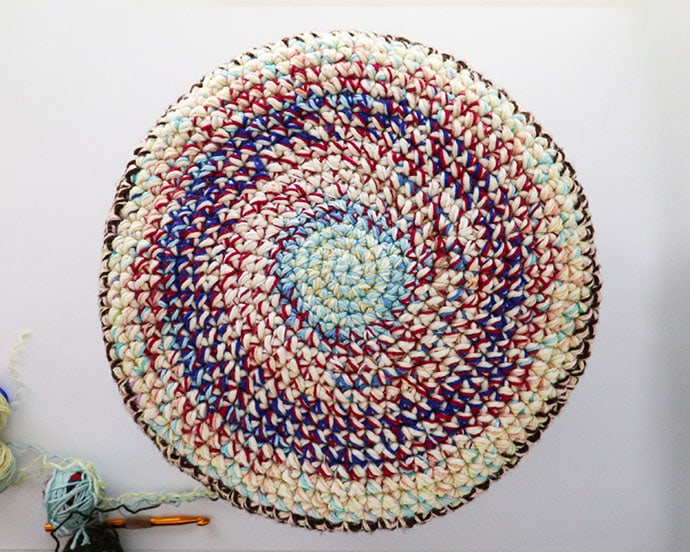
Keep checking that your circle is laying flat.
If your circle shows signs of ruffling, pull back a couple of rounds and skip the increases for one round. Because you’re skipping a set of increases, you’ll have fewer stitches and hopefully a flatter edge.
Continue crocheting your base until the diameter reaches 35cm (13.5″) or your desired size. Around 17 rounds.
Final stitch count is irrelevant.
To make the basket sides
2. Once you are happy with the size of the base, continue to crochet sc in a spiral but with no increases. The sides will start to curl up and build the walls of the basket.
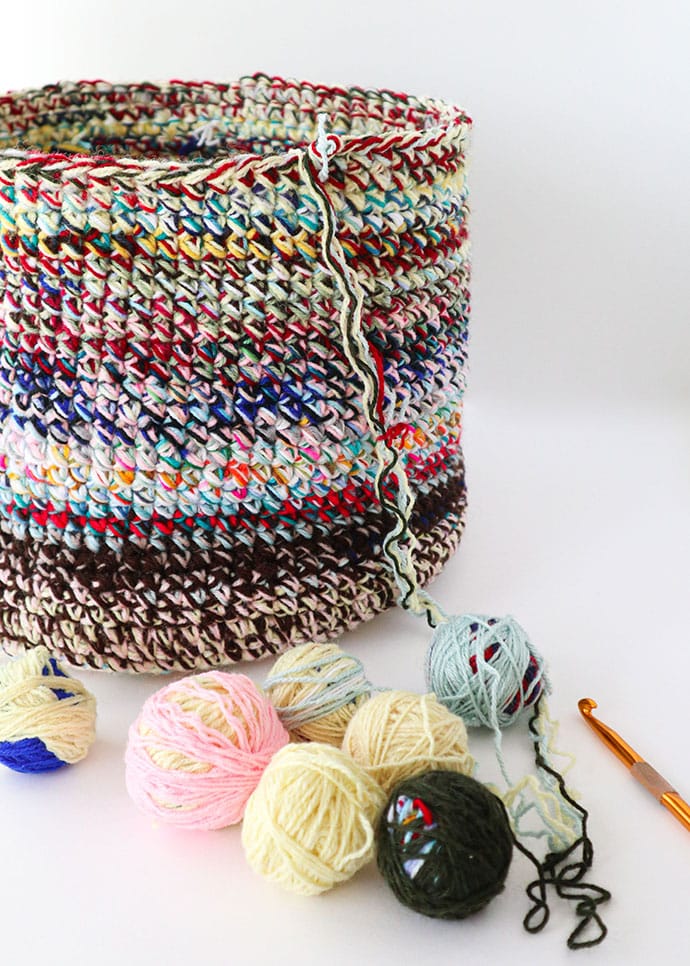
3. Continue to crochet until the walls reach about 25cm tall (10″), or about 25 rows.
To make the handles
4. Lay the project flat aligning the top edges. Mark the center stitch on both the front and back, measuring in from the sides, with a stitch marker.
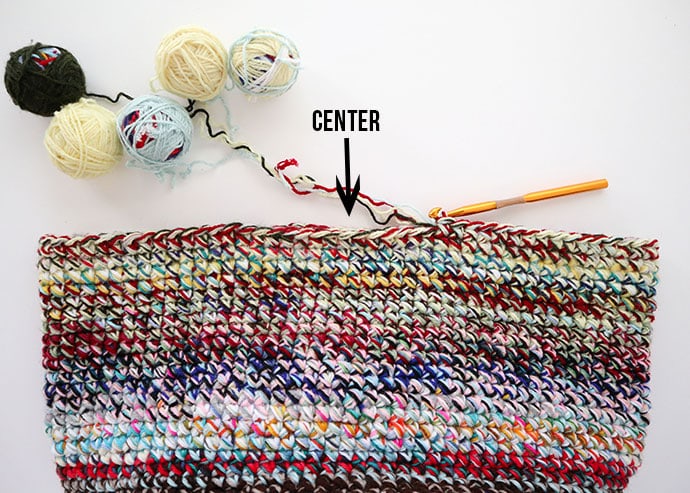
5. To make a handle count 5 stitches out from each center stitch and place a stitch marker.
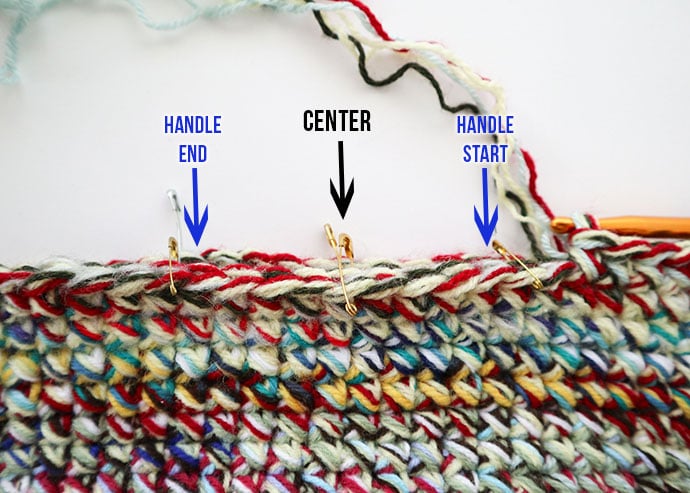
6. Single crochet up to and into the stitch with the 1st marker, chain 9, and then sc into the stitch with the 2nd marker. Continue sc around the basket and repeat on the opposite side.
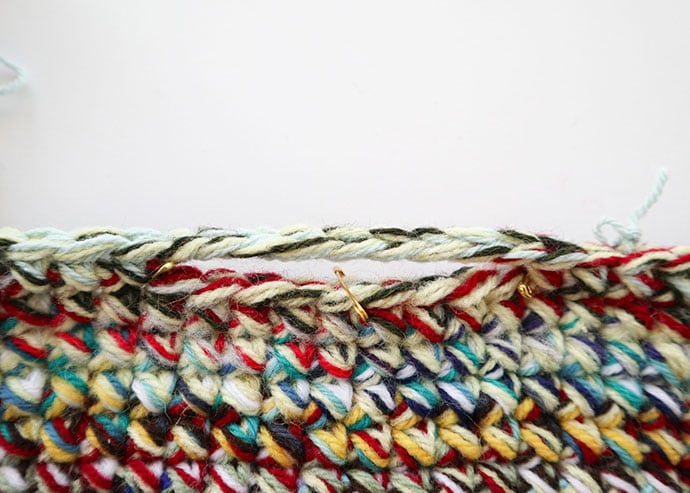
7. On the next round, when you reach the chain, sc 9 stitches over the chain into the gap.
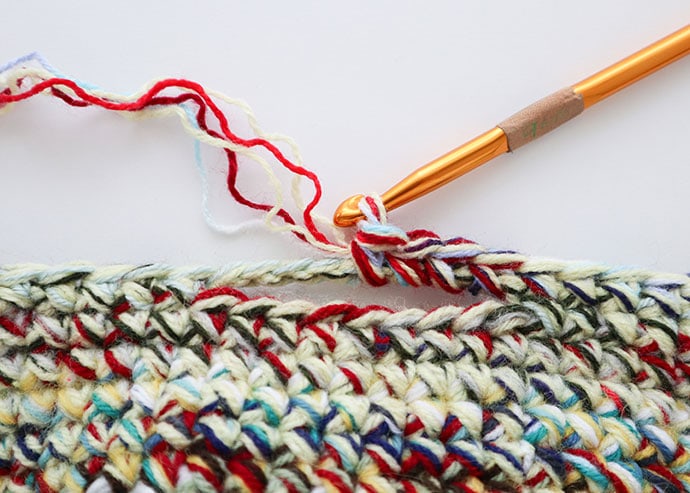
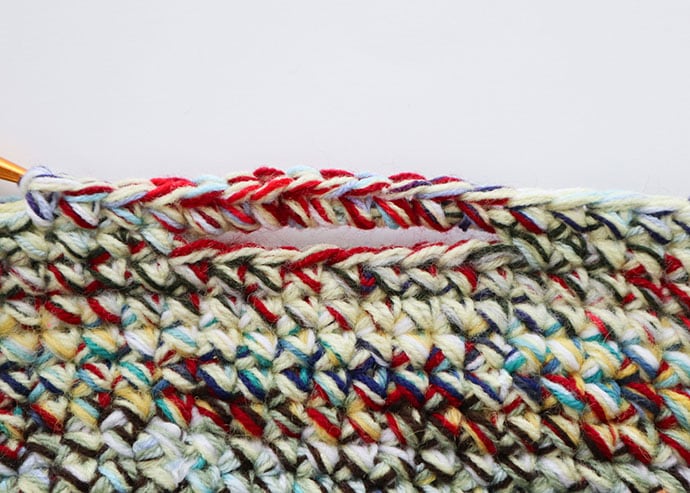
8. Crochet 2 more rounds to complete basket handles.
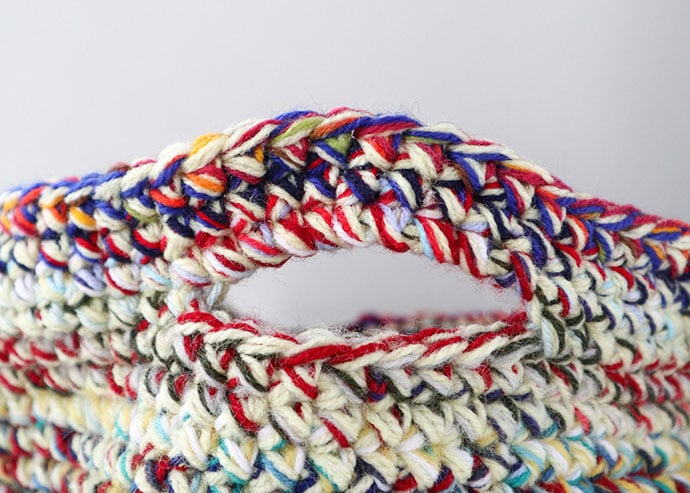
9. To finish, slip stitch the last few stitches, break off yarn and weave ends in.
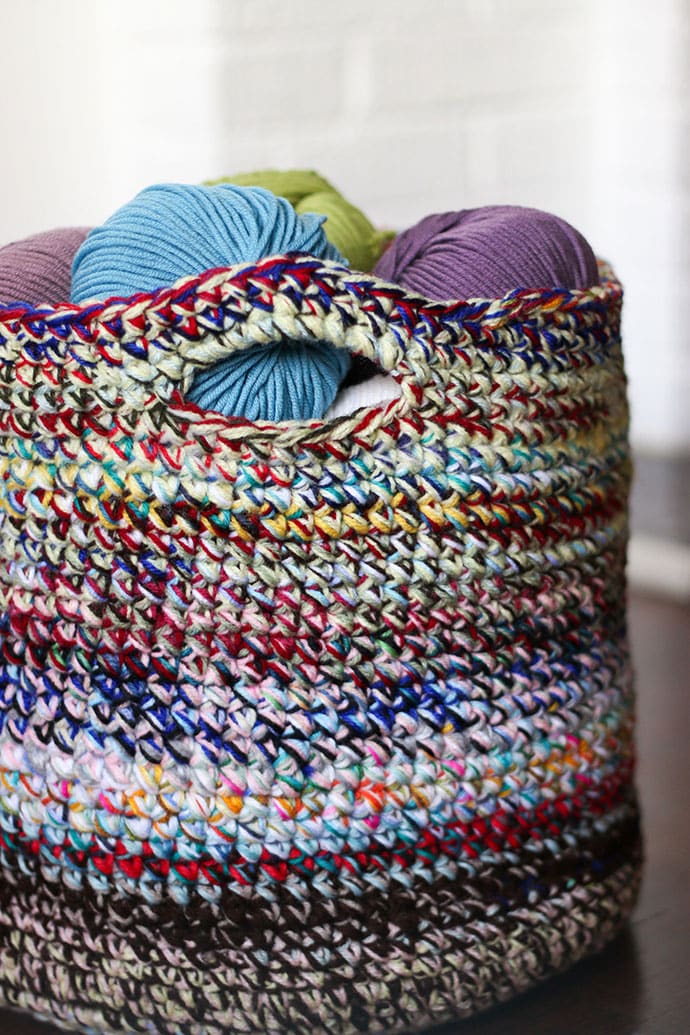
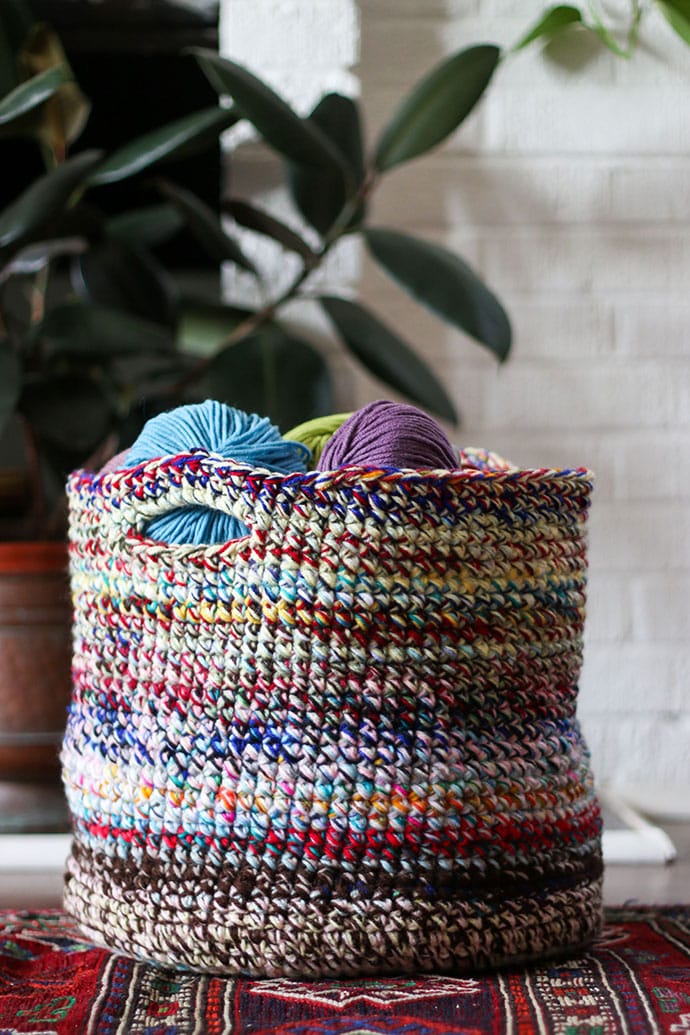
All done! Time to enjoy your new basket.
Want more posts like this straight to your inbox?
LOVE IT? PIN IT!

Size N is the 9mm crochet size. I am not crochet person, but knitting better. I am going to get most of my yarn scraps and make one basket.
I absolutely love this pattern. I made a large basket to hold/display a couple of cuddly blankets in my living room. This idea got me thinking even further. We had been furniture shopping and came across poufs which can be used for extra sesting and accents. I adapted this pattern simply by reversing the increase rows to decrease rows once the sides are as tall as you wish. I stopped when I felt the opening was just large enough to allow filling.I am working on my 4th. I used a queen sized sheet to sew liners and then filled with the polystyrene beads that you would use to fill a bean bag chair.
Great idea. You could also fill them with old clothing.
Great idea with using old clothes as stuffing! Very environmentally friendly!
I’m loving these junk yarn baskets! What a way to create without waste. I like the way you think! You get some mad props from me! Simple and way cool results!
This is by far the easiest basket pattern out there! I have something to do with my scraps and now I have yarn storage. Thank you!
Wow, just made one for a sister and my second sister wanted one too!! So easy, came out great and colorful!! Great pattern.
DO you have a printable version of this? I’m not seeing it.
I don’t have a printable version at the moment, but feel free to copy and paste any relevant information into a word doc for your personal use.
Thank you I have loved this pattern, so easy and fast to complete so many scraps used up.
I would love to make this!!!! Do you happen to have this on YouTube? I am very new to knit/crochet, i find that it’s easy to see as you make, and try to understand!! I am excited to make this!!!! Thank you!
Sorry I don’t have a video for this, but you can use a ‘how to crochet a SC circle’ video for the base, then the sides are just all single crochet without any increases.
I finally threw all of my ugly scrap yarn into a space saver bag, sucked out the air and put it in the closet. I just can’t bear to throw away yarn of any kind! Now I can’t wait to get that bag out and get to work. Thanks!
I am an avid knitter, not so much for crochet but have a bag full of scraps and things that I have no idea what I wanted to do with it until now.
I’m going to get my mum to help with the crochet basics but do you think it would be easy enough to modify into a square size? I’ve just got one of those cube storage units and would love to make something like this from my scraps for the storage of my yarns.
Yes, I’ve made a similar style of basket in a rectangular shape, but the sides don’t self support so it ends up a bit floppy.
To adjust the pattern, make a square base and then just single crochet all stitches to build the sides. Here are some instructions for making a square or rectangle in single crochet. http://shrsl.com/2kbrp
Hello Cintia. I was wondering if there is a site that if you type in the instructions it will make a diagram for you? I take longer when I have to read them and sometimes ripping it all apart and starting over. Thank you.
I would love someone tech savvy to invent this. It would help me too. As far as I know all crochet patterns are manually designed.
Very similar to this video. https://youtu.be/oNkPGm3CsTw
Thanks for the idea and tips for using spare yarn.
Here is something similar
https://www.youtube.com/watch?v=NzQmkNuruas
Love this!!!! Just whipped one up! On the final row, I did crochet 13 sc around the entire handle. I then dropped a yarn every few stitches until I had 2 left then finished off.
I know it’s only Sept. but I have just looked out lots of scraps and complete balls of crazy yarn and am going to make an advent kit for myself to crochet the basket during Dec. There will be a corny joke in each small bag of yarn (just can’t call it wool).
Looking forward to clearing some cupboard space and putting the yarn to some use.
Many thanks for the pattern.
That’s a fantastic idea – so fun! Enjoy your crocheting!
Just finished my basket, love it. Will be my go to basket when we travel in our camper….I can crochet while hubby drives…..best way to travel.
I love portable crafts. I too enjoy crocheting during road trips. I used to get travel sickness while doing this but am now accustomed to it.
Now end of Oct. and making 8th basket. I am a tight knitter and crocheter so I opted to use a 10mm hook, I am making a nesting set of baskets I find I just need to go down 1 inc row before making the next smallest size of basket. I have also made 2 rolled edge cat baskets for my DD’s cats using the pattern with a 15st base. Still using up scraps and now have some much needed empty cupboard space. Great pattern and a pity the scraps took up valuable cupboard space for years not being used. My DD has asked for the pattern to use her scraps. Many thanks.
Loving this pattern but after 17 rounds it’s a hexagon rather than circular like the one in your picture . What am I doing wrong ?
It seems you are adding increases in the same spot which can create ‘corners’. I’d suggest switching up the areas where you make increases, just shift the increases a few stitches in alternating rounds.
In my case I didn’t need to add increases in every round, so did some rounds without increases and that can also stop ‘corners’ forming.
Here is a great explanation https://lianainstitches.com/do-your-crocheted-circles-look-like-hexagons/
What yarn would you recommend as I don’t have enough of a stash of leftover yarns to make one and want to make for Christmas presents.
Thank you
Almost any robust yarn works for this. Just buy whatever is on sale as long as you like the colour. Cheap acrylic yarns are very suitable for this project.
Love the baskets. Thank you.
What am I doing wrong? I havec10 cm to go on the base for the third time and it’s not laying flat! It’s becoming a shallow bowl. I flowed your suggestions about it not being flat and it’s still a shallow bowl.
You will need to add more increases. I suggest ripping the crochet back to the row where it starts to curl up, then adding some evenly spaced increase stitches in the next row. Keep an eye on every row for curling up. If it doesn’t lay flat, add an increase row.
because the exact pattern will be unique to your tension and thickness of yarn (and hook size) you will need to adapt the pattern to your project.
I am trying to make the basket but having trouble with the base not sitting flat. Please could you tell me what you mean by ” general rule with every round you work one more regular stitch between your increase stitches”.
Thanking you Regards Roslyn
The base of this bag pattern is a good guide to keep the base flat https://mypoppet.com.au/makes/crochet-bucket-bag-free-pattern/
” general rule with every round you work one more regular stitch between your increase stitches” means that with every row there is a larger number of plain stitches between every increase.
Thank you! I also used a bigger hook and it’s working great!
Thank you for the ‘recipe’ for this basket! It was fun to read and I am looking forward to trying it!
I seem to collect LOTS of what I call ‘orphaned yarn’…it has no label…and I have been making rugs and market bags with these yarns.
I think this basket is a perfect addition to my projects.
Happy Stitching!
Im making this basket now😊
Just wondering if you turned the project inside out after completed. I prefer the pattern facing me as I work which would actually be the inside of the basket.
Loving the outcome so far. Thank you so much
You can turn it inside out if you prefer. Sometimes I do flip my crochet inside out even while working.
I have a bin full of fun fur that I never liked. Thinking 2-3 strands of that with 2-3 strands of worsted weight scraps will work us nicely. So happy to use that yarn that I didn’t like but couldn’t part with for some reason!
I’d love to see how that turns out. Fun fur yarn is hard to use, I think it will be an interesting result.
I am new to crocheting. So, I don’t have scrap yarn laying around. How many skeins do you think that I would need? I would like to use 3 different variegated yarns. How many do I buy of each one? Thank you.
My basket (pictured) weighs around 700g, so you’ll need about that much yarn. It will depend on the size of the balls of yarn you are intending to use.
I made this and will be making more. They are wonderful. I love how it doesn’t need to be perfect to store my yarn.
Thank you – wonderful project. Have you considered using fabric strips for this? I make rugs using old sheets, now I’m going to make baskets. Same process, different material. Youtube has several videos on joining the strips – no knots. I recommend 1″ – 2″ strips depending on the weight of the sheet. Hint, if you tear instead of cut your sheet strips, do it outside, the process creates an incredible amount of “dust”. 🙂
Yes, it’s on my list of things to make. Thought a denim strip one similar to the technique I used on this mat may be good. https://mypoppet.com.au/makes/upcycled-denim-rag-rug-diy/.
I love your pattern and I have oodles of scrap Yarn. I started my basket tonight and the bottom got to curl a little bit so I just kept going with it which made my basket a little bit smaller and I have crocheted up about 9 inches already and actually put some of my scrap yarn in it so I wouldn’t lose the yarn before I finish my project. Thank you. I am having a ball (no pun intended!)
This is absolutely brilliant!! I have a few boxes of yarns that I’ll go through and pull one out and say to myself ‘what was I thinking???” 😛 Thank you for the idea and pattern! Just frogging something ‘I have no idea’ what it was supposed to be! Happy New Year!
Do you use multiple strands of yarn to make the magic circle or just one strand? If you use multiple, how do you do it? If it’s just one, when do you add more?
Yes, you are always holding multiple strands. Just treat several strands of yarn as one big chunkier yarn.
Thank you for the pattern. It was fun making a basket.
I tried to post a pic, but no option to do that.
If you have an Instagram account you can tag me there @mypoppetmakes, or email me at [email protected] and I can include it in the newsletter for other readers to be inspired by.
I have been making these for over 20 years and get yarn from everywhere and anywhere LOL If you want a sturdier basket…the first two rows of the sides use jute cord and then every 5 inches do two rows of jute cord it gives a nice rustic look and makes the basket more stable. Another thing I sometimes do is after it is finished paint it with a mixture of half “mod podge” and half water. Simply use a paint brush and squish it into the wool. When coated squeeze it into the crochet project and then shape it the way you want it and stuff with crupled newspaper until it is dry. This is particularily useful when using them for plant pot covers. Hope this is helpful to someone.
I just made this basket, but instead of using yarn, I made yarn using 1-2 inch strips of quilting cotton from my mom’s quilt scraps. It turned out amazing! My mother-in-law has a ton of leftover fabric from a few people, and I’m going to make more baskets with that. This is a great project!!
This is fantastic! I have toys all over the place and it drives me nuts, but I can’t bring myself to buy decent looking baskets. So expensive! This is EXACTLY what I was looking for and I can make it in any color I wish!! Woohoo!! 🙂
Hi
What a great idea. I have a load of yarn of different thicknesses.
You suggest the number of strands for DK but do you have any suggestions for
chunky or 4ply yarns
Happy crocheting
In Australia we use the ply weight rather than the terms DK, sport etc. So as a reference DK= 8ply, sport= 5ply, fingering =4ply, worsted=10ply. So if I suggest hold 5 x DK yarns together total ply weight would be 40. So any combo of yarns that equal a total ply weight of 40ish should be fine.
But mainly you want a robust fabric so whatever yarn combo make a nice stiff fabric will work.
Thank you! I’ve been trying to find a FREE basket pattern and this is totally adaptable to any size. I’ve seen other patterns where you SC in back loop only, when you transition from bottom to wall. I might try adding this step; I think it might give the finish product a little more structure, which is what I am trying to achieve. Very excited to get started!
PLease do you have a rule of thumb for mixing different yarn thicknesses
for example 5 strands of double knit equals 2x4ply+ 3xDK = 5xDK or 1xboucle yarn + 2xDK=5xDK or 1xchunky+1xDK=5DK
Do you think I am on the right lines
Hope this makes sense
Take care
Yes sort of on the right track. In Australia we use the ply weight rather than the terms DK, sport etc. So as a reference DK= 8ply, sport= 5ply, fingering =4ply, worsted=10ply. So if I suggest hold 5 x DK yarns together total ply weight would be 40. So any combo of yarns that equal a total ply weight of 40ish should be fine.
so yes I’d suggest more like 4x4ply + 3xDk = 5xDK
But mainly you want a robust fabric so whatever yarn combo make a nice stiff fabric will work.
Thank you! I made a scrap basket today the only thing I did different was when I did the base, on the last round I sc into the back loop. This gave me a ridge and I think it helps to stabilize the side.. It came out great! and I finally used up a lot of my scrap yarn!
Thanks for the tip about crocheting into the back loop….did this on my second one and it will make the basket sit so much better!
This could be used to make animal beds. Make the bottom the the size needed for the size of animal and the sides however needed.
Yes a few people have already made cat beds from this pattern and rolled down the sides for extra support to the walls.
Has anyone done anything to create structure in the sides of a larger basket? To keep the sides from collapsing?
The weight of the yarn can make the sides a bit floppy on large baskets. Using stiff yarn without much drape can help. Otherwise try incorporating crochet over cord like in this basket https://mypoppet.com.au/makes/crochet-coiled-rainbow-basket/
Love it! This will be the next project I make using all my cotton yarn scraps! Thanks for sharing.
Do you have any patterns for baskets to knit?
Knitting probably won’t make such a sturdy basket, but you can give this pattern a try https://www.angiecruise.com/knit-basket-pattern-free/
I have just finished making the basket…and am so happy with it. I had been wanting a place to keep our mittens, gloves, ear warmers, cowls, etc. by the door and this basket is perfect! Plus,I got to mix up my yarn scraps to make colorful combinations..a win, win everywhere! Thanks you so much for your pattern.
This is so therapeutic I can’t believe it! Thank you for sharing!!!
I am a knitter and new to crochet thanks to your great project idea. I would love to make it and have figured out how to sc and managed making the magic circle…but how do you place a marker for the beginning of the increase rounds? I keep getting lost.
I just lay a scrap piece of yarn when I make the first stitch of the round. This video explains the idea https://youtu.be/0BzbCre__co?t=24
Thank you for posting this pattern! I have been looking for something to do with the large amount of t-shirt yarn I had, and this worked perfectly.
I made myself a basket using this easy pattern and it turned out so cute! I love the handles! I used a lot of fun yarn I don’t usually use.
The sides of my basket are very floppy, I’m not adding stitches to the sides but it’s very foppy.
The sides may be floppy because of a few things: 1. tension not tight enough – either add more yarn strands or use a smaller hook. The more yarn strands the thicker the walls will be and more stable. 2. Some yarns have a lot of natural drape and don’t create stiff fabric. Combine any drapey yarns with stiffer acrylic or coarse yarns.
Hope that helps.
Could I do this with 1 piece of thicker yarn or would it not be as sturdy?
Yes you can make this with super chunky yarn. The key is to have a smaller hook size than normal to get a tight stitch. Some yarns with a lot of drape will make a floppy basket so to get sturdy sides I do recommend combining a few yarns with varying textures. Feel free to experiment
I made this basket out of a bag of old wool given to me by my mother in law. It turned out really well and I’ve now been asked to do one for someone else. Thanks for the pattern and the inspiration.
Enjoying crocheting the basket but having a bit of trouble with the sides curling up. Sorta looks more like a bowl than a basket.
Do you join each round with a slip stitch or a single crochet? Thank you. Even as a bowl/basket of looks good
I work the sides in a spiral so just keep single crocheting, no slip stitch to join rounds. The sides may be curling because the tension can differ with different yarn widths/varieties.
My basket wasn’t actually looking like one. More like a bowl. But as I continue it is getting a lot better shaped to it. This is a great project and certainly uses up the extra “ what am I gonna do with this” yarn
Thanks for the project
Thank you so much for sharing this basket pattern! It was so easy!! I finished my first basket and plan to make more to give as birthday gifts.
OMG! I thought I might have enough yarn for a couple of these! I’m now starting on my fifth basket. Love this pattern so much, and it feels so good to get rid of the yarn that’s just sitting around being unloved! Going to use these as Christmas gifts this year. Thanks for a great pattern!
I LOVE your pattern instructions and video. I’ve only crocheted blankets before and find this so satisfying! I used 2 grays and a black strand. It looks like a stylish tweed. I finished with 8 rows of solid black. I wish we could post pics. Thank you VERY much for a fantastic pattern. Very enjoyable!!
Can’t wait to make another one.
Love this basket and want to give it a go but any idea roughly how much yarn will be needed.? Im not sure I have enough scrap yarn. Thanks
Using the feedback from all the ravelry projects as a guide, about 1000-2000m total depending on how thick your yarn is. This yarn length to weight conversion chart may help https://www.laughinghens.com/yarn-conversion-chart
I love making these bags and my friends and family love them too
I’m having trouble with the crochet base. I’m a beginner n got so far as your R4 Then I do not know what to do. Can u please explain it to me??
Take a look at some youtube videos that explain how to make a flat circle.
What a brilliant concept. I’ve already made one so far and looking forward to making another.
I love this scrap basket idea The pattern is easy to follow. I made a couple of adjustments to suit my tension and needs. I am just happy to use old yarn I have had in my tote box. It’s quite full, so I have lots of color combos. I was even able to mix some different types of yarn.